Airtable automation action: Send Twilio SMS
- 19 Jan 2024
- 3 Minutes to read
- Print
- DarkLight
- PDF
Airtable automation action: Send Twilio SMS
- Updated on 19 Jan 2024
- 3 Minutes to read
- Print
- DarkLight
- PDF
Article Summary
Share feedback
Thanks for sharing your feedback!
Plan availability | All paid plan types |
Permissions |
|
Platform(s) | Web/Browser, Mac app, and Windows app |
Overview
In this article, we will walk you through the various aspects of setting up the Twilio: Send SMS automation action, which allows you to engage customers via text message based upon a trigger related to an event that occurs in a connected Airtable base.
Many teams use Twilio for their SMS communication capabilities. By leveraging data and processes built in Airtable, you and your team can create automations that integrate the two services, resulting in powerful communication workflows.
If you’ve already started thinking about how you want to use this action in your automation, then it is time to start building in Airtable. Here are a few workflow examples that would benefit from using the Twilio: Send SMS automation action:
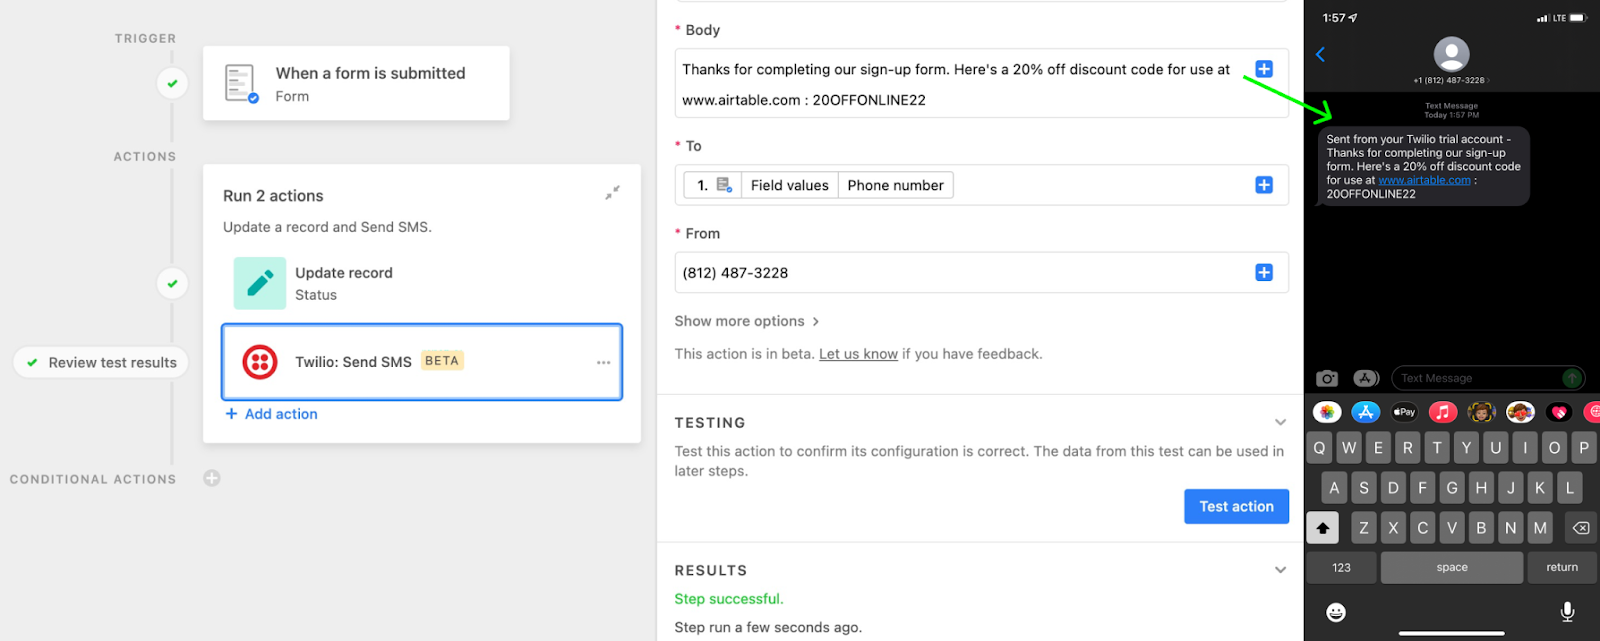
Sending an SMS containing a discount code to customers who fill out an Airtable form.
Comms for an engineering team that needs to have an SMS message pushed out to assigned, on-call employees when an issue or bug requires priority response.
Scheduling SMS marketing campaigns based on a specific date or dates.
Twilio: Send SMS automation setup
Step 1: Choose a trigger
Choosing a good trigger for your automation is largely dependent upon the goals of your overarching workflow. For instance, do you want a certain condition to trigger the automation to run or would you rather have it occur at a specific time? In our example, we’ll be triggering the automation using the When a form is submitted trigger connected to a client intake form.
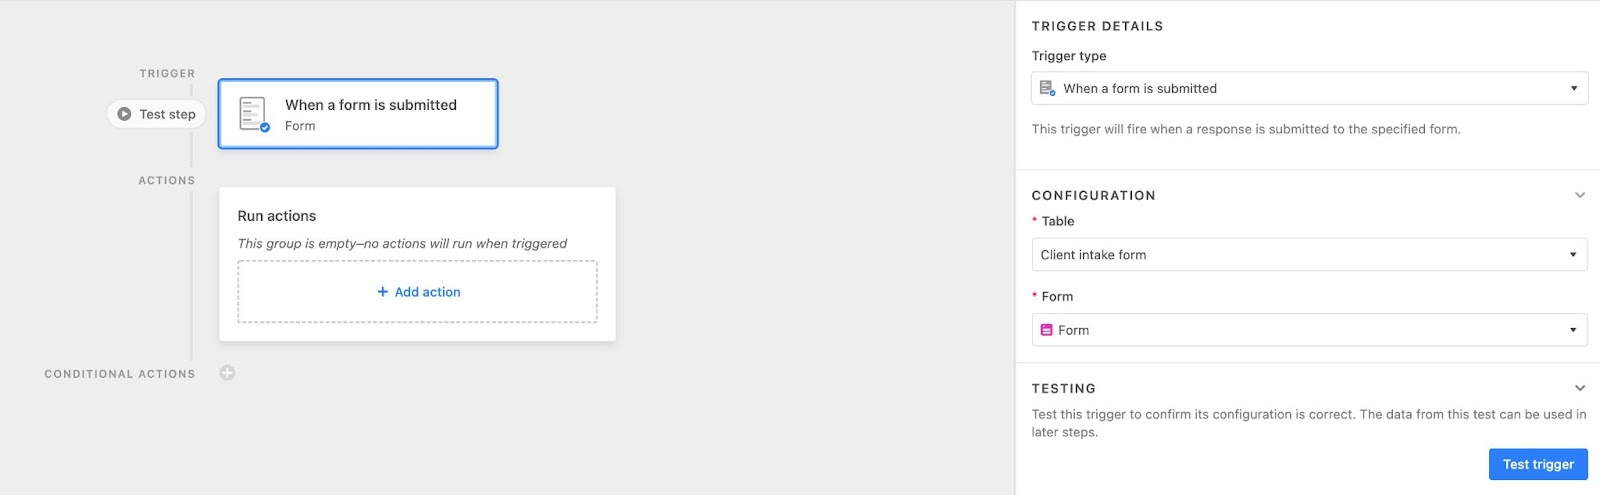
No matter your choice of trigger, remember that the trigger you choose will determine the initial dynamic data that you’ll be able to input into the action step’s output later on. You may need to consider adding a linked record and/or lookup field to the table that is connected to the trigger in order to bring in more information.
Step 2: Add an action
Below the trigger step, you will see the actions section with an + Add action dropdown menu. Here you can choose the Twilio: Send SMS option.
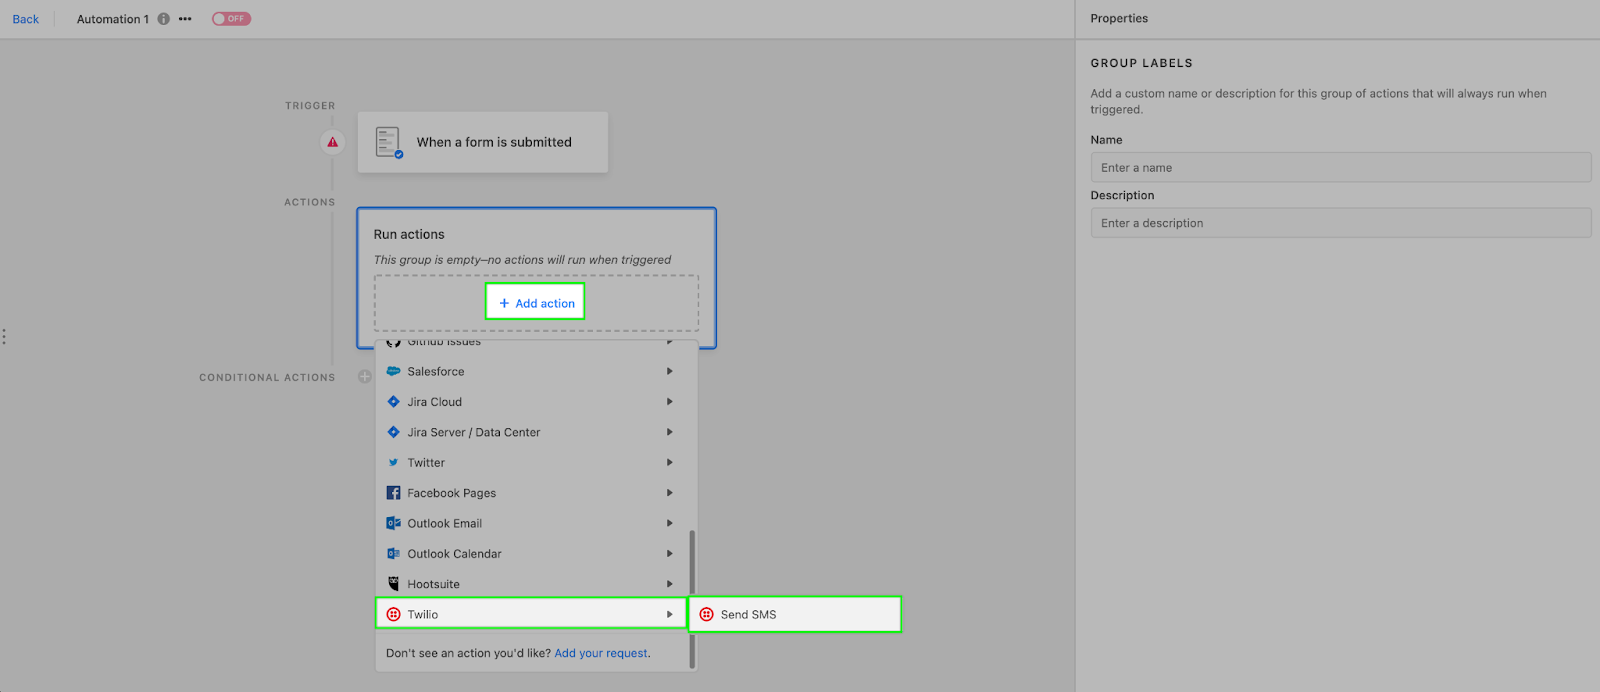
This will open a setup window on the right side of the screen.

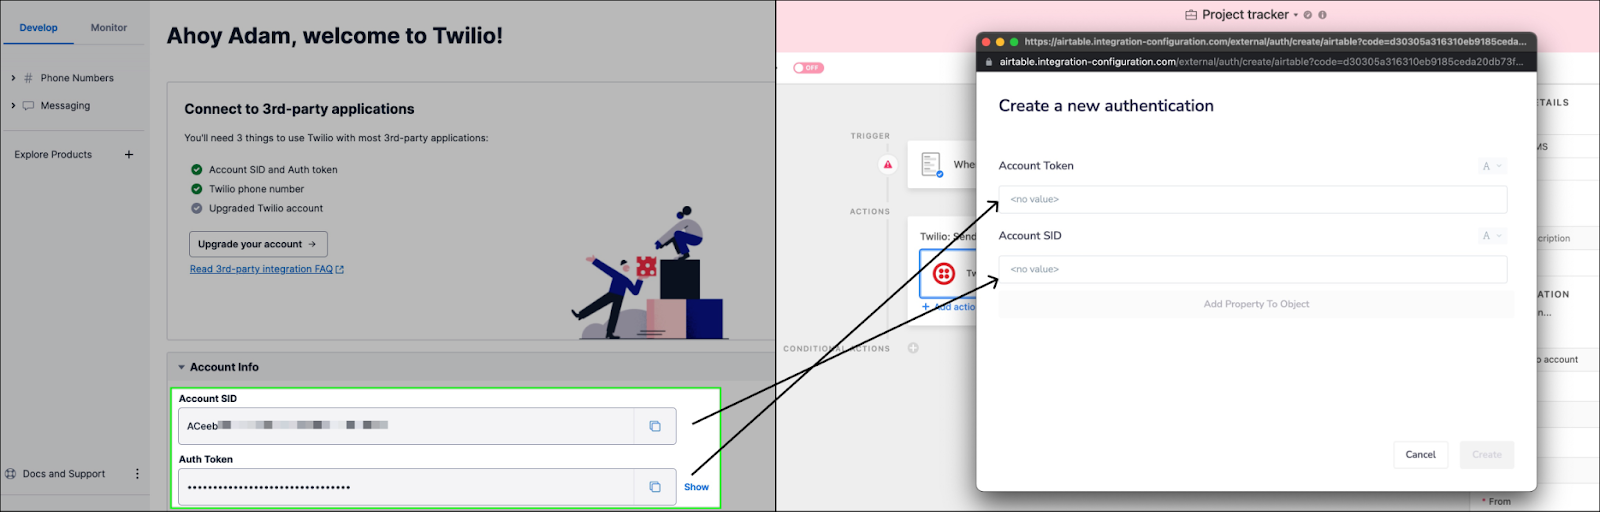
When setting up this automation for the first time, you’ll need to connect your Twilio account to Airtable. Check out the Managing external accounts support article for more general information about connecting accounts. For this particular automation, you will need to have both the “Account SID” and the “Auth Token” from Twilio which can be found on your Twilio console homepage.
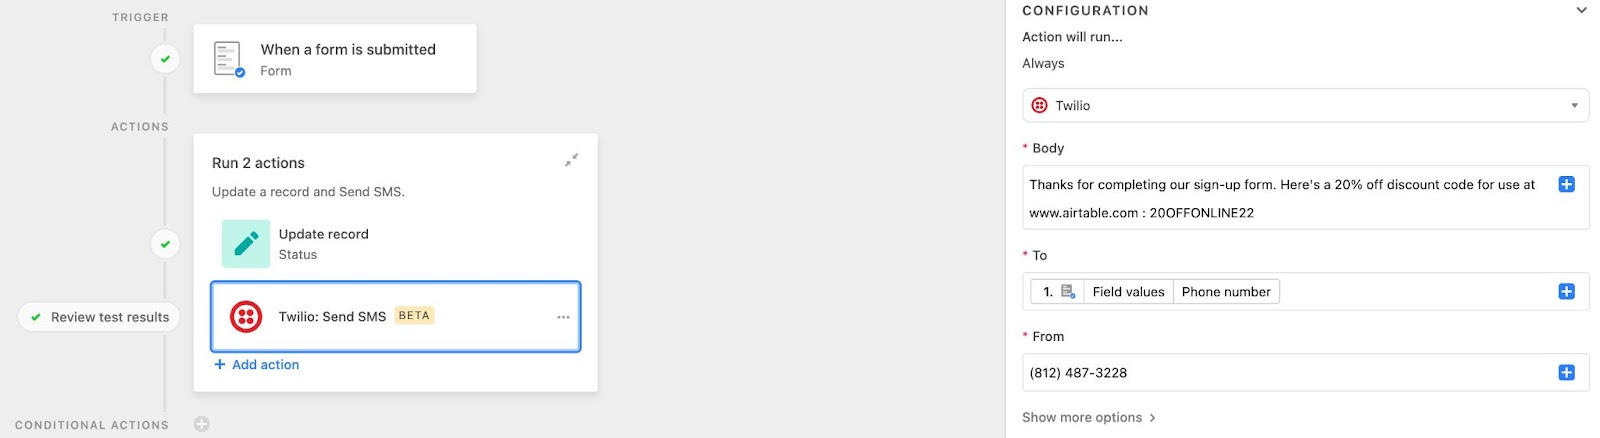
After authorizing and connecting your Twilio account you can move on to setting up the Body, To, and From fields in the automation configuration window. In the example below, we use a mix of dynamic and static values. Dynamic data comes from the record(s) in your Airtable base that triggered the automation to run. In this case, we are inserting the form submitter’s phone number in the To field.


Other options
When setting up your automation you may also want to include a picture or a callback URL for status updates.
Media URL - This is Twilio’s name for the feature that allows you to add an image to your SMS message. JPG, PNG, and GIF are the only file formats that Twilio currently supports.
Status callback URL - As this automation triggers an SMS to be sent via Twilio, they support a way of tracking the state of the message (Queued/Accepted, Sending, Sent, and Delivered). For every status change, Twilio will make an asynchronous webhook to the URL provided.
Step 3: Test the automation
After your trigger is set up the way you want it, you must click "Run test" to ensure the trigger is working properly. Below you’ll see that the action test has run successfully and sent the SMS message out to the form submitter’s phone.
If the test runs successfully, then you can move on to adding more action steps and/or turning the automation on.
Note
If the action test does not run successfully and you are unable to quickly rectify the issue, then check out our support article on troubleshooting automations.
Was this article helpful?