Airtable automation actions: Google Workspace
- 07 Feb 2024
- 8 Minutes to read
- Print
- DarkLight
- PDF
Airtable automation actions: Google Workspace
- Updated on 07 Feb 2024
- 8 Minutes to read
- Print
- DarkLight
- PDF
Article Summary
Share feedback
Thanks for sharing your feedback!
As part of our Airtable Automations feature, a series of actions for Google users can be set up in Airtable in order to automate common tasks or workflows associated with your Google account. Learn how to leverage Airtable automations to create or update Google Docs or Calendar events, send emails in Gmail, append new rows to a Sheet, or create new Form responses.
Introduction
All plan types with varying limitations - Certain actions are only available on paid plan types which are called out below. | |
Permissions |
|
Platform(s) | Web/Browser, Mac app, and Windows app |
Related reading |
Google account authorization
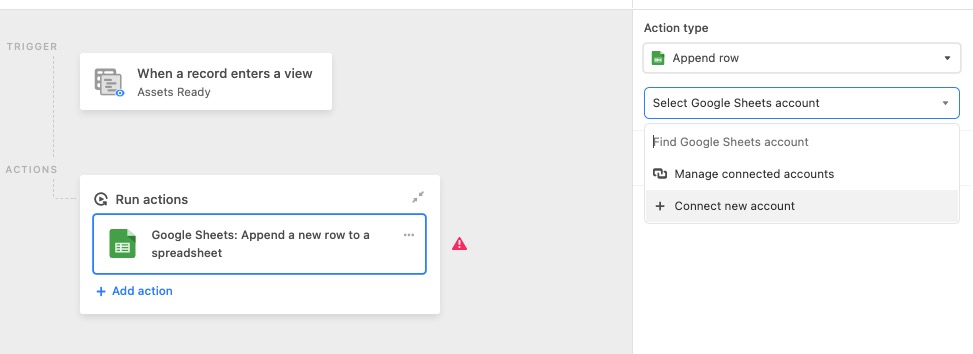
As a prerequisite, you will need to already have a Google account. After choosing the Google action you would like to set up, you will have the option to "Manage connected accounts" or "Connect new account."
If you'd like to know more about managing external accounts, see this support article.
This authorization process is scoped to each individual Google service, so you will need to perform this process multiple times, at least once for each Google Workspace action, and also for reauthorizations in the future as needed.
Understanding each Google action type
Google Docs: Create/Update Doc actions

Only available on Paid plan workspaces
These Google Workspace actions allow you to insert a document creation or update step in your Airtable automation. The resulting document will be created/updated in a Google Drive folder of your choosing.
These actions are best paired with the "Find records" action because it will allow you to render a grid of records in the document. For a simple introduction to these two automation actions, visit this support article.
There are some rich text options to consider when building out the "Content" section of the actions. The rich text editor is similar to the one we offer in the long text field.
Additionally, you can also choose to create the document in portrait or landscape mode. We suggest using landscape for documents that will render found records as a grid or list when there are more than 4 or 5 fields included.
For more advanced considerations, we cover the ins and outs of Document automator in this article. This automation template will allow you to automate document creation ahead of regularly scheduled meetings to ensure that various stakeholders in (or out of) your organization can align on tasks, projects, campaigns, goals, and more.
Gmail: Send email action
Only available on Paid plan workspaces
This Google Workspace action allows you to automatically send an email from your Gmail account.
To use the action, the user must have a Google account and must be able to access Gmail on that account.
This action works very similarly to the existing Send an email action.
One of the main differences from the "Send an email" action is that the email from this action comes from your Gmail account whereas the email from the “Send an email” action comes from Airtable’s mail server.
Another difference is that the Gmail send email action has a "From address" field which allows you to send emails from addresses other than the main one associated with your Google account. You can send using whatever name you prefer, but in order to send from another address, your Gmail account must have ownership of that address. See these Google instructions for how to verify ownership of alternate addresses. If you try using a "From address" that you don’t own, then the "From name" field will not be respected.
The final major difference between the two actions is that this action does not have any limitations on who can be emailed.
You are able to use a comma-separated list to include email addresses in the "To", "CC", "BCC", and "Reply to" fields. Additionally, you can use markdown for the message body as well as send mail using a custom "From name".
While using the "Gmail: Send email" action, the owner of the Gmail account (the one who connected their account to Airtable) is the only person who can edit the "To", "CC", and "BCC" fields. If you wish to update any of these fields in an existing automation, we recommend relinking a Gmail account which will allow you edit access.
You can preview the email that the automation will send out before testing the action. More info on that option can be found here.
Limits
There is a limit of 100 total recipients across the To/CC/BCC fields of a single instance of this action due to sending limits with Google Workspaces.
There is a limit of sending 1 email per second from this automation action to avoid rate limiting from Google.
Google Sheets: Append a new row to a spreadsheet
This Google Workspace action allows you to automatically create a new row in a Google Sheet that is appended to an existing Google Sheet.
To use the action, the user must have a Google account and must be able to access Google Sheets on that account. The "Spreadsheet" input corresponds to the overall document, which is selected via the Google Drive file picker UI, while the "Worksheet" input corresponds to the individual tabs of that spreadsheet.
After selecting the desired "Spreadsheet" and "Worksheet", you can specify what fields to fill in for the "Row data". These fields correspond to the first row of the worksheet which is interpreted as the header for the sheet. If no header is present, then the user will be unable to choose fields.
Google Forms: Create a new response action
This Google Workspace action allows you to automatically create a new form response in a connected Google Sheet.
For the “Google Sheets: Create Response” action, since there is no direct API for Google Forms, we instead create a new “response” for a Google Form by appending a new row to the spreadsheet that’s associated with the form. This means that the Google form you are looking to be filled out will need to store responses in Google Sheets. More information on this process can be found on this Google support page.
The "Spreadsheet" input corresponds to the Google Sheet created for storing form responses, which is selected via the Google Drive file picker UI, while the "Worksheet" input corresponds to the individual tabs of that spreadsheet.
After selecting the desired "Spreadsheet" and "Worksheet", you can specify what fields to fill in for the "Row data". These fields correspond to the first row of the worksheet which is interpreted as the header for the sheet. If no header is present, then the user will be unable to choose fields.
Finally, it's worth noting that responses that were added to the Google Spreadsheet via your automation will not be synced back to the original Google Form, but responses that were submitted via your Google Form will appear alongside responses created by your automation in the spreadsheet.
Google Calendar: Create event action
This Google Workspace action allows you to automatically create a new event in a Google Calendar.
To use this action, you must have a Google account with Google Calendar enabled. When configuring the event, you must select a start and end date and time. The input format of the date and time is flexible, and many formats should work. A few examples of formats that will work are listed here:
August 18, 2020 at 6pm PST
08/18/2020 at 6pm (if the time zone is excluded, it defaults to your calendar time zone)
2020-08-18T12:05:05.217Z (ISO format)
You can check the "All day event" box if you’d like the event to be all day. For these events, a time field is not required, so a start and end date will suffice.
You can choose to set custom text in the "Title", "Description", and/or " location" fields. For the "Attendees" field you should enter a comma-separated list of email addresses.
You can also decide to create your event with "Video conferencing"options like Google Meet.
Google Calendar: Update event action
This Google Workspace action will allow you to automatically update an existing event in a Google Calendar. To use this action, you must have a Google account with Google Calendar enabled.
The "Update event" action requires that you specify the Google Calendar Event ID of the event you'd like to update.
It can be difficult to extrapolate the Event ID using methods like this. Instead, we recommend using one of the Google Calendar triggers to target the event you'll be updating with this action.

You can choose to set/change the following fields on a selected event:
Title
Description
Location
Start and End Dates and Times
Whether the event is an All Day Event (removing event times)
Video Conferencing options
Attendees - you should enter a comma-separated list of email addresses for this field.
If you are updating an event's time or date the input format is flexible, and many formats should work. A few examples of formats that will work are listed here:
August 18, 2020 at 6pm PST
08/18/2020 at 6pm (if the time zone is excluded, it defaults to your calendar time zone)
2020-08-18T12:05:05.217Z (ISO format)
FAQs
Can I preview the email that I'm sending out via the "Gmail: Send email" action?
Yes, more info can be found here.
Can recurring calendar events be created using the "Create event" action?
No, it is not possible to create recurring events using the "Create event" Google Calendar action.
Are there any troubleshooting steps when experiencing a 400 error?
As the first step in troubleshooting this issue, try disconnecting your Google account and then signing back in. If that doesn't work, you may need to change your Google Chrome settings to allow third-party cookies. To do so:
Open Settings from the "three-dots" menu in the top-right corner of Google Chrome.
Click on the "Privacy and Security" tab on the left.
Under "General settings", select either "Allow all cookies" or "Block third-party cookies in Incognito" instead of "Block third-party cookies" or "Block all cookies (not recommended)."
Why are new rows populating at the top of my Google Sheet rather than the bottom and how do I fix this behavior?
This is due to the first cell in the first column of your Google Sheet being blank. Google's API looks to column A to determine where the next empty row is. In order for records to be added to the bottom of your sheet via the automation, you'll need to make sure that each cell in the A column has data in it. Otherwise, the record will be added to the row directly after the previous row that has data in column A.
If you've added a blank first column to your Google Sheet for formatting reasons, you may want to consider deleting it since this will cause new records to be added to the top of your sheet. Please note that if you do that, you will need to update your automation to reflect this since your column numbers will change in the automation.
Was this article helpful?