Taking and restoring base snapshots
- 06 Mar 2024
- 3 Minutes to read
- Print
- DarkLight
- PDF
Taking and restoring base snapshots
- Updated on 06 Mar 2024
- 3 Minutes to read
- Print
- DarkLight
- PDF
Article Summary
Share feedback
Thanks for sharing your feedback!
Base snapshots allow you to back up bases and restore them to previous versions. Airtable automatically takes occasional snapshots of your bases, and you can also manually take a snapshot. Below, you’ll learn how to manually take a snapshot of an Airtable base immediately before restructuring or otherwise making a large number of changes to your base, and then restore that base when needed.
Note
Taking a snapshot won't affect the base you create it in. Restoring a base from a snapshot will create a new base without affecting your existing base. The new base created by a snapshot can be used as a reference for recovery purposes, or you can switch over to this base completely moving forward. Bases restored from snapshots do not have revision history but will include record comments.
Introduction
All plans with varying limits | |
| |
Platform(s) | Web/Browser, Mac app, and Windows app |
Taking snapshots in Airtable
To take a snapshot:
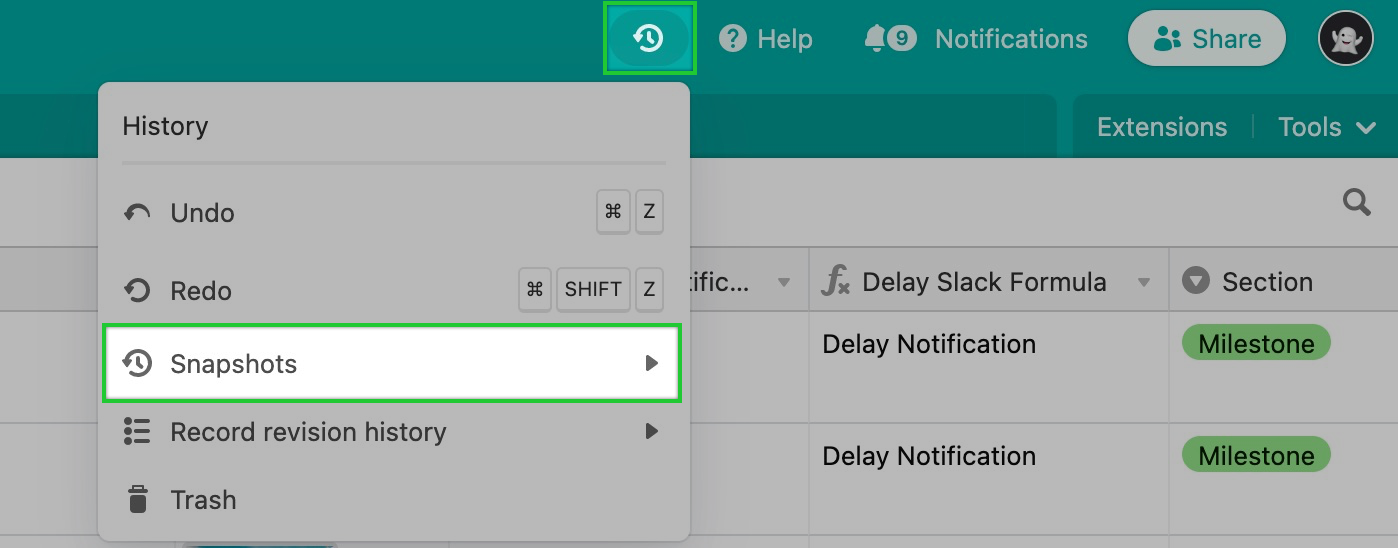
Open the base history menu icon(which resembles a clock running backwards in time) and click the Snapshots option:
Then, select the "Take a snapshot" option:

It may take a few seconds for your snapshot to complete. A message will appear. Click Okay.
Once it has been completed, it will show up in the snapshots menu. Depending upon the workspace plan, snapshots are stored for different periods of time. Learn more below.


Restoring snapshots in Airtable
To restore a snapshot:
Click the base history icon, then snapshots, then choose the snapshot you'd like to restore:
You will then be prompted to select a workspace into which to place the restored snapshot of your base.
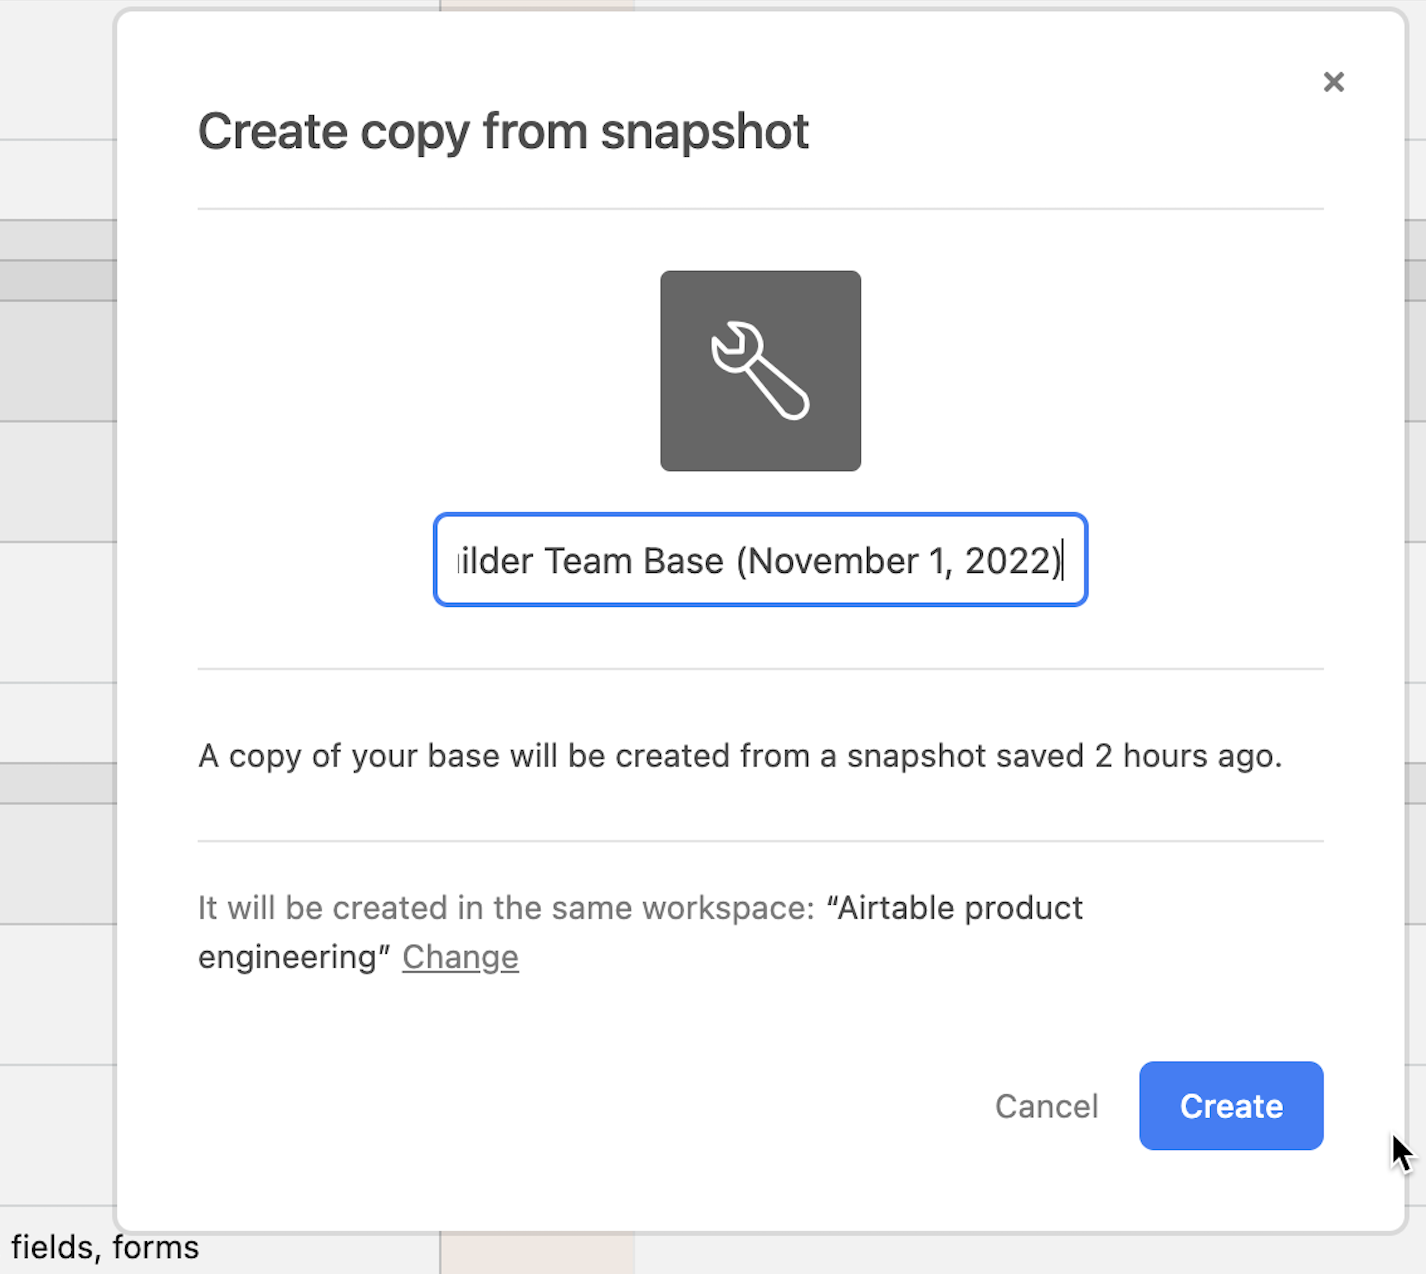
This is a reminder that snapshots are a previous version of the base. Since other changes may have occurred since the snapshot was taken, Airtable creates a new base in the workspace of your choice. We do not overwrite the current version of the base.


Snapshot history limitations
Each Airtable plan includes access to base snapshots. The information below details base access limitations by plan type:
Free plan - Access the past 2 weeks of base snapshot history.
Team plan - Access 1 year of snapshot history.
Business plan - Access 2 years of snapshot history.
Enterprise plan - 3 Access 2 years of snapshot history. Your admin can customize this timeframe.
NOTE
Snapshots have no revision history -- but comments are retained from the source base, like any other data.
FAQs
How often are base snapshots automatically taken?
The exact scheduling of snapshots is based on the count of user actions taken in a base. On a base that's very actively used, you'll probably get at least one snapshot a day. For bases not used as frequently, snapshot cadence will adjust accordingly. You can get a sense of the regularity around which you can expect snapshots to be taken, presuming usage levels remain steady, by viewing your current snapshot intervals after a few days of using your base at a typical rate.
What is the limit on manual base snapshots?
If you take a base snapshot manually, you'll need to wait for a little while before you can take another. This time period is typically just a few hours, but can vary depending on how many changes are made in your base since that last snapshot was taken.
Do base snapshots include interfaces?
Yes. Base snapshots do include interfaces, and any edits currently pending on those interfaces.
.png)
Can snapshots write replace an existing base?
No, snapshots create a new base. The existing base cannot be overwritten to be returned to a previous state.
Can I schedule snapshots to be taken at automated intervals?
No. Airtable does not currently support this feature.
Was this article helpful?