Web clipper extension CSS selector examples
- 08 Jan 2024
- 7 Minutes to read
- Print
- DarkLight
- PDF
Web clipper extension CSS selector examples
- Updated on 08 Jan 2024
- 7 Minutes to read
- Print
- DarkLight
- PDF
Article Summary
Share feedback
Thanks for sharing your feedback!
The Web Clipper extension supports two CSS selector options for gathering information from HTML elements:
Text content by CSS Selector
HTML attribute by CSS Selector
In this article, we'll go over a brief overview HTML and CSS, then provide examples of how to use both of the above web clipper extension CSS selector options.
A brief explanation of HTML and CSS
A brief explanation of HTML and CSS
A web page is made up of individual HTML elements that are comprised of angle brackets and a tag name (e.x. <div> ,<img>, <button>, and so many more). These HTML elements can hold values, such as text or numbers. Look below for an example of the text “cameron@example.com” within a span (i.e. <span></span>) tag.
<span>cameron@example.com</span>HTML elements can also hold additional values in the form of HTML attributes. HTML attributes hold information about the HTML element, such as where the element should link to when clicked, or the source of an image to display. Below is an example of a link tag with an href attribute that, when rendered on a webpage, would lead to Airtable's website when clicked.
<a href="https://www.airtable.com"/>Click for Airtable!</a>On top of the HTML of a website, you can use Cascading Style Sheets (CSS) to select HTML element(s) on a page and style them. Using the metaphor of a house: you can think of HTML as the essential building materials of the house's structure, and CSS as the paint on the walls and outside of the house. Following our house metaphor, a CSS selector would be a way of identifying elements in order to establish painting rules— like selecting all the north-facing walls to be painted blue, or saying the second bathroom on the left should be painted yellow.
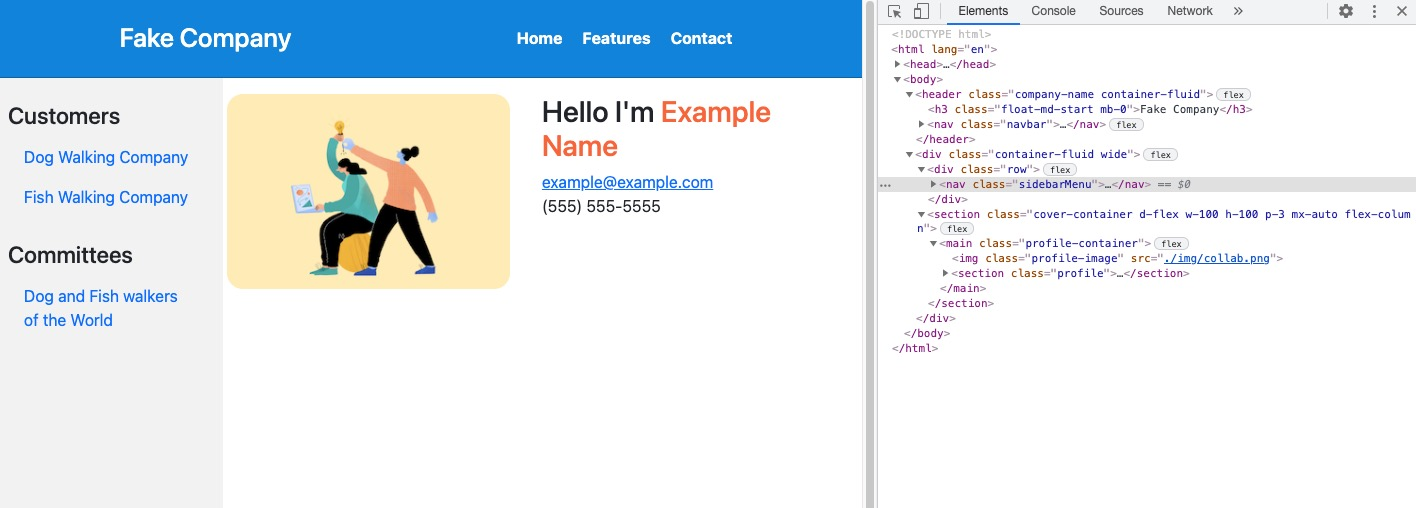
The website you are currently looking at is built from HTML elements, with CSS selectors identifying elements and telling them how to present themselves to your web browser. With that context in place, the web clipper extension can intake a CSS selector to identify an HTML element to get the value of: 1. an attribute of an HTML element, or 2. the text content of an HTML element.
This is a pretty simplified and brief explanation of HTML and CSS, and we recommend checking out the MDN documentation if you want more context.
Using the Web clipper extension with a CSS Selector
Using the Web clipper extension with a CSS Selector
Note
Popular websites frequently change their HTML structures and CSS styles. If your clip action is no longer working, it is most likely because the underlying HTML structure or CSS styles of the website you are looking at have changed. This is simple enough fix—you'll just need to re-configure your CSS selectors to account for the the web page's changes.
Since a web page is made up of many HTML elements, we need a way to specify exactly which HTML element we are looking for. When using either of the Web Clipper CSS selector options you'll need to first find the element you are looking to capture, and then decide what information you need from that HTML element.
A CSS selector pattern can be made up of a combination of HTML elements themselves and/or HTML element attributes (ex. an element's .class, #id, name, etc.).
For the rest of this article we will be using an example site we created for this demo. Please feel free to open it up and follow along! If you've never worked with a browser's developer console before, we recommend reading this article before diving in.
An HTML element can have multiple attributes for each element (the attributes for an element will be listed within the angled brackets for that HTML element). These attributes are in the form of the attribute name followed by its value (<div name=“value”>).
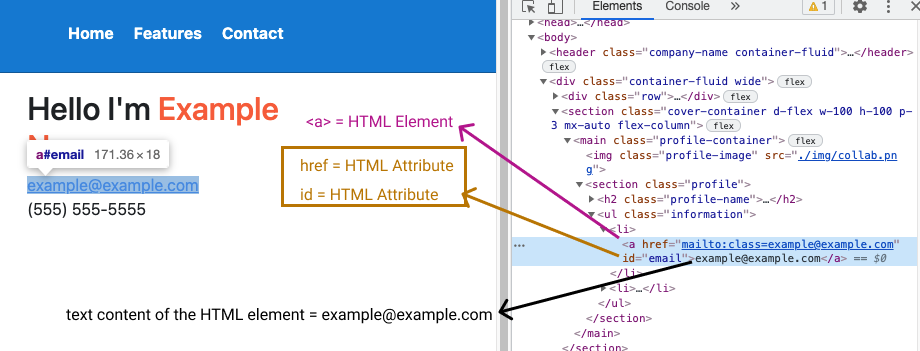
An HTML element can sometimes have a unique id attribute that uniquely identifies that singular element on the page (in our above example we can see id=“email”). The #id and .class HTML attributes are mostly commonly used for styling— and can often be very helpful in building CSS selectors!
Note
We won't be going over every CSS selector in this article, because there is a lot of great information out there on how to use CSS selectors to target HTML elements on a page.
Using a CSS Selector to get an HTML element's attribute
Using a CSS Selector to get an HTML element's attribute
After installing the web clipper extension, we can create a new clip action and start defining our fields.
For this example we'll collect the href attribute ( the link to "mailto:class=example@example.com"), from the <a> HTML element, with the id="email". As we noted above, an HTML element can sometimes have a unique id attribute, making it a perfect choice for a CSS selector.

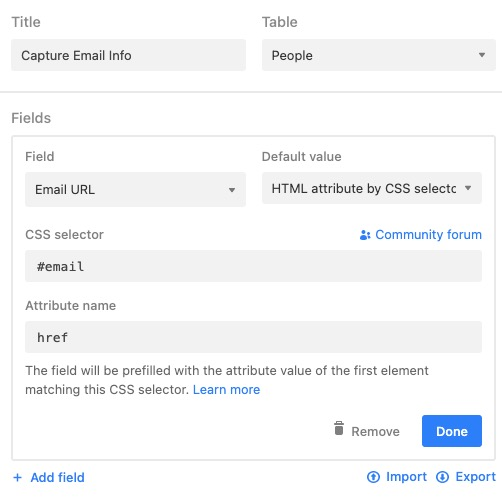
In our clip action we can add a new field, then choose the "HTML attribute by CSS selector" option to ensure we are clipping an HTML attribute. We can set the CSS selector to #email to signify we want to target the HTML element with the id of "email". Finally, we'll specify the attribute we'd like to target—which in this case will be the href.
Now when we use this clip action, we can see we've captured the href attribute value we were looking for:

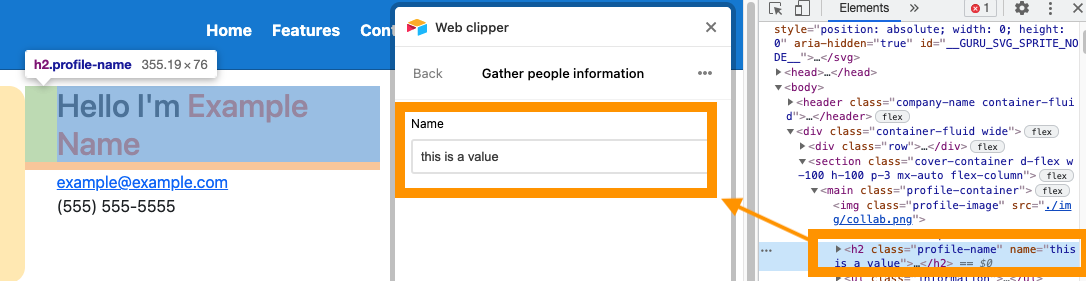
Let's go over one more example of getting an attribute from an HTML element. Below you'll see an example of an <h2> tag with a name attribute with the value: "this is a value". Let's capture that name attribute!

So if you cannot find an id attribute on an HTML element, your next best option is to look for class attribute. Classes are often used for styling purposes on a web page, so they can be used on multiple elements on a page. The class we see above is only applied to one element on the page, so we can safely use that class as the CSS selector without further specificity. We can see an element's class on the HTML element itself or if you look above, you can see a “.” before the class name in the popup when hovering over that element in the developer console.
Now we'll configure our field to use the "HTML attribute by CSS selector" with the .profile-name class, specifying name as the attribute we'd like to clip from:

Now when we use our clip action, we can see we collected the information from that name attribute:
Using a CSS Selector to get an HTML element's text content
Using a CSS Selector to get an HTML element's text content
The text content of an HTML element is what lies between the angled brackets. For example, between the two <p> brackets below, the text content is the phrase "Text content here!".
<p>Text content here!</p>
Let's put it to the test! After installing the Web Clipper extension, we can create a new clip action and start defining our fields. We'll start by capturing the text labeled "Example Name".
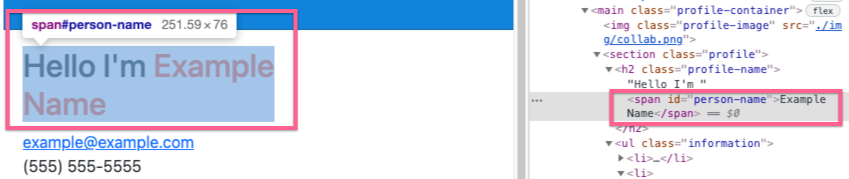
As we noted above, an HTML element can sometimes have a unique id attribute, making it a perfect choice for a CSS selector. Here we can see the element we'd like to capture has an id attribute of "person-name" so we'll use that id attribute for our clip action.
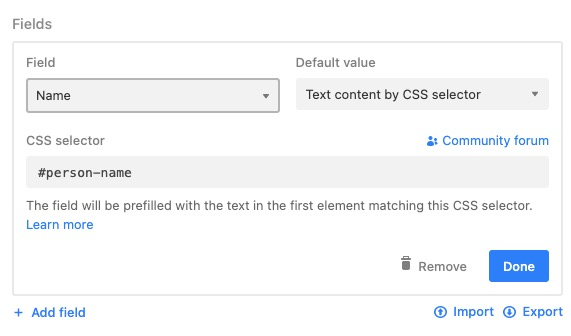
Choosing the "Text context by CSS selector" option will make sure we get the text context within the HTML element we are selecting. We'll also make sure to use append a "#" to specify that we are selecting an id with the value of person-name.
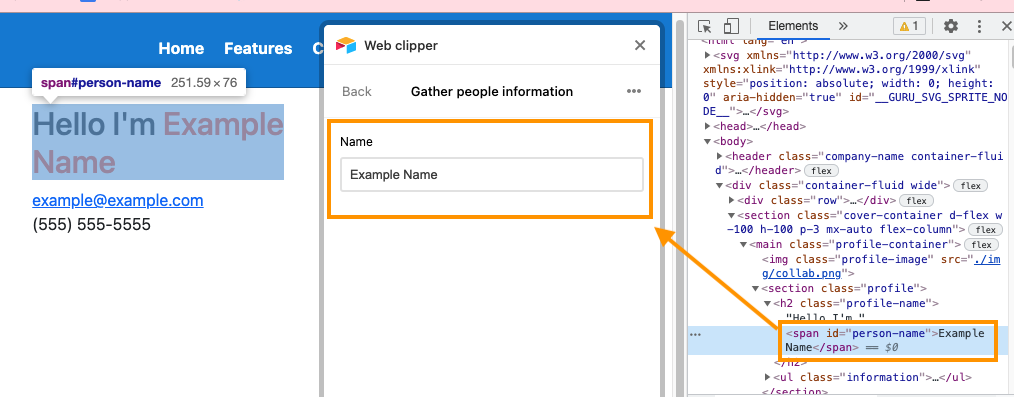
We can then test it out, and see that we captured the text content with our clip action:
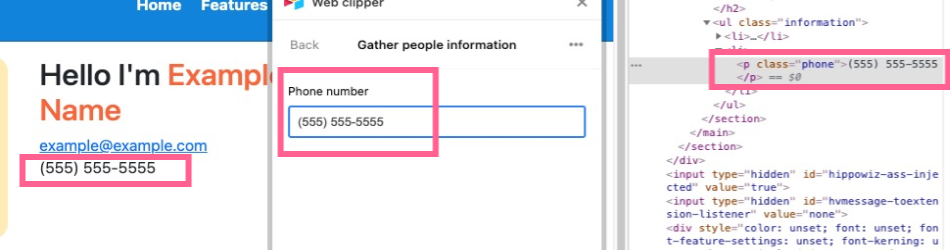
We'll go over one more example of capturing the text content of an HTML element. Below we can a phone number is nested within a <p> tag with a class of "phone".
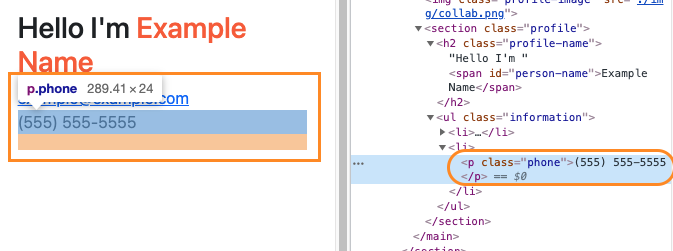
So if you cannot find an id attribute on an HTML element, your next best option is to use that class attribute. The class we see above is only applied to one element on the page, so we can safely use that class as the CSS selector without further specificity. We can see an element's class on the HTML element itself or if you look above, you can see a “.” before the class name in the popup when hovering over that element in the developer console.
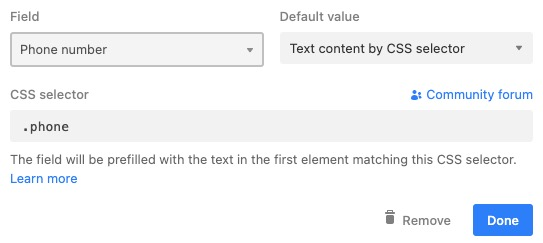
So we'll now configure our field to capture the "Text content by CSS selector" with the .phone class:
Putting it all together, we can see that we captured the text content of the <p> tag with our clip action:
Using the web clipper extension with images
Using the web clipper extension with images
Attachments work a little differently within the web clipper extension. If you want to capture an image, you'll need to use the "Text content by CSS selector" option to capture the url associated with the <img> HTML tag.
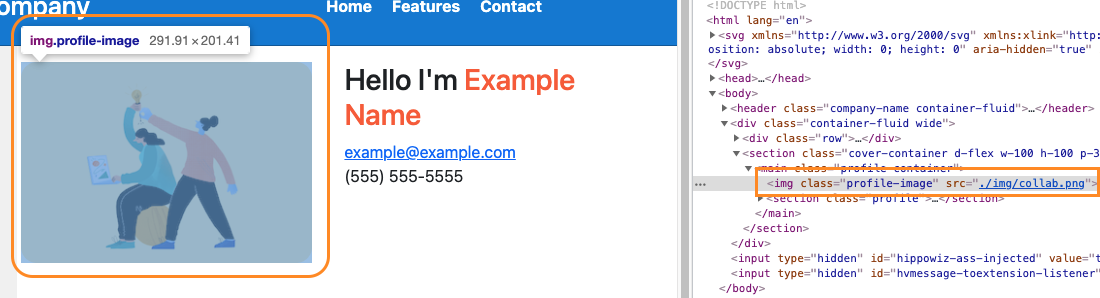
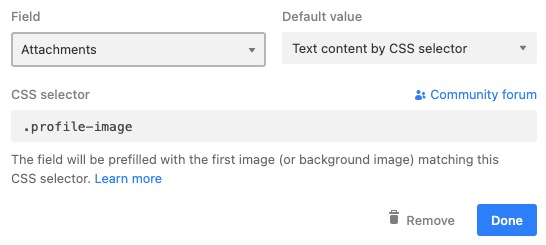
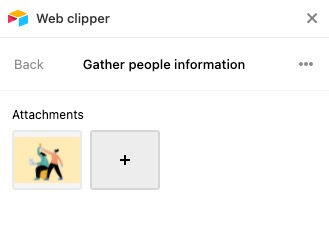
After selecting the Attachment field you'd like to fill, choose the option for "Text content by CSS selector". Since our image has a class of .profile-image, we'll use that class as our CSS selector for this clip action input:
Using our clip action on the page, we can see we have successfully captured the image:
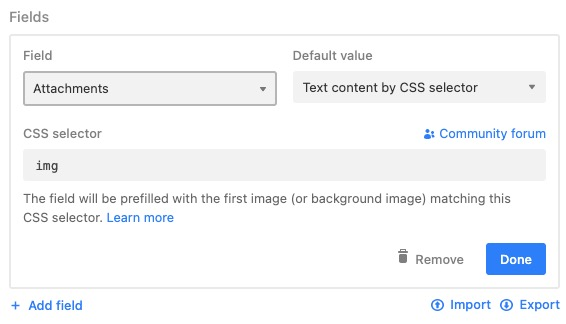
This example page also provides a great example of when you could use an HTML element as your CSS selector. Since we only have one <img> tag on the page—you could easily use the “img” CSS selector to capture the same information:
If you have additional questions on how to find an element on a page, this CSS Selectors Reference page provides even more examples of how to select particular elements.
Was this article helpful?