Airtable automation action: Find records
- 01 Mar 2024
- 6 Minutes to read
- Print
- DarkLight
- PDF
Airtable automation action: Find records
- Updated on 01 Mar 2024
- 6 Minutes to read
- Print
- DarkLight
- PDF
Article Summary
Share feedback
Thanks for sharing your feedback!
All plan types with varying limitations | |
| |
Platform(s) | Web/Browser, Mac app, and Windows app |
Related reading | Creating an automation - Learn how to set up your first automation in Airtable. |
Setting up an automation to find records
Learn how to build an automation using the Find records action. This automation action will look for records matching specific conditions that you can specify within the action settings.
Step 1: Create a new automation
T o start creating an automation, from the open base of your choice click on Automations in the upper left corner of your screen to open the automation configuration window. Click the + Create automation option to begin the setup process. If you would like, you can rename the automation right away to make it easier to understand what it does.
Step 2: Configure a trigger
N ext, you will need to click + Add trigger option. Once clicked, the available triggers will display for you to choose from. Click here to learn more about all available automation triggers . Once you have configured and tested the trigger, you can move on to the next step.
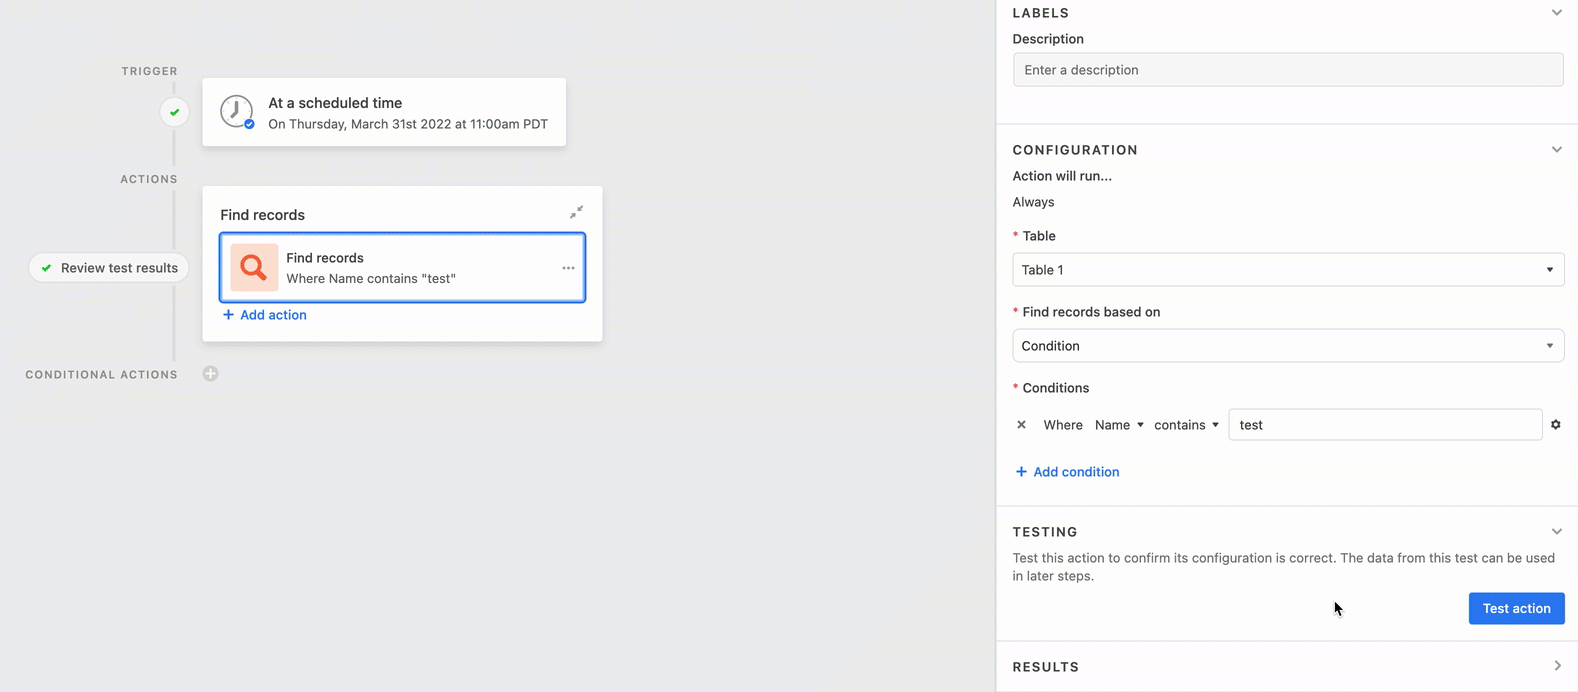
Step 3: Find the “Find records” action
Click the + Add advanced logic or action option.
Scroll down in the menu that appears, then find and click on the “Find records” option.
Step 4: Configure the “Find records” action
Feel free to enter a description of what the action will do. You can always add one later if you prefer to skip this step.
Under “Configuration,” first select the Table where you would like to have the automation find records.
Next, click the dropdown to Find records based on one of these two options
Condition - This option allows you to use a set of specified conditions to find one or more records. Click + Add condition to begin configuring the first condition. Continue this process as needed.
You can choose to combine conditions using either an “And” conjunction or an “Or” conjunction.
You can add up to 50 conditions.
For more information about using conditional logic in Airtable, please consult this support article.
View - This option is a good one to use if you have already set up specific conditions in a view in the underlying base. Click on Select a view and then click the view of your choice.
Note
There is a limit of 100 records per find records action. If you have a view or condition that returns more than 100 records, then adding multiple find records steps to query different views or conditions is currently the best workaround.
Step 5: Add another action to Utilize the found records
After you've found the records you are looking for, you can add another action to determine what step to take with those records (as long as at least one record was found).
For example, if your "Find records" action found one record, you can choose to update that record using the update record action. Note that the "update record" action only supports updating a single record. Meaning, that you can use the "Find records" action to find and pass a single record to the "update record" action to update that record.
Another example workflow would be to find a list of records with impending dates, then use the "Send email" action to automatically email those records to a colleague. You are free to use any automation action that's most helpful for your workflow.
Note
If you'd like to see an example of using the "Find Record" action in a multistep workflow (coupled with the "Update Record" action) check out this guide on linking existing records.
Step 6: Test and turn on the automation
Again, be sure to test all of the steps in the automation that you are building. Once every part of the automation has tested successfully, you’ll likely be ready to turn the automation on. Find the red colored “OFF” toggle and click it so the automation now appears as “ON” in green.
Understanding static and dynamic conditions
While setting up the "Find records" action you may notice a small cog icon ⚙ next to the condition that you are setting up. Clicking on the cog will bring up a menu to choose from static or dynamic values. Any conditions you set will default to the static conditions option, so anytime you want to use a dynamic condition you will need to change it to be dynamic via the cog menu.
Static conditions are values that you manually add in order to look for the same value in a certain field every time.
Dynamic conditions will change depending on the variables set up in a previous step in the automation you are building out. After clicking the "Dynamic" option you should see a blue and white plus sign icon appear in that condition's setup window.
Note
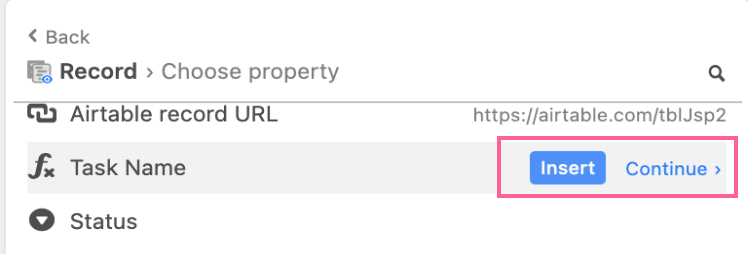
If you'd like to insert the entire value of a field into your condition as is click the "Insert" button. Certain field types will allow you to insert other properties about that field like the length of the text or color of that field. If you'd like to see what other data is available for the selected field type then click the "Continue" button.
Using found records from a view
If you “Find Records” based on a view, and then render those records as an HTML list or grid in an email, the records will be rendered in the same order as they were in the view. The way that fields have been ordered within that view will also be rendered in the same manner. This means that you can use the following workflow to send an email with a custom order for your records:
Create a view and sort the records and fields however you like.
Set up an automation, that when triggered, will use the "Find Records" action to find records based on your previously created view.
Use the "Send email" action to send an email rendering the records you just found, as either an HTML list or grid, in the same order as they were presented in your view. In actions that include the option to render found records as a list or grid, such as the "Send email" action, there is an option to include a link to the view where the rendered list or grid of records is coming from. To learn more about the basics of sending emails via automations check out this article.
Note
Airtable does not support rendering "Found" records in their view order if the records have been grouped.
Previewing found records
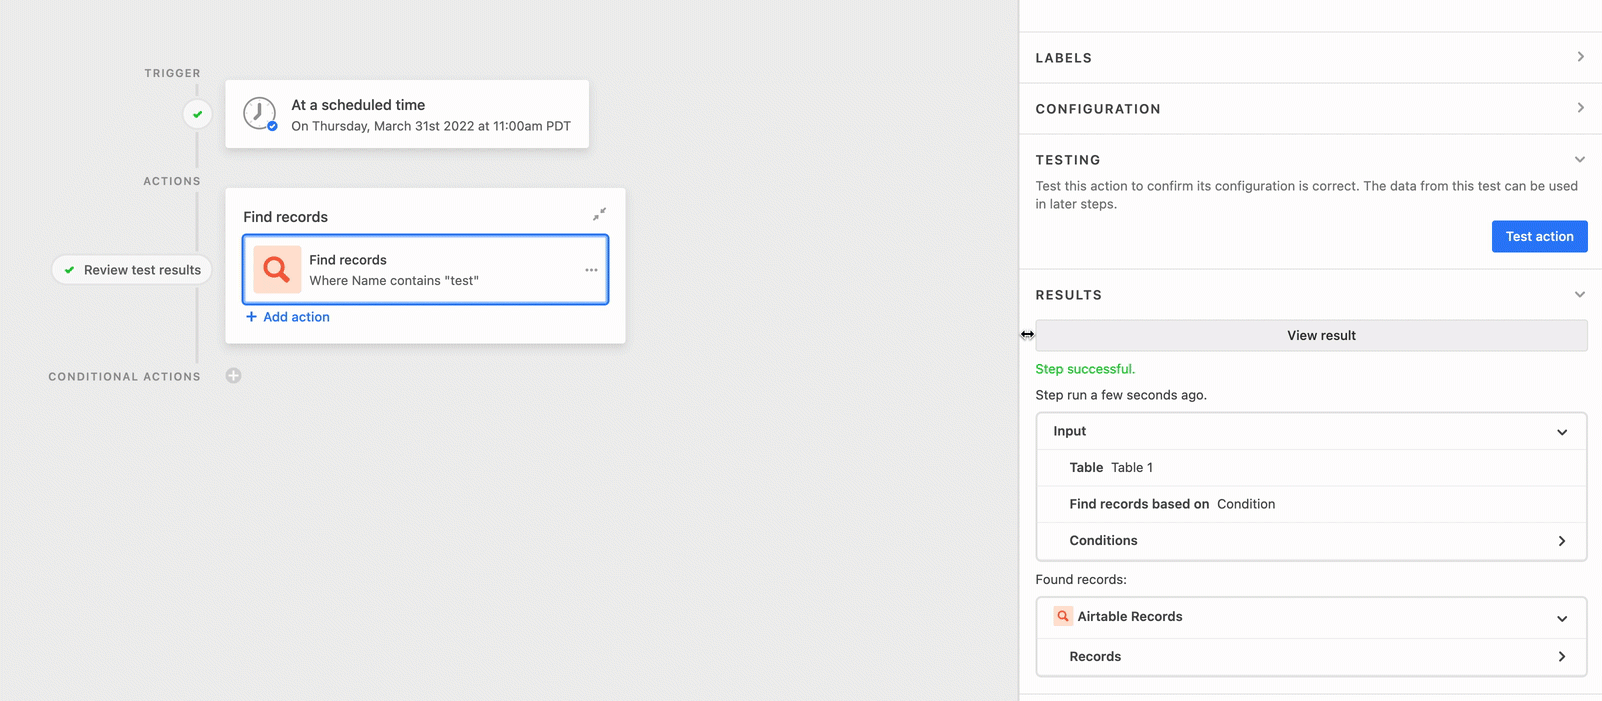
When testing the Find records action, a preview of the records found based upon the view or condition(s) you have set will pop up.
The preview you see will include all fields, even those hidden in a connected view. This is because the test is showing what our system sees on the backend. This is important because hidden fields may still be included in later actions.
For example, if you include records found in the Find records action in a Send email action, then you will decide in the Send email action’s setup process which fields should be hidden in the email that is sent.
If you want to see the test result at a later point in time, then you can click the "View result" button in the Results drop-down.
FAQs
Why aren't the date, or time-based, conditions in my Find records action, conditional logic, or When a record matches conditions trigger evaluating correctly?
Automations run on GMT since that is the default timezone that Airtable operates on behind the scenes. When setting up time-based conditions in automations you may need to adjust times manually or create a formula to auto-adjust times so that the conditions evaluate according to your timezone.
Is there a way to stop an automation's run if the Find Records action does not find any records?
A no-code way of accomplishing this is to utilize conditional logic in automations to prevent automation runs when no records are found. There is also a workaround in which you can insert a Run a script action after the Find records step to achieve this — check out the video here to guide you through how to do it.
Here's the script in the video above ( Note: you will still need to set the input variable as shown in the video):
let numRecordsFound = input.config().numRecordsFound;if (numRecordsFound < 1) {throw Error("No records were found.")}Was this article helpful?