Airtable automation trigger: Google Workspace
- 29 Feb 2024
- 5 Minutes to read
- Print
- DarkLight
- PDF
Airtable automation trigger: Google Workspace
- Updated on 29 Feb 2024
- 5 Minutes to read
- Print
- DarkLight
- PDF
Article Summary
Share feedback
Thanks for sharing your feedback!
Plan availability | All plan types with varying limitations |
Permissions |
|
Platform(s) | Web/Browser, Mac app, and Windows app |
Related reading | Creating an automation - Learn how to set up your first automation in Airtable. |
Note
As part of our Automations feature, a series of triggers for Google users can be set up in Airtable to automate common tasks or workflows associated with your Google account. If you are unfamiliar with the Automations feature, then we strongly recommend reading the Creating an automation support article before diving in.
Account authorization
As a prerequisite, you will need to already have a Google account. This account will need to be connected to the Airtable base that you are working in. After choosing which trigger you would like to set up, you will have the option to "Manage connected accounts" or "Connect new account". This authorization process is scoped to each individual Google service, so you will need to perform this process multiple times, at least once for each Google Workspace trigger, and also for reauthorizations in the future as needed.
Google Calendar triggers
Note
All Google Calendar triggers will return a Google Calendar Event ID. A Google Calendar event's ID is a unique identifier returned from Google Calendar for that event. If you intend to update a Google Calendar event at any point, we recommend storing the Google Calendar Event ID on your table. Note, that this ID is different from an Airtable Record ID, which is a unique identifier for an Airtable record.
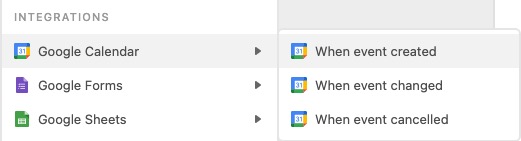
There are currently three Google Calendar triggers to consider using in Automations:
When event created
When event changed
When event cancelled
Note
To track all changes in a Calendar, you'll likely need to set up 3 different automations, one for each Google Calendar trigger listed above.
Each of the Google Calendar triggers requires the same general setup process. You'll need to:
Pick which trigger you want to use
Connect your Google account (or select an already connected account)
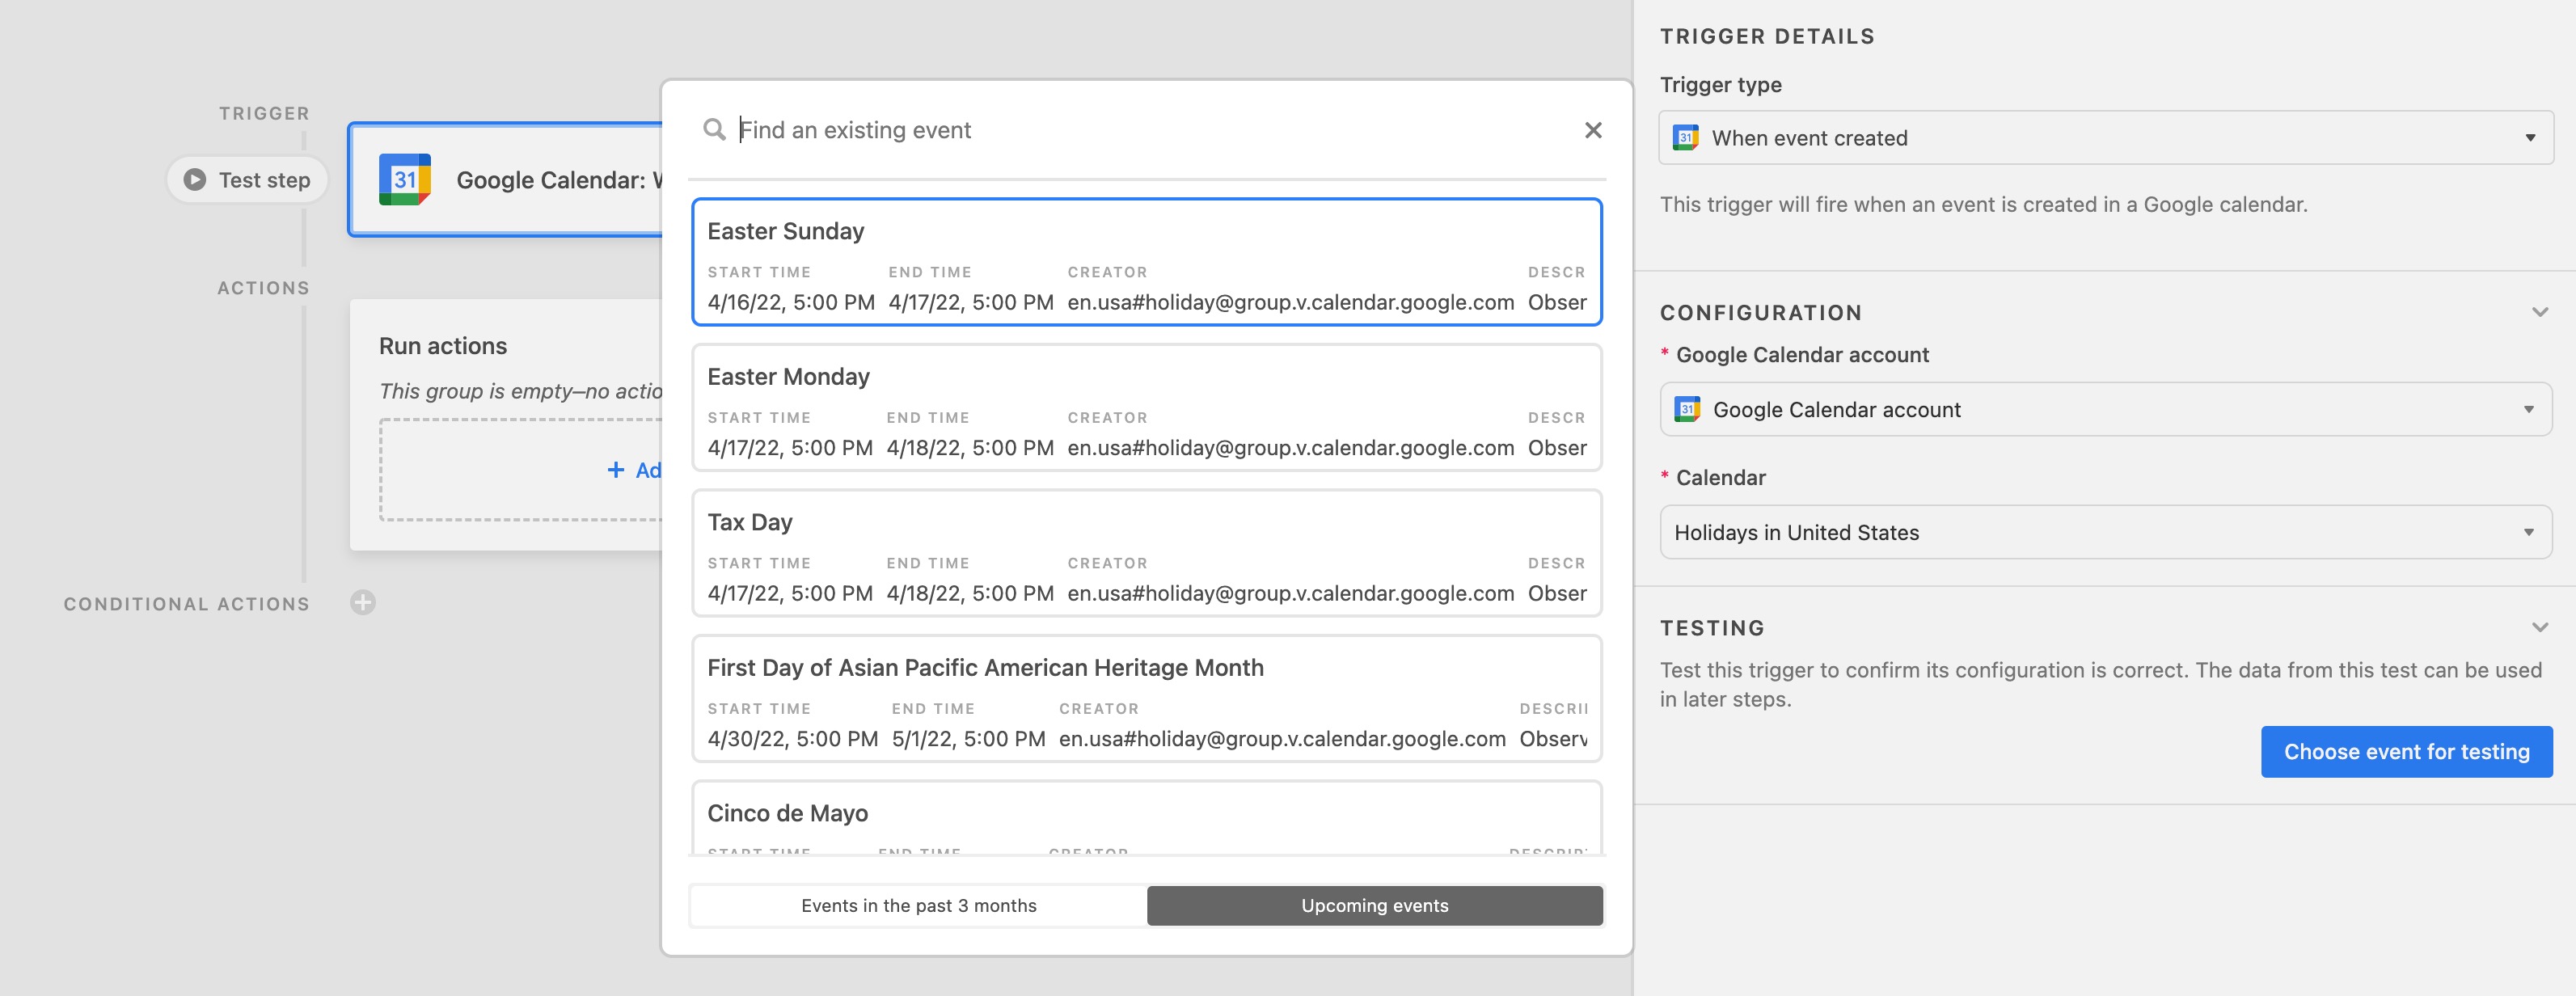
Select a calendar that will trigger this automation
Pick an event and Run a test to make sure the connection is configured correctly (at least one event will need to be present in the calendar you selected to be able to test)
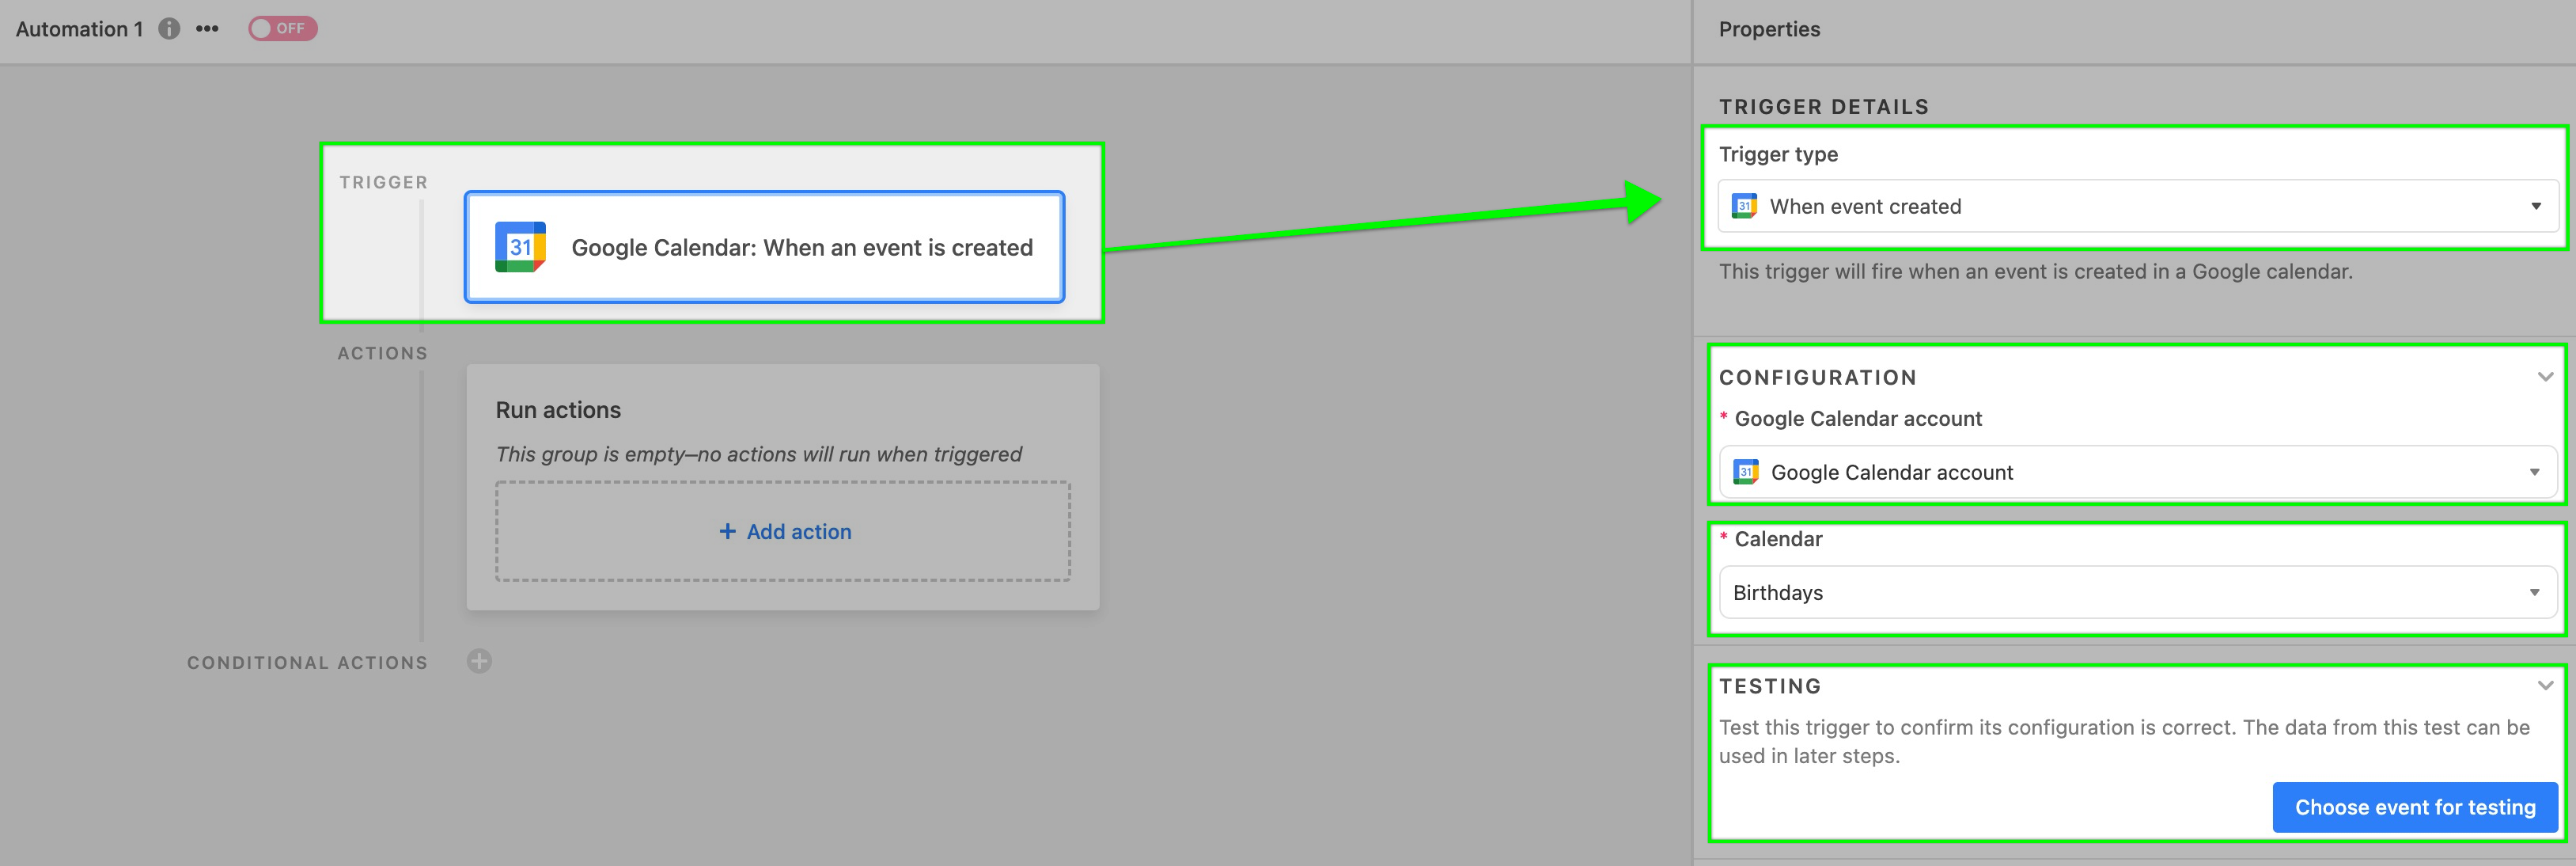 After successfully testing a Google Calendar trigger, you are ready to move on to some action steps. Consult below for more information about each trigger type.
Google Forms trigger
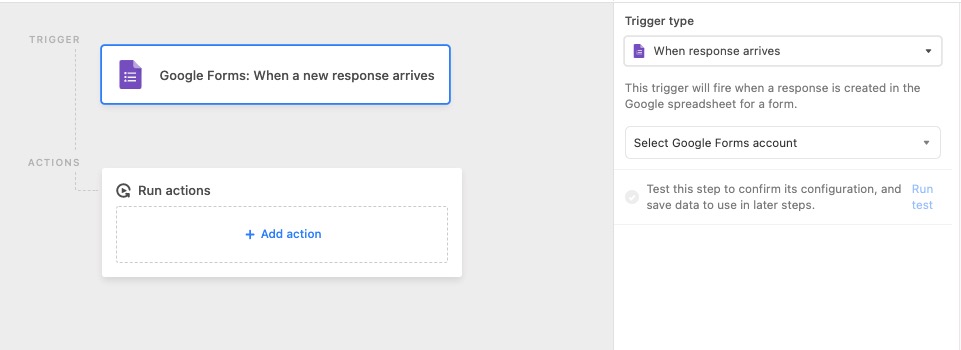
For Google Forms, we currently provide one Automation trigger option. Select the “When a response arrives” trigger from the list of available triggers. Then follow these setup steps to connect to the right Google account.
Note
You need to use the “Select response destination” setting in your Google Form and designate a spreadsheet to use to collect response information. For help on this, please visit this support article from Google for more details.
Next, connect to your Google Forms account, and select the spreadsheet and worksheet where your form responses are populating.
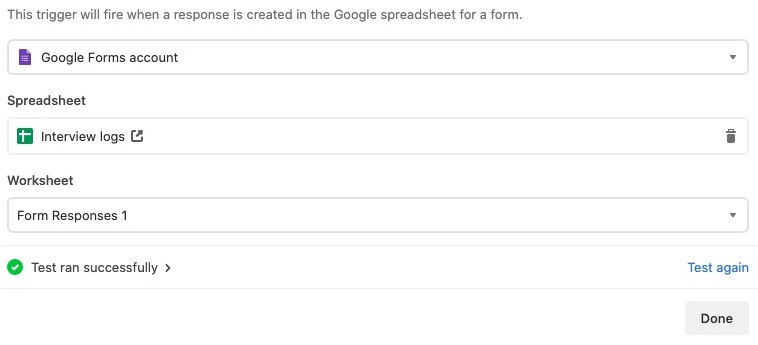
Then, run a test to make sure the connection is configured correctly (at least one form response will need to be already submitted to test the connection).
Note
The trigger will only detect rows that are added to the bottom of the spreadsheet. For example, if 3 rows were deleted from the spreadsheet and 3 more were added to replace them, then we wouldn't detect the 3 new rows. However, we would detect an additional 4th row or any subsequent submissions (rows) after that.
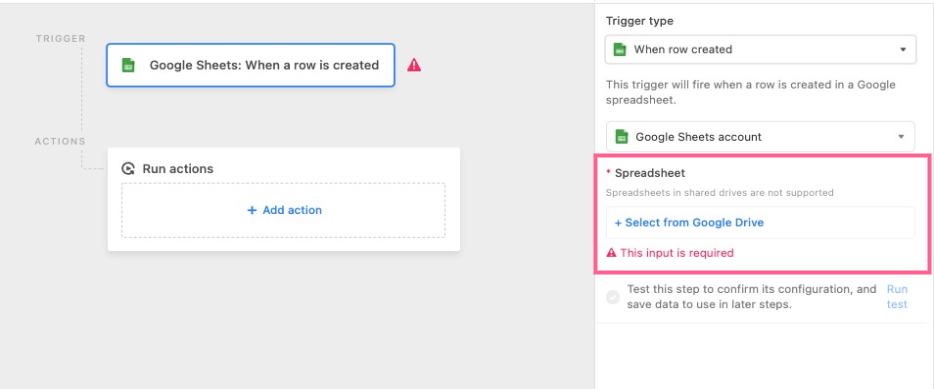
Google Sheets trigger
Note
The same row trigger rules apply as outlined in the note at the end of the section on the Google Forms trigger listed just above ^.
There is currently one Google Sheets trigger to choose when setting up an automation. Select the “When row created” trigger from the list of available triggers. Then follow these setup steps to connect to the right Google Sheet:
Connect your Google account (or select an already connected account)
Select a spreadsheet Select a worksheet (the worksheet must have column headers)
Run a test to make sure the connection is configured correctly
Note
The trigger on this automation is designed to run quickly after a new row has been created in a Google Sheet. If the row hasn't been entirely filled out at the time the automation triggers/runs, it may miss important information and not pull it into your Airtable table. This explains why you're able to retroactively test records successfully and pull them from Google into Airtable, yet the automation is unable to capture all of the information contained in a Google Sheet's row in live automation runs.
Add an action
After you’ve configured and tested the Google Workspace trigger, it’s time to add an action.
Action steps example:
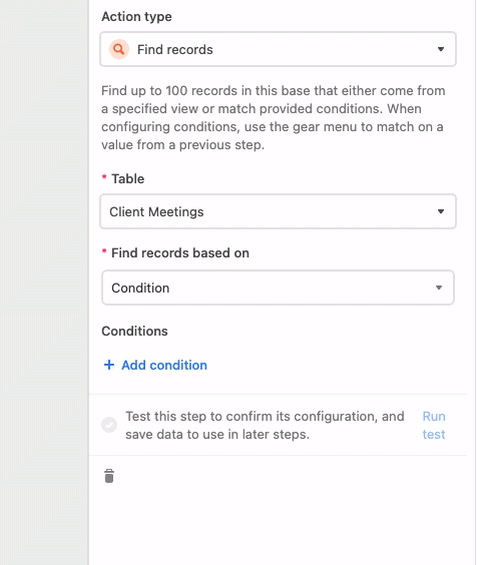
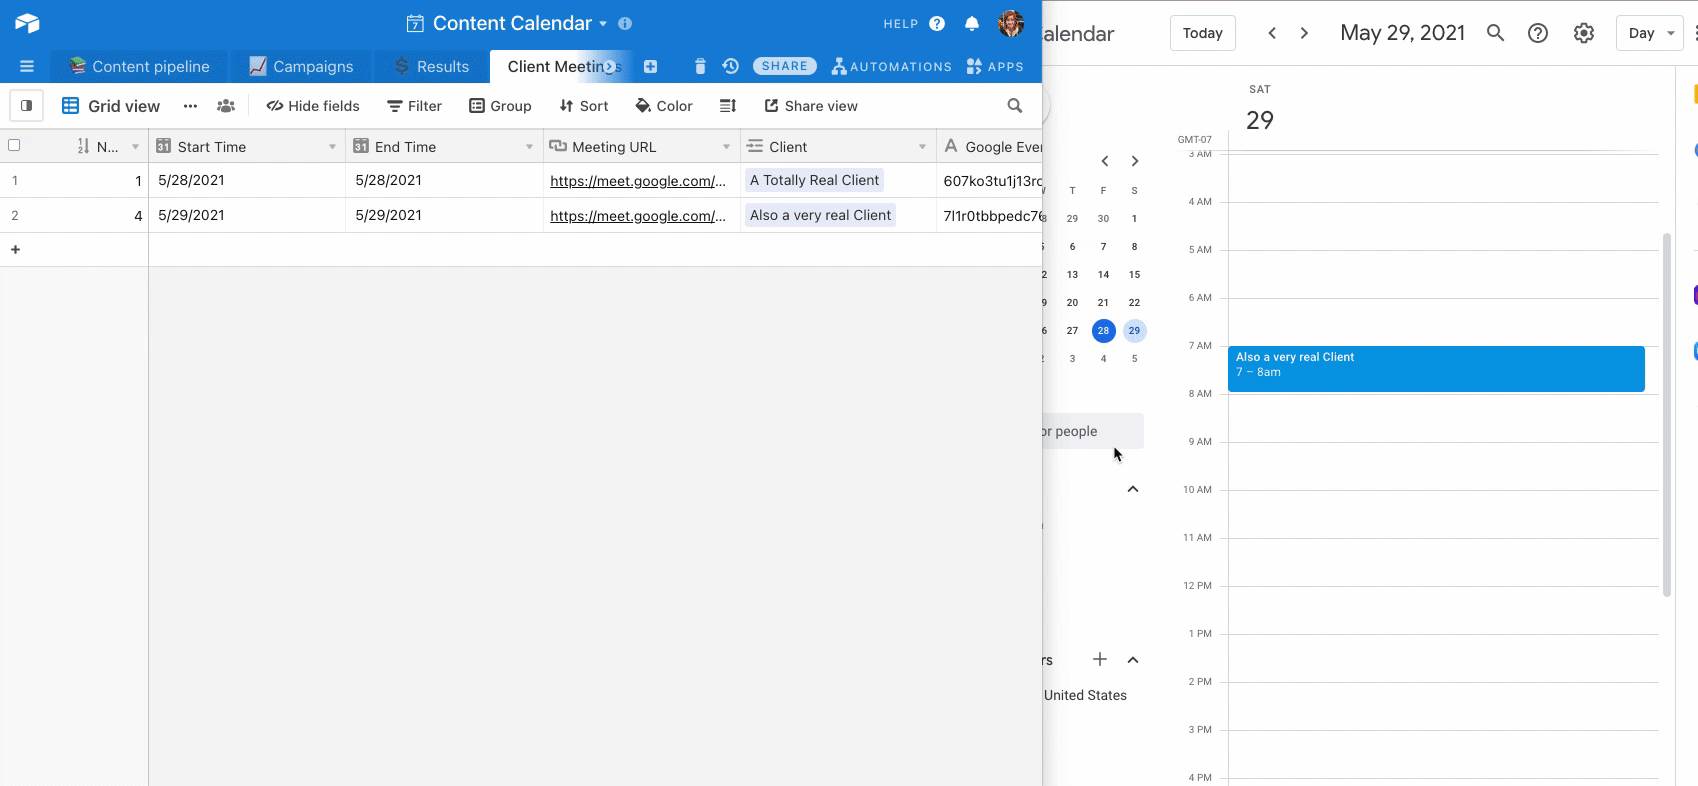
For this example, we'll use the example of finding and updating the corresponding record for a Google Calendar event that has been changed or canceled. So to do this we need to do two actions:
Find the record that corresponds to the Google Calendar event.
Update that record with the new details from the triggering Google Calendar event.
This is where the field we created holding "Google Event ID" comes in handy! We can use the "Find record" action to find the record with the same Google Calendar Event ID as the one from our Google Calendar trigger.
Now that we have found our record it's time to update it. We'll use the "Update record" action to update the record we just found with the new information from our Google Calendar trigger:
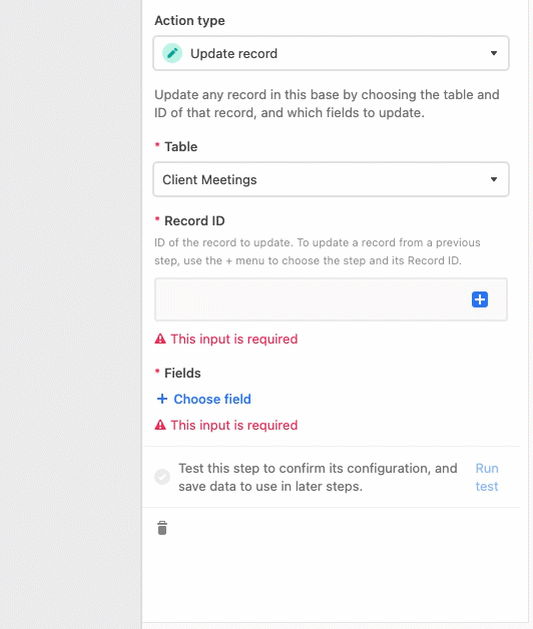
Then we can update all our fields from our original calendar. Here is what it looks like together:

You don't need to update the Google Event ID because that ID won't change—it is still a unique identifier for this event.
Note
While updating an existing calendar event, if you specify a field and do not input a value for that field, the automation will assume you'd like that field empty within the updated event.
Test and enable your automation
When testing a Google Workspace trigger, you'll have the option of choosing a test record, For example, if you are using the "Google Calendar: When event created" trigger, you'll be able to select an upcoming event or an event that's occurred within the past 3 months to use as a test event.
Once your action is configured and tested, make sure to turn the automation on. In this example, when an event is changed on the calendar selected in the trigger setup, the automation action will run and the corresponding record in Airtable will be updated:
FAQs
Why am I not seeing an option to connect my automation trigger with a shared Drive folder in Google?
Google Workspace automation triggers won't work with files from shared drives. Until this option can be allowed on Google's end, we are unable to support this type of folder. If it's an option to move the file into a personal drive folder, then you should be able to otherwise configure this automation as you intended.
Was this article helpful?