- 01 Mar 2024
- 2 Minutes to read
- Print
- DarkLight
- PDF
Airtable automation action: Create record
- Updated on 01 Mar 2024
- 2 Minutes to read
- Print
- DarkLight
- PDF
All plan types with varying limitations | |
| |
Platform(s) | Web/Browser, Mac app, and Windows app |
Related reading | Creating an automation - Learn how to set up your first automation in Airtable. |
Adding a create record action in automations
Airtable automations are trigger-action workflows that execute a series of steps, often used to take the place of repetitive or tedious work (ex. posting updates, sending messages, etc). All automations include a trigger and at least one action (ex. when a new record is added [trigger], send a message to the assignee [action]).
When building an Automation, you may choose the Create record action. When the automation runs successfully, a record will be created in a specified table. The Create record action can be configured with one or more fields set to any text or to a value from a previous step or both.
Building create record actions in Airtable
Visit your Airtable homepage.
Create or open your preferred base.
Click Automations to the right of your base's name.
.png)
Click + Add trigger and select your preferred trigger. After completing the trigger setup, test your trigger by clicking Use suggested record or Choose record.
(1).png)
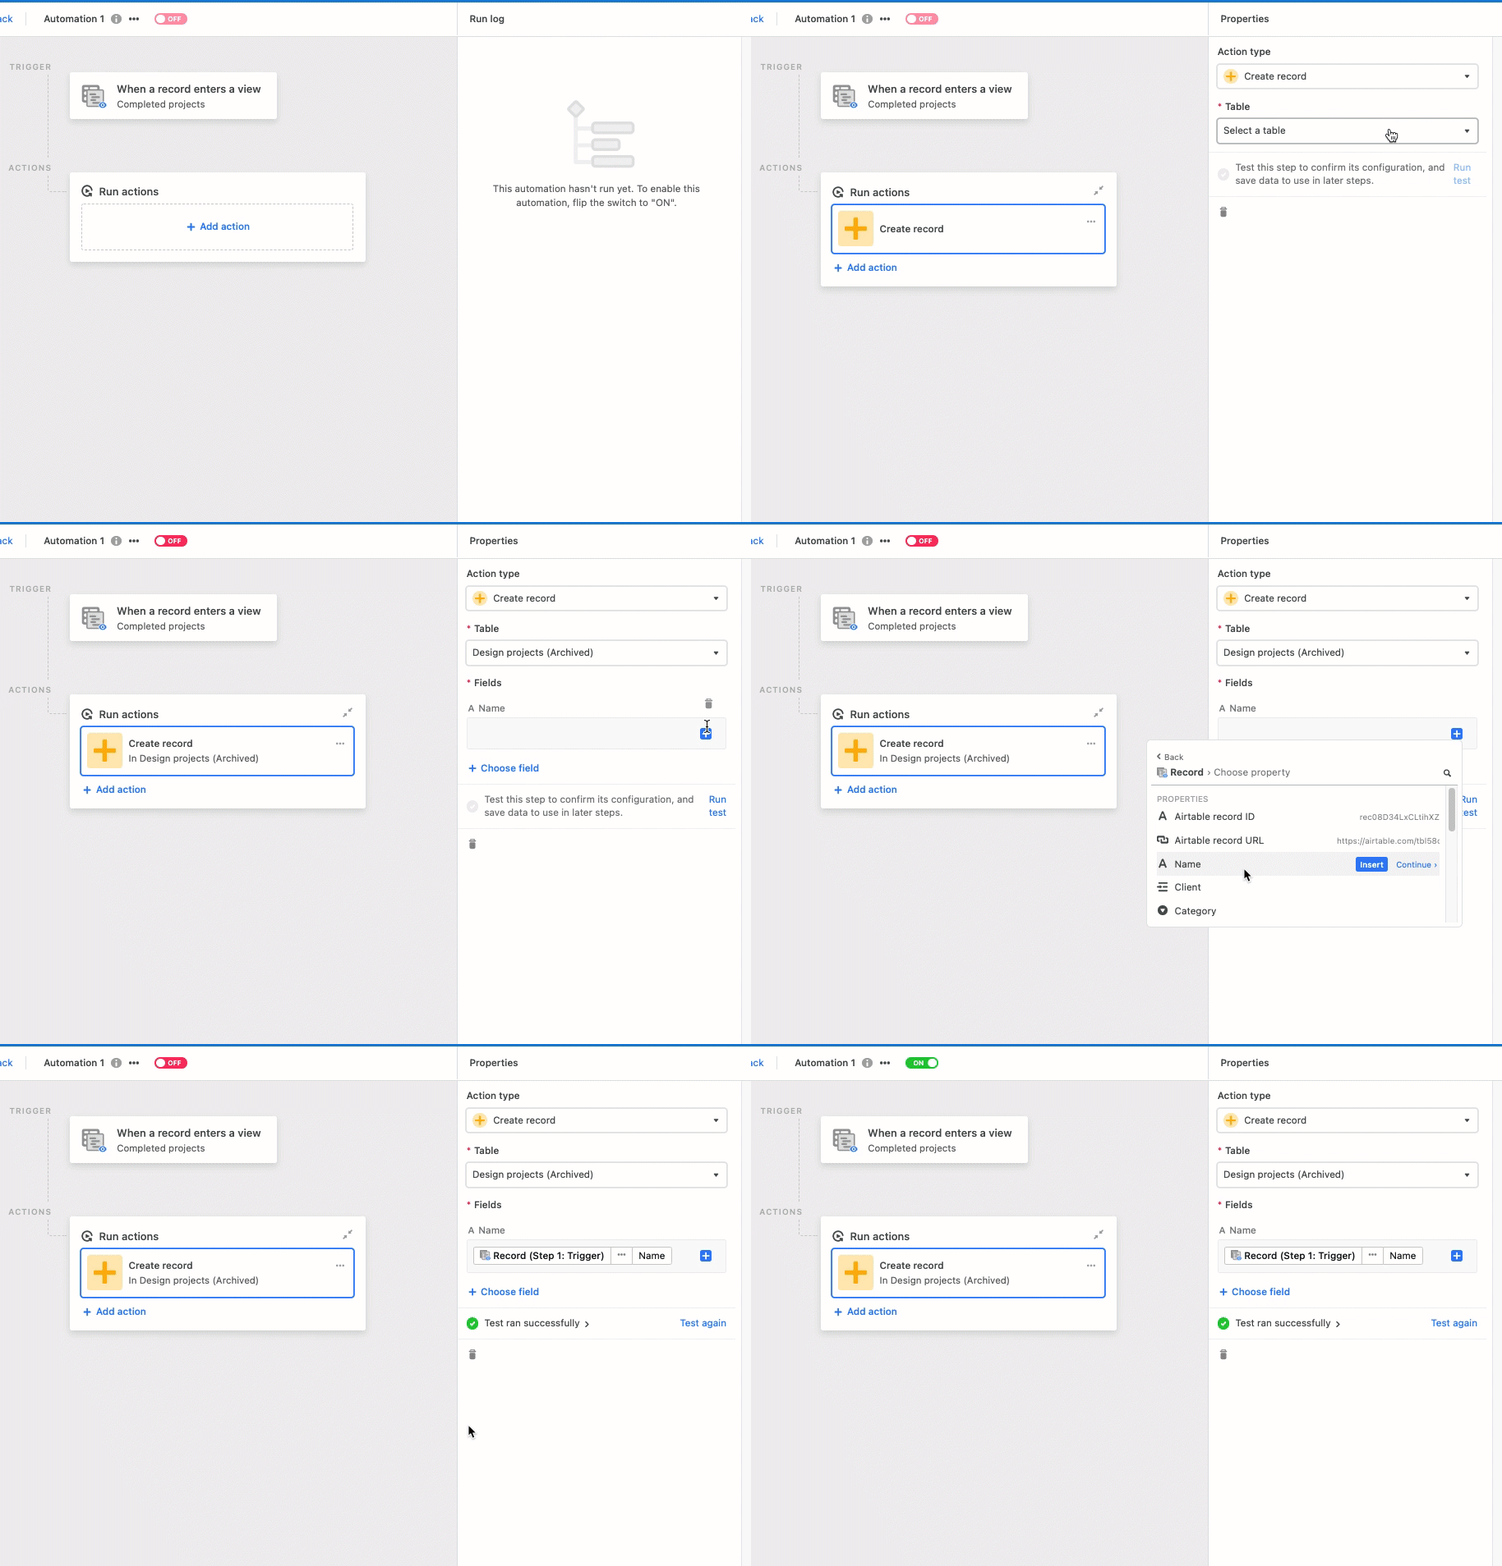
After testing the trigger successfully, we can move on to setting up the action. Click the blue "+ Add Action" button. Then, click on the "Create record" option. This will bring up a menu of options. First, select your desired table where the new record will be created. Next, you can choose which information from the trigger to add to the table you have chosen for this step. In our example, we are only inserting certain information into a new "Design projects (Archived)" table that we created. After adding the desired information for the action step make sure to test the action.

After successfully testing the action, you can turn your automation on.
FAQs
How do I have all of the field information from a record inserted into the created record?
If your use case requires that more or all of the information from a record be created in another table, then you'll need to configure each field in the automation to be included in that record. It's possible that field names may not match, so be sure to double-check the way that you are mapping the fields and data in the automation's configuration.
Can I use this automation to create records in other bases?
In general, no. To create records in another base you'll need to use a scripting action that includes a custom Web API call to create those records elsewhere. The one exception to this rule is for Enterprise customers who are using Airtable's two-way sync feature. In this case, creators can build an automation that creates the records in that synced table. These created records will sync to any other bases connected via that two-way sync.


(1).png)
