All plan types with additional options for paid plans | |
Permissions | Creators - Base collaborators at the Creator level can create, rename, or delete view sections to best organize views for each table within that base. |
Platform(s) | Web/Browser, Mac app, and Windows app |
Related reading | |
Airtable terminology |
|
Airtable views at a glance
In Airtable, a view is a particular way to look at and organize the underlying data in a table. The default type of view is a grid, but other types include form, calendar, gallery, and kanban. A given table can have multiple views and multiple view types. In this article, we discuss the My views and All views sections located within Airtable bases.
Note
View sections are a premium feature available on workspaces on paid plans.
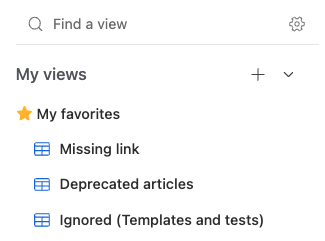
Your My Views section will only appear when you have one or more personal or favorite views.
Airtable view sections are automatically created organizational structures that allow you to access and manage all your views quickly. These view sections are broken into two distinct areas:
My views - a collection of favorited and personal views
All views - a collection of all views created by or shared with you
Accessing views in Airtable
To access My views or All views
Visit your Airtable homepage.
Select and open your preferred based.
After opening a base, your My views and All views sections are visible in the top-left corner.

Creating personal or collaborative views in Airtable
To create a personal or collaborative view
Visit your Airtable homepage.
Select and open your preferred based.
Click the + icon next to My views or All views.
Select your preferred view type.
Choose between Collaborative, Personal, or Locked.
Click Create new view.
Favoriting views in Airtable
Read this article to learn how to favorite a view in Airtable.
Collapsing and expanding views in Airtable
To collapse an Airtable view section
Visit your Airtable homepage.
Select and open your preferred based.
Click the ⌄ symbol next to My views.
To collapse an Airtable view section
Visit your Airtable homepage.
Select and open your preferred based.
Click the ˄ symbol next to My views.
Creating sections in Airtable
To create a section in Airtable
Visit your Airtable homepage.
Select and open your preferred based.
Click New section in the bottom-left corner and name your new section.
To move a view into section, right-click on your preferred view's name, choose Move to, and select the select your desired location.

Renaming sections or views in Airtable
To rename a section or view
Visit your Airtable homepage.
Select and open your preferred based.
Right-click on the name of section or view you want to update.
Click Rename section or Rename view.
FAQs
Is the Personal Views section visible if no personal views are created?
By default, you will not see the Personal views section if you do not have any personal views. However, if you toggle the Show everyone's personal views option, the Personal views section will appear if your collaborators have personal views.
What is the maximum amount of views that can be created per table?
You can create 1000 view sections per table 1001, including the More default view section.
What is the maximum amount of view sections that can be created per table?
You can create 1000 views per table.