Plan availability | All plan types |
Permissions |
|
Platform(s) | Web/Browser, Mac app, and Windows app |
Note
In addition to writing your own formulas, Airtable’s AI can help you create them. You can click "Generate formula" from a formula field’s editor or ask Omni for assistance.
AI must be enabled to utilize these features.
What is an Airtable formula field?
A formula field automatically calculates a value for every record in a table using a formula you write. Formula fields are similar to spreadsheet formulas — they can do math, compare values, manipulate text, work with dates, and combine information from other fields.
How do formulas work in Airtable?
Airtable formulas allow you to output numbers, dates, strings, and more in each record based on static or dynamic information from other cells in that same record.
For example, if you have a table of product orders, you can create a field that computes the “Total cost” for each record based on the information in each record’s “Price” and “Quantity” fields.
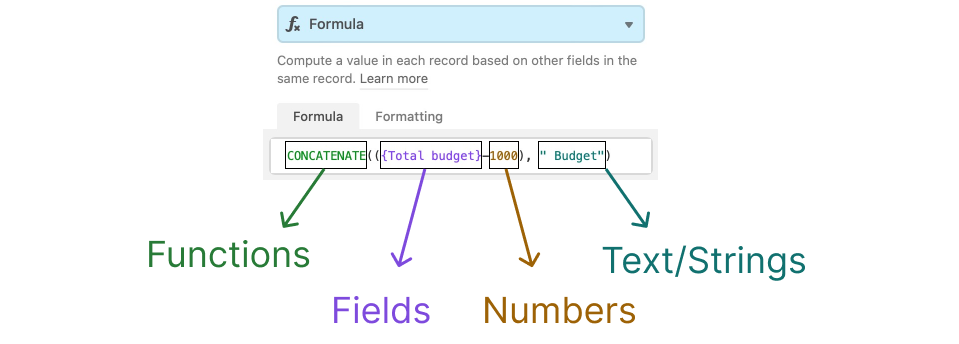
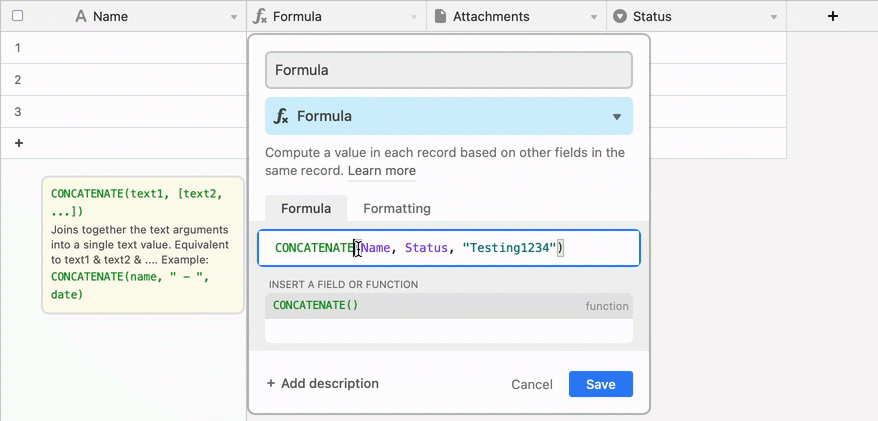
A formula can comprise functions (e.g., SUM, CONCATENATE), operators (e.g., +, -, *, /, &), and other fields from the same table.
You can enter the formula into the text box as you would in a spreadsheet, except in Airtable you will use the names of fields instead of cell ranges.
Airtable formulas cannot reference values present in the cell or cells of other records in the same table, another table, or another base. To work around this:
To bring information from one record to another record in the same table you can configure self-linking record relationships between records and use a lookup field to reflect a value from one record onto another record.
To bring information from one record to another record in a different table you can create a linked record relationship between records in one table and another table. You’ll then need to utilize lookup, rollup, and count fields in order to reflect or compute information from another record or records in the other table.
To bring information from another base to a record in the base where you are configuring your formula, you will need to use the Airtable Sync functionality in tandem with one or both of the work arounds listed above.
Adding formula fields in Airtable
Open your Airtable home screen.
Open the base where you want to add a formula field.
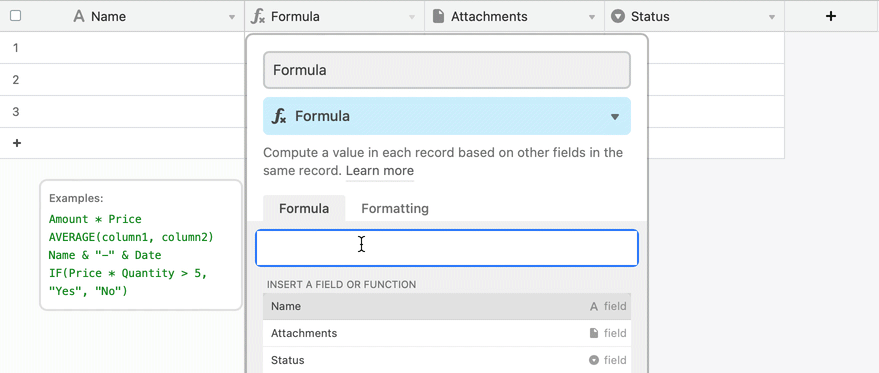
Add or edit a field.
Search for and select “Formula.”
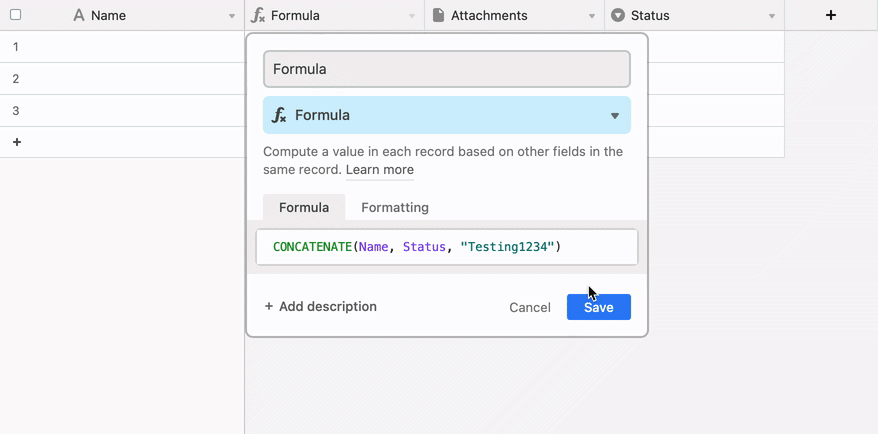
Enter your formula in the space under “Formula.”
Click the Formatting tab to adjust the way the formula’s output is formatted.
For example, suppose your formula will result in a numerical output. In that case, you can format the formula's result as a decimal, an integer, a currency, a percent, or a time duration. Additionally, you can adjust the precision for decimals, currencies, and percentages.
Refer to this article for more information about formatting.
Click Create field.
Using AI to generate formulas
Users who are creating formula fields in a workspace where AI has been enabled can have AI generate a formula by inputting a prompt of plain English.
Open your Airtable home screen.
Open the base where you want to add a formula field.
Add or edit a field.
Search for and select “Formula.”
Click the Generate formula option under the formula editor.
Enter a prompt describing the formula that you would like to have AI generate.
Click Generate.
You can then describe any additional changes you want the AI to make in order to tweak the formula to your liking. You can also click the back or forward arrow buttons to see different versions of the formula that the AI has created based on the tweaks that you have made.
Click Done when the formula looks how you want it to. You can also:
Click the two arrow icon to compare formula versions.

Or click the back arrow icon to undo the change to the formula. Note that this will clear the AI change and you will not be able to redo the formula change unless you write out another prompt.
Lastly, click Create field if this is a new formula field or click Save if this is an existing formula field that you modified.
Note
A field description will automatically be added to reflect what calculation the formula is performing. You can also have AI generate/regenerate a description based on the current formula by clicking Generate description.
Tips for formula prompts
Be direct and as clear as possible since larger prompts may take awhile to run.
Refer to field names the same way they appear in the table.
Remember you may need to still adjust formatting even if the formula is looking correct.
Feel free to experiment with this functionality, since formula generation does not count against your AI credit usage.
Prompt examples:
Concatenating two strings together - “Combine the status with the due date and put a hyphen in between.”
Result: CONCATENATE({Status}, ' - ', DATETIME_FORMAT({Due date}, 'MM/DD/YYYY'))
Finding the difference between two dates - “Subtract the end date from the start date and format the result in number of days”
Result: DATETIME_DIFF({End date}, {Start date}, 'days')
Changing an existing formula - Using the example above that generates a DATETIME_DIFF() formula in “days,” imagine that you are wanting to change the formula to display in “hours” instead. In this case, you should see the text “Describe any additional changes” in the AI formula box. Type in the phrase “Change the output of the formula to hours instead of days.”
Result: DATETIME_DIFF({End date}, {Start date}, 'hours')
Using the formula editor in Airtable
Colorful Syntax highlighting
Green = Functions Purple = Fields Orange/Brown = Numbers Teal = Text/strings Black = Anything else not represented above. ex. commas, parentheses, etc.
Parenthesis matching
Multiline editing with the ability to fold multiline formulas
Error warnings when there are unbalanced parentheses
Error warnings when there is a blank space or miscellaneous characters between a function name and the opening parenthesis
Formulas versus other computed fields in Airtable
Computed fields are unique field types where field values are calculated by Airtable automatically rather than directly edited by users. These fields allow you to tally a value based on values in other fields—like formula, lookup, count, and rollup—or fields that return the same values independently of other fields in the table or user actions—like auto number or created time.
Like all field types, you can set these fields up using the field customization menu. To learn about the basic, non-computed field types, see the article Guide to the basic field types.
Note
Computed field types are slightly different from formulas in a spreadsheet. In a spreadsheet, you can put a formula in any cell and have it reference any other cell in the sheet. In Airtable, you configure computed fields that apply the same formula to every record in the table. As a result, these formulas reference other fields rather than other cells so that they apply to every record.
Rollup, lookup, and count fields can only be used when you have a linked record field in your table.
Fields to connect to other tables
Additional computed fields
FAQs
Can I create SQL queries in Airtable?
While you can't directly query a table in Airtable, a view can help accomplish something similar.
By building a view, you can apply similar parameters to filter and present the information you'd like from your base's tables.
When building a view, you can filter records, hide unnecessary fields and group values, sort values, and add additional formula fields to manage complicated conditional logic to use in a filter.
You can join multiple tables by hard-coding joins into a table using linked record fields. With linked records in place, you can perform subqueries using lookup and rollup fields.
With your view/query—created, it is automatically saved in your table. You can easily switch between views, building new views—knowing your view/query is there for future reference.