- Cómo empezar a usar Airtable
- Introducción a los aspectos básicos de Airtable
- Cómo comunicarse con el equipo de soporte de Airtable
- Pantalla de inicio de Airtable
- Glosario de terminología de Airtable
- Airtable technical requirements
- Diferencias entre las funciones de Airtable para escritorio y para móvil
- Atajos de teclado de Airtable
- Cómo usar Markdown en Airtable
- Adding descriptions in Airtable
- Finding Airtable IDs
- Automatizaciones de Airtable
- Descripción general de automatizaciones
- Guías de automatizaciones
- Guías de automatizaciones integradas
- Guías de automatizaciones en Airtable
- Linking existing records using automations
- Conditional groups of automation actions
- Repeating groups of Airtable automation actions
- Creating recurring records using automations
- How to delay Airtable automation runs
- Prevent automations from triggering by mistake
- Use automations to timestamp status updates
- Desencadenantes de automatizaciones
- Desencadenantes de Airtable
- Airtable automation trigger: When record matches conditions
- Airtable automation trigger: When a form is submitted
- Airtable automation trigger: When record created
- Desencadenante de automatización de Airtable: cuando se actualiza un registro
- Airtable automation trigger: When record enters view
- Desencadenante de automatización de Airtable: a una hora programada
- Airtable automation trigger: When webhook received
- Airtable automation trigger: When a button is clicked
- Airtable automation trigger: When email received
- Desencadenantes integrados
- Desencadenantes de Airtable
- Acciones de automatización
- Acciones en Airtable
- Acción de automatización de Airtable: enviar correo electrónico
- Airtable automation action: Create record
- Airtable automation action: Update record
- Airtable automation action: Find records
- Airtable automation action: Sort list
- Acción de automatización de Airtable: ejecutar un script
- Airtable automation action: Generate with AI
- Acciones integradas
- Airtable automation actions: Slack
- Airtable automation actions: Google Workspace
- Airtable automation action: Send MS Teams message
- Airtable automation actions: Outlook
- Airtable automation actions: Jira Cloud
- Airtable automation actions: Jira Server / Data Center
- Airtable automation actions: Salesforce
- Airtable automation action: Create post in Facebook Pages
- Airtable automation actions: GitHub Issues
- Airtable automation action: Hootsuite post
- Airtable automation action: Send Twilio SMS
- Acciones en Airtable
- Bases de Airtable
- Using Airtable Cobuilder
- Descripción general de las bases de Airtable
- Creating and duplicating bases in Airtable
- Structuring your Airtable bases effectively
- Moving Airtable bases between workspaces
- Tables in Airtable
- Crear enlaces para compartir bases de Airtable
- Importing third-party data into Airtable
- Uso de las perspectivas
- Troubleshooting Airtable base performance
- Versiones beta de Airtable
- Colaboración en Airtable
- Asistencia de Airtable Enterprise
- Información general
- External badging in Airtable
- Creating and using Airtable components
- Ask an Expert beta overview
- Data residency at Airtable
- Descripción general de los grupos de usuarios en Airtable
- API de Enterprise de Airtable
- Creating and managing data retention policies in Airtable
- eDiscovery APIs in Airtable
- Airtable and data loss prevention
- Acceder a los registros de auditoría de Enterprise en Airtable
- Configuración de Jira Server/Data Center para conectarse con Airtable
- Panel de Administración de Enterprise
- Descripción general del panel de administración de Enterprise
- Usuarios: panel de administración de Enterprise en Airtable
- Detalles del usuario en el panel de administración de Airtable
- Grupos: panel de administración de Airtable
- Espacios de trabajos: panel de administración de Enterprise de Airtable
- Bases: panel de administración de Enterprise en Airtable
- Interfaces: Panel de administración de Enterprise en Airtable
- Data sets - Airtable admin panel
- Managed apps - Airtable admin panel
- Components - Airtable admin panel
- Informes: panel de administración de Enterprise en Airtable
- Airtable admin panel settings
- Guía práctica de Enterprise
- Gestionar a los admins de Enterprise en el panel de administración
- Uso de organizaciones
- Organizational branding for apps in Airtable
- Enterprise Hub in Airtable
- Enterprise Hub : Org unit assignment with user groups
- Desactivar, retirar el acceso y reactivar usuarios desde el panel de administración
- Gestionar el acceso de usuario a espacios de trabajo y bases
- Airtable Enterprise Key Management
- Custom terms of use
- SSO en Enterprise
- Información general
- Extensiones de Airtable
- Descripción general de las extensiones
- Extensiones por Airtable
- Extensiones integradas
- Campos de Airtable
- Descripción general de los campos
- Archivo adjunto
- Campos basados en fecha
- Fórmula
- Empezar a usar fórmulas
- Fundamentos de fórmulas
- Soluciones frecuentes: principiante
- Soluciones habituales: intermedias
- Soluciones habituales: avanzado
- Campo de texto largo
- Campos de registros vinculados
- Campos con números
- Otros campos
- Campos de compilación, búsqueda y recuento
- Campos de selección y colaborador
- Integración con Airtable
- API
- Getting started with Airtable's Web API
- Crear tokens de acceso personal
- Airtable Webhooks API Overview
- Service accounts overview
- API web de Airtable: usar filterByFormula o parámetros para ordenar
- Airtable API Deprecation Guidelines
- Airtable API: Common troubleshooting
- Managing API call limits in Airtable
- Enforcement of URL length limit for Web API requests
- Servicios de integración
- Third-party integrations via OAuth overview
- Troubleshooting disconnected OAuth integrations in Airtable
- Options for integrating with Airtable
- Third-party integrations - Common troubleshooting
- Low-code integrations - Common troubleshooting
- Integrating Airtable with external calendar applications
- Visualizing records from Airtable in Tableau
- Visualizing Airtable records in Microsoft Power BI & Power Query
- Integrating HubSpot with Airtable
- Using Zapier to integrate Airtable with other services
- Using Zapier's Multi-Step Zaps to find and update records
- Using IFTTT to integrate Airtable with other services
- Integrating with AWS Lambda & DynamoDB
- Herramientas para desarrolladores
- API
- Diseñador de Interfaces de Airtable
- Descripción general
- Diseños de página
- Elementos
- Adding and removing elements in interfaces
- Adding layouts to interfaces
- Formatting elements in interfaces
- Interface element: Button
- Interface element: Calendar
- Interface element: Chart
- Interface element: Filter
- Interface element: Gallery
- Interface element: Grid
- Interface element: Kanban
- Interface element: Number
- Interface element: Record picker
- Interface element: Text
- Interface element: Timeline
- Aprendizaje y recursos
- Gestión de Airtable
- Política de Airtable
- Registros de Airtable
- Sincronización de Airtable
- Vistas de Airtable
- Espacios de trabajo de Airtable
- 05 Mar 2024
- 4 Minutos para leer
- Impresión
- Compartir
- OscuroLigero
- PDF
Gantt view milestones, dependencies, and critical paths
- Actualizado en 05 Mar 2024
- 4 Minutos para leer
- Impresión
- Compartir
- OscuroLigero
- PDF
All paid plans | |
| |
Platform(s) | Web/Browser, Mac app, and Windows app |
Milestones
Learn about the advanced settings that are available for the Gantt view, including milestones, dependencies, and critical paths. To learn about the other Gantt view settings, including how to add the Gantt view, see this article.
In the Gantt view, you can work with two different kinds of records; tasks and milestones.
A task represents work done over a date range. A task record must have both a start date and end date.
A milestone represents a single point in time like a checkpoint, deadline, or meeting. A milestone record must have only an end date (with no start date).
When choosing to work with either or both types of records, note that they must be records within the same table.
Note
Milestones currently only support date fields, and aren't yet compatible with formulas that produce a date (e.g. {Start date} + duration = End date).
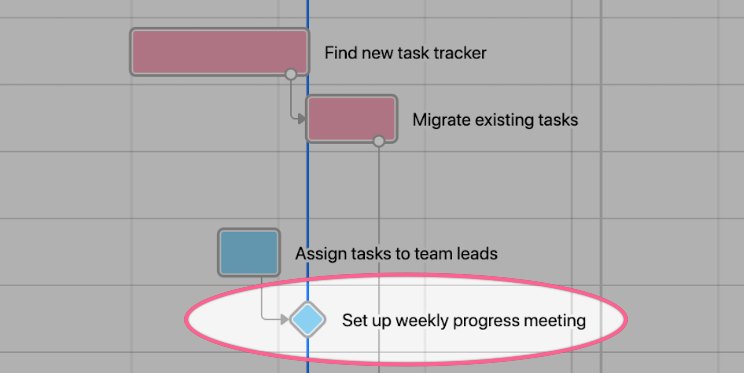
Milestones are represented in the Gantt chart as diamonds with vertical lines. Like tasks, they can have dependencies and record coloring.
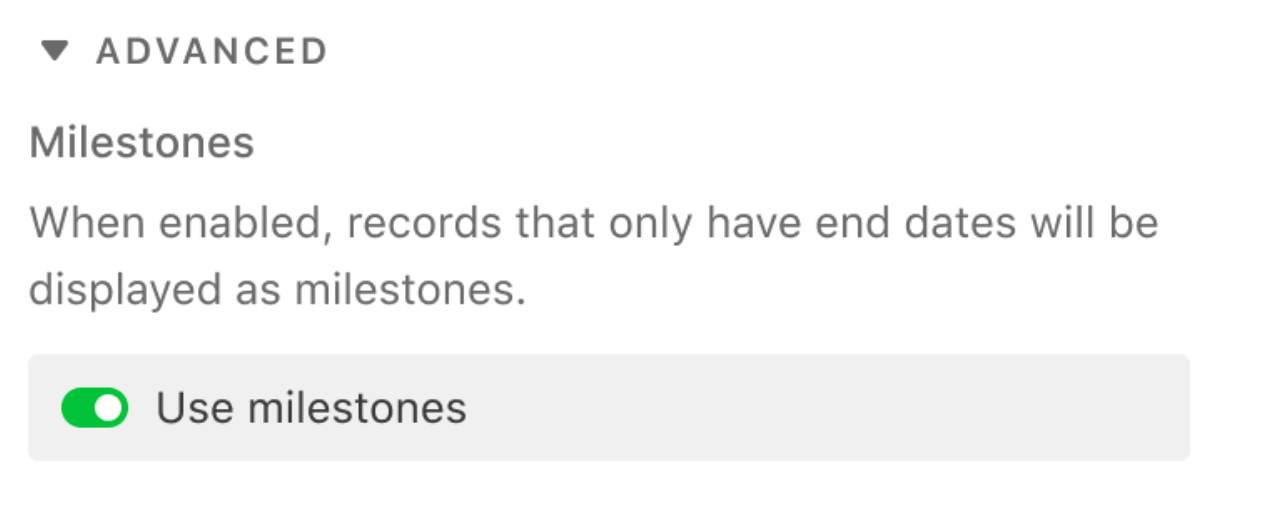
To enable this feature, turn on the “Use milestones” setting in the Gantt view.
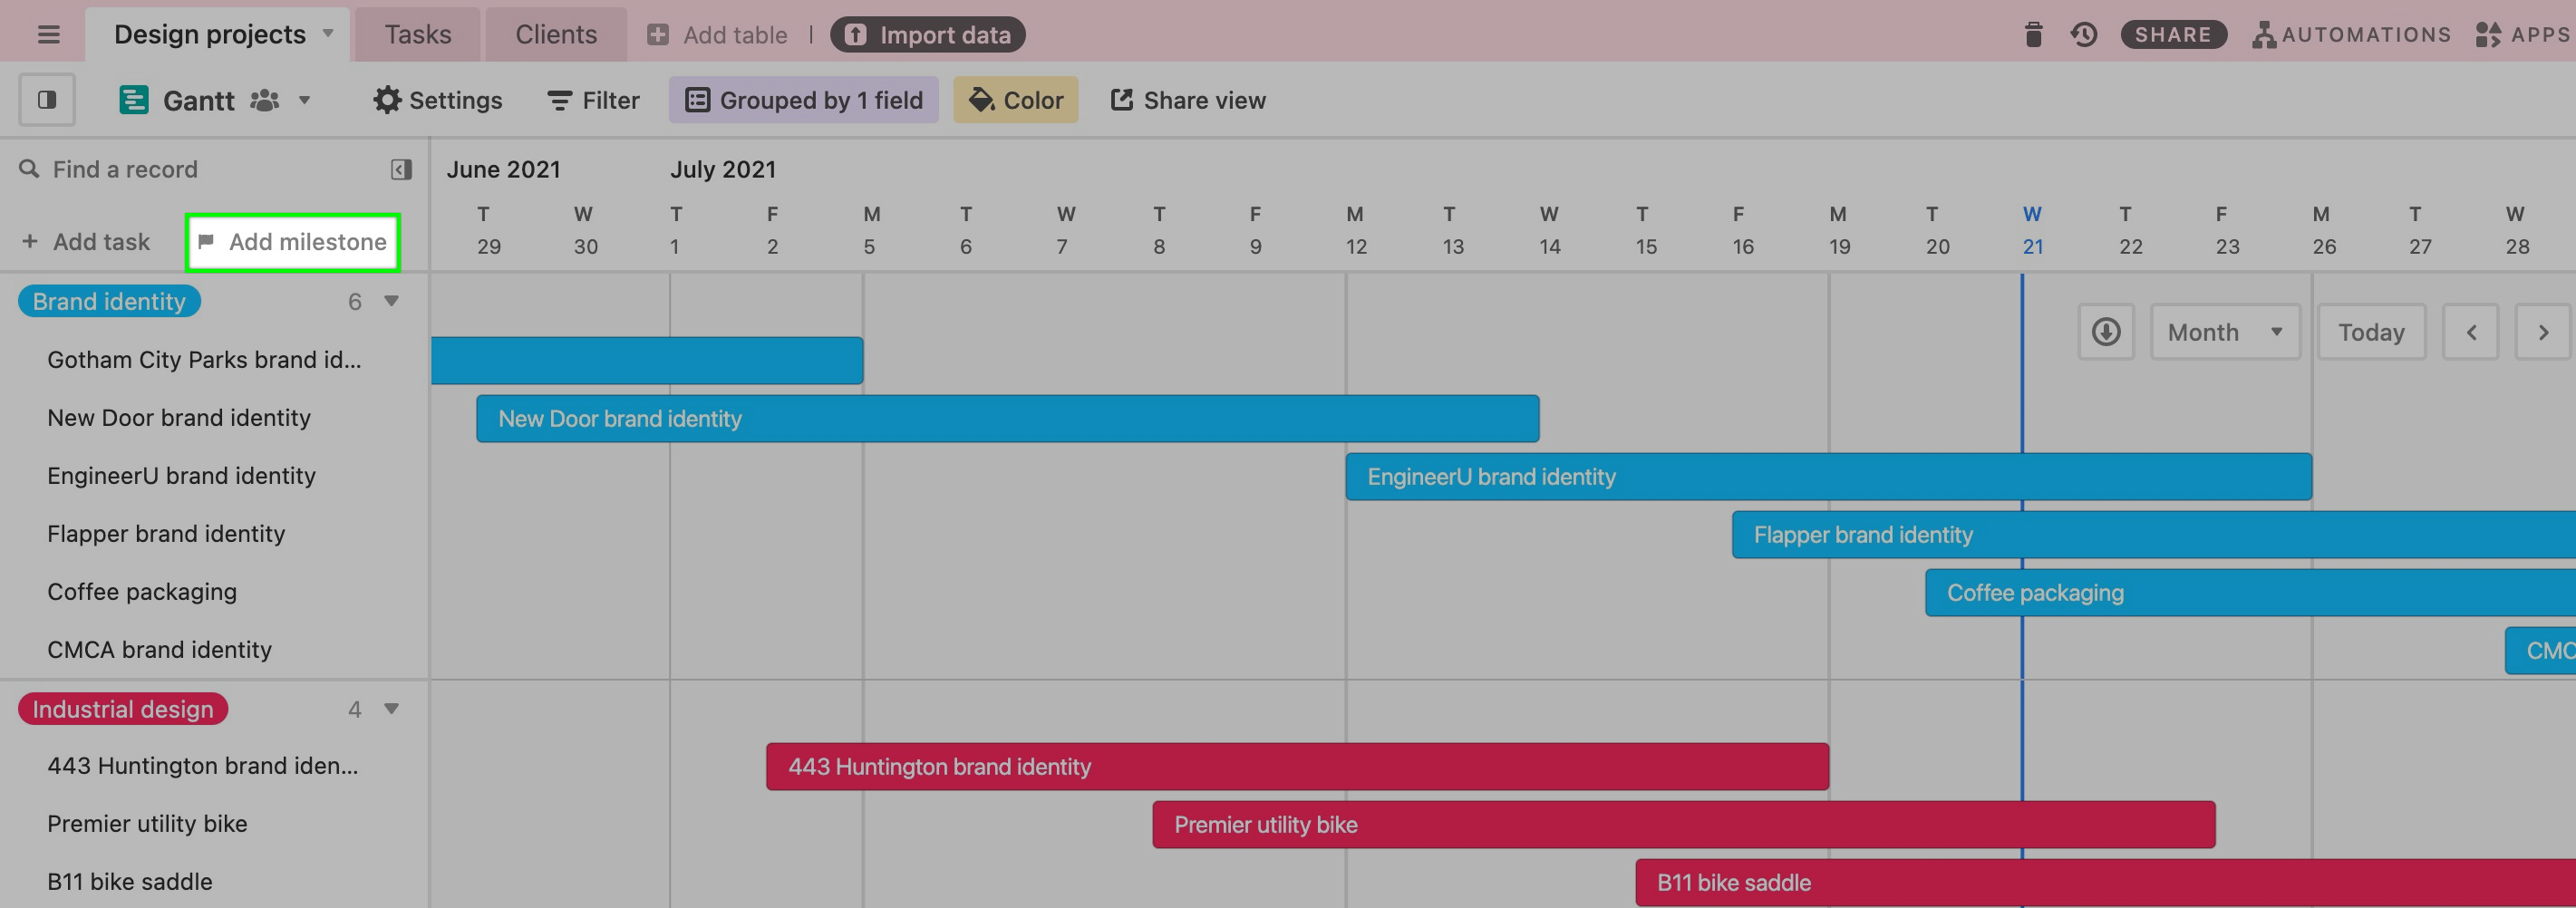
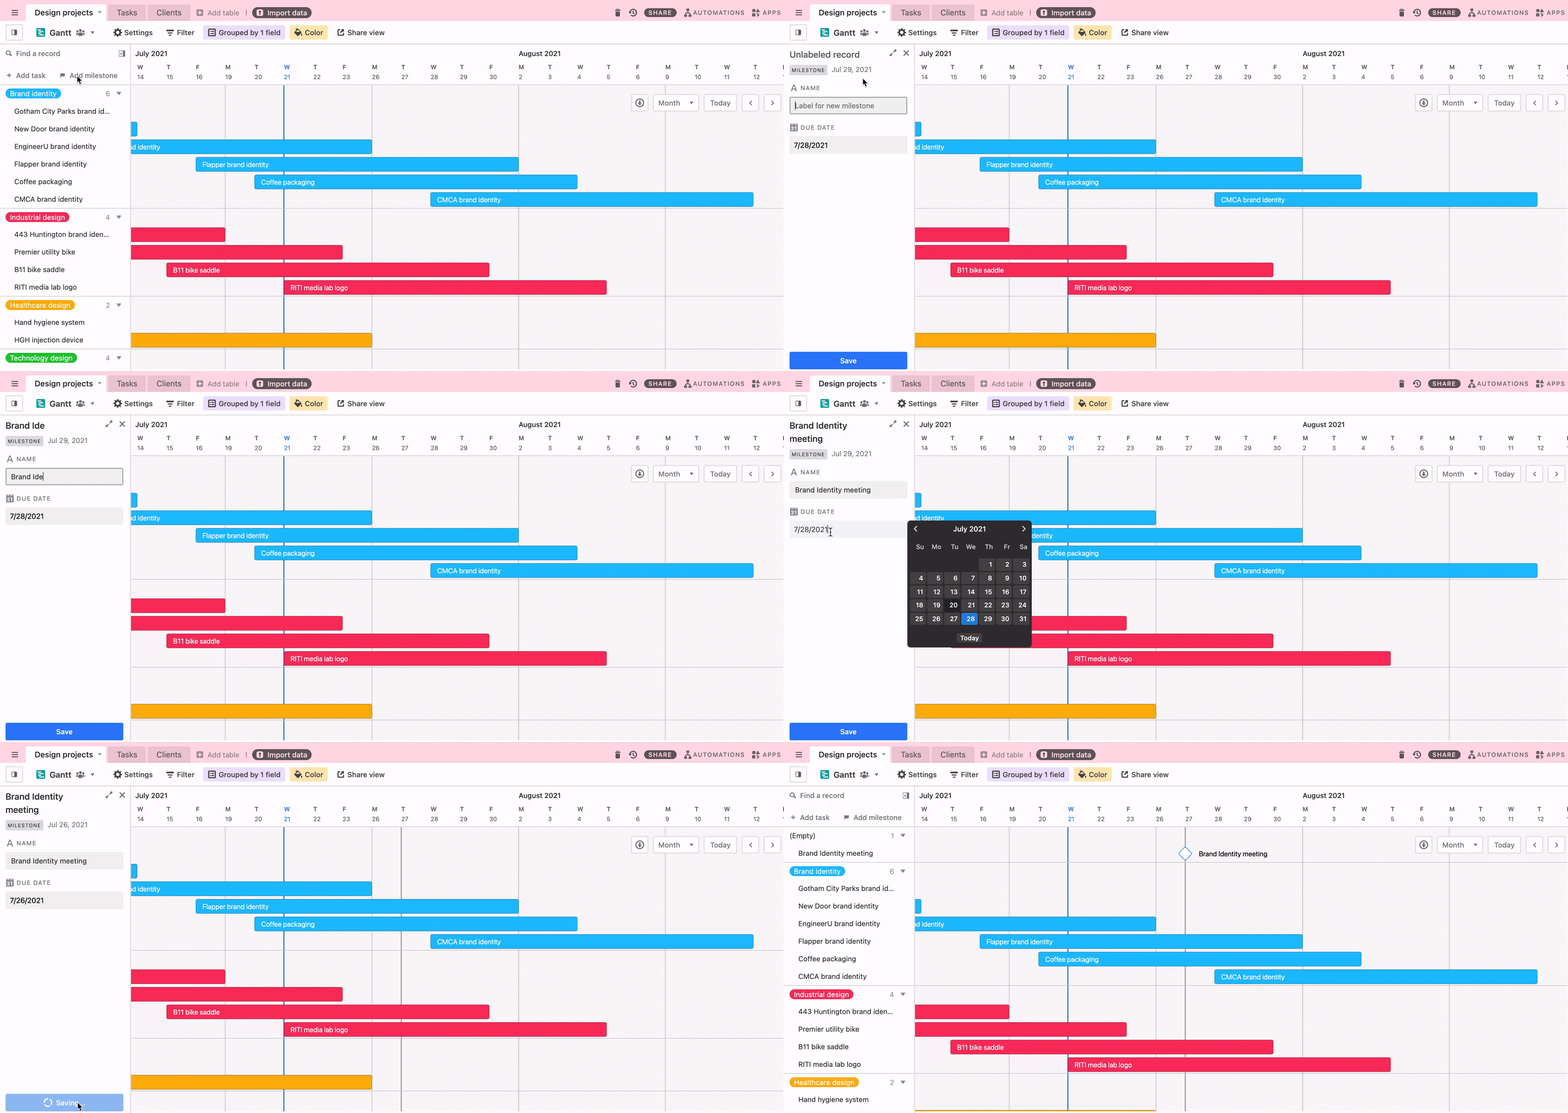
Milestones can be created just like any other record in an Airtable view, but you can also use the “Add milestone” button in the left-hand sidebar of the Gantt chart.
This will automatically create a record with no start date and an end date based on the chart’s current scroll position.
Dependency field
In some cases, a project plan or schedule will require that activities be performed in a certain order. For example, you need to finish making a presentation deck before you give a presentation. You can visualize these dependent relationships between different tasks with arrows (called dependencies) connecting the different bars in the Gantt chart.
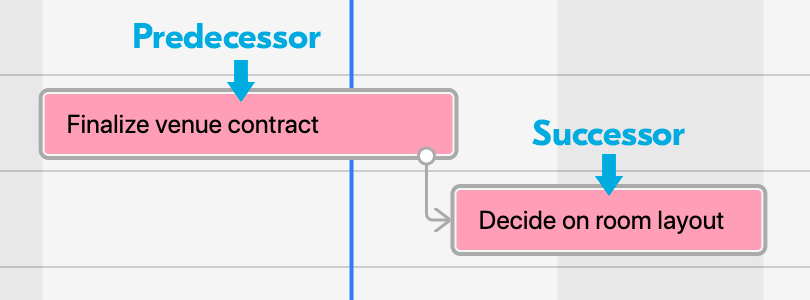
The arrow reflects the direction of the dependency. The base of the arrow comes out of the record that needs to be completed first (the predecessor) and points toward the record that can only be started after the predecessor is completed (the successor).
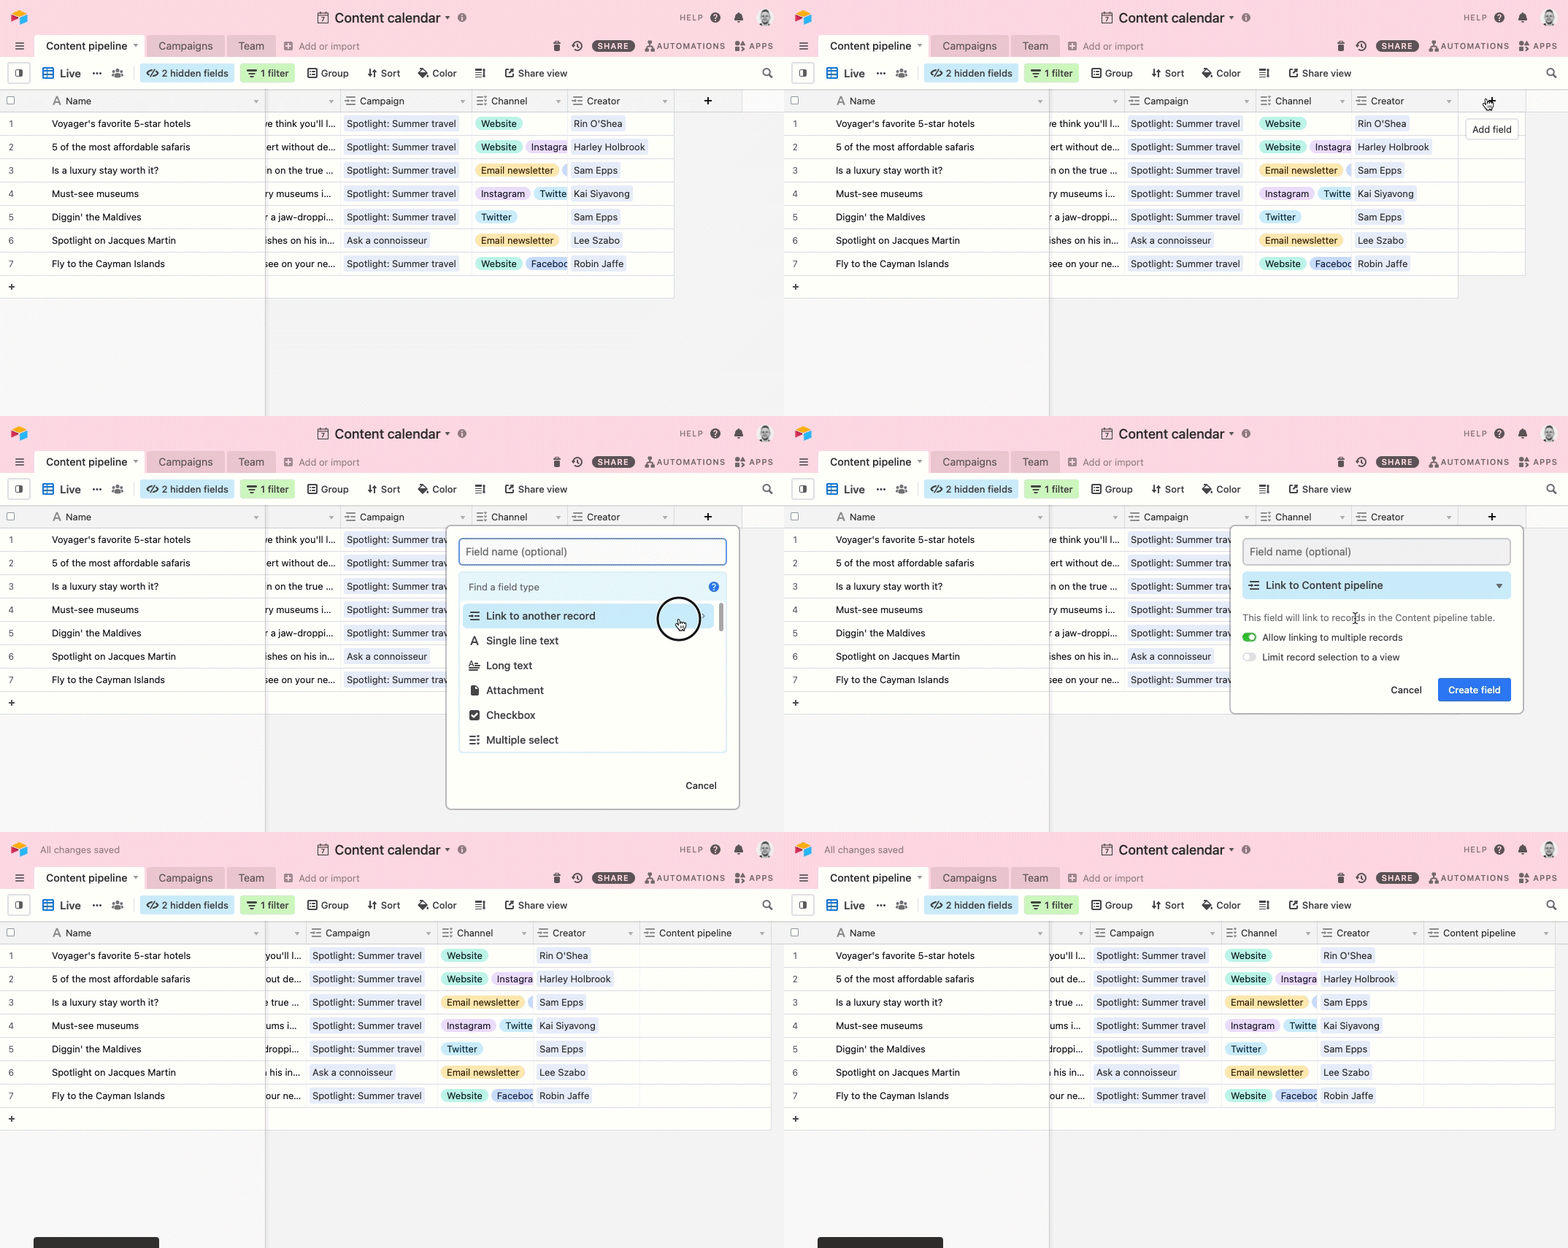
To create this relationship, you need a linked record field that links to its own table rather than to another table ( a "self-linking" record field).
Self-linking record field
To create this type of linked record field, start by clicking the plus button to the right of your existing fields. Then, select the "Link to another record" option, and select the same table that you're creating the field in.
Note
If you already have a single line text field or other field containing successors or predecessors, you can convert this existing field into a self-linking linked record field. Otherwise, you can create a new self-linking linked record field using the instructions above.
Once you've added the linked record field, you can use it to contain either:
Links to activities that can start only after the activity in the primary field is completed (successors)
Links to activities that must be completed before work can start on the activity in the primary field (predecessors)
Setting the dependency relationship
Let's circle back to the Gantt view settings. There you'll find the option to decide if the type of relationship you've configured for your self-linking record is a predecessor or a successor.
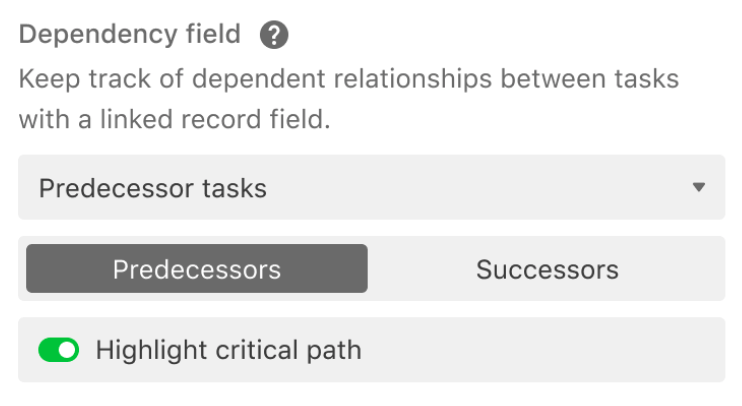
After making the selection - and if your self-linking record field already has record links in it - your Gantt chart will automatically populate with dependency arrows.
If your self-linking record field doesn't already have record links in it, you won't see any dependency arrows yet, even after selecting a dependency field. However, as long as you have a dependency field set, you can create your own dependency arrows in the view.
Invalid dependencies
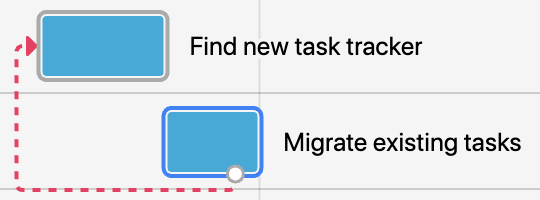
If a dependency appears with a red line, that means the dependency is invalid: either a dependent record is scheduled to start prior to one of its precedent tasks, or the records are in a dependency loop.
Creating dependencies directly in the Gantt chart
If you've selected a self-linking linked record field to serve as a dependency field for your Gantt view, you can make dependencies directly within the Gantt chart interface. When you move your mouse over a record, a white circle will appear. Click and drag this white circle to another record to create a dependency arrow.
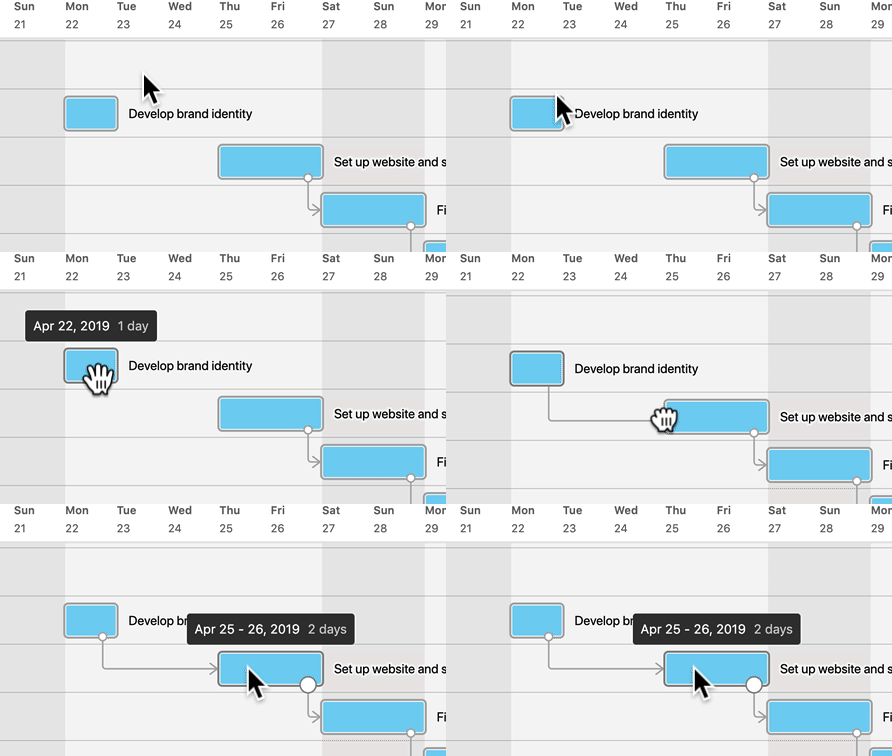
As you create dependency arrows, links will be created in whichever field you designated as your dependency field.
Highlighting critical paths
When tasks are dependent on each other, delays to individual tasks can end up directly affecting the completion date of an entire project. A chain of dependent tasks that can influence the finishing date of the overall project is called the critical path. The Gantt view will highlight the critical path based on the earliest and latest records from your dependencies—below is a quick example demonstrating this behavior (outlined in gold)
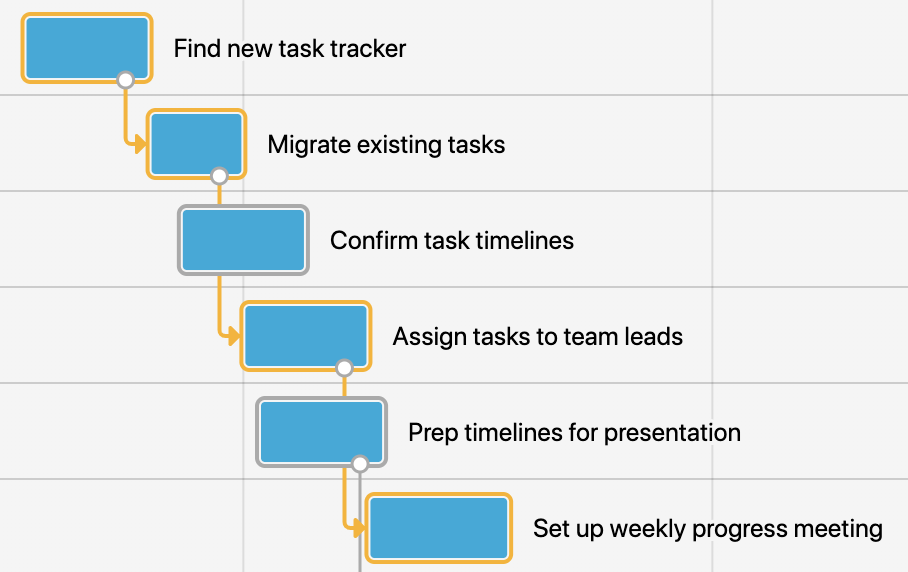
Delays to earlier tasks (i.e. 'Migrate existing tasks' above) that affect the sequential timing of the final task(i.e. 'Set up weekly progress meeting' above) are considered critical to remaining on schedule.
Tasks that do not have a dependency link to the final task will be omitted from the critical path (i.e. 'Confirm task timelines' in the above example).
If you have a dependency field selected in your Gantt view settings, you can highlight the records and dependency arrows on the critical path by toggling the Highlight critical path button. This will automatically display the critical path for any applicable records.
Note
If you already have a field named "Dependencies" in the table you are looking to create a new Gantt view in, then the option to add a new linked "Dependencies" field will not appear in step 2 of the configuration window. This is because two fields of the same name are not possible within the same table.

