Prevent automations from triggering by mistake
- 29 Feb 2024
- 1 Minuto para leer
- Impresión
- OscuroLigero
- PDF
Prevent automations from triggering by mistake
- Actualizado en 29 Feb 2024
- 1 Minuto para leer
- Impresión
- OscuroLigero
- PDF
The content is currently unavailable in Spanish. You are viewing the default English version.
Resumen del artículo
¿Te ha resultado útil este resumen?
Gracias por sus comentarios
Plan availability | All plan types |
Permissions | Owners/Creators - These permissions are needed in order to be able to perform the steps outlined in this article. |
Platform(s) | Web/Browser, Mac app, and Windows app |
Example and overview of preventing unintended
This article covers the setup process for adding a manual review process of a record before an automation runs. This approach can be helpful for many workflows where having someone personally review a record before running an automation is desired.
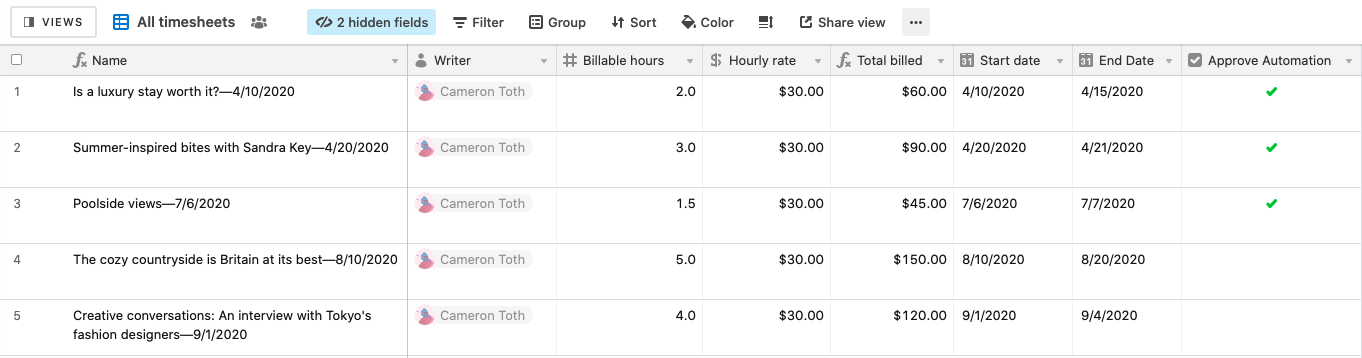
In this article, we'll apply this workflow to an example scenario where a marketing team wants to personally check that all invoice details for their contract writers are correct before sending them over to their accounting department.
Here's a summary of the workflow we'll create for this hypothetical marketing team:
Create a checkbox field to manually approve that the record is ready to be used in an automation
Configure a view to only show records with that field checked
Configure the automation to only run for records that appear in that view
Walkthrough: Preventing automations from running by mistake
Step 1: Create a checkbox field
Start by adding a new checkbox field and naming it Approve automation. This field would be checked off after the relevant information for each contracted article is reviewed.
Step 2: Configure a view
Next, you'll need to set up a new filtered view that will be used to display only records that have Approve automation checked.

As soon as that field is checked the record will filter into this view.
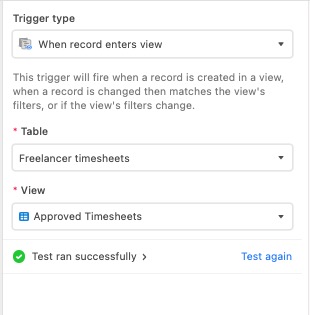
Step 3: Choose a trigger
The next step is to setup an automation using the When a record enters a view trigger. Select the appropriate table and the Approved Timesheets view we just created. The automation will trigger (run) for every new record that is added to that view. As a reminder, records should only be added to that view once the Approve automation checkbox field is manually clicked.
Note
We strongly recommend pairing the "When record enters view" trigger with a locked view. By using a locked view, or ensuring a locked field is involved, you can decrease the likeliness of accidentally changing a view's filtering (therefore avoiding accidental automation runs for unintended records that enter that view).
Step 4: Add an action
After you've configured and tested the trigger it's time to select an action. For more guidance on adding actions please see Creating an automation.
¿Te ha sido útil este artículo?