Configuring SSO with Microsoft Entra ID
Last updated: September 17, 2026
Plan availability | Business and Enterprise Scale only |
Platform(s) | Web/Browser, Mac app, and Windows app |
Related reading |
Set up Microsoft SSO with an email attribute
Use this setup for a separate login identifier and email address, or to onboard external users. If you already have working SSO, start with Upgrade an existing SSO configuration. Basic email-NameID SSO instructions are in the collapsed section below.
Open the Airtable SAML application in Microsoft Entra ID. You’ll need access to its SAML settings and your organization’s Airtable SSO settings, including a verified domain for the configuration.
In the app’s SAML claims, send the user’s email in a claim named
mail, or keep an existing email claim name. For example,user.mailmay be the source field, whilemailorhttp://schemas.xmlsoap.org/ws/2005/05/identity/claims/emailaddressis the outgoing claim name. Airtable needs the outgoing name, not the source field.Choose a stable, unique NameID. For a non-email identifier, use Unspecified as its format. If you keep an email or UPN as the identifier, confirm whether that value will change during email or domain changes.
In Airtable, enter the IdP’s sign-in URL and X.509 certificate. Select V2, set Email attribute name to the exact outgoing attribute name from step 2, and save. See the Airtable setup instructions.
Copy the two values from the saved Airtable configuration into Microsoft Entra ID:
Airtable field
Microsoft Entra ID field
Reply URL (ACS)
Reply URL (ACS URL)
Audience URI (Entity ID)
Identifier (Entity ID)
Use the configuration-specific pair. Don’t combine the new ACS URL with a legacy Entity ID. If your IdP validates Airtable’s signed requests, use the corresponding V2 Airtable metadata/certificate.
Assign a test user and launch Airtable from the IdP. Complete any email confirmation and linking steps, then confirm the correct email and existing account content. Test Sign in with Single Sign On from Airtable as well.
Decide whether to turn on SSO required after testing. It is not required to enable SSO. For external users, follow the onboarding steps; the first unlinked sign-in starts from the IdP.
If your preconfigured app doesn’t expose the required attribute and endpoint settings, contact Airtable Support before changing an existing integration. If you use SCIM, preserve provisioning and align its userName mapping with the SAML NameID as part of the upgrade.
Basic Microsoft SSO with the legacy ACS URL
Use this path when the NameID is each user’s Airtable email address. Leave Email attribute name at Use NameID (default).
Use https://airtable.com/auth/ssoCallback as the ACS URL and the legacy Entity ID shown in the saved configuration:
https://airtable.com/sso/metadata.xmlfor V1or
https://airtable.com/sso/metadata0418.xmlfor V2
Setting up SSO for Microsoft Entra ( previously Azure AD)
The content below may be outdated as Microsoft makes changes. In addition to reviewing our setup information, we recommend checking out Azure's Marketplace app page.
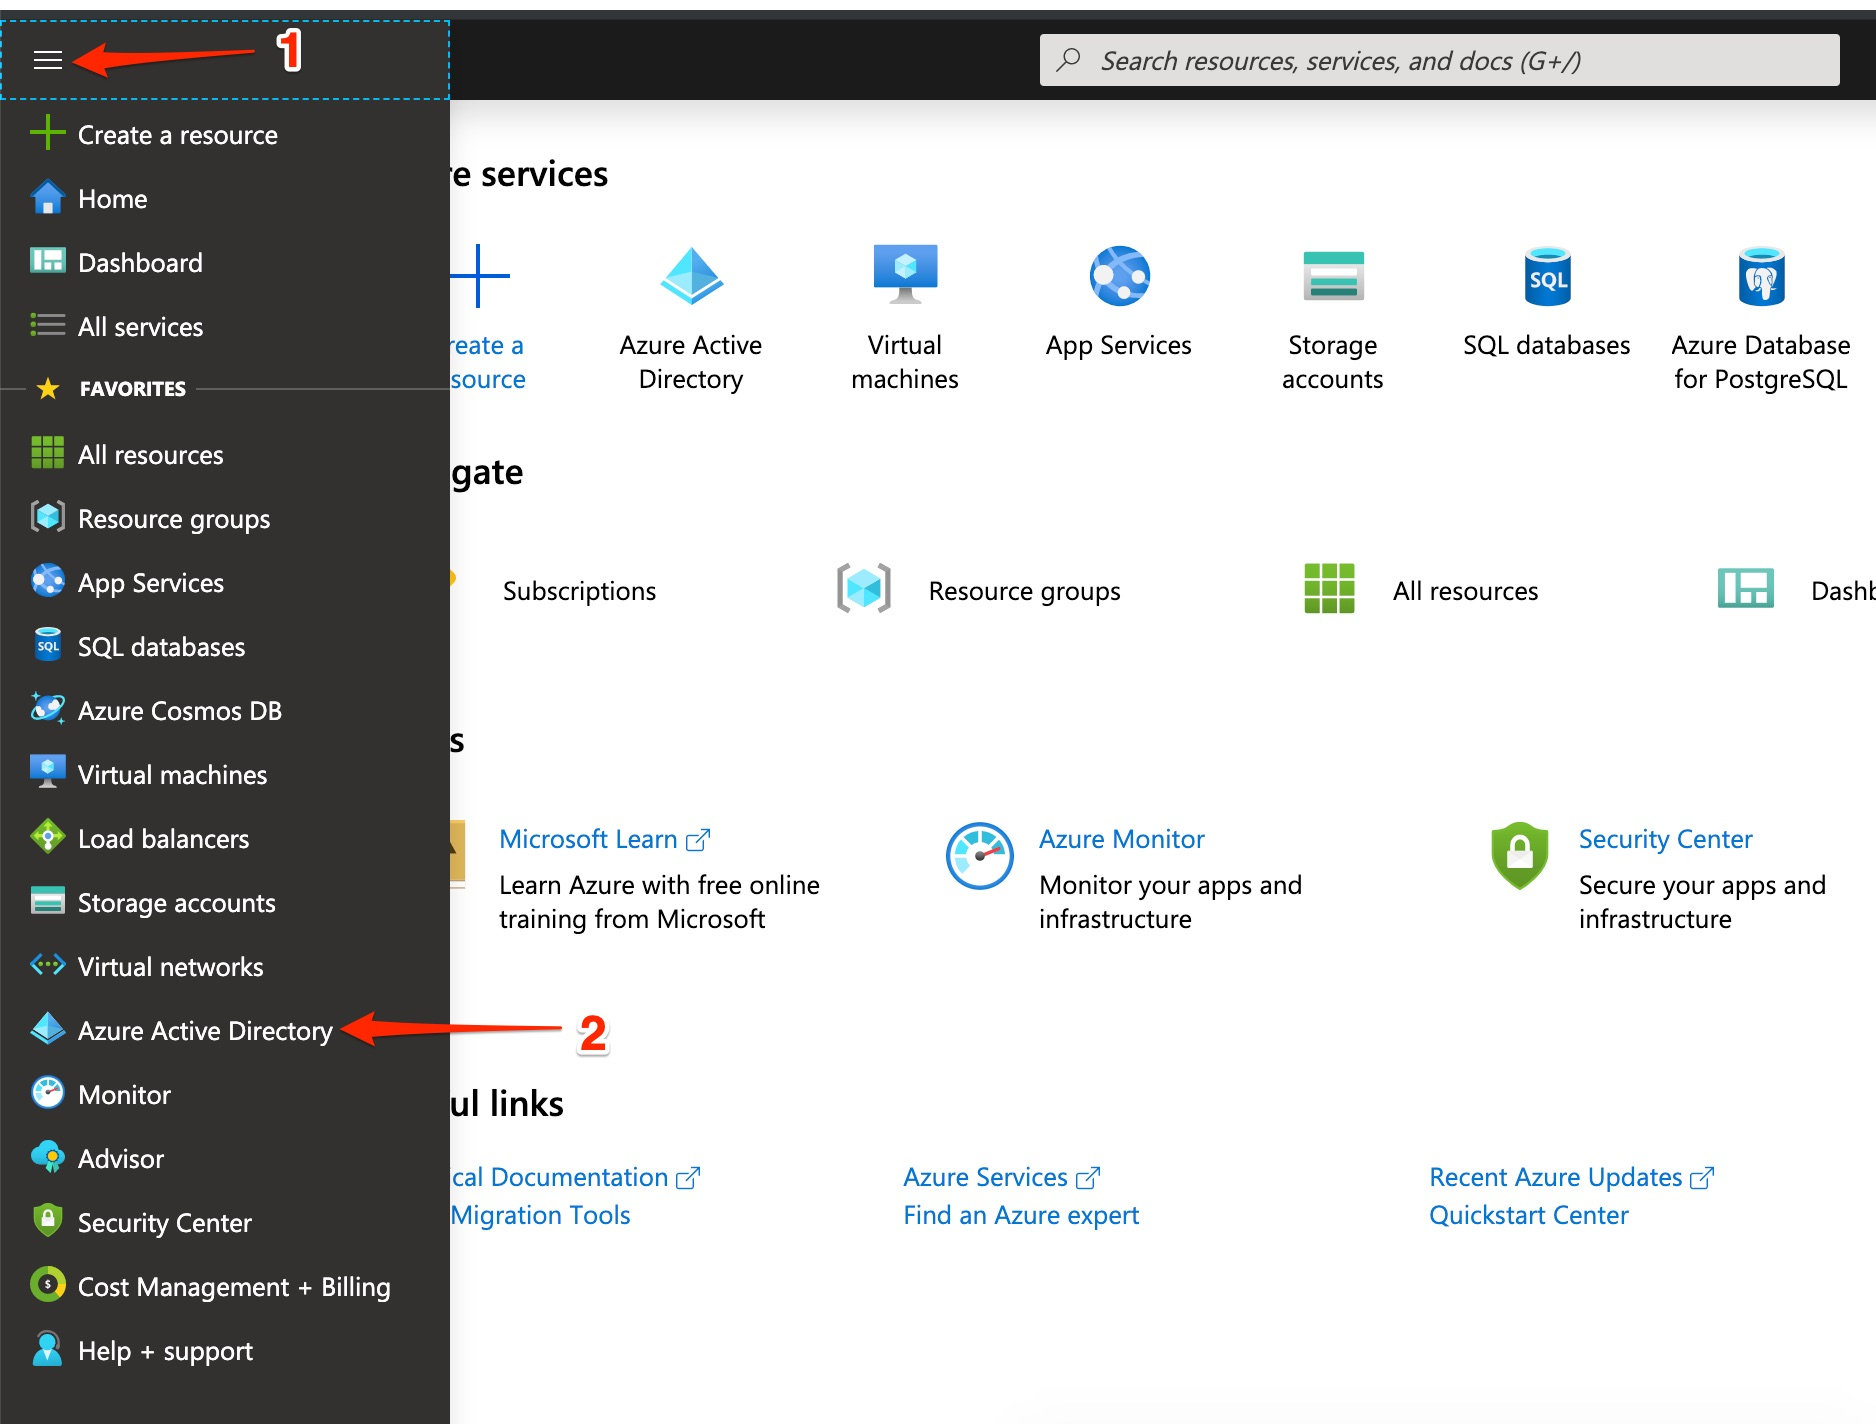
From your home screen, click the menu in the top left corner.
Select Azure Active Directory.
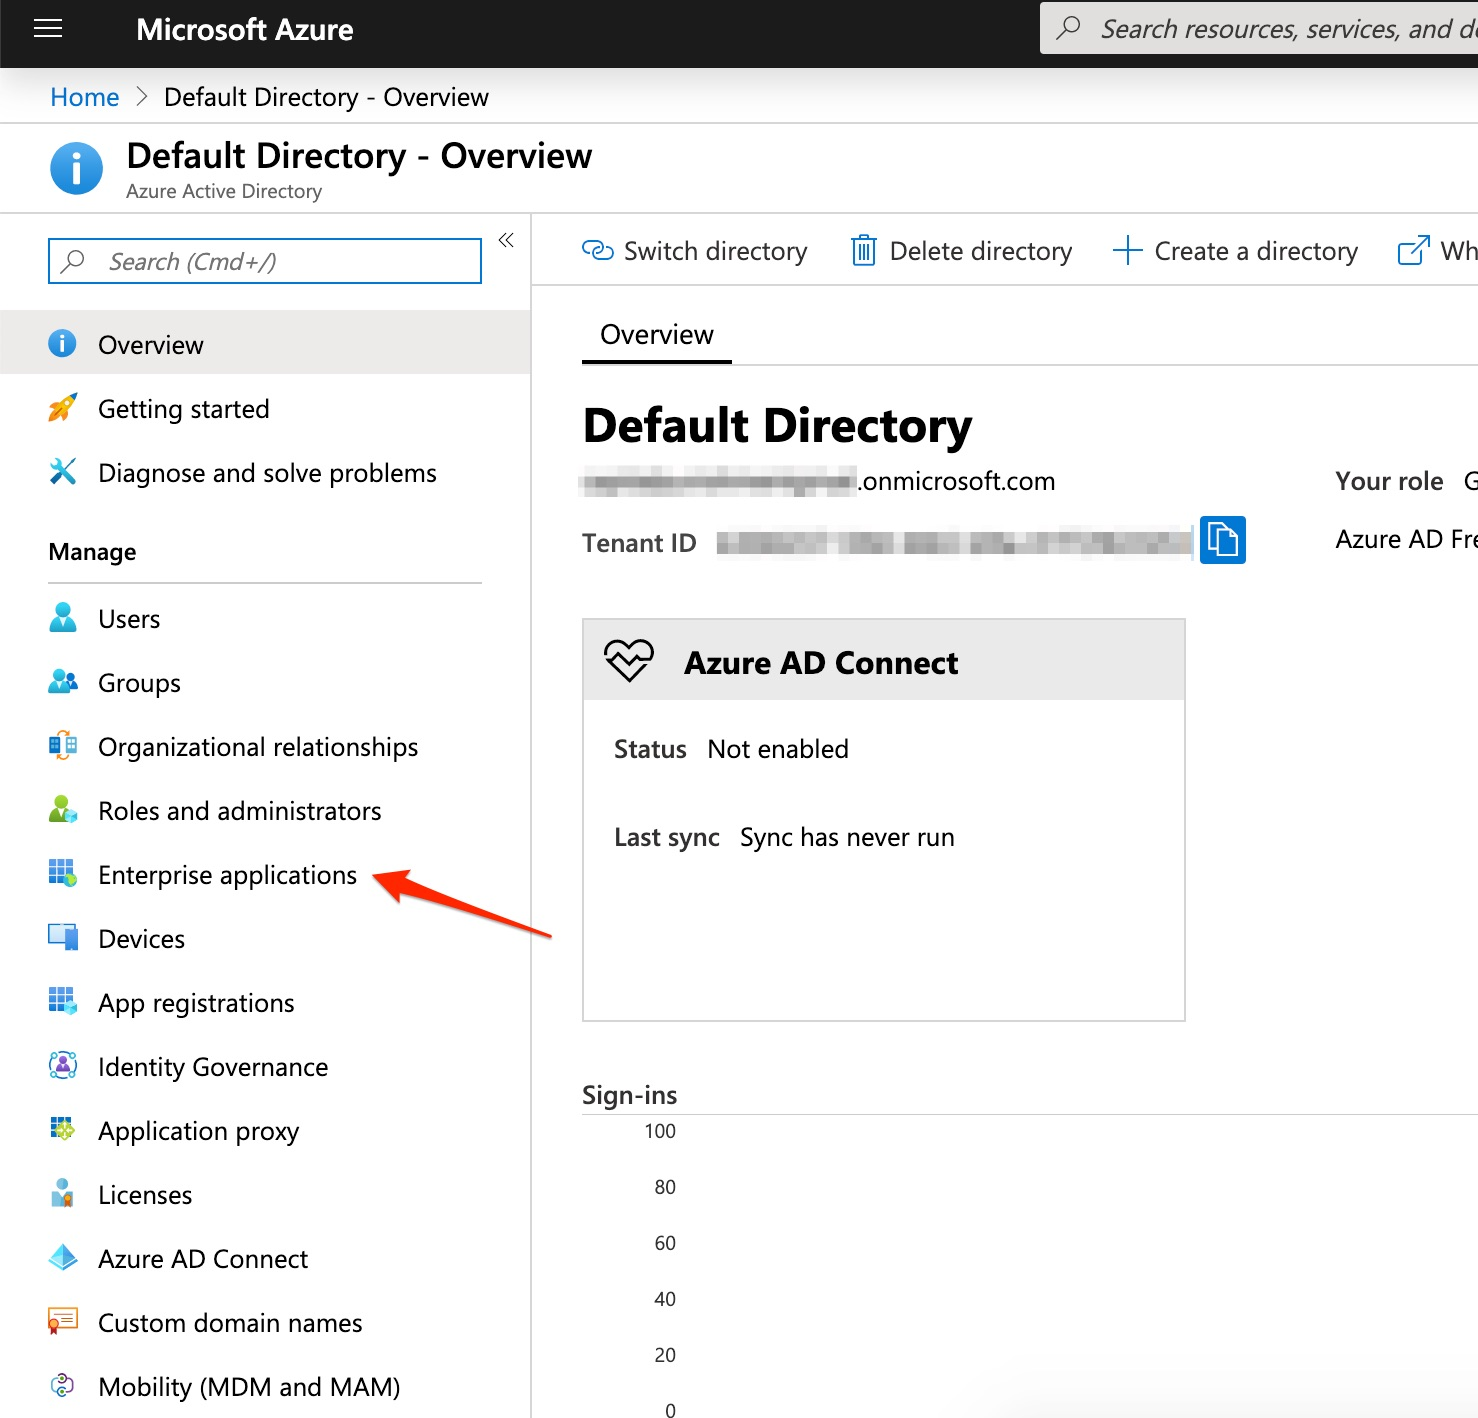
Click Enterprise applications.
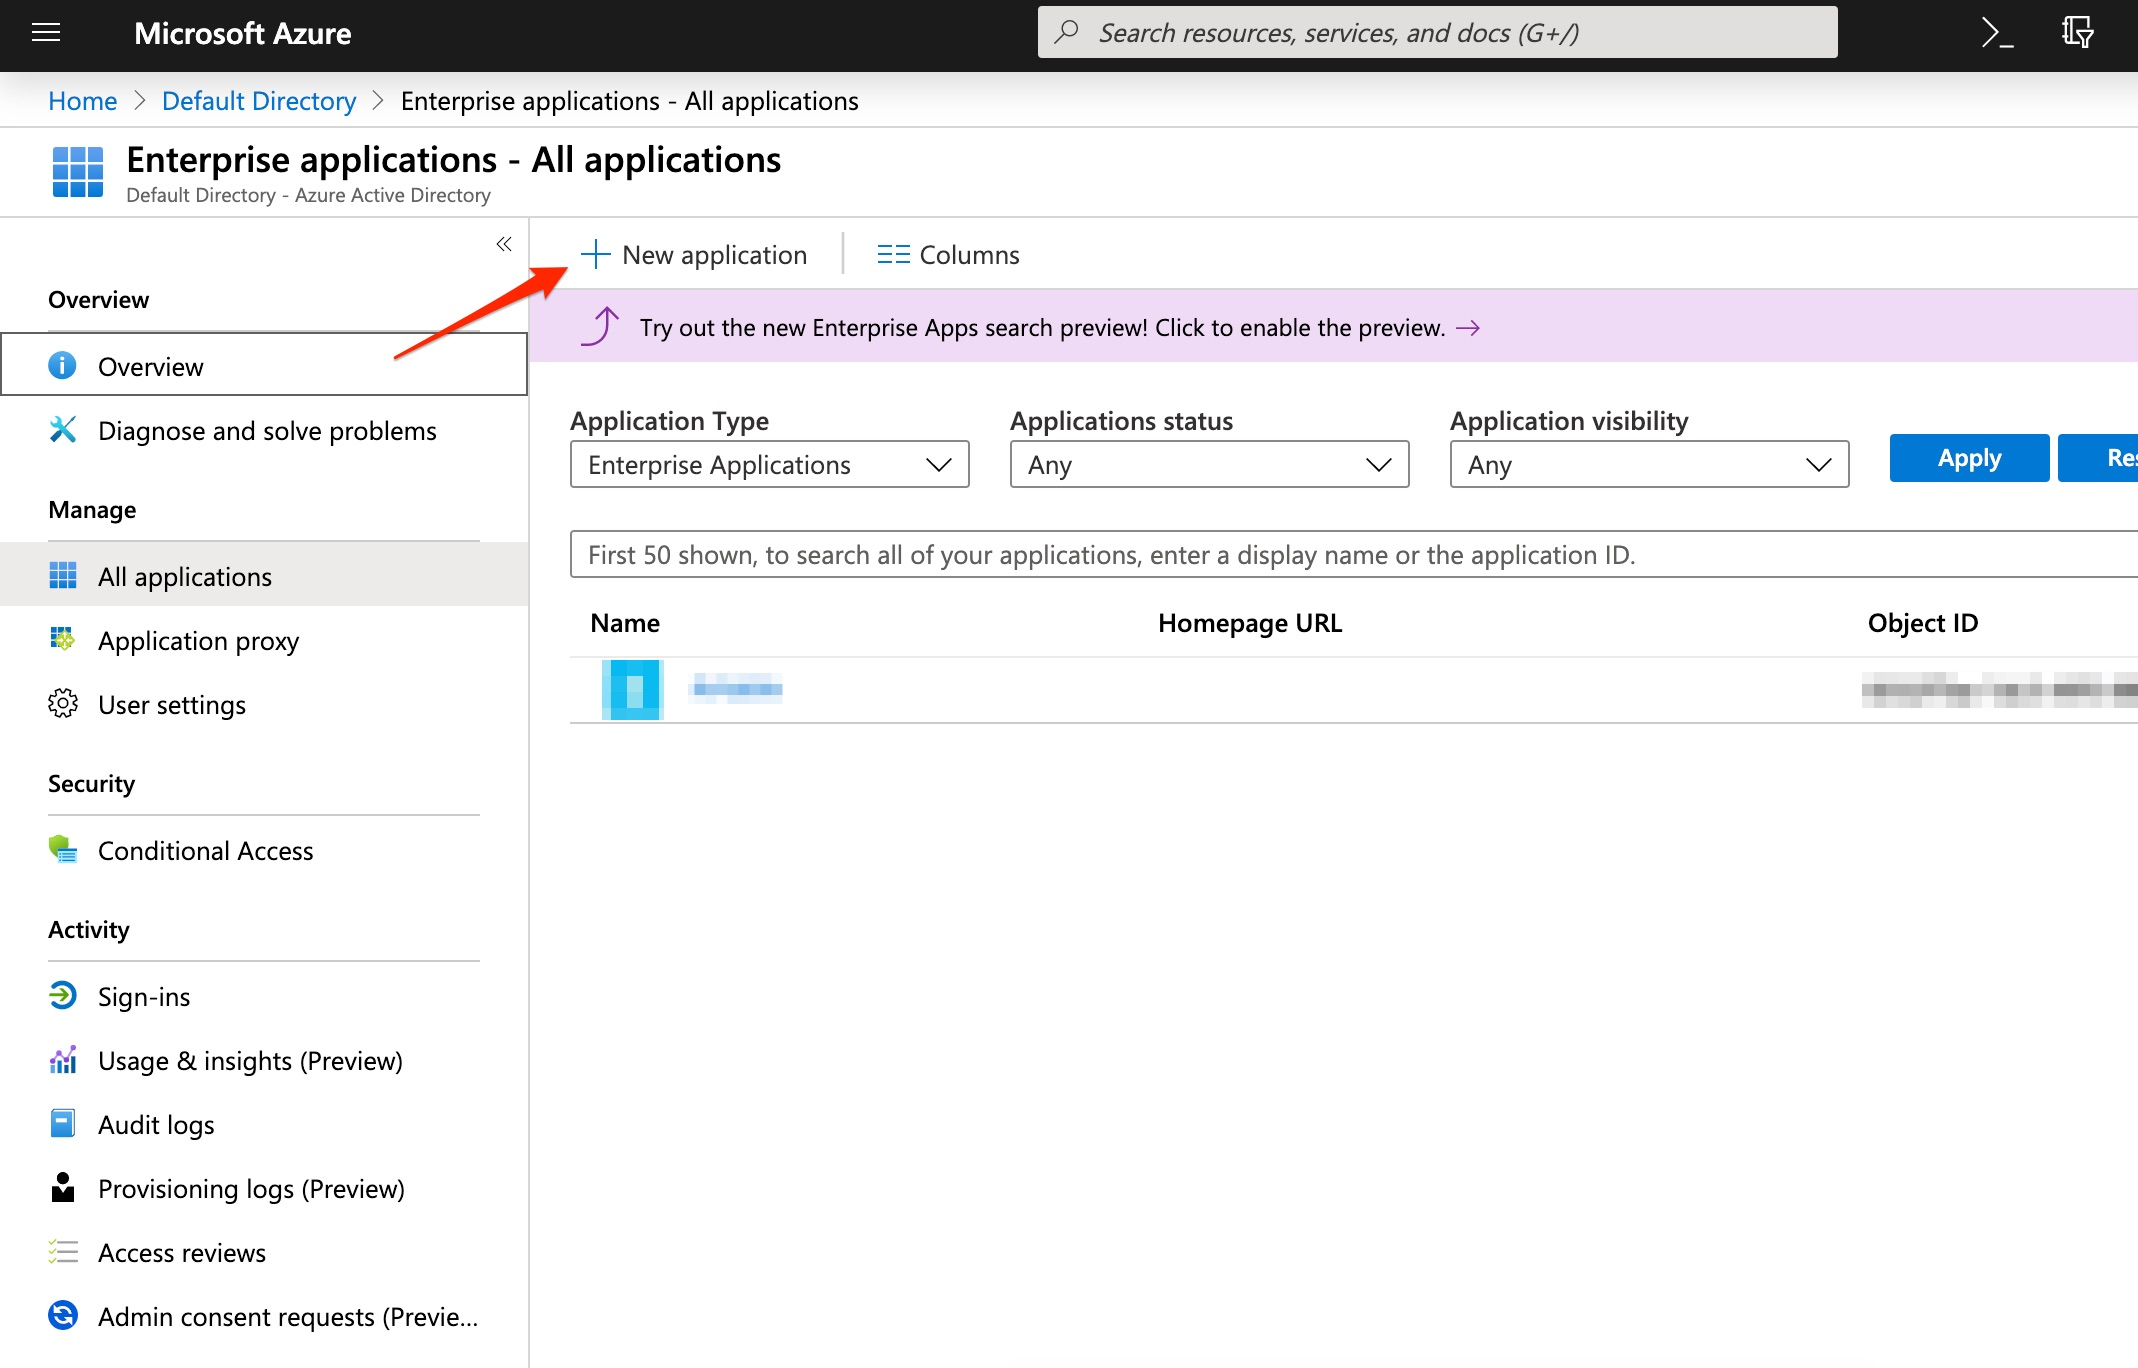
Click New application.
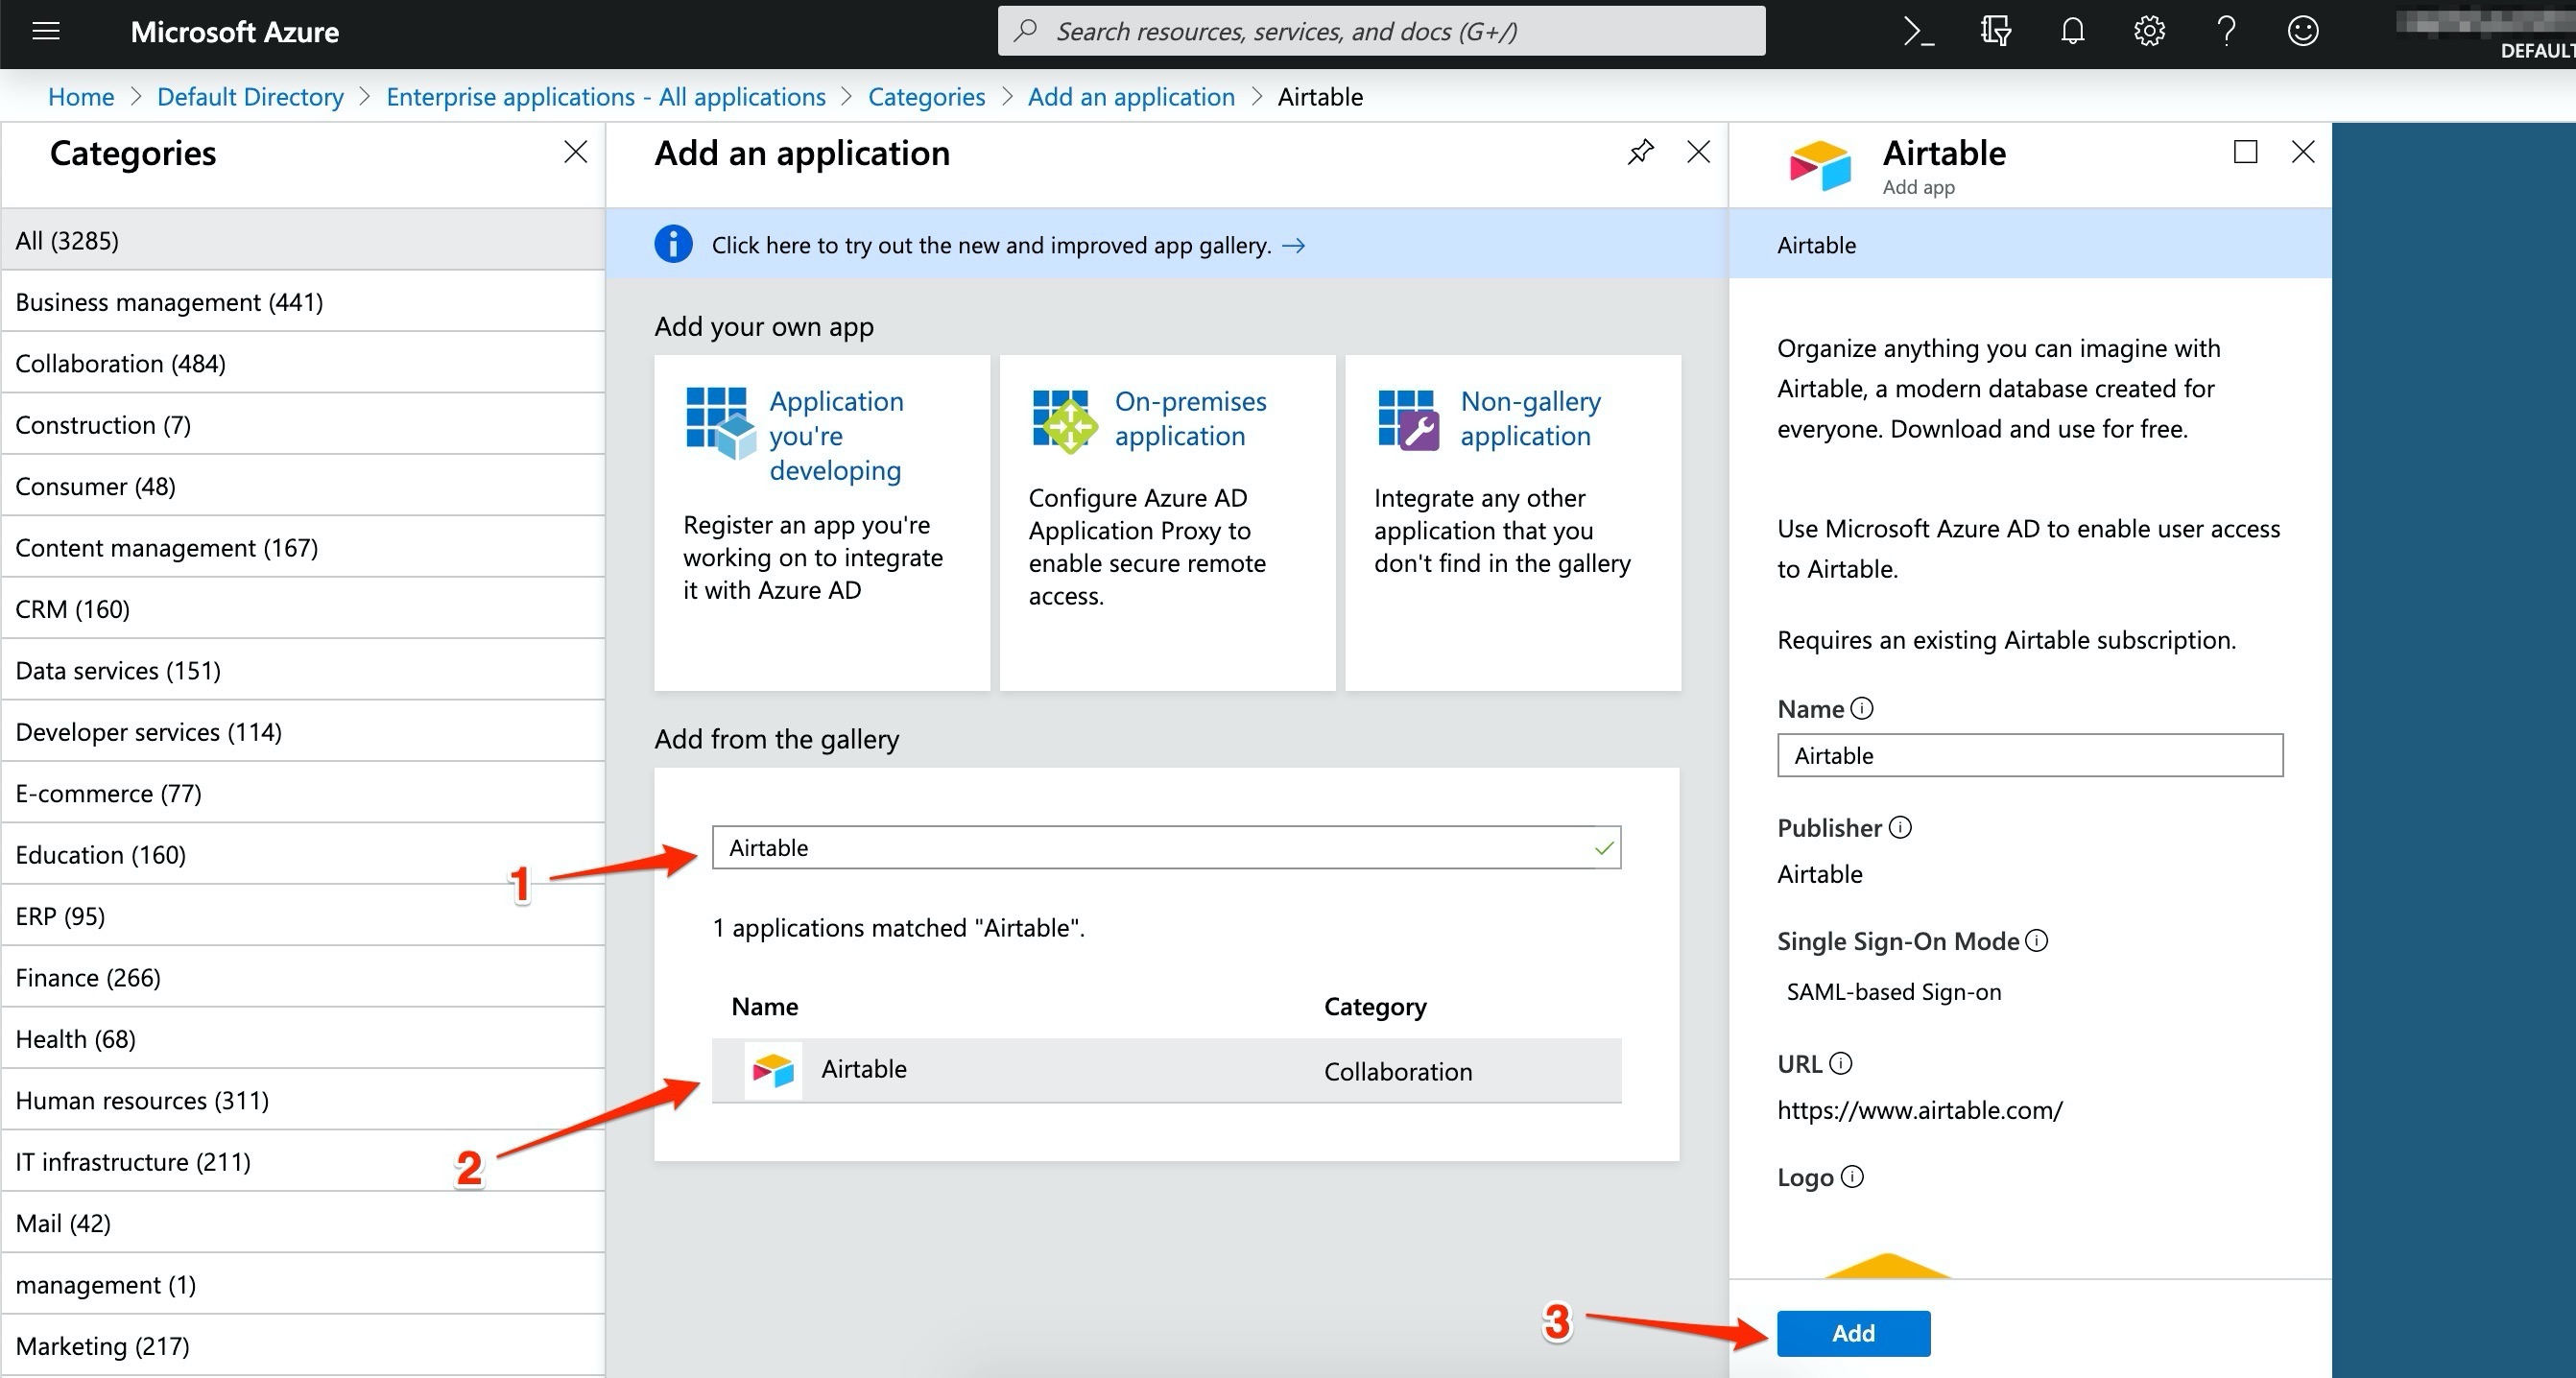
Search for and select "Airtable." Then, click Add.
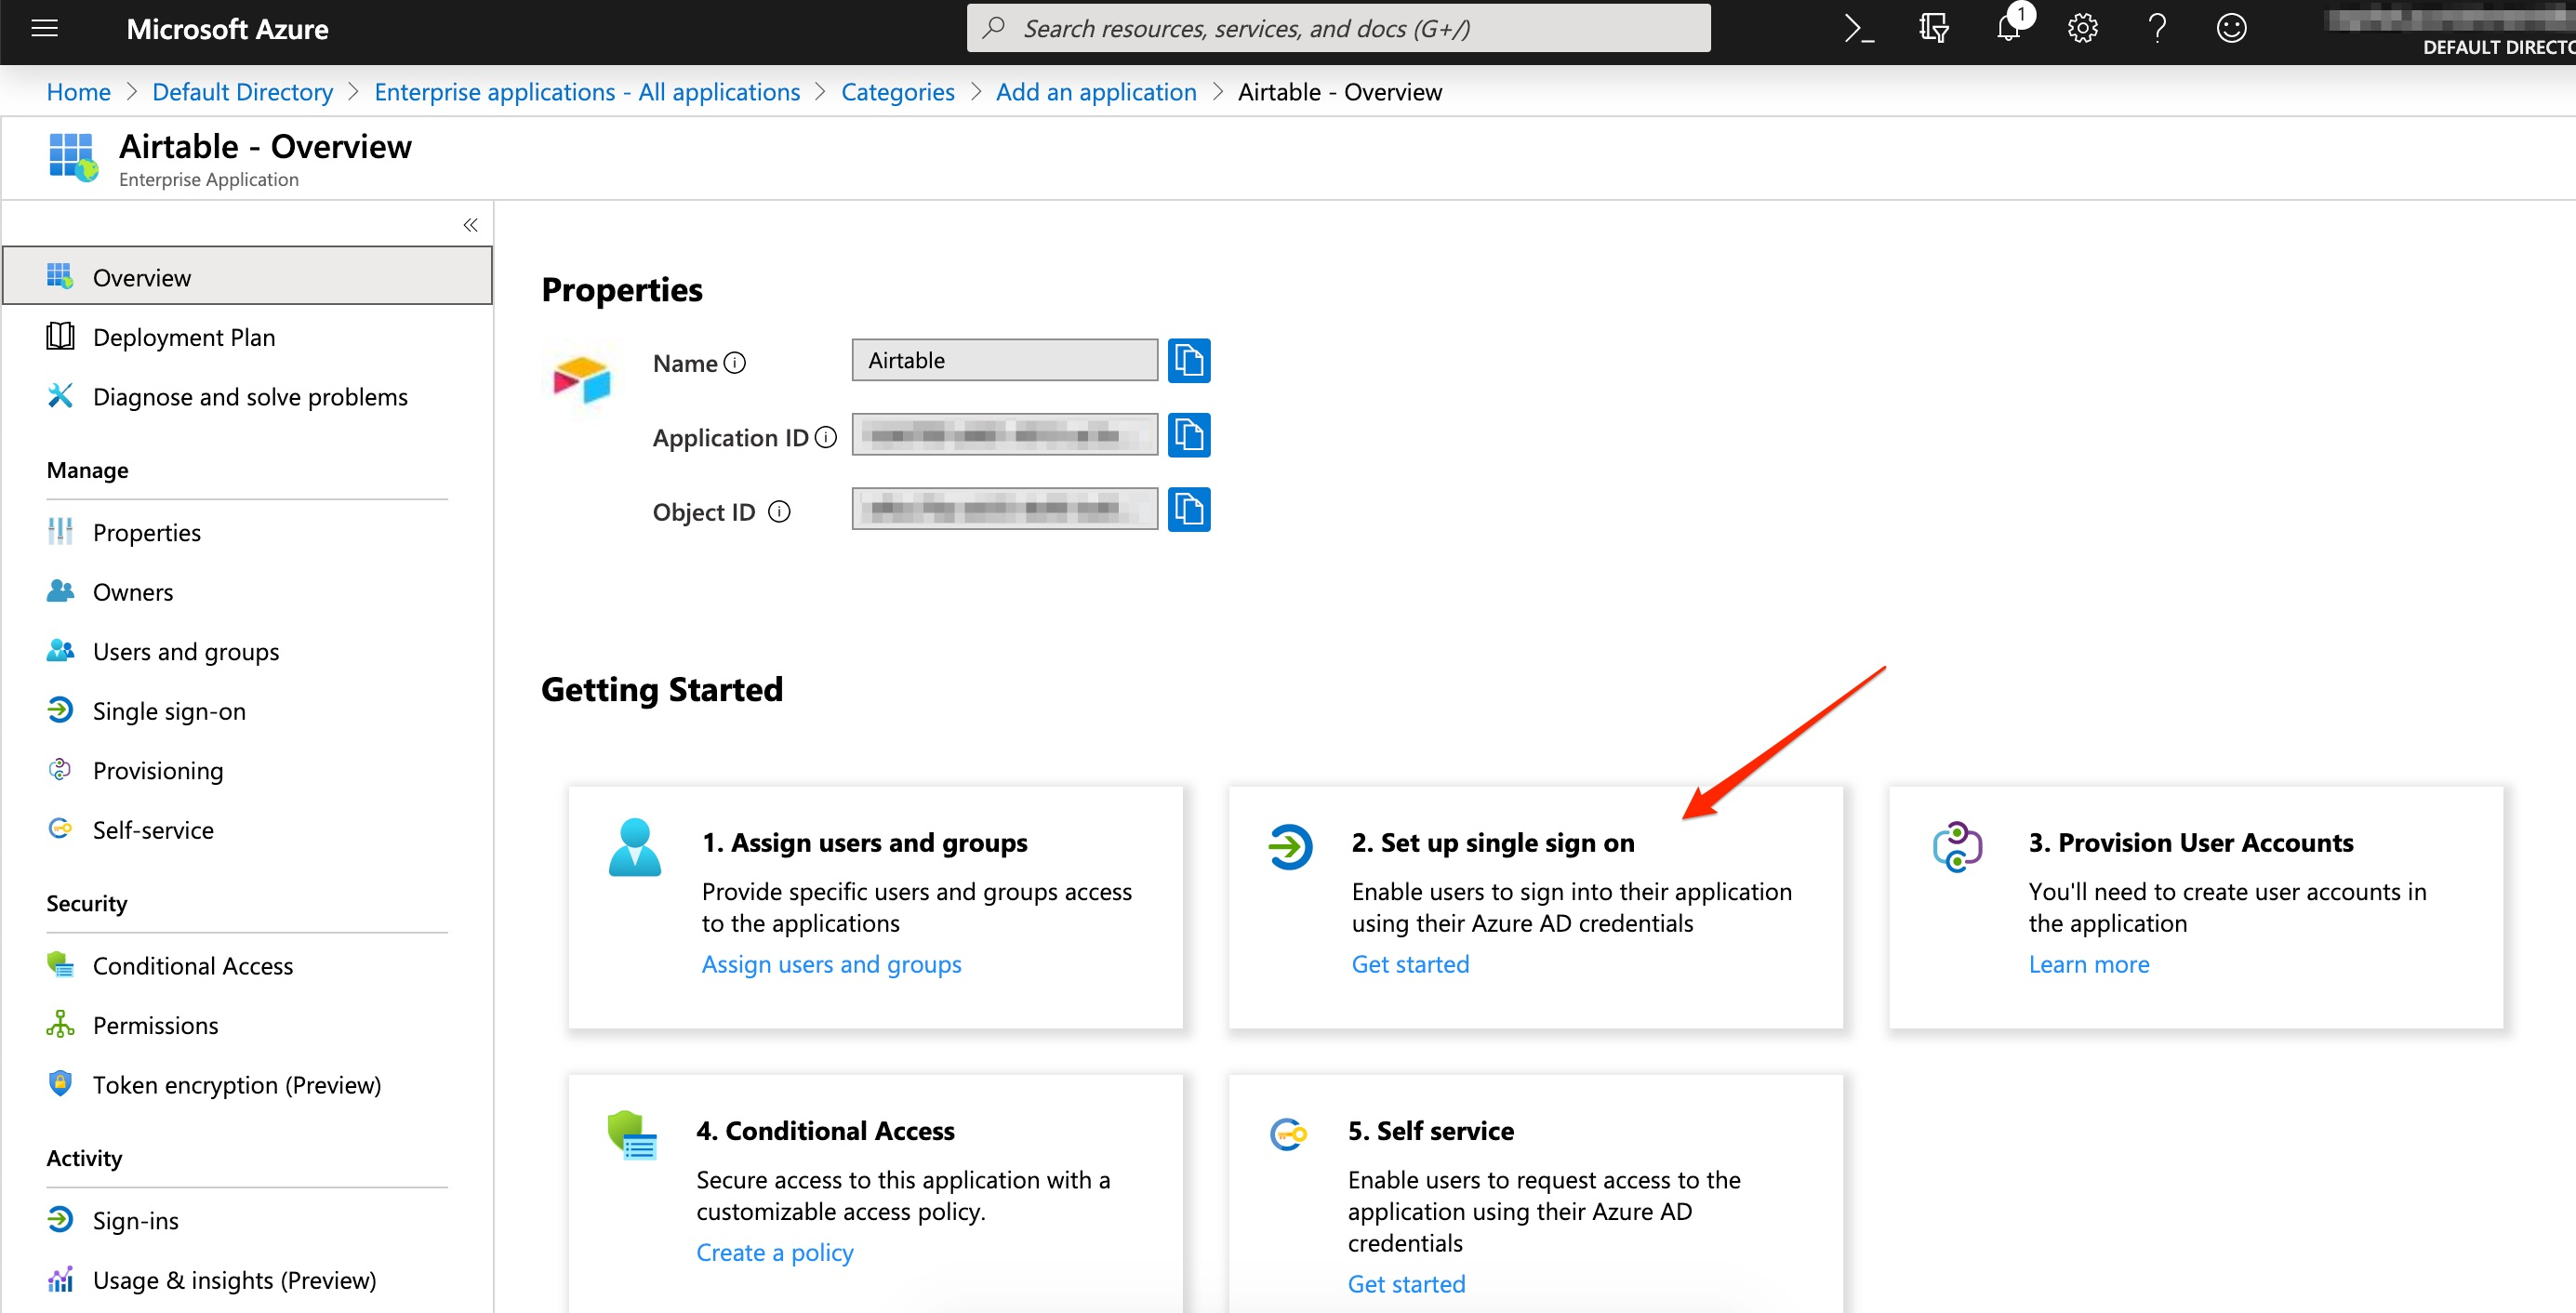
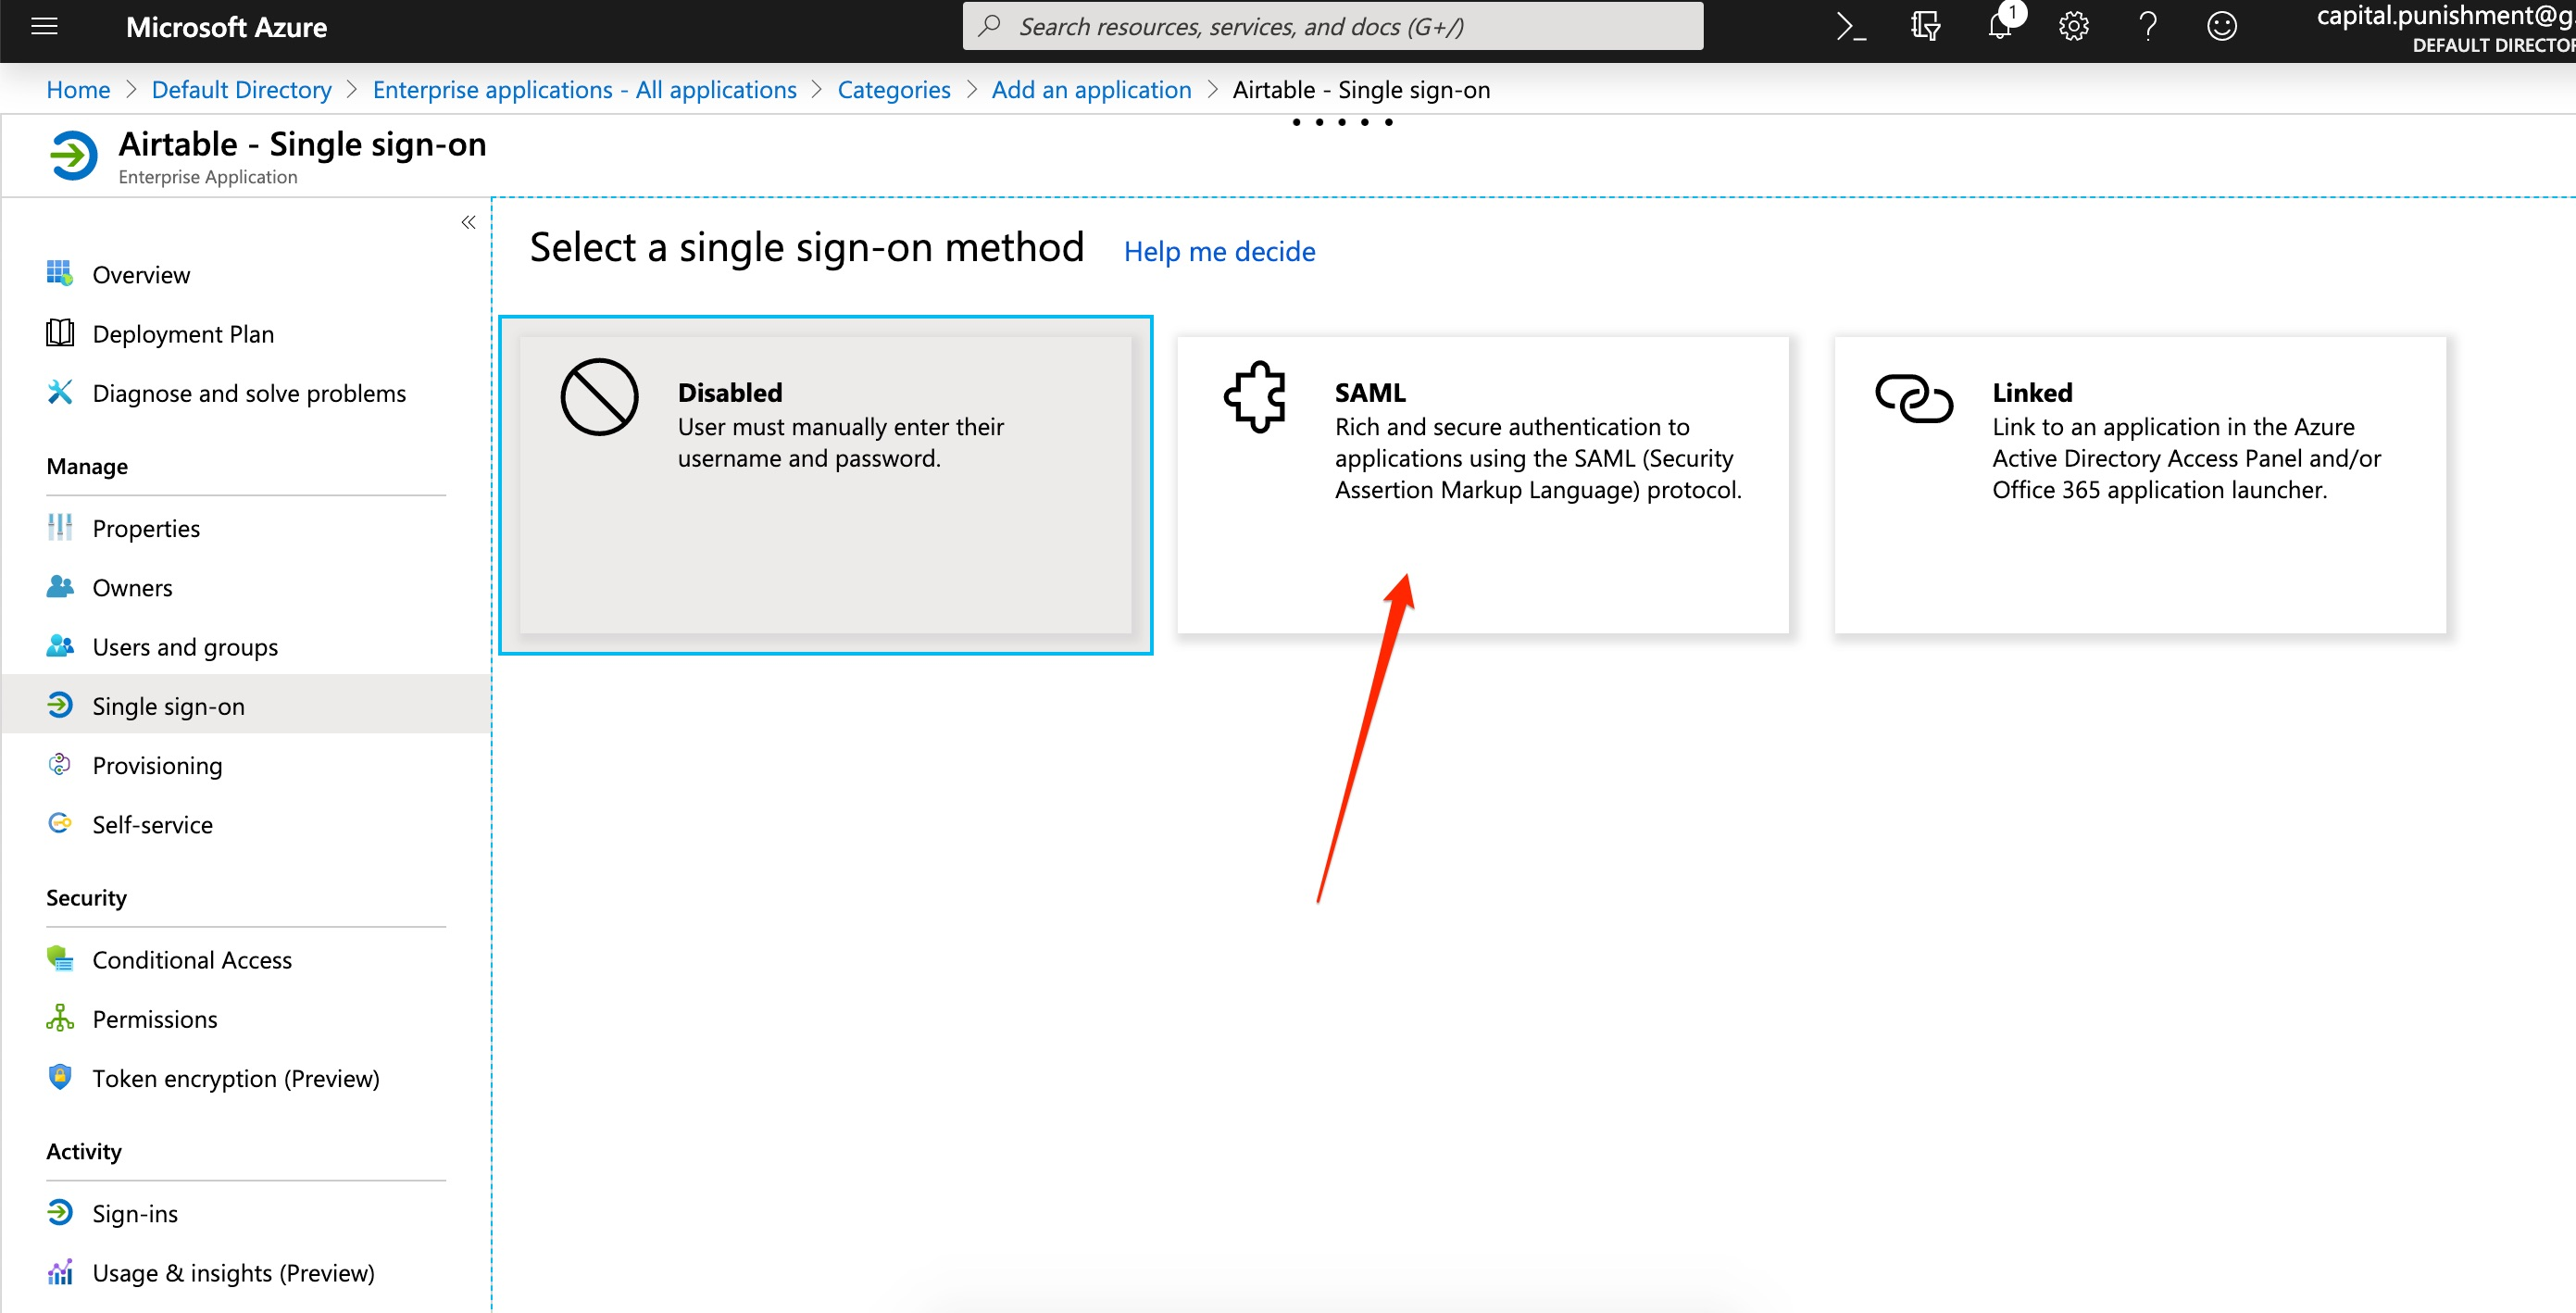
Click Set up single sign on. Then, select SAML as the single sign-on method.
Click Download to the right of "Certificate (Base64)."
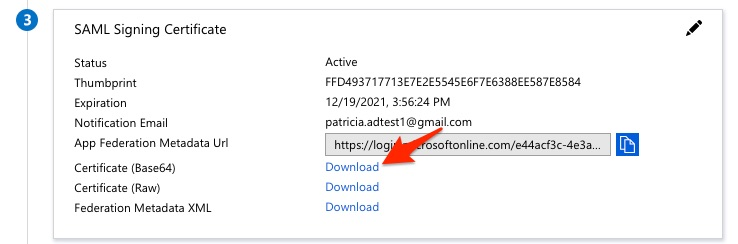
Copy and paste the "LoginURL."
Once complete, submit your "Login URL" and "SAML" signing certificate. Learn how to open .cer files in a text editor by following the steps in the Configuring SSO in the admin panel article.
After completing the above steps, you should be able to log in from https://airtable.com/sso/login.
When Entra ID asks for the Identifier (Entity ID) and Reply URL (ACS URL), use the values shown in your Airtable SSO configuration dialog.
By default, Airtable requires the NameID to be the user’s email address — if your tenant sends the User Principal Name (UPN) or another non-email identifier as the NameID, configure the email attribute in Airtable’s SSO settings so Airtable reads each user’s email address from the SAML attribute you specify (for example,
user.mail) — see SSO dependencies for more information.Because the NameID is the stable identifier, users keep access to their account even if their email address changes in Entra ID.
Troubleshooting SSO issues with Microsoft Entra ID
If you are still having issues, click Get Help on the lower right corner to contact Airtable Support.
You can also review the Azure Active Directory single sign-on (SSO) integration with Airtable tutorial.
FAQs
If another team in my company already uses SSO with Airtable, how does this impact my Business or Enterprise Scale account?
In Airtable, our system expects Enterprise Scale accounts using shared domains—domains federated to multiple Enterprise accounts—to use the same SAML metadata for SSO. What this means is that if your company has existing Enterprise Scale accounts with SSO configured, you will need to coordinate with the admins (or IT department) of the other accounts to obtain the current sign-in URLs, x.509 certificates, and ensure that your users have the necessary access to the Airtable tenant present in your company’s identity provider.
You can configure separate tenants or identity providers for domains unique to Enterprise Scale accounts, as each domain can be configured with its own SAML metadata.
What Entity ID do I use when configuring SSO in Airtable?
Use the Entity ID shown in your SSO configuration dialog in the admin panel.
For basic SSO, use the legacy Entity ID for the saved metadata version. For the email-attribute setup, use the configuration-specific Entity ID. Copy the displayed pair rather than choosing based on whether the IdP requires a unique identifier.