Business and Enterprise Scale only | |
Platform(s) | Web/Browser, Mac app, and Windows app |
Related reading | |
Airtable terminology |
|
Groups in admin panel
The "Groups" page of the admin panel lets Airtable admins manage and view information about the User Groups associated with their organization. Groups can be helpful for things like on/offboarding and adding/removing users from a specific team’s Airtable User Group.
Accessing the admin panel
Visit your Airtable homepage.
Click your account menu icon in the top-right corner.
Select Admin, then Groups.
The information and options on the "Groups" home page allow admins to:
View all current user groups that exist within their organization
Search for a specific user group
Download a CSV file of the displayed list of groups
Create a new user group
See the number of members in each user group
View the time period that the group was created
Open up an individual group page to view more information about the group and perform additional actions
The individual "Groups" page allows admins to:
Change the group name
Leave a group that you, as an admin, are a member of
Delete the group
Search for particular users within the group
Download a CSV file of the displayed list of users
Invite users (other users from your organization) to the group
Remove members from the group
Assign a group manager or managers
View the date the individual user was added to the group
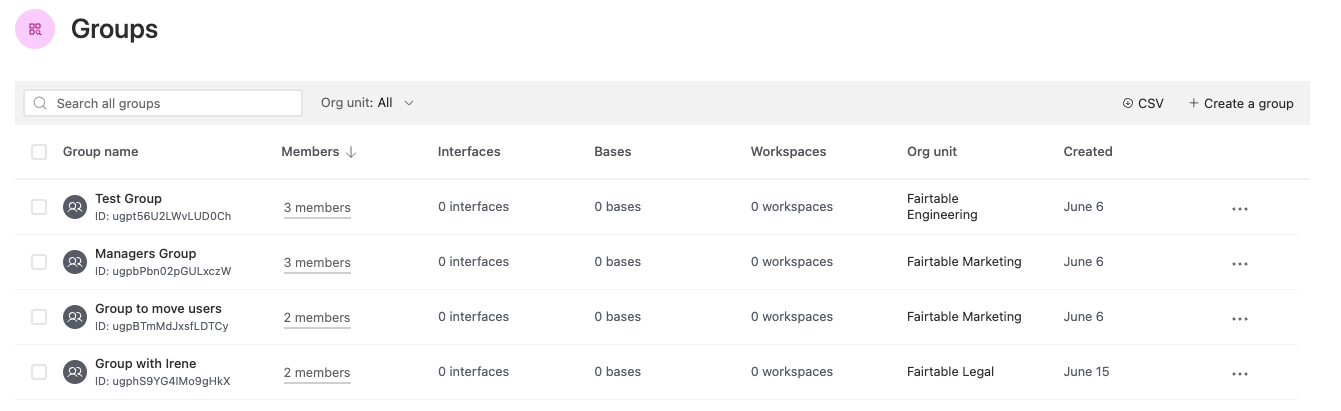
Groups home page
From the "Groups" home page, admins can search for groups by their group name. Additionally, groups can be sorted by:
Group name
Members
Interfaces
Bases
Workspaces
Org unit
Date created
To sort, simply click the header column that you would like to sort by:
Individual group pages in admin panel
On an individual group’s page, admins can review individual members and pending invitations for that group.
On the Members tab, admins can search members by name and sort by:
Member name - alphabetically (arrow down) or reverse-alphabetical order (arrow up)
Email - Email address alphabetically (arrow down) or reverse-alphabetical order (arrow up)
Group manager - Managers at the top (arrow down) or at the bottom (arrow up)
Date added - Longest tenured group members (arrow down) or most recently added members (arrow up)
On the Pending invites tab, admins can resend invitation emails up to once per day and delete pending invitations. They can also search for pending invitations by email address, and sort by:
Email - Invited email address alphabetically (arrow down) or reverse-alphabetical order (arrow up)
Invited by - Referring user’s name alphabetically (arrow down) or reverse-alphabetical order (arrow up)
Last invited - Email addresses to which invites were sent most recently at the bottom (arrow down) or at the top (arrow up)
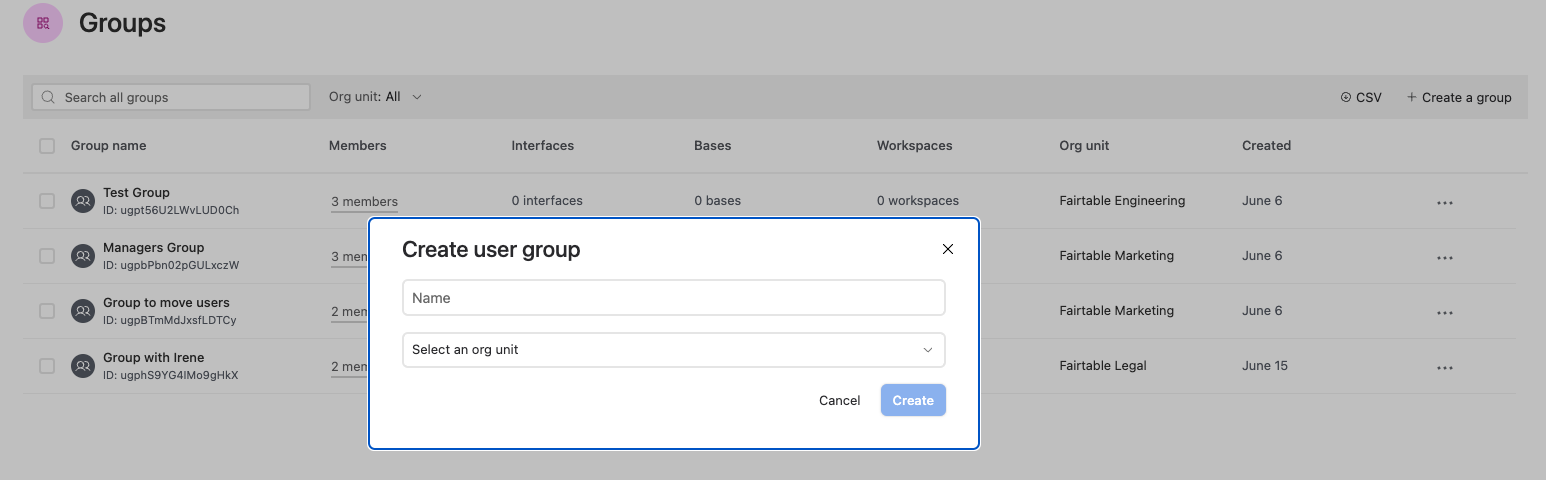
Creating and deleting groups in admin panel
To create a group in admin panel:
Visit your admin panel.
Click Groups.
Click + Create a group.
Enter your preferred group name and org unit.
To delete a group in admin panel:
Visit your admin panel.
Click Groups.
Select the checkbox next to the group name and click the ... icon.
Select Delete.

Adding and removing users from a group
Note
Only internal, provisioned, users may be added as members of a group. External or deactivated users are unable to be added.
When inviting a non-Airtable user to a group via email, the invited email’s domain must match an email domain belonging to your enterprise account. The invitation recipient will have to sign up for Airtable and verify their email address before they can access the group.
To add users to a group:
Visit your admin panel.
Click Groups.
Open your preferred group page.
Click + Add members.
A form opens, allowing you to enter a comma-separated list of both new and existing collaborator emails to invite to your group.
You can search for existing users in your organization by name or email. These users will automatically accept the invitation.
Collaborators who aren't currently in your organization must accept your email invitation before they appear in your group's member list. Collaborators who haven't accepted the invitation appear in the visible "Pending invites" tab.

.png "unnamed-1(10).png")
.png "unnamed-4(4).png")
.png "unnamed-5(3).png")
To remove a user from a group:
Visit your admin panel.
Click Groups.
Open your preferred group page.
Select the checkbox next to the name(s) you want to remove from the group.
Click Remove member.
.png "group member selected screenshot(1).png")
CSV downloads
Note
Learn how to import CSV files into Airtable.
Exporting groups data
Visit your admin panel.
Click Groups.
Click CSV in the top right corner.
Homepage CSV data
User first name
User last name
User email
Account types
Two-factor auth enabled?
Email verified
Invited by ID
Invited by email
Last active (UTC)
Joined (UTC)
Seat type
Seat upgrade data
Seat upgrade reason
SCIM: External ID, Title, Cost center, Department, Division, Organization, Manager display name, and Manager
Individual group page CSV data
Member User ID
Name
Email
Role
User state
Added on (UTC)