Once you're done with the page designer settings, you'll see your page. Depending on what's in your table, your page may be pre-populated with a couple of elements to give you an idea of what the page designer extension can do. This article covers the various ways you can edit your page design.
Editing a page designer layout
After adding a page designer extension and choosing Table, Record size, and Record orientation, click Done.
If you are returning to a previously configured page designer extension, then click the pencil icon (Edit layout button).
This will take you into a fullscreen editor experience, in which you can make your own custom page for your table data.
Adding and deleting elements
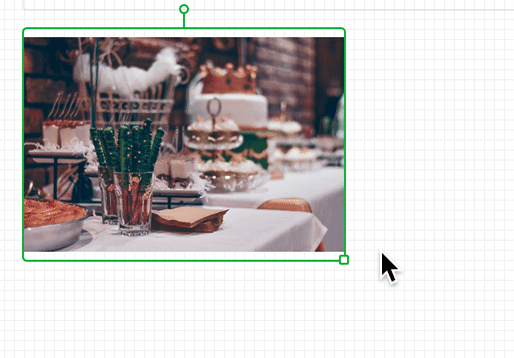
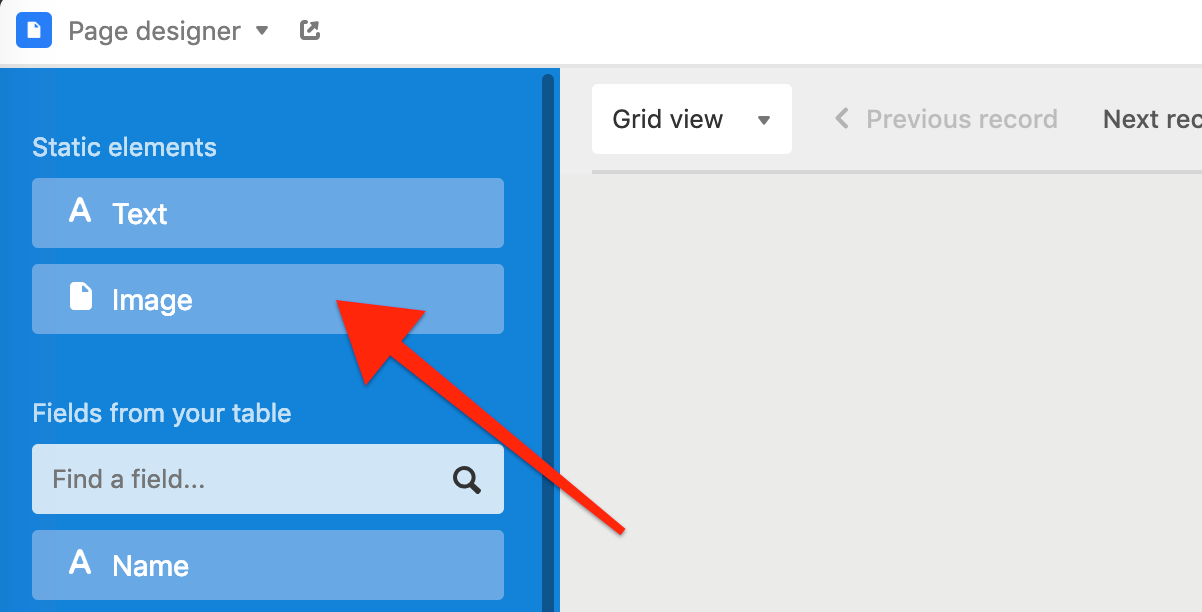
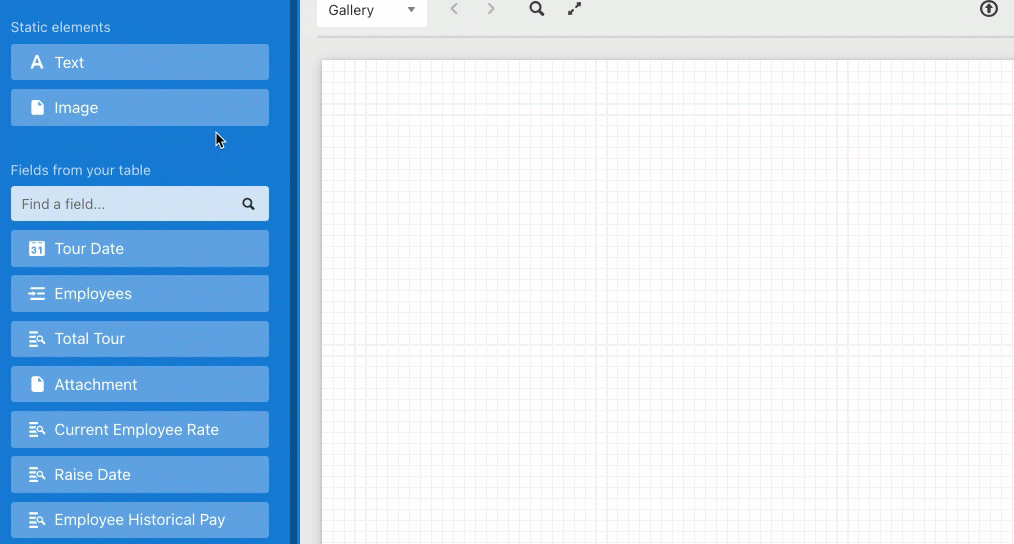
In the blue sidebar, you'll see a list of all of the fields in your table, plus a few other types of static elements that you can add to your page (text and image). To add a new layout element to your page, click on any of these options.
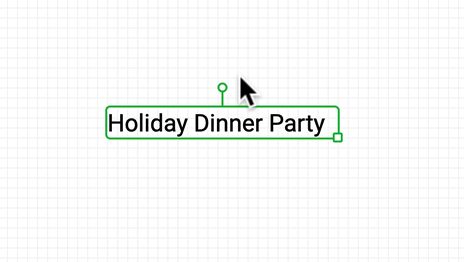
When an element is selected, it appears with a green outline, and the sidebar changes from blue to green. To delete an element from your page, scroll all the way down to the bottom of the sidebar while the element you want to delete is selected, then click the Delete element option. Alternatively, you can press the Delete key while an element is selected.
You can also add a new element to your page by duplicating an existing element. To duplicate an existing element, scroll all the way down to the bottom of the sidebar while the element you want to delete is selected, then click the Duplicate element option.
Moving page designer elements
When an element has been selected, you can change its position on the page using a couple of different methods.
Click and drag the element to the desired location on the page.
Use the arrow keys on your keyboard while the element is selected.
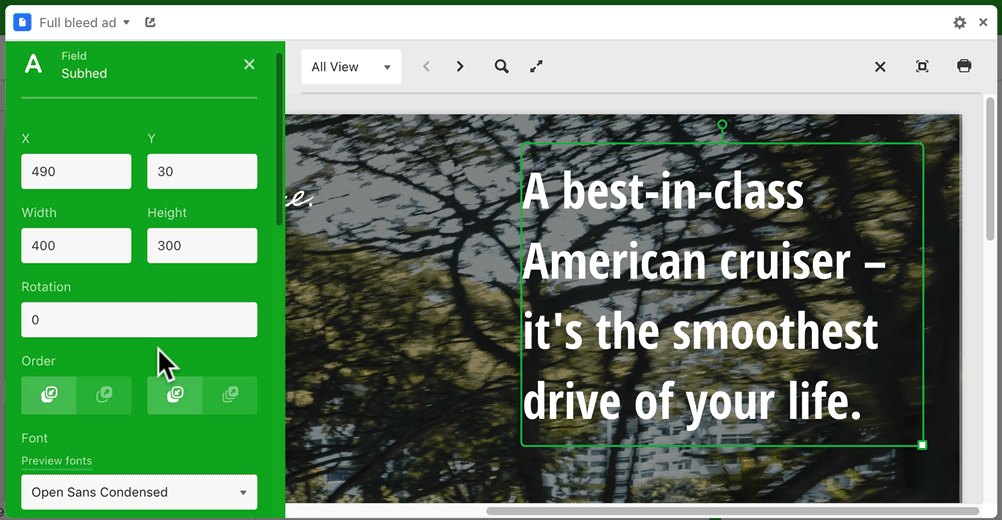
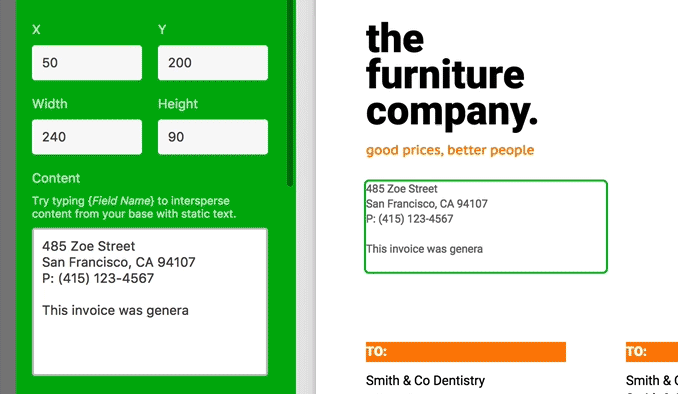
Specify the desired X/Y coordinates in the element customization sidebar.
![]()

Customizing elements
There are several different ways that you can customize the elements on your page:
Element size
You can adjust the size of an element in one of two ways:
Click and drag the element to its desired size using the drag handle in the bottom right corner.
Specify an absolute width and height in the element customization sidebar.

Element rotation
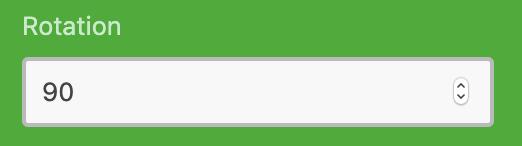
You can adjust the rotation of an element in one of two ways:
Click and drag the element to its desired rotation using the rotation handle that appears when an element is selected
Specify the rotation angle for the element (in degrees) in the element customization sidebar.
Element order
You can change the order in which the elements are layered using the buttons under the Order header. The buttons on the left allow you to send a selected element backward or bring it forward; the buttons on the right allow you to send the selected element all the way to the back or bring it all the way to the front.
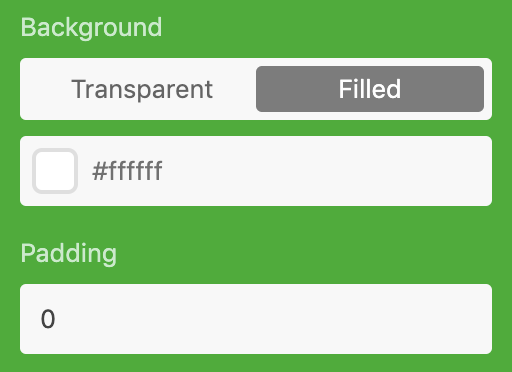
Element background and padding
You can specify if you would like the background of your element to be transparent (the default setting) or if you would like the background to be filled with a specific color. If you choose the Filled option, you can specify a hex code or click the color swatch to bring up a color picker. You can also adjust the padding.
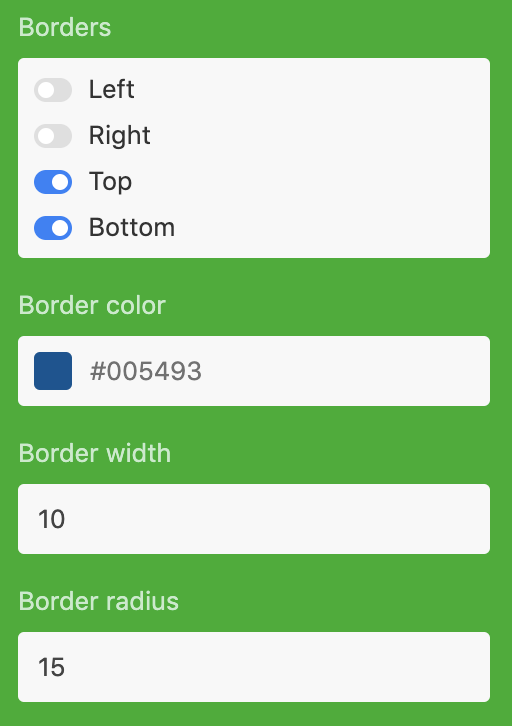
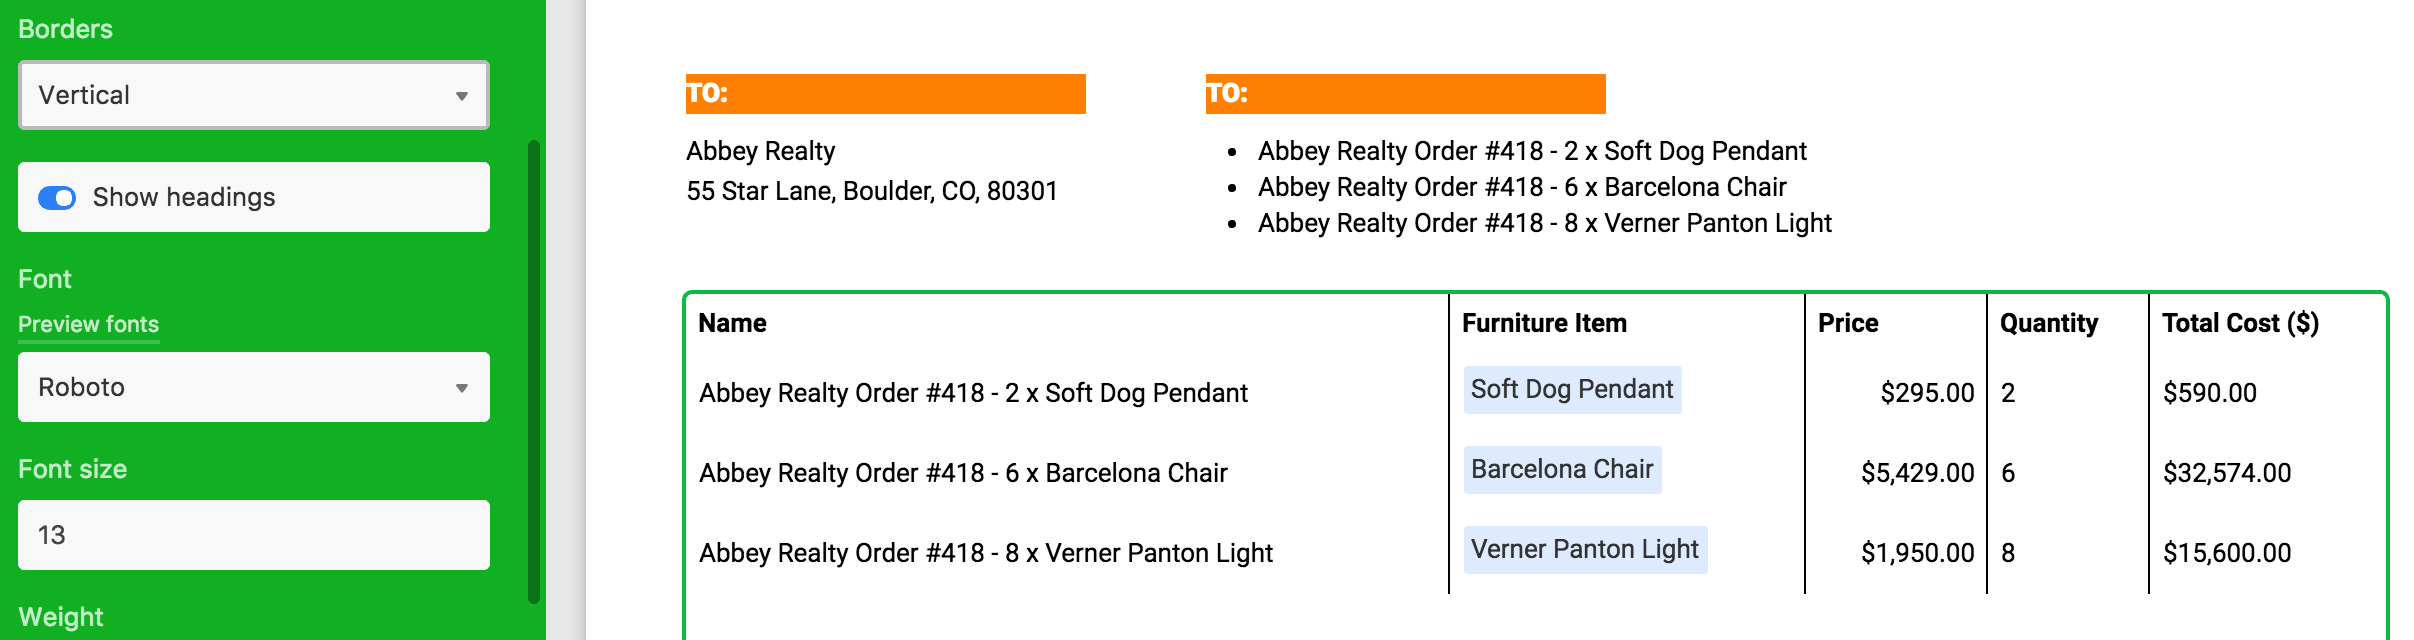
Element borders
You can customize the borders of your elements using the options in the element customization menu. You can adjust:
Whether your element will have borders on its left, right, top, and/or bottom
Border color (specify a hex code or click the color swatch to bring up a color picker)
Border width
Border radius (which rounds the corners of your element)
Text elements
In addition to all of the customization options described above, text-type elements have a couple of additional options.
To intersperse content from your records within static text, type {Field name} into the text area of a static text element.
You can also adjust the following font options for your text elements:
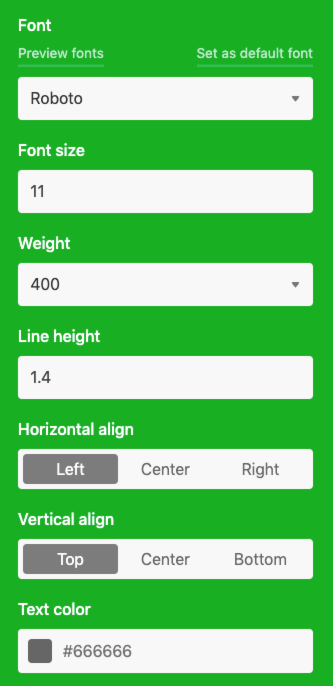
Font
Font size
Weight
Line height
Horizontal alignment (Left, Center, or Right)
Vertical alignment (Top, Center, or Bottom)
Text color (specify a hex code or click the color swatch to bring up a color picker)
Clicking "Set as default font" will change the default to the selected font for all new text elements. Any existing text elements with the default also switch to the new font. If the results are not what you expected, you can undo by clicking the undo icon next to the extension's settings button or by using the CtrlZ keyboard shortcut.
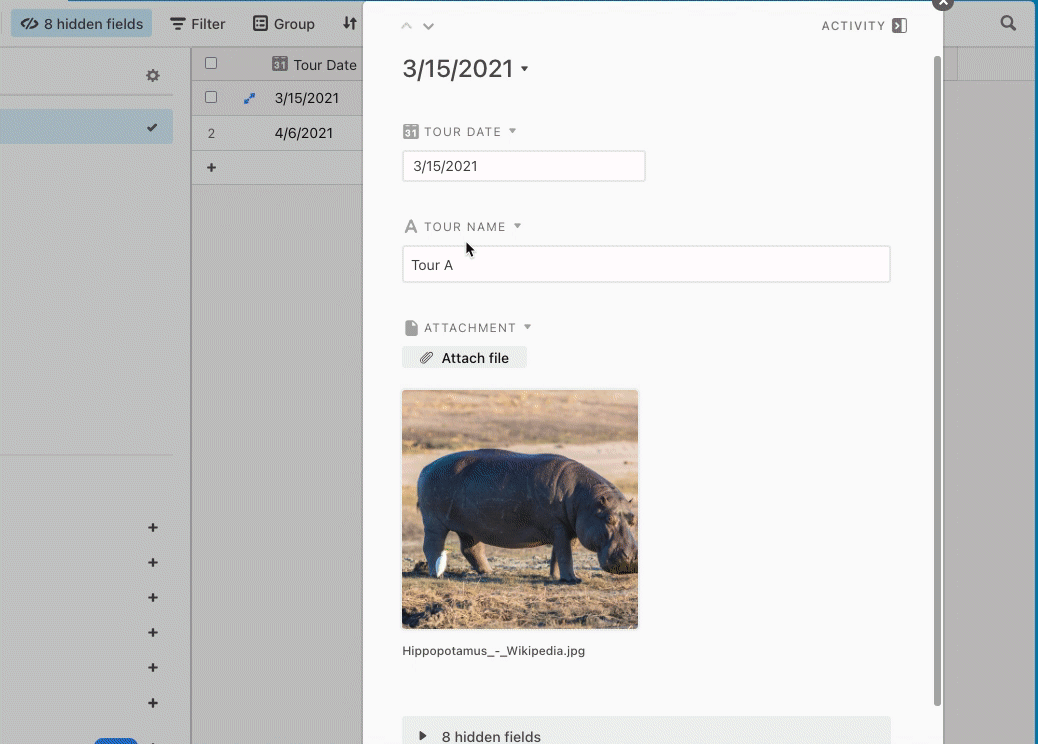
Attachment field elements
If you have added an attachment field as an element to your page, you have a couple of additional customization options. In the Display section of the element customization menu, you have two choices.
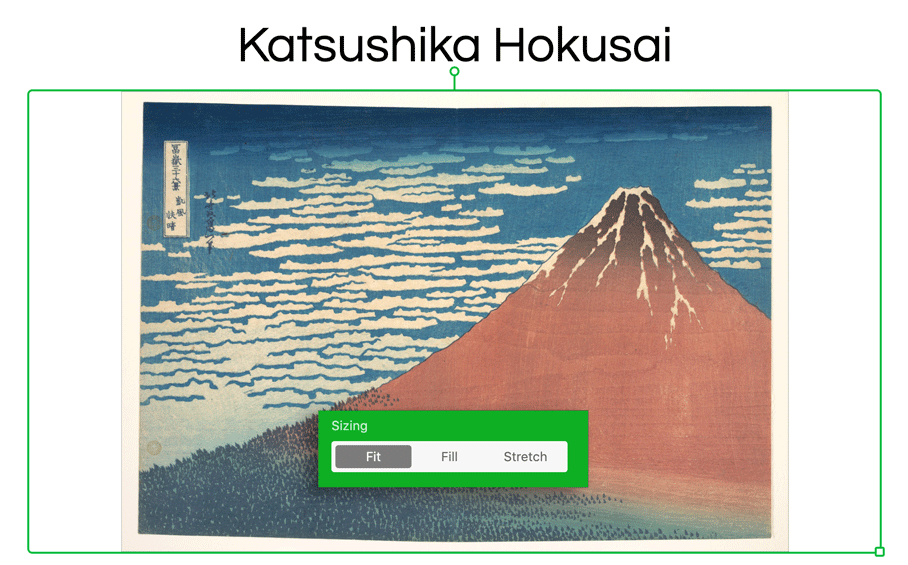
Option 1: First image
The first image option displays just the first image in the attachment field. If you pick First image, you can pick one of three sizing options that will determine how the image is displayed: Fit, Fill and Stretch.
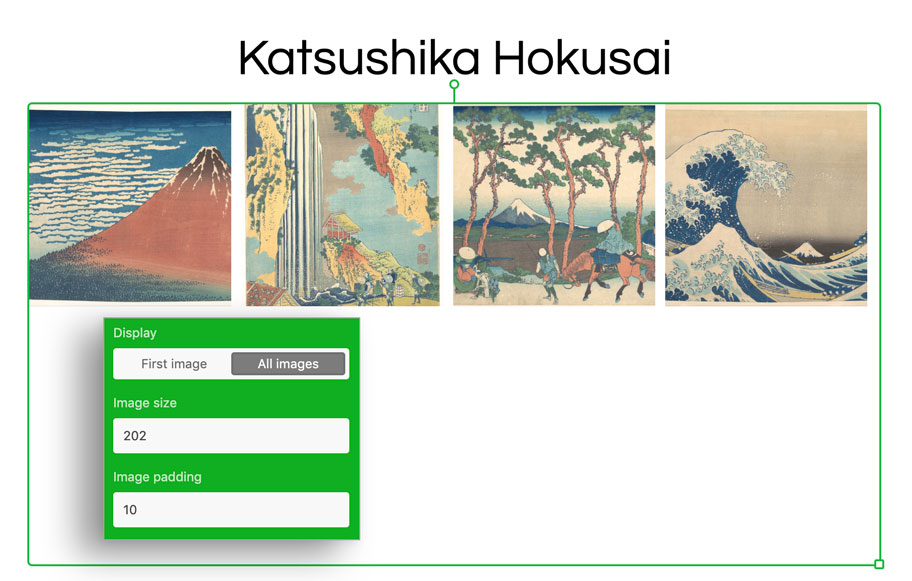
Option 2: All images
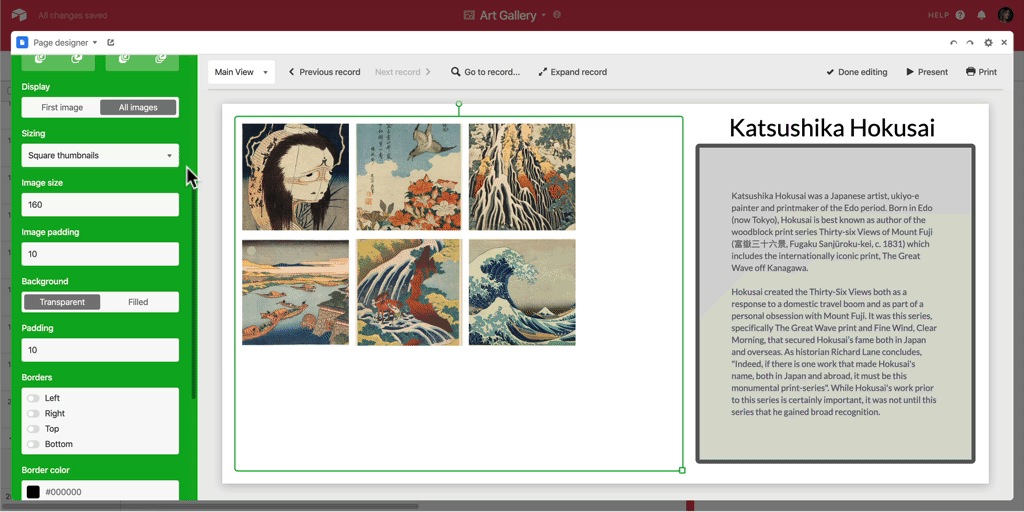
The all images option displays all of the images in the attachment field as equally sized thumbnails as the default sizing. If you choose this option, you can adjust the image size and padding.
In addition to the square thumbnails, you can also choose to display the images with either a fixed height or a fixed width in the sizing options.
Static images
At the top of the add-element sidebar in page designer (at the left edge of the extension once you click "Edit Layout"), you'll see a button that lets you insert a static image, i.e. an image (like a company logo) that you will want to appear the same across every record.
We only support linking directly to a URL to add a static image—you can't upload an image to page designer as you would an attachment to an Airtable base. To add a static image, right-click on the image where it's hosted online and select "copy image address".
If the image you'd like to use is not hosted online(e.x. an image on your computer), you can upload that image to be hosted by Airtable using an attachment field. Start by uploading the image you'd like to use to an attachment field in any record in any Airtable base. Once the image is uploaded, you can click on it to open it in full screen preview. In full screen preview mode, right-click the image and select the option to Copy Image Address (this is the url where this image can be found).
With the Image Address copied, open Page Designer, and paste the copied Image Address into the Image URL field. Page Designer will then create a static image that will appear in the same location on every record included in this installation of page designer.
Similarly to static images, you can add "static text" to any record in the print queue, which will cause this same text to appear in the same location on every record included in this installation of page designer.
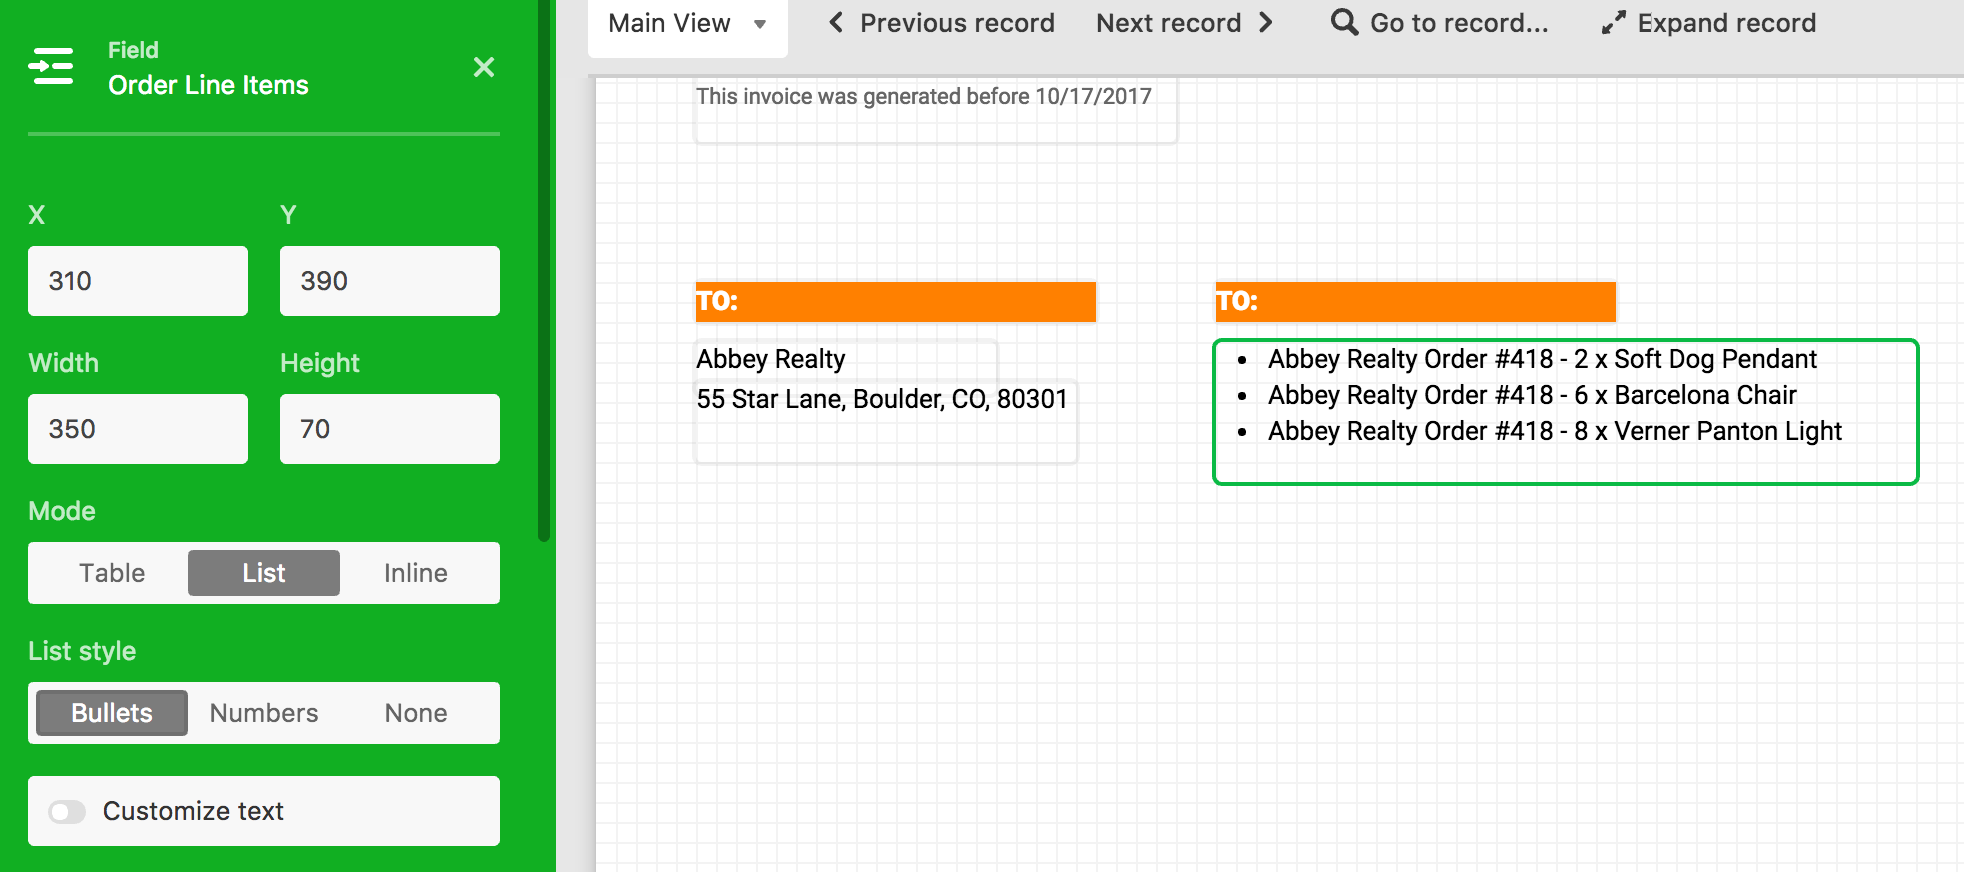
Linked record field elements
When you add a linked record element to your page, you can select one of three modes in which to display information from your linked records.
Inline
Inline mode displays the values from the linked record field as a text string. If there are multiple linked records, the links are separated by commas.

List
List mode displays the values from the linked record field as a list. You can choose whether to display the values as a bulleted list, as a numbered list, or neither.
Table
Table mode takes information from other tables using the link created by the linked record field, and turns it into a grid table on your page. Under the Table Columns header, you can use the Add column... dropdown menu to pick fields from the table linked to by your linked record field and turn them into columns on your page.
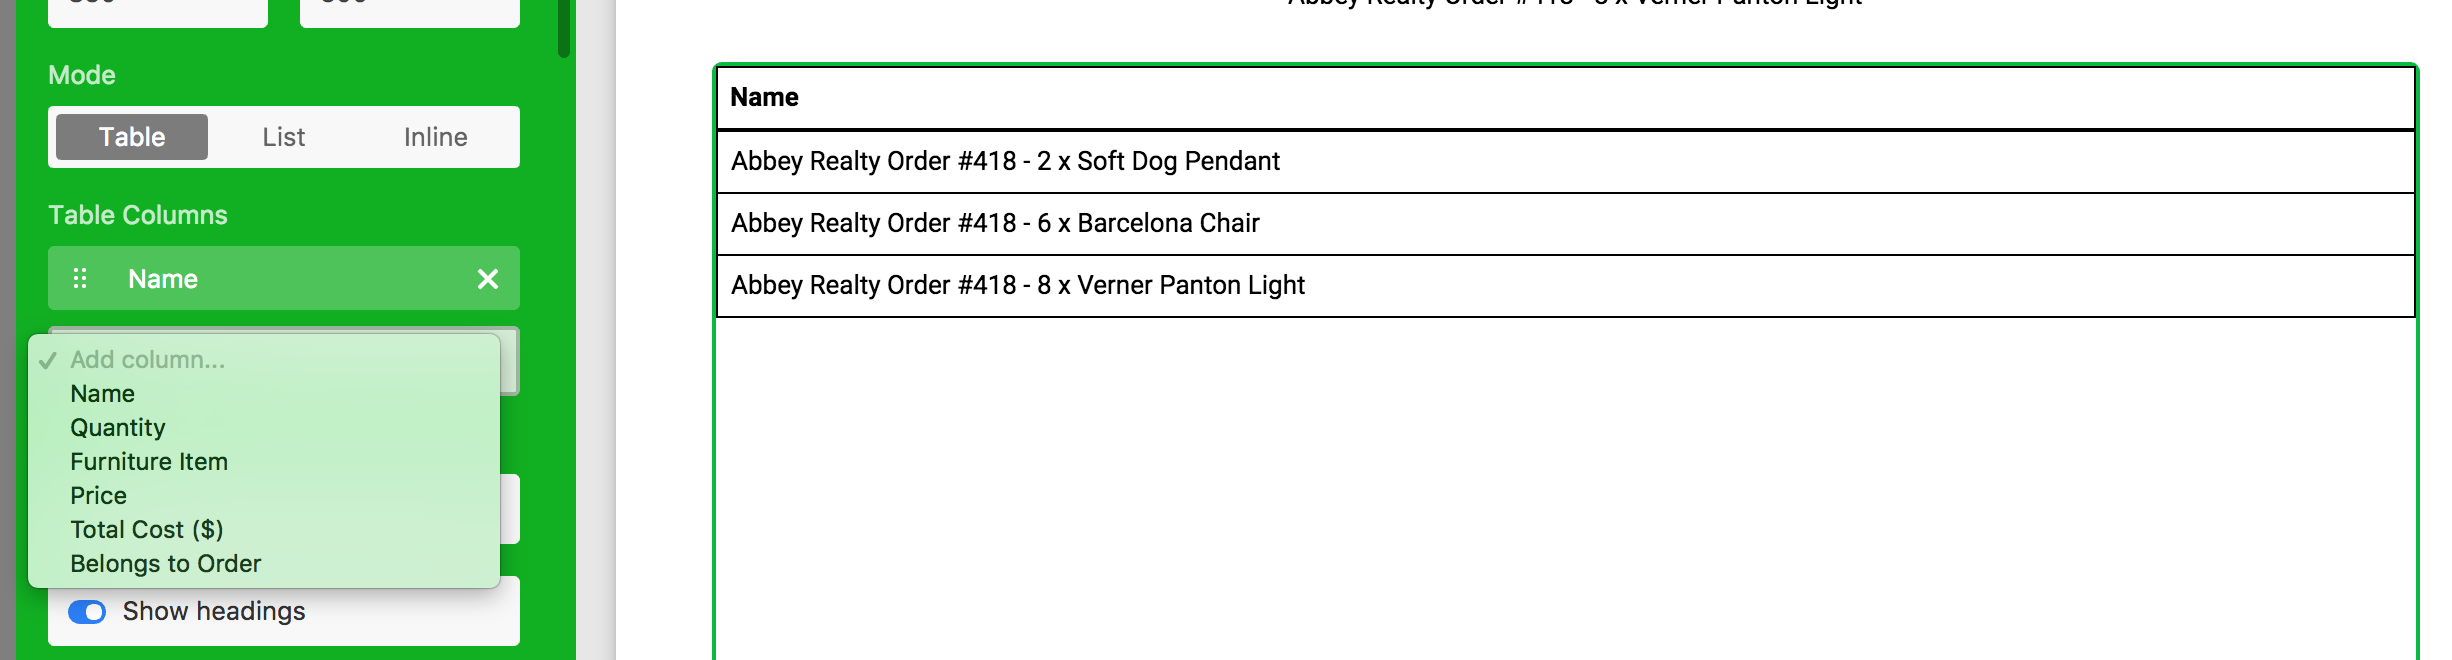
You can reorder the columns in the Table Columns section by using the drag handles and dragging and dropping the columns into whatever order you want; you can also remove a column by clicking the X button.
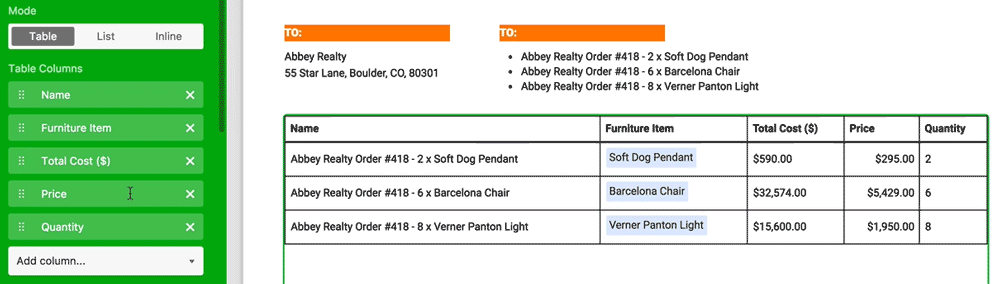
Additionally, you can customize the table borders using the dropdown menu under the Borders heading, or remove the headings from the table by clicking the Show headings toggle.
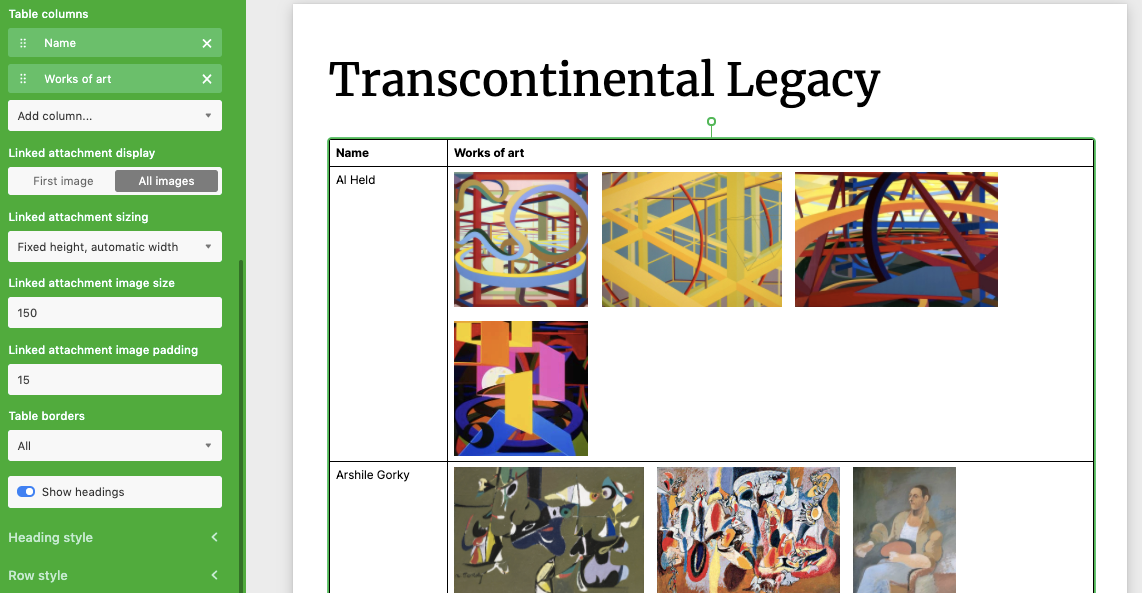
 If you include an attachment field in the table, you will have the following additional options for images:
Which images are displayed
You can choose the first image or all images.
Sizing of the images
Square (this setting will crop the image to fit)
Fixed height
Fixed width
Size in pixels
If square, setting pixels will be for height and width
If fixed height or fixed width, setting pixels will be for the selected option
Padding around image
Setting pixels will pad around all sides of the image
Minimum padding is 1px.
Note
Inserting a URL field will NOT allow you to create a hyperlink. However, if you use a long text field and create the hyperlink within it, and add that long text field to the page designer, then it will correctly create the hyperlink.
Undoing and redoing changes
You can undo any changes made through the extension by clicking the undo icon next to the extension's settings button or by using the Ctrl Z keyboard shortcut.
Similarly, you can redo any changes by clicking the redo button, by using the Ctrl Z keyboard shortcut, or by using the Ctrl Shift Z keyboard shortcut.
If you're using the keyboard shortcuts, make sure that the page designer extension is focused (i.e., that it's been clicked into and is selected to receive keyboard inputs)—otherwise, the keyboard shortcuts will apply to the changes last made outside the extension, in the currently visible table. You can focus the extension by clicking anywhere in its frame.
FAQs
Can I include an extension's information on the page I'm designing with Page Designer?
We do not support directly adding extensions to page designer pages. Page designer was built to enable the printing of individual records in a customized layout. The printout for a record can display a table of records that have been linked to that record, and even include custom-selected data associated with those records (like lookups), but it cannot currently run display extensions or calculations related to that data.
Why can’t I see the image settings on the left pane?
The image settings will only display if an attachment field type is added to table columns.
Note that if your page designer layout was created before this feature was released in May 2020, you will see a toggle to "Use advanced image settings" which will then make these options available.