With the Vision extension, you can use the Google Cloud Vision API to get more insight out of images from your records. You can quickly classify your images into thousands of categories (like "dog," "lighthouse," or "Sahara"), extract those labels, and save them to a field in your base—meaning that you can tag hundreds of images with just a few clicks. You can also identify logos, or use optical character recognition (OCR) to extract text from images. Please note that this extension requires a Google Cloud Vision API key.
Introduction
| Plan availability | All paid plans |
| Permissions |
|
| Platform(s) | Web/Browser, Mac app, and Windows app |
| Related reading | |
| Airtable terminology | Extension - Extensions are modular components that add visuals or functionality to a base, and were shown in the base's dashboard. Users can create custom extensions, or they can use extensions created by Airtable or other open-source extensions. |
Install the vision extension
- Start by clicking the Extensions option at the top-right-hand corner of your base.
- You can then click Add an extension
- This will open up the extensions menu where you can search for and install the Vision extension.
Enter your Google Cloud API key
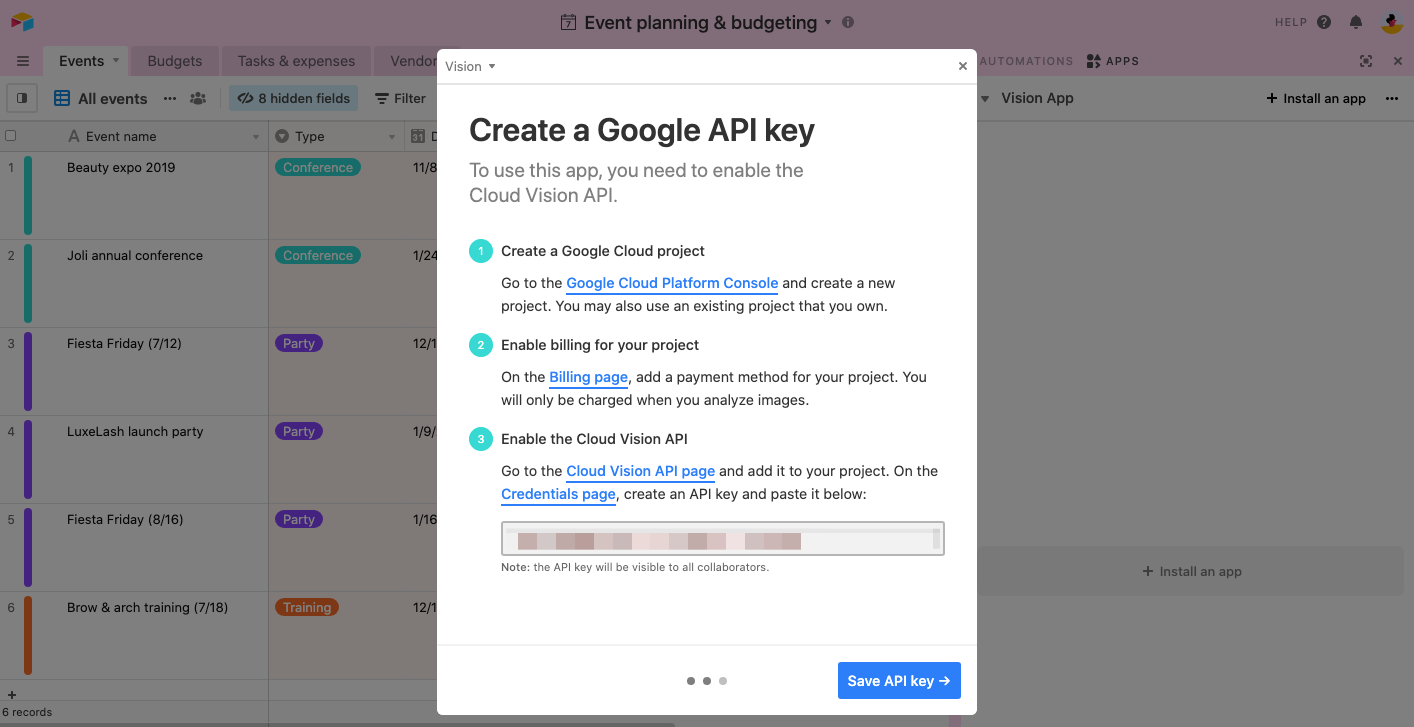
After adding the extension to your base, you'll be prompted to enter your Google Cloud API key. To get your API key you need to:
- Create a Google Cloud project. Go to the Google Cloud Platform Console and create a new project. You may also use an existing project that you own.
- Enable billing for your project. On the Billing page, add a payment method for your project. You will only be charged when you analyze images.
- Enable the Cloud Vision API. Go to the Cloud Vision API page and add it to your project. On the Credentials page, create an API key.
Once you've followed these steps, paste your API key in the space provided in the Vision extension setup window.

Configure extension settings
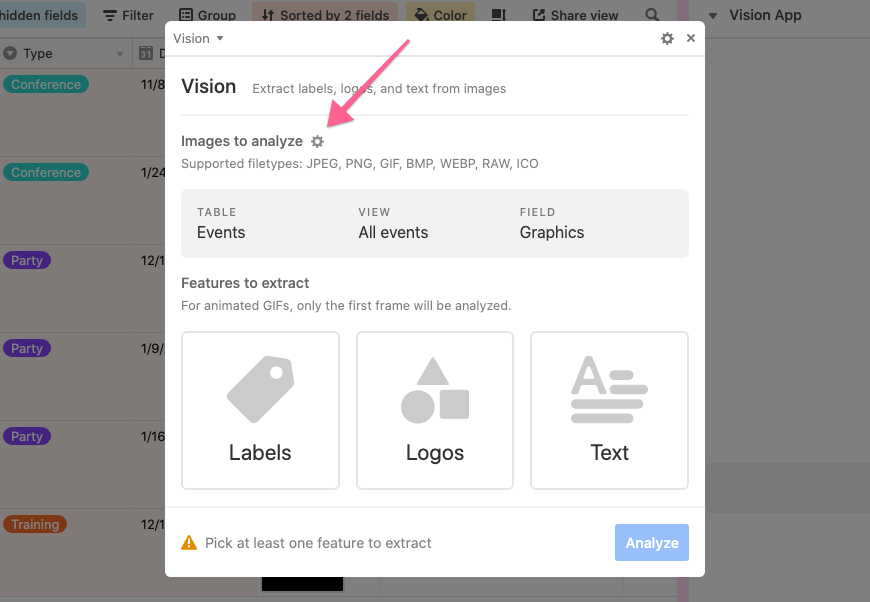
Next, you'll need to select which images you want to analyze and what features to extract from them. To select the images to analyze, click the gear icon next to "Images to analyze" to adjust which table, view, and field you want to use.

Then, choose what features to extract from the images by selecting one or more of the three available options.
Analyze images
Once you've configured the available options, click "Analyze" to begin extracting the selected information based on how Google categorizes your images. This will bring up a confirmation dialog confirming your use of the API. After you confirm by clicking the Analyze button, you'll see previews of the text that the extension has extracted from your images on their associated records.
Before savings the results you'll need to select a destination text field (using a single line text field or long text field) into which the extracted text can go. You can select the destination text field next to each of the options you've selected (shown in the screenshot below).
Next, click Save.
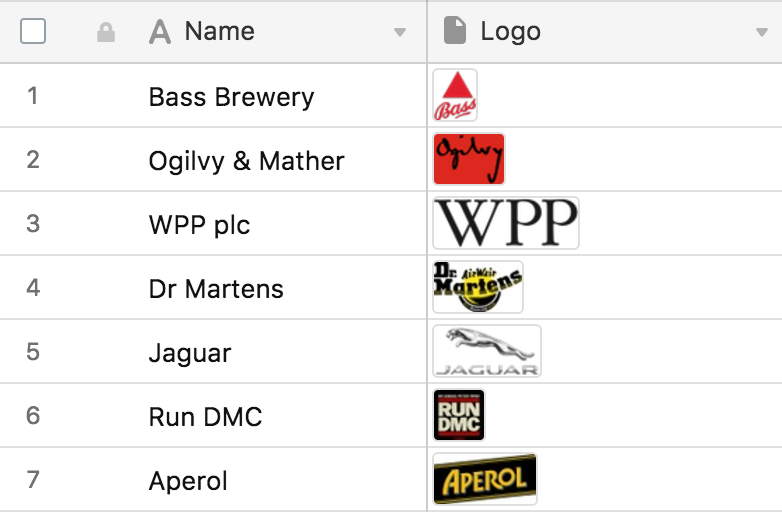
Extracted logos
Extracted logos will output the company or brand name associated with any logos depicted in your attachments.

Extracted text
Extracted text will pull words from your images and put them in a designated text field.

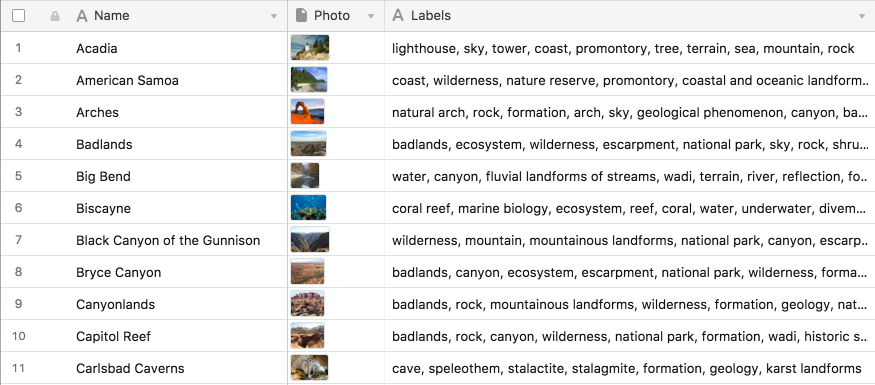
Extracted labels
Extracted labels will pull labels from your images and place them in the designated text field as comma separated values.
