- Getting started with Airtable
- Introduction to Airtable basics
- Contacting Airtable Support Updated
- Airtable home screen
- Glossary of Airtable terminology
- Airtable technical requirements
- Feature differences between Airtable on desktop and mobile
- Airtable keyboard shortcuts
- Using Markdown in Airtable
- Adding descriptions in Airtable
- Finding Airtable IDs
- Airtable Automations
- Automations Overview
- Automation feature walkthroughs
- Integrated automation walkthroughs
- Airtable automation walkthroughs
- Linking existing records using automations
- Conditional groups of automation actions
- Repeating groups of Airtable automation actions
- Creating recurring records using automations
- How to delay Airtable automation runs
- Prevent automations from triggering by mistake
- Use automations to timestamp status updates
- Automation Triggers
- Airtable Triggers
- Airtable automation trigger: When record matches conditions
- Airtable automation trigger: When a form is submitted
- Airtable automation trigger: When record created
- Airtable automation trigger: When record updated
- Airtable automation trigger: When record enters view
- Airtable automation trigger: At scheduled time
- Airtable automation trigger: When webhook received
- Airtable automation trigger: When a button is clicked
- Airtable automation trigger: When email received Updated
- Integrated Triggers
- Airtable Triggers
- Automation Actions
- Airtable Actions
- Airtable automation action: Send email Updated
- Airtable automation action: Create record
- Airtable automation action: Update record
- Airtable automation action: Find records
- Airtable automation action: Sort list
- Airtable automation action: Run a script Updated
- Airtable automation action: Generate with AI
- Integrated Actions
- Airtable automation actions: Slack
- Airtable automation actions: Google Workspace
- Airtable automation action: Send MS Teams message
- Airtable automation actions: Outlook
- Airtable automation actions: Jira Cloud
- Airtable automation actions: Jira Server / Data Center
- Airtable automation actions: Salesforce
- Airtable automation action: Create post in Facebook Pages
- Airtable automation actions: GitHub Issues
- Airtable automation action: Hootsuite post
- Airtable automation action: Send Twilio SMS
- Airtable Actions
- Airtable Bases
- Using Airtable Cobuilder
- Airtable bases overview
- Creating and managing Airtable bases
- Structuring bases in Airtable
- Moving bases between workspaces in Airtable
- Creating and managing tables in Airtable
- Creating Airtable base share links
- Importing third-party data into Airtable
- Using insights in Airtable
- Troubleshooting Airtable base performance
- Airtable Betas
- Collaborating in Airtable
- Airtable Enterprise Support
- General Enterprise information
- External badging in Airtable
- Using app library and components in Airtable Updated
- Ask an Expert beta overview
- European data residency at Airtable
- Airtable user groups overview
- Airtable Enterprise API
- Creating and managing data retention policies in Airtable
- eDiscovery APIs in Airtable
- Airtable and data loss prevention
- Accessing Enterprise audit logs in Airtable
- Set up Jira Server / Data Center to connect with Airtable
- Admin panel pages
- Airtable admin panel overview
- Users - Airtable enterprise admin panel
- Airtable admin panel user details
- Groups - Airtable admin panel
- Workspaces - Airtable Enterprise Admin Panel
- Bases - Airtable admin panel
- Interfaces - Airtable admin panel
- Data sets - Airtable admin panel
- Managed apps - Airtable admin panel
- Components - Airtable admin panel
- Reports - Airtable admin panel
- Settings - Airtable admin panel Updated
- Managing Enterprise organizations
- Managing Enterprise admins in admin panel
- Using Organizations
- Organization branding for apps in Airtable
- Enterprise Hub in Airtable
- Enterprise Hub: Org unit assignment with user groups Updated
- Deactivating, removing access, and reactivating users in the admin panel
- Managing user access to workspaces and bases
- Airtable Enterprise Key Management Updated
- Custom terms of use New
- Enterprise SSO
- General Enterprise information
- Airtable Extensions
- Airtable Fields
- Fields Overview
- Attachment
- Date-based fields
- Formula
- Getting Started with Formulas
- Formula Foundations
- The essentials of Airtable formulas
- Formula writing tips for beginners
- Troubleshooting formulas
- Basic calculations
- Conditional statements
- Logical arguments
- Working with dates
- Displaying DATETIME_FORMAT using the date field in Airtable
- Working with date functions in Airtable
- Calculating the difference between dates in Airtable
- Supported DATETIME_DIFF unit specifiers in Airtable
- Supported DATETIME_FORMAT format specifiers in Airtable
- Using the DATETIME_PARSE() formula in Airtable
- Working with timezones
- Record functions
- Text functions
- Numeric functions
- Common Solutions: Beginner
- Common Solutions: Intermediate
- Common Solutions: Advanced
- Long Text Field
- Linked Record Field
- Linking records in Airtable
- Limiting linked record selection to a view in Airtable
- Dynamic filtering in linked record fields
- Linking to one, many, or a subset of Airtable records
- Converting existing fields to Airtable linked records
- Reordering record links in Airtable
- Understanding linked record relationships in Airtable
- Number-Based Fields
- Other Fields
- Rollup, lookup, and count fields
- Select and user fields
- Integrating with Airtable
- API
- Getting started with Airtable's Web API
- Creating personal access tokens
- Airtable Webhooks API Overview
- Service accounts overview
- Airtable Web API - Using filterByFormula or sort parameters
- Airtable API Deprecation Guidelines
- Airtable API: Common troubleshooting
- Managing API call limits in Airtable
- URL length limitations for web API requests
- Integration services
- Third-party integrations via OAuth overview
- Troubleshooting disconnected OAuth integrations in Airtable
- Options for integrating with Airtable
- Third-party integrations - Common troubleshooting
- Low-code integrations - Common troubleshooting
- Integrating Airtable with external calendar applications
- Visualizing records from Airtable in Tableau
- Visualizing Airtable records in Microsoft Power BI & Power Query
- Integrating HubSpot with Airtable
- Using Zapier to integrate Airtable with other services
- Using Zapier's Multi-Step Zaps to find and update records
- Using IFTTT to integrate Airtable with other services
- Integrating with AWS Lambda & DynamoDB
- Developer tools
- API
- Airtable Interface Designer
- Interface Designer overview articles
- Interface layouts
- Interface elements
- Adding and removing elements in interfaces
- Adding layouts to interfaces
- Formatting elements in interfaces
- Interface element: Button
- Interface element: Calendar
- Interface element: Chart
- Interface element: Filter
- Interface element: Gallery
- Interface element: Grid
- Interface element: Kanban
- Interface element: Number
- Interface element: Record picker
- Interface element: Text
- Interface element: Timeline
- Learning and Resources
- Managing Airtable
- Airtable Policy
- Airtable Records
- Airtable Sync
- Airtable Views
- Airtable Workspaces
- Print
- Share
- DarkLight
- PDF
All paid plans | |
| |
Platform(s) | Web/Browser, Mac app, and Windows app |
Related reading | |
Extension - Extensions are modular components that add visuals or functionality to a base, and were shown in the base's dashboard. Users can create custom extensions, or they can use extensions created by Airtable or other open-source extensions. |
The Typeform extension allows you to either import submissions from an existing form in your Typeform account to a table in your base or generate a new Typeform from an existing table. Combining Airtable with Typeform can provide greater opportunities for customization and speed when designing and sending surveys, and organizing customer information.
Getting started with the Typeform extension
You can install the Typeform extension from the marketplace. Please note that you need a working Typeform account to use this extension. You can sign up for Typeform here.
When you first add the extension to your dashboard, the extension prompts you to connect to a Typeform account. Follow the on-screen instructions to allow Airtable to read and write to Typeform.
The home screen will prompt you to either import responses from an existing Typeform or to create a new Typeform based on the fields in your table.
If at any point you’d like to disconnect from your Typeform account, you can go to the settings for the extension (the gear icon) and click on the Log out button.
Creating a new typeform from a table
When selecting the create tab at the top of the extension, you have the option to create a typeform using the fields in one of your tables. Each Typeform account can have many workspaces (not to be confused with Airtable’s workspaces). Select a workspace from the dropdown.
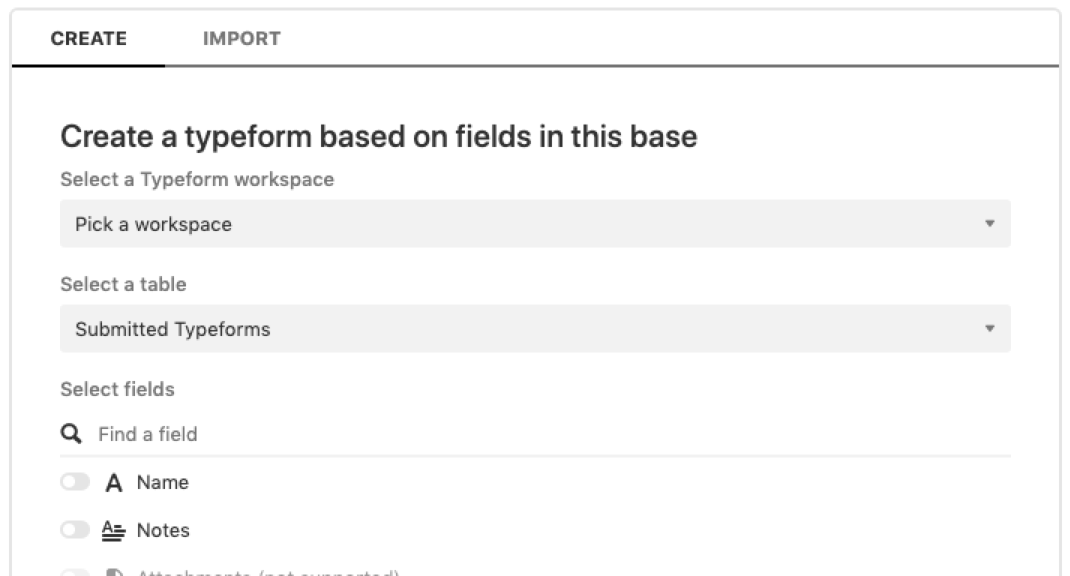
Next, you can choose any of your tables in the current base as the basis of your typeform.
Once your table is selected, the “Select fields” section allows you to choose which fields to include in the typeform. In the screenshot below, some fields have been named using the field type to show which Airtable field types are supported.
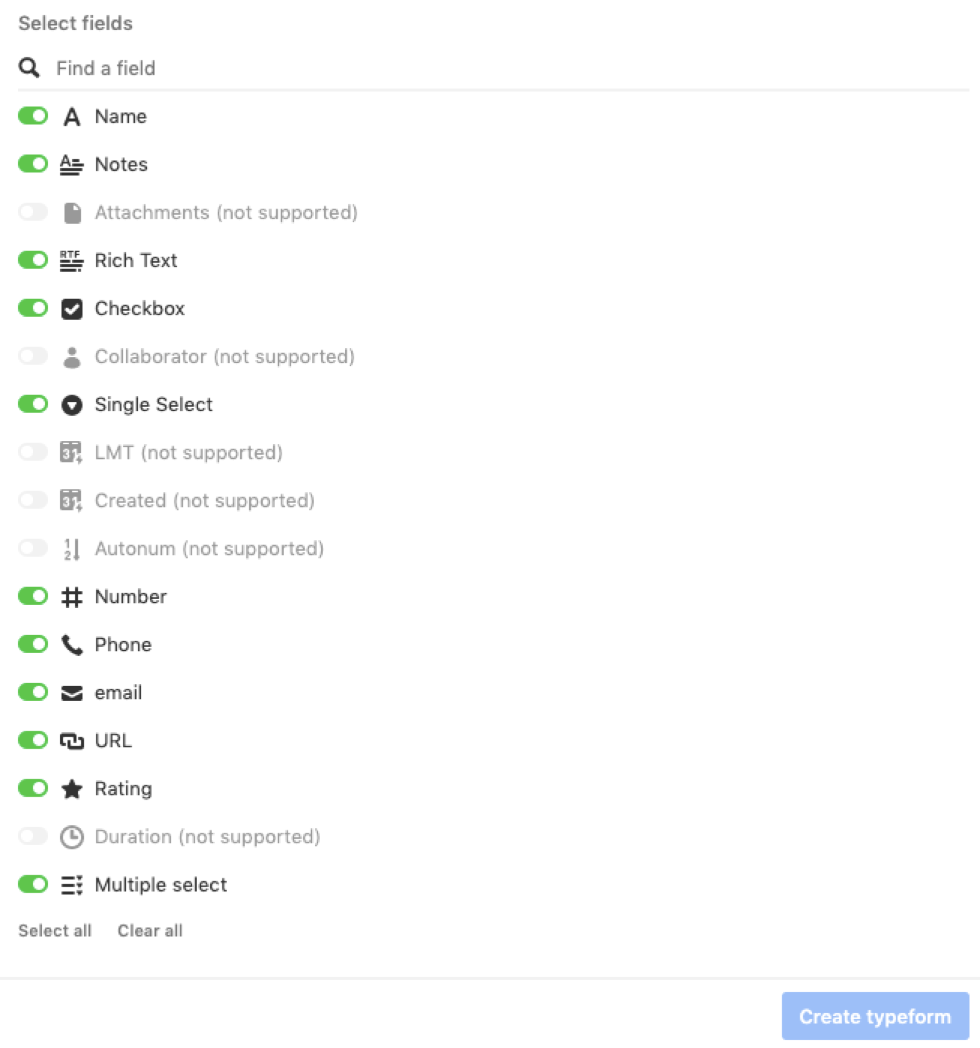
Toggle on the fields that will appear on the form and then click Create typeform.
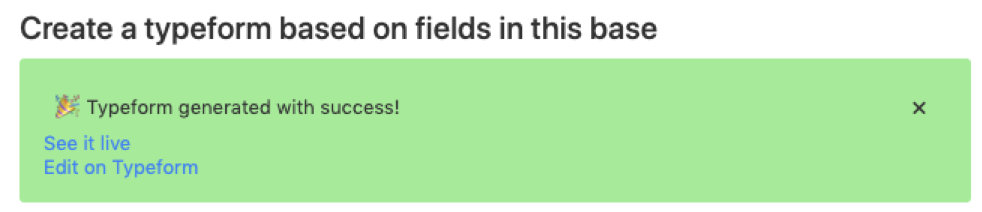
When the newly created typeform is generated, you will be notified with links to both a live link and an edit link. This will be a good time to rename the form as it will be named “Generated a typeform (generated by [your name])” by default. You can further customize the design of the form by selecting “Edit on Typeform”. If you want the data captured by this new form to sync back to Airtable, please implement the second feature of the extension (see next section): importing responses from an existing typeform.
Import responses from an existing typeform
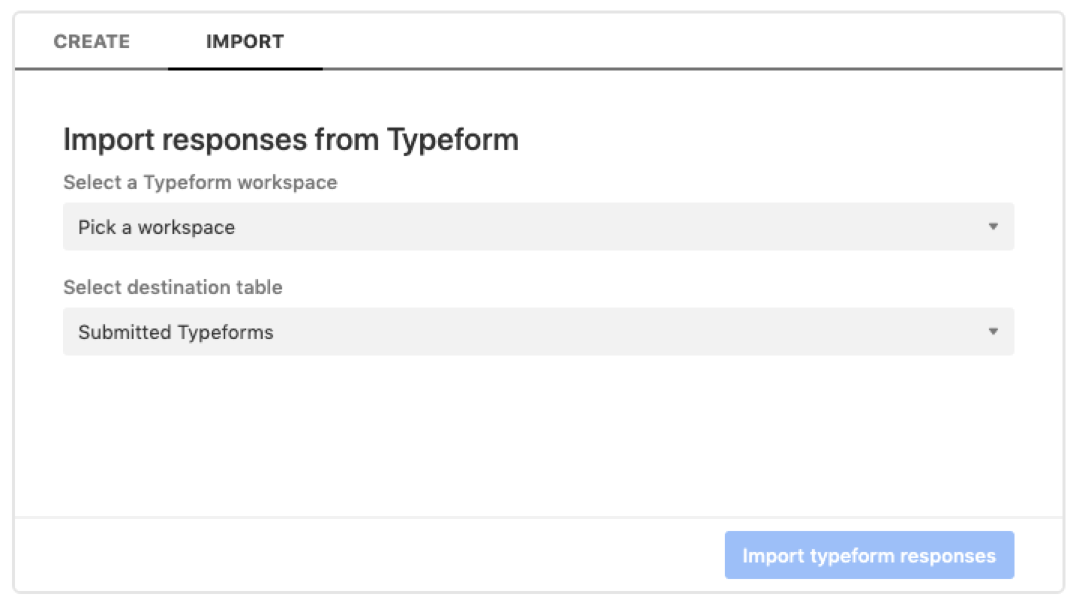
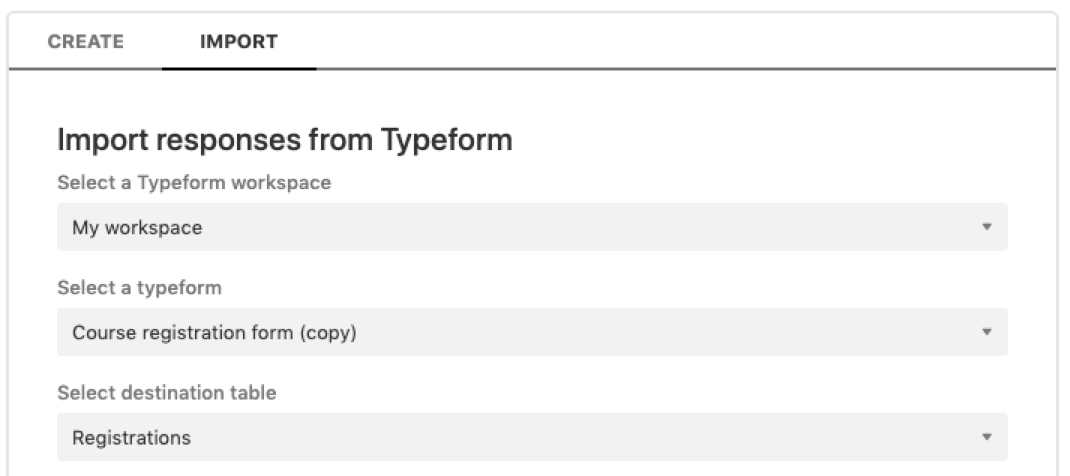
When you have collected responses through your typeform, you can manually import them into Airtable using the Import tab at the top of the extension.
First, select a Typeform workspace to view the available typeforms already created. Select the typeform with the responses you need to import and then select the destination table in your base.
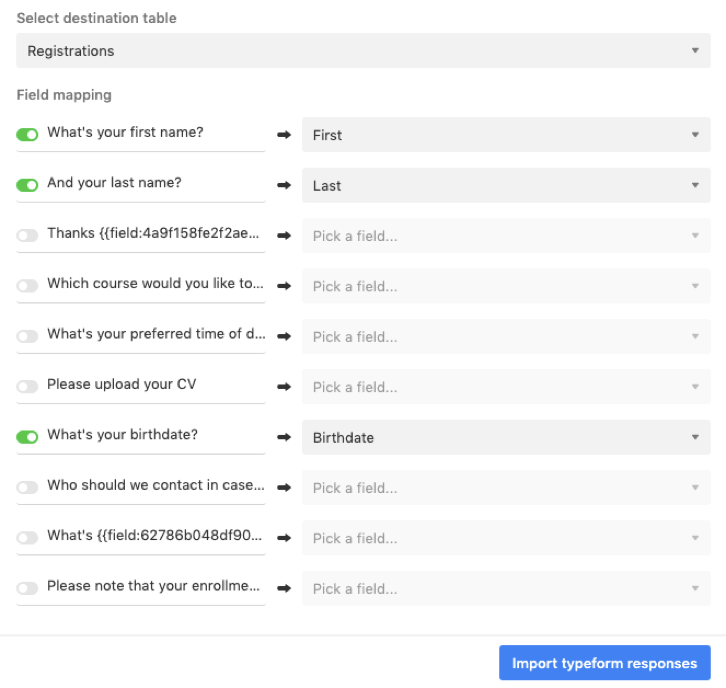
In the “Field mapping” section, you can choose which fields to use to save the imported values. Once you map at least one value to a field, click the “Import typeform responses” button to complete the step. If you’re having trouble selecting your desired field in the dropdown, make sure that the field type in Airtable matches the field type in Typeform. For example, if you have an email input in Typeform, the mapped Airtable field type should also be email.
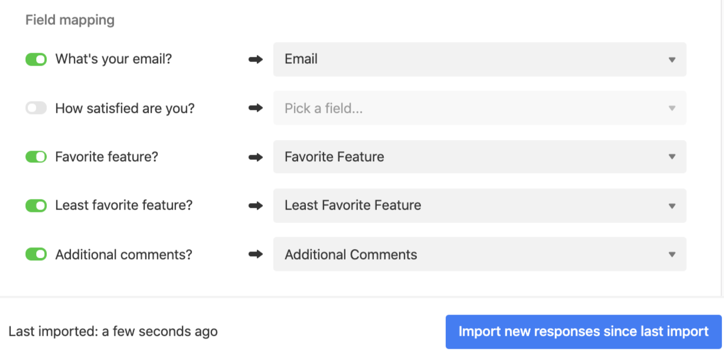
You can sync new responses from typeform by returning to the extension and clicking “Import new responses since last import” to fetch additional results.
Supported field types
Airtable field | Typeform field |
---|---|
Long text | Long text |
Rich text | Long text |
Number | Number |
Count | Number |
Checkbox | Yes/no |
Date | Date |
Multiple select | Multiple choice |
Phone number | Phone number |
Rating | Rating |
Single line text | Short text |
Single select | Dropdown |
Frequently asked questions
Why are my multiple choice or dropdown questions blank after importing?
If you are importing into a multi-select or single select field and the selections being imported from Typeform are not available as configured selections, the field will not update. Make sure all selections are configured correctly in the field and matches text formatting exactly.
Are there any other ways to integrate Airtable and Typeform?
Besides the Typeform extension, you can use the Typeform/Airtable Integration, configured in Typeform, to send responses to your Airtable base automatically.