Plan availability | All plan types with varying limitations |
Permissions |
|
Platform(s) | Web/Browser, Mac app, and Windows app |
Tokens in Airtable automations overview
When building automations in Airtable, you may want to refer to values from earlier steps. This can include both the trigger step and any subsequent action steps. You may also want to use a mix of static and dynamic values:
Static automation value - Static values in automations remain constant whenever the automation runs and reaches the action containing that static value. Examples include static text, numeric values, or select field selections. Static values could even be intentionally set blank if you are wanting the automation to “clear out” any values currently present.
Dynamic automation value - Dynamic values in automations change depending on the values from previous steps in your automation. We commonly refer to these as "tokens." A frequent use case for dynamic values is in an "Update record" action step. In these steps, you need a record ID to identify which record should be updated. A common approach is to insert the record ID token from the trigger step. In this example, the record that triggered the automation is the same record that will be updated in the "Update record" action step.
Adding dynamic tokens in automations
Note
There are two main places where you might add a dynamic token:
Record id input box - This represents metadata that allows our automation system to know which record to take action on.
Airtable fields - Airtable fields are the main location where data is stored in Airtable. Depending on the field type your automation action is referring to, there will be different requirements for the type of dynamic value that will be accepted. For example, if you are looking to update a number field, then you want to ensure that the dynamic token you add will not potentially be a string of text, since that type of data will not be accepted in a number field.
To add a dynamic token to an Airtable automation:
Open your Airtable home screen.
Select the base where you want to add a dynamic token to an automation.
Click Automations in the top-center.
Click + Create new… in the the top-left corner.
Create automation.
You may not see this button if the sidebar is closed. Click the
 icon to open the automations sidebar.
Click + Add trigger and select a trigger.
For example: Choose the “When record created” trigger. Then choose a table and click Use suggested record button to test the trigger step.
This is important to do before moving on to the automation actions because it allows our system to load the potential values to be used as dynamic tokens in later steps.
If you end up adding new fields to the table you are referring to in the trigger step, retest the trigger for those values to appear as potential dynamic tokens in later action steps.
Click + Add advanced logic or action and choose an action.
For this setup, let’s choose the “Update record” option.
Under the “Configuration” section, we need to let the automation know which table and record it will be updating.
For our example, choose the same table used in the trigger step, and now we will use our first dynamic token.
In the box under “Record ID,” click the blue and white plus button. This opens a menu of tokens that can be inserted as a “Record ID.”
For our example, select “Use data from…” the “When a record is created”—in “Projects”—trigger step. Use the “Airtable record ID token” dynamic token under the “Insert value from field” section.
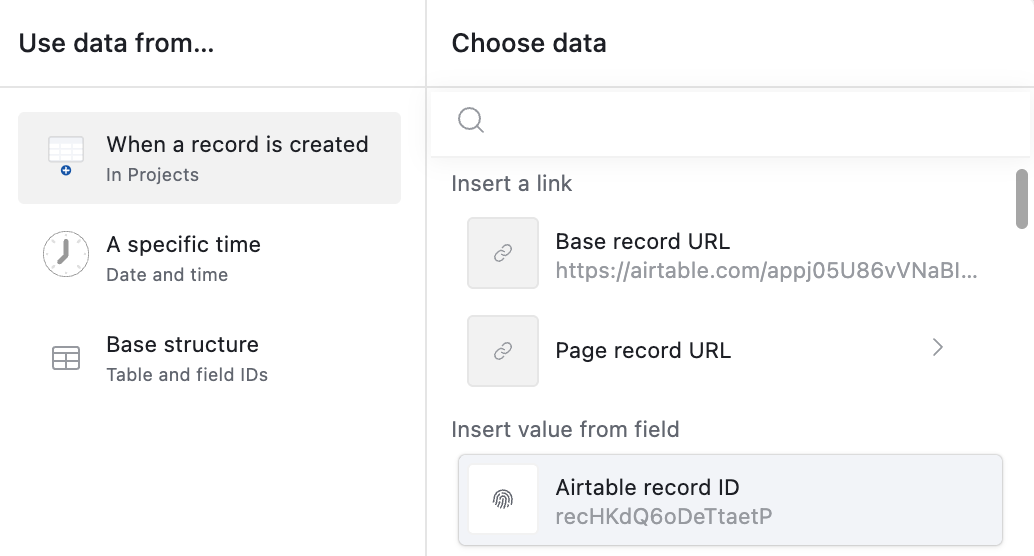
When a token under the “Choose data” section has a > icon, there is an additional token properties sub-menu that must be used. This sub-menu appears for values from user fields, select fields, lookup fields, page record URLs, whole-record insertion tokens, and more.
Once your dynamic record ID token has been added, it will look like this in the automation action configuration: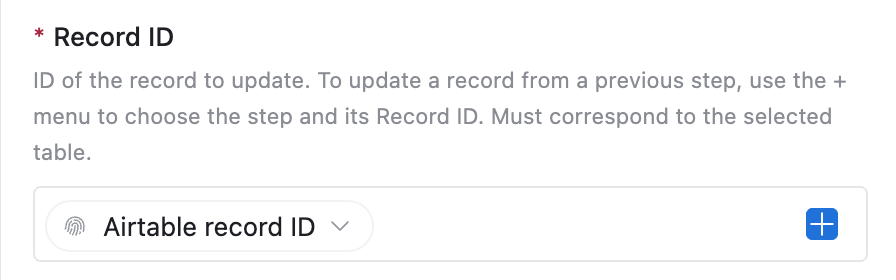
Now you’ll want to configure fields to update in this record. This can be a mix of static values and/or dynamic tokens. More on mixing static and dynamic values is available in this section.
Note that in some cases you will see a cogwheel icon
 . You’ll need to click this and choose Dynamic for the blue and white plus button to appear so that you can add dynamic tokens.
You can also include multiple dynamic tokens when it’s the case that you need multiple potential values to appear in the same field.
Experiment with mixing static and dynamic values where possible. Remember that you are in the testing phase of building your automation, so this will help you become more familiar with the possibilities.
Click Generate a preview under the “Test step” section.
Calculated values cannot pass through the test, so in these cases, you may want to use the “Run as configured” option, then click Run test to have the automation action run.
Keep in mind that running the automation action as configured will result in actual updates to your base, so think of any downstream impacts that could cause before running a test in this way.
If you have access to the sandbox feature, use it to prevent accidental effects from occurring.
After finishing your automation, turn the automation “On” by clicking the OFF toggle.
Updating previously configured automation tokens
To update a previously configured automation token:
Open your Airtable home screen.
Select the base where you want to add a dynamic token to an automation.
Click Automations in the top-center.
Select the automation with the token you want to update under the “Find an automation” section.
Click Update record.
Click the “Airtable record ID” button under the “Record ID” section.
Select Edit token, Modify, Copy, Duplicate, or Delete and follow the on-screen instructions.
Edit token - Replace the current token with another token from a previous automation step.
Modify - 5 options that you can use to format the token’s values:
Uppercase - All letters in a string will be capitalized.
Lowercase - All letters in a string will be lowercased.
Capitalize - Only capitalizes the first letter of the first word in a string.
Trim - Removes any leading or trailing whitespace from the token's value. Useful for cleaning up text from form submissions or other data entry points that may contain extra spaces.
Length - Returns the length of a string including whitespaces.
Copy - Copy a previously configured token and paste it into another field or into another part of the same field.
Duplicate - Duplicate the token within the same field.
Delete - Delete the token from the field.
Mixing multiple static and dynamic values in automations
To better understand the concept of using multiple static and dynamic values in an automation let’s use an example where we have a long text field that is holding meeting notes. Let’s say you have an automation with the following setup:
Trigger step - Using the “When record matches conditions” trigger, conditions are set such that when a checkbox field “Compile meeting notes” is checked, the automation will run.
First automation action step - Using the “Update record” action, we will update a “Meeting notes for review” long text field.
Second automation action step - Using the “Send email” action, we will send an email out to everyone on the team in case they missed the meeting or want to review key points.
We are just going to focus on the “Update record” action step, and specifically the “Meeting notes for review” field setup for this example. Here’s what a blank meeting notes field will look like:
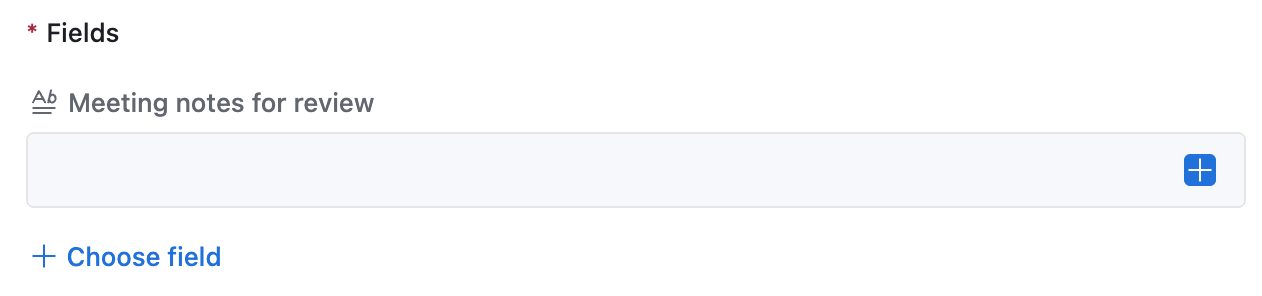
There are several fields that get filled out before and during the meeting that we want to add together into the “Meeting notes for review” field that we are updating:
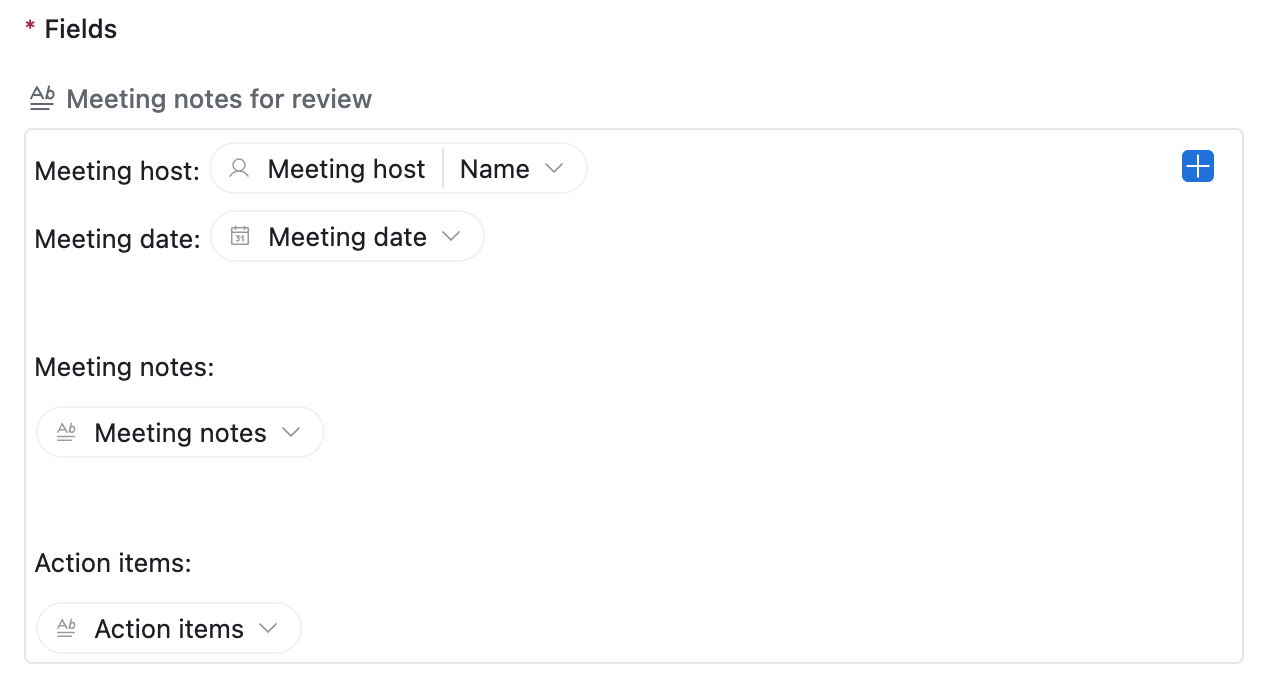
Meeting host - In our case, the meeting host is coming from a user field. When we add the token, we will click the Meeting host token and then choose the Name option under the “Insert value from field” section. The other token values (record ID, email, or profile picture) could be helpful in other workflows, but, in this case, we want the user’s name.
Meeting date - Note that the token will not inherit the date field’s formatting settings. Instead, it will ouput in a YYYY-MM-DD format. If you desire another format type, then you will want to consider creating a new formula field that will output the date as a string in your preferred format.
Meeting notes - Note that rich text will need to be enabled in both the “Meeting notes” field as well as the “Meeting notes for review” field in order for rich text to be passed over properly in the token.
Meeting action items - Similar note to the meeting notes token mentioned above.
Now let’s format this with a mix of static text and dynamic tokens like so:
Note that when you want to add a new line, press Shift Return. Pressing Return alone will not create a new line.
Understanding Record ID tokens versus field names
When configuring automation actions that require a Record ID, it's important to understand the difference between using a Record ID token and referencing a field name. Record ID tokens are unique identifiers that Airtable automatically generates for each record. When an automation action needs to know which record to update, create, or reference, it requires this Record ID—not the name of a field.
Common mistake: Entering a field name (like "Project Name" or "Task ID") in the Record ID input box. This will cause the automation to fail because field names are not the same as Record IDs.
Correct approach: Use the Record ID token from a previous step in the automation:
Click the blue and white plus button in the Record ID input box.
Select the trigger or action step that contains the record you want to reference.
Choose the Airtable record ID token (not a field name).
For example, if the trigger is "When a record is created," the Record ID token from that trigger step represents the newly created record. This is what should be inserted into the Record ID field of an "Update record" action if the goal is to update that same record.
Note
Record IDs are different from field values. Even if a field in the table is called "Record ID" or contains ID-like values, those are field values—not the Airtable-generated Record ID needed for automation actions.