Plan availability | Paid plans only |
Permissions | Please consult this support article for a breakdown of Interface Designer permissions.
|
Platform(s) | Web/Browser, Mac app, and Windows app |
Related reading |
|
Note
This element is only available in element-based Blank, Record review, and Record summary layouts.
The Timeline element is similar to the Timeline view in a base. There are some slight differences in functionality between the view and element versions, but overall the two mostly match. Below, we break down all of the necessary configuration options that appear in Interface Designer when choosing to use this element.
Adding and configuring timeline elements
If this is the first time you've added elements to an interface, please consult this help article first.
Find the Timeline element by clicking + Add element in the lower left portion of the interface editor.
You'll then place the element somewhere in the layout of your interface page. Don't worry if it isn't in perfect positioning yet, as you can always move the element later.
Next move on to configuring the Data and Appearance of the timeline element.
Configuring Timeline elements
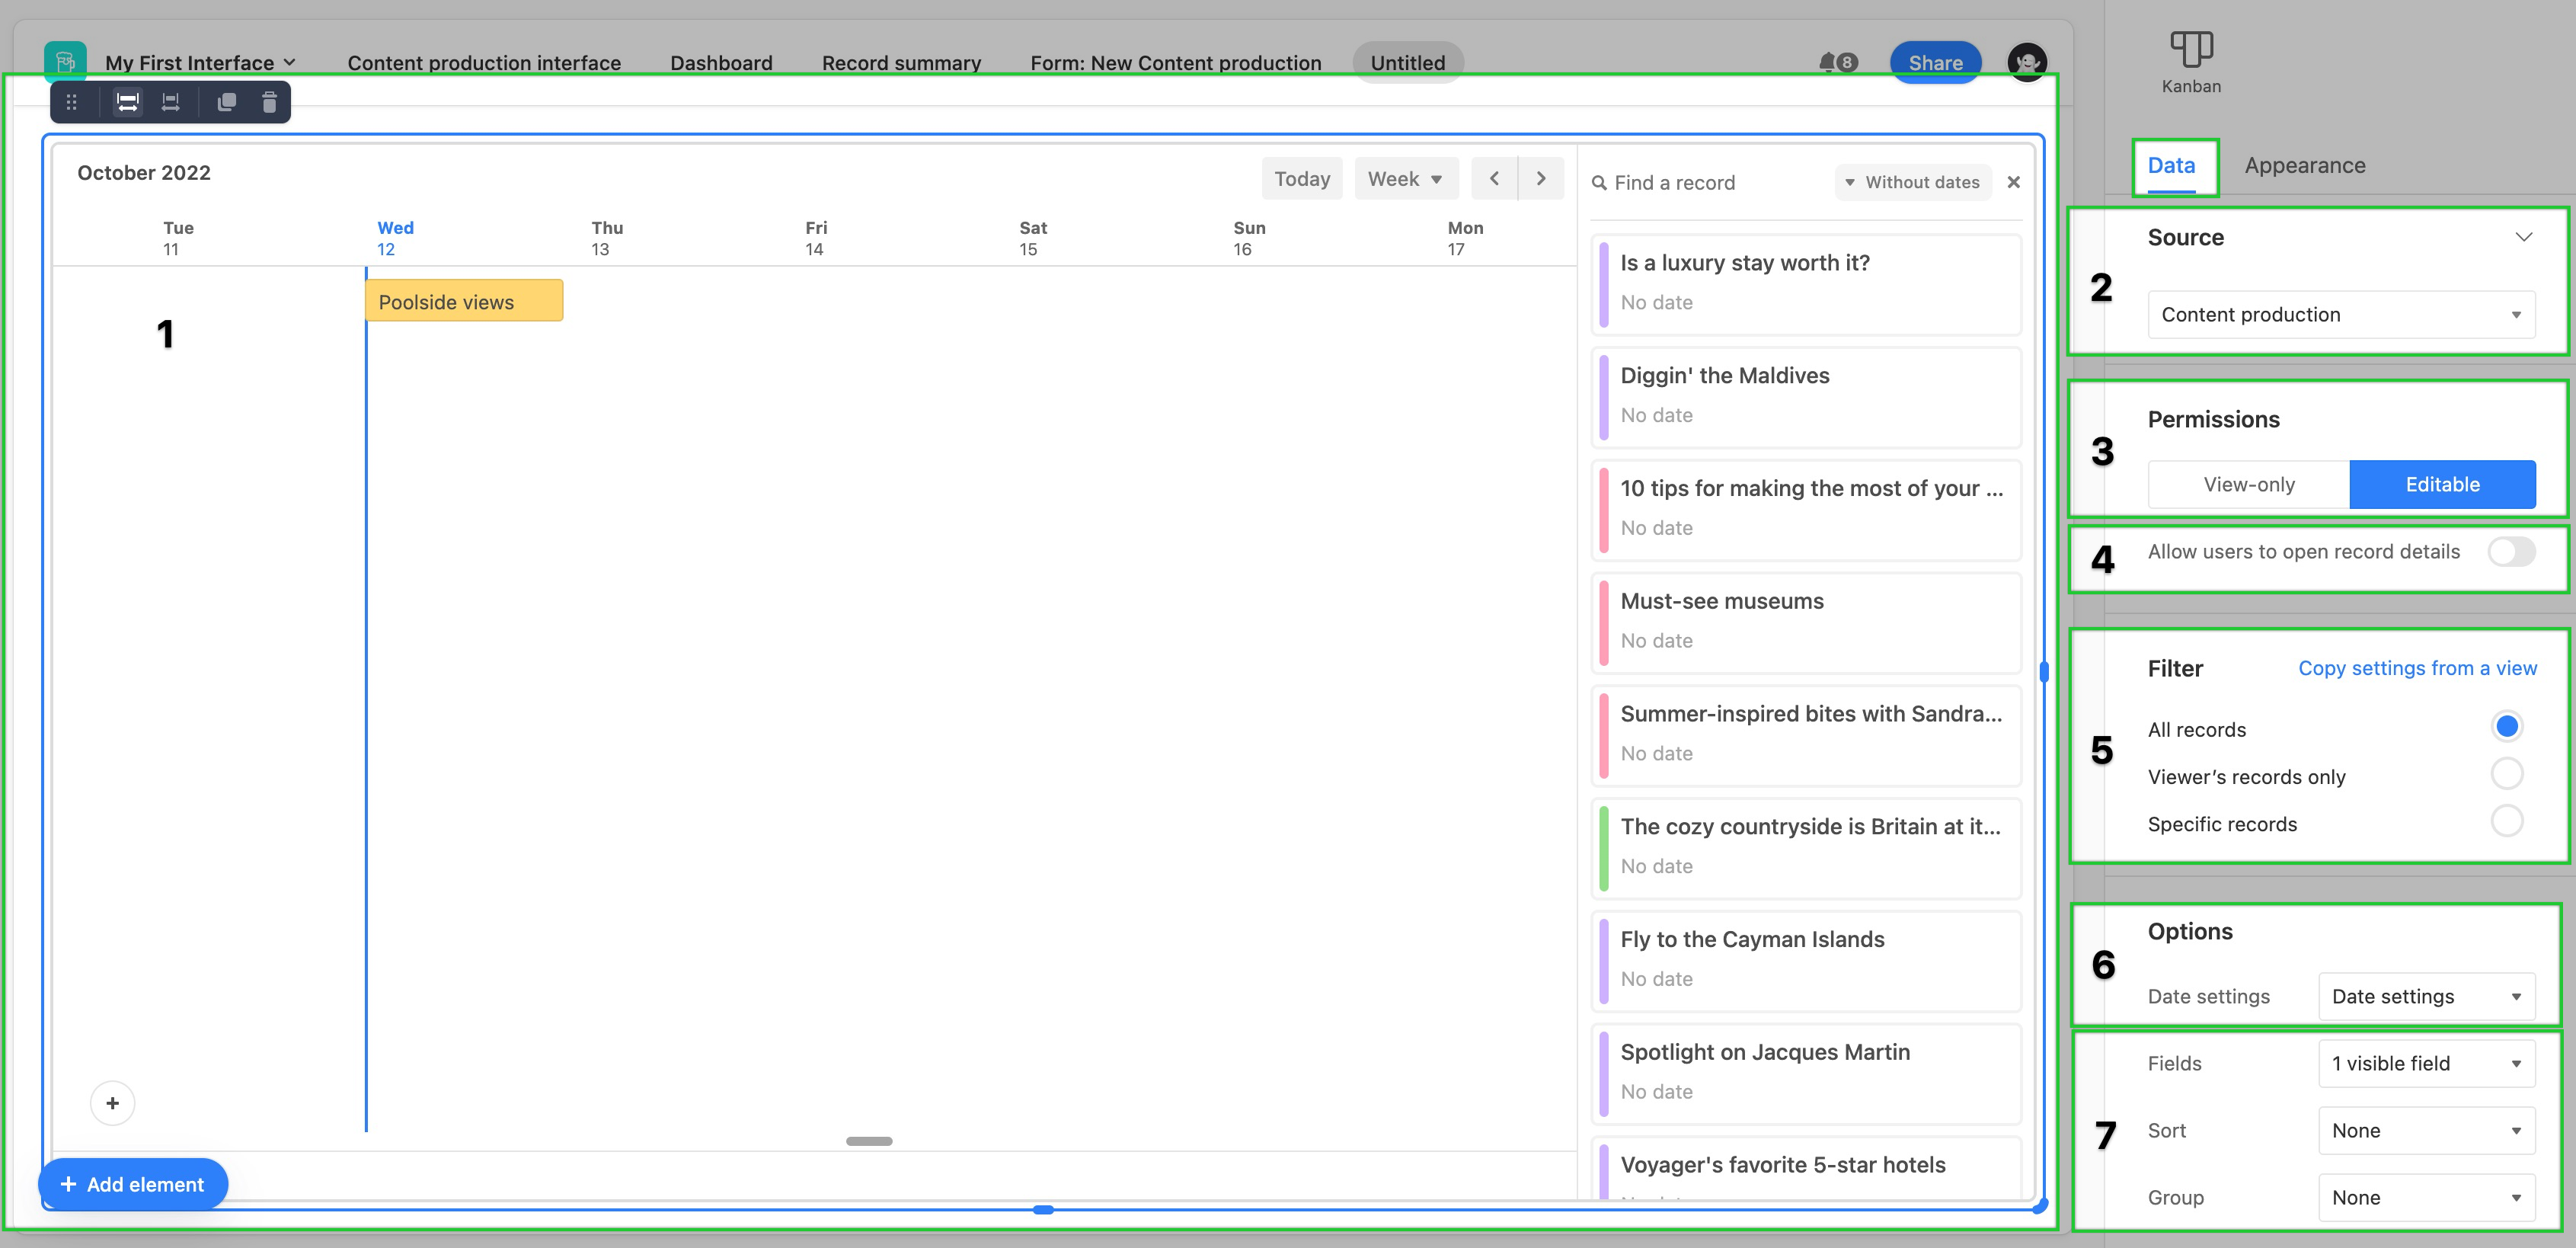
After placing a timeline element, you'll see the configuration panel appear on the right side of the editor.
Choose a source for the timeline. Usually, this is a table from the underlying base.
Set the permissions to be View-only or Editable. More on permissions here. The Editable setting allows users interacting with the interface to add, edit, or delete records in the view element.
The record details toggle lets you configure the way an expanded timeline record will appear to interface collaborators. In short, you can think of this as another interface page that is hidden from view unless a user presses the space bar to open a record. This is similar to the functionality of expanded records in a base.
Set the filters for the timeline element. If you already know of a view from the underlying base that uses the same filters you would like to see used in this timeline element, then choose the Copy settings from a view option. Otherwise, choose from the other three filter options. By default, the All records option will keep the timeline element unfiltered. The Viewer's records only option will only show records related to the interface viewer if their name (or a group they belong to) has been added to a user field in the underlying base. You can specifically set one, and only one, user field for this option. Finally, you can set Specific records by condition(s) or condition group(s) to filter the underlying records.
In the Options section, you will configure Date settings that will have a big impact on the configuration of the timeline element. We cover this more extensively below.
At the bottom of the Data configuration options, you will choose which fields are visible, the sort behavior of records in the timeline, as well as any groups you'd like the records to appear in.

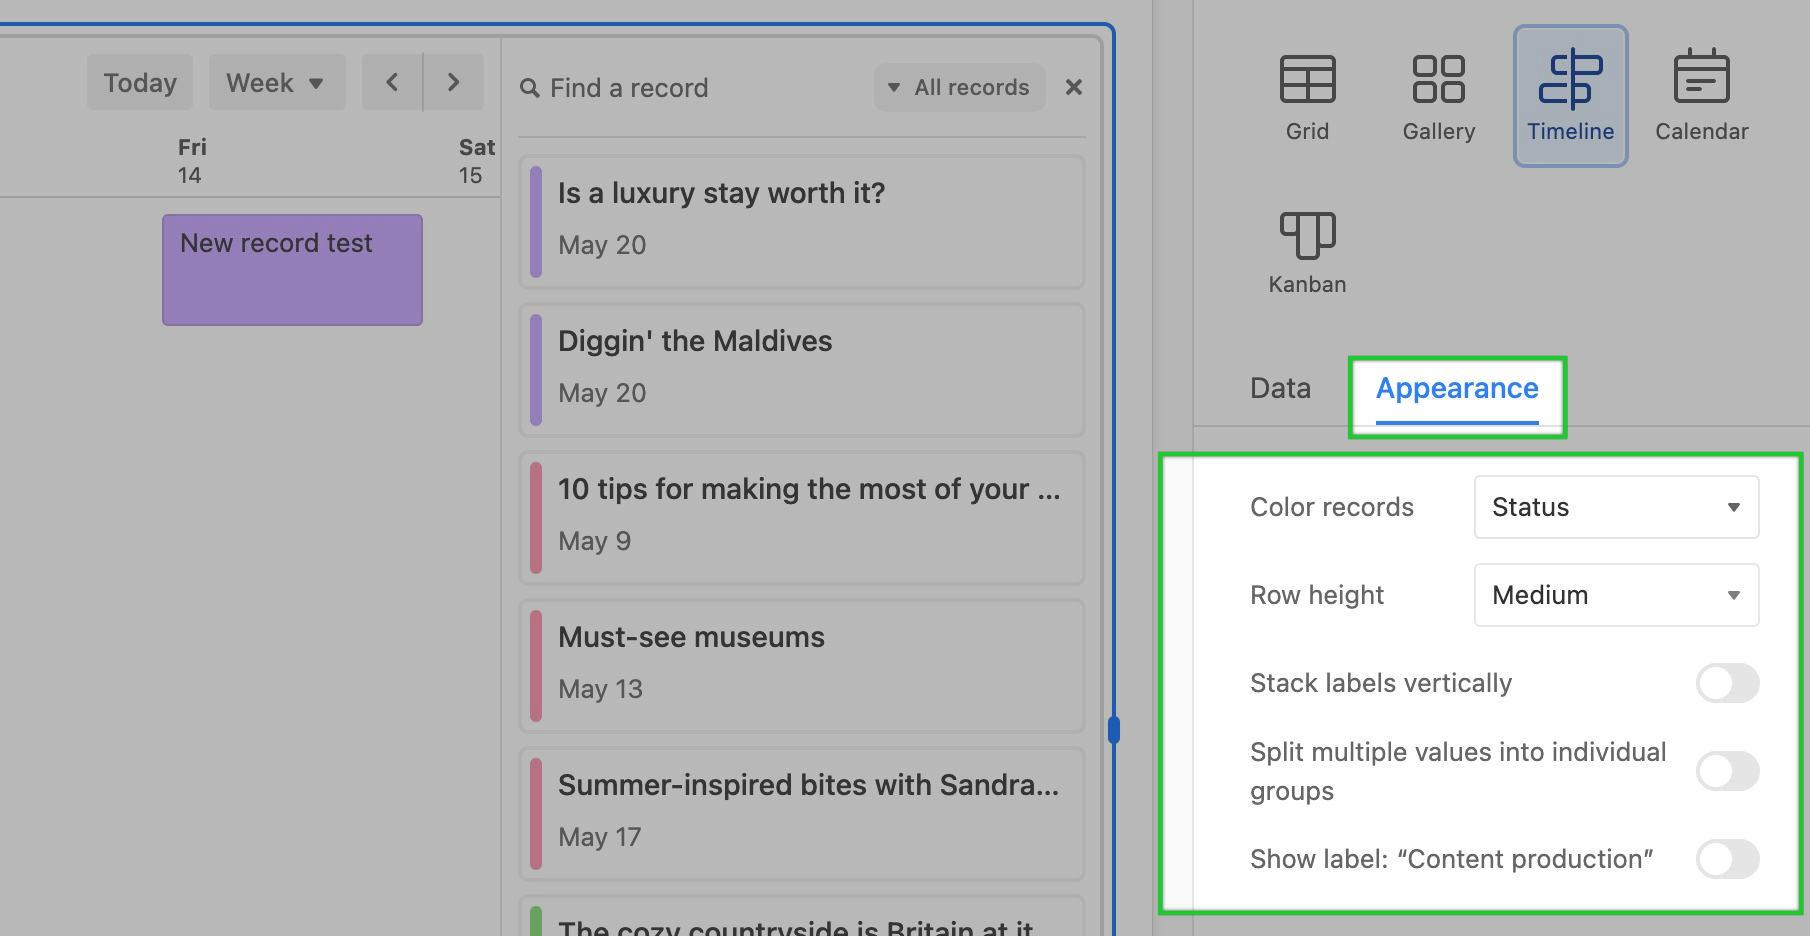
The last thing to do is click the Appearance tab and configure the available options. Here, you can:
Color records by a single/multi select field or conditions
Set the Row height for timeline records
Toggle whether or not to Stack labels vertically. Note that this option isn't possible if the row height is set at Short.
Toggle the option to Split multiple values into individual groups. For a more comprehensive understanding of this feature, please read the section at this link.
Finally, you can toggle on or off the name/label of the timeline element.

Configuring date settings in a Timeline element
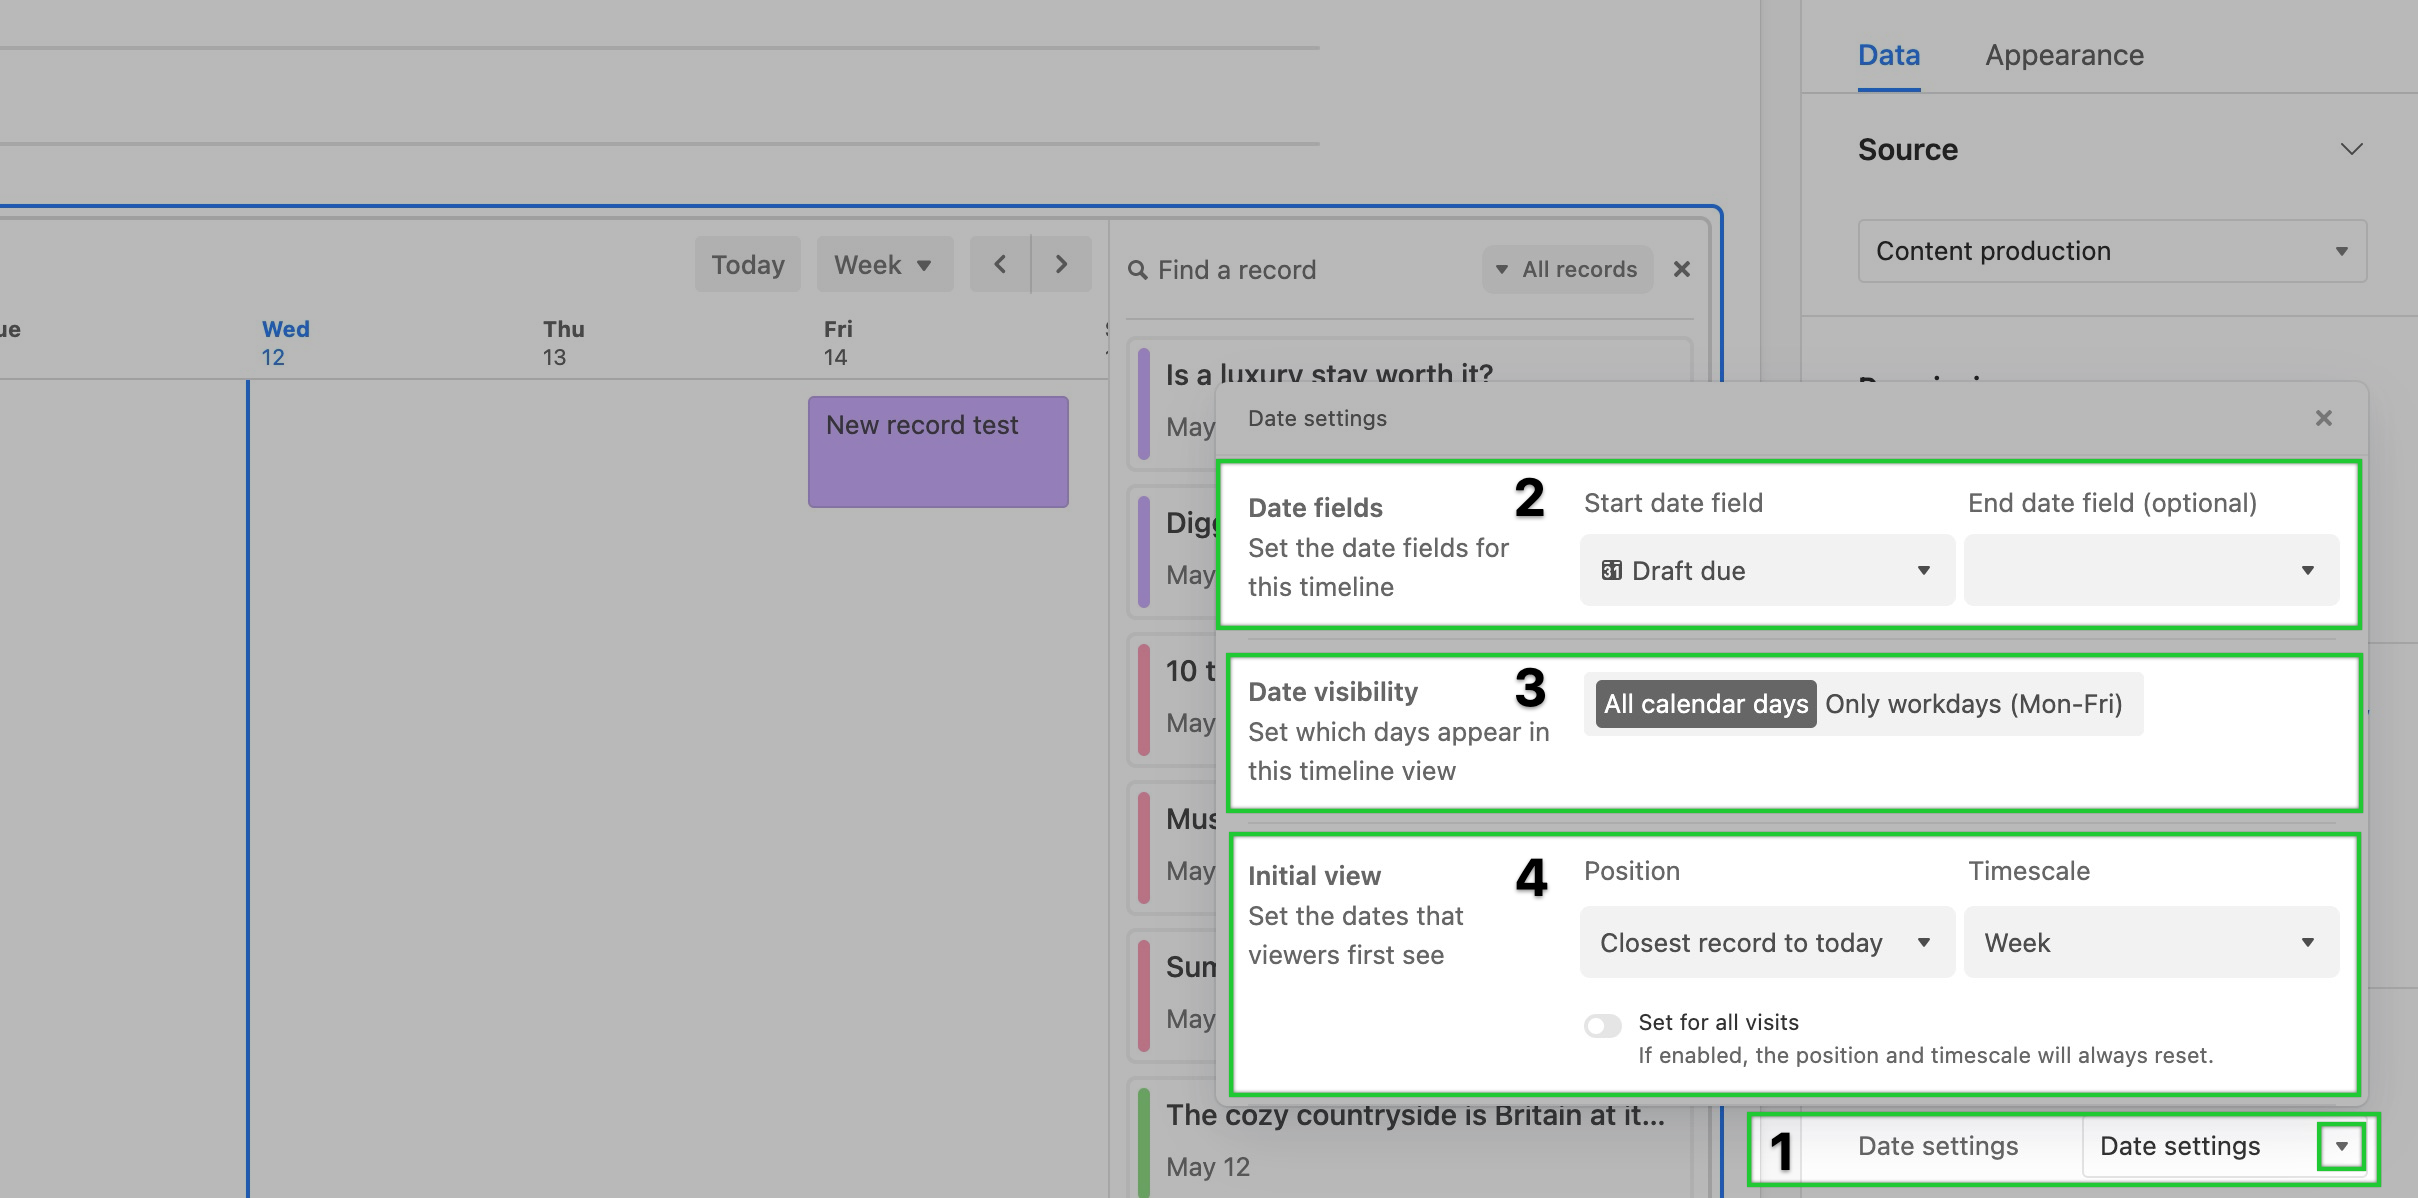
To configure the Date settings for a timeline element:
Click the Date settings dropdown in the Data tab of the timeline element configuration sidebar.
Set which date field from the underlying base will act as the Start date field in the timeline element. Optionally, you can also choose another date field from the underlying base to be the End date field.
Set the Date visibility on the timeline. If you choose to show only workdays (Monday through Friday), then you'll see the additional option to set up a comma-separated list of holidays to hide within the timeline element.
Last you'll set the initial view when the interface containing the timeline element first loads. This includes setting the Position the timeline will appear. There are three options to choose from:
Closest record to today (Whichever past or future record is closest)
Today (Will navigate to the day that the user is loading the interface)
Exact date (A static date of your choosing)
Then, you can set the timescale of the timeline element. Options include: Day, Week, 2 weeks, Month, Quarter, and Year. Interface collaborators can always adjust this timescale later while they are interacting with the timeline interface element.
Finally, choose whether the Initial view will only show the first time the interface is loaded (Toggle off) or reset each time the interface page containing the timeline element is reloaded (toggle on).
