All plan types | |
Owners/Creators - Because the steps below involve creating new fields and automations, Creator permissions are required in order to perform these actions. | |
Platform(s) | Web/Browser, Mac app, and Windows app |
Related reading |
|
Learn how to use Airtable Automations to track the amount of time a record maintains a specific status. This can be helpful for teams who need to stay on top of how long a record stays in each stage of a process. Automations are helpful in this scenario because they can be used to input a static date and time into a date field based on when the status field changes. This would otherwise not be possible without leveraging a custom API call or a third-party tool like Zapier.
Use case scenario for timestamping
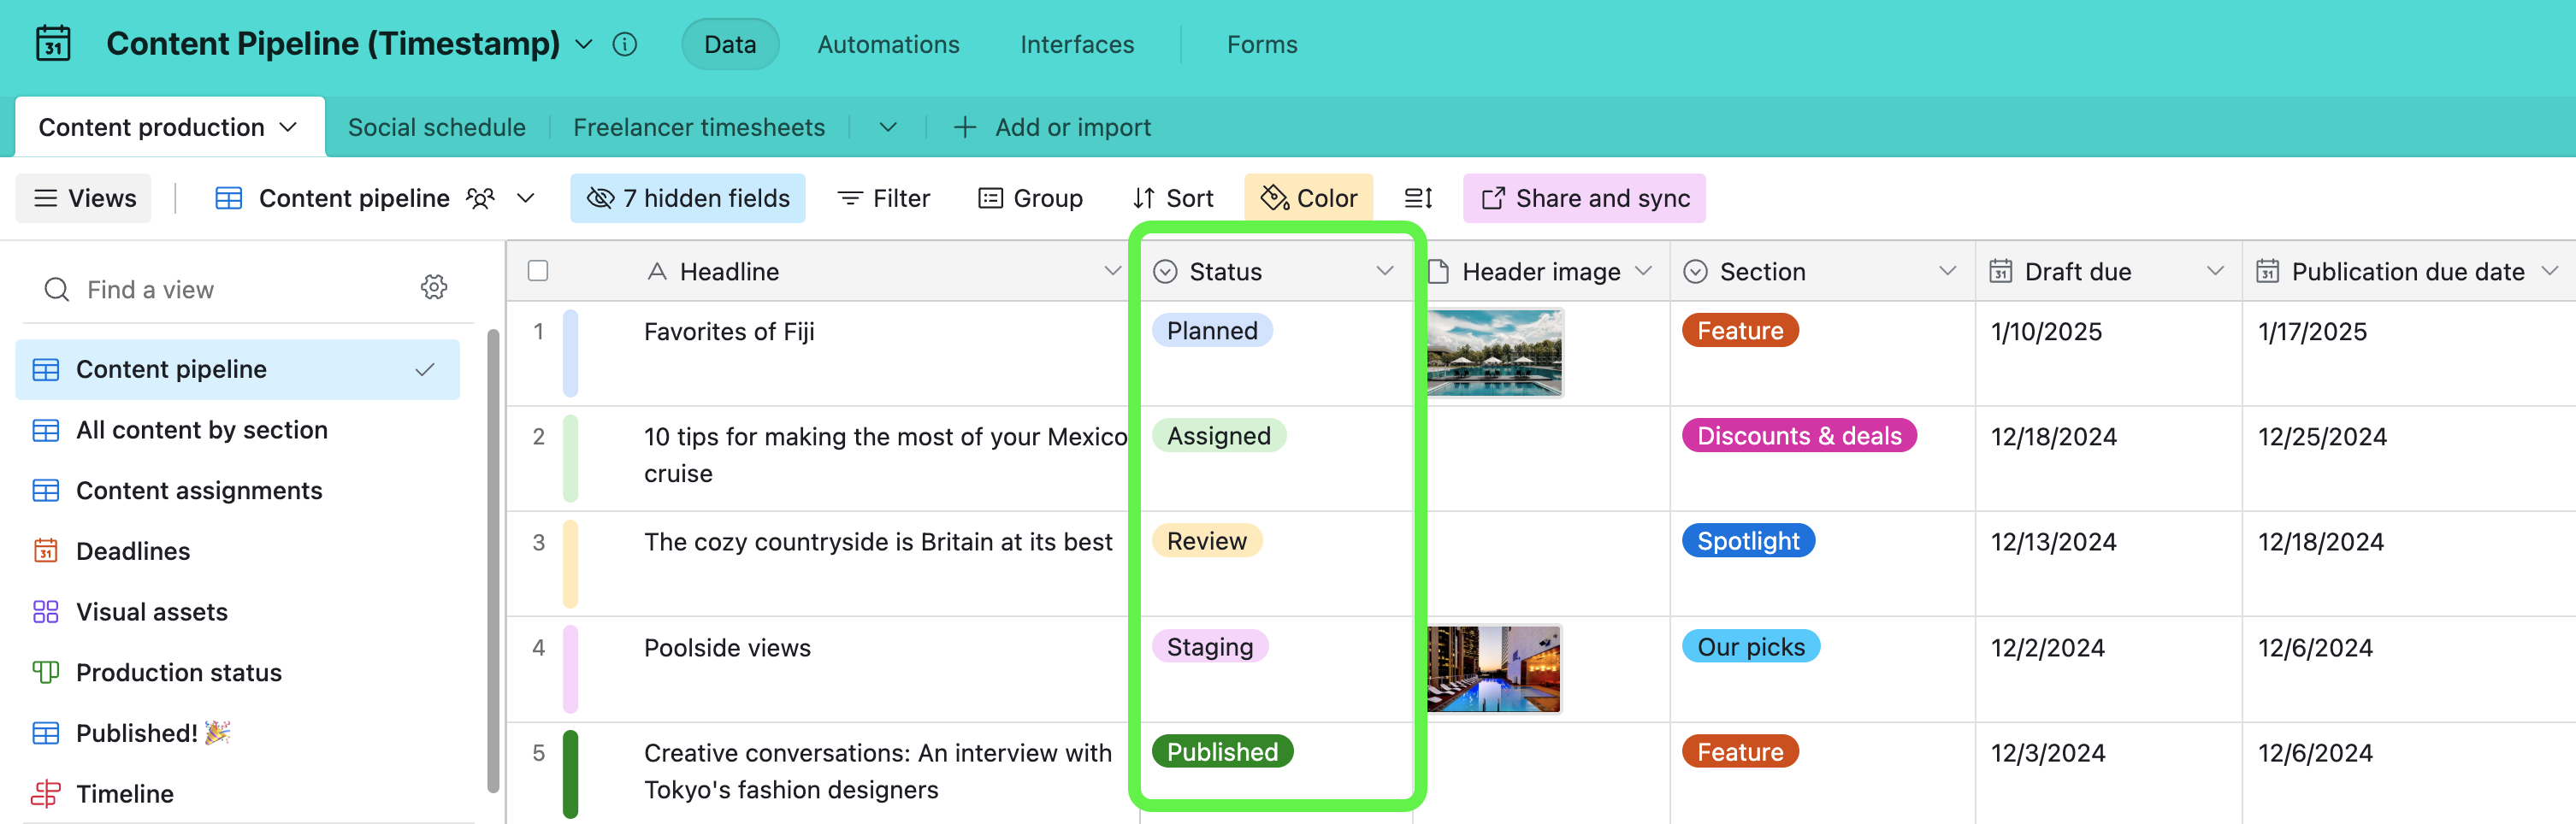
We'll use a scenario where a content marketing team wants to track how long blog articles in their development queue spend in each stage of their process. The end result is valuable data that can provide insights into their internal processes. Focusing on new blog content, each new article can move through five different stages:
Planned
Assigned
Review
Staging
Published
Base design and setup
A few tips before reading ahead:
In the base that you are looking to apply these concepts, you'll likely use different names. Remember, you might use different values in later sections on formulas and automations.
You might need to modify the base that you are working in. It's a good idea to duplicate the original base and practice building in the copy to make sure everything looks correct before applying the concepts to the original base.
Step 1: Designate a status field
Use a single select field to designate each of the different statuses. In our example, we call this the "Status" field, but you might name this something else depending on your individual workflow's needs.
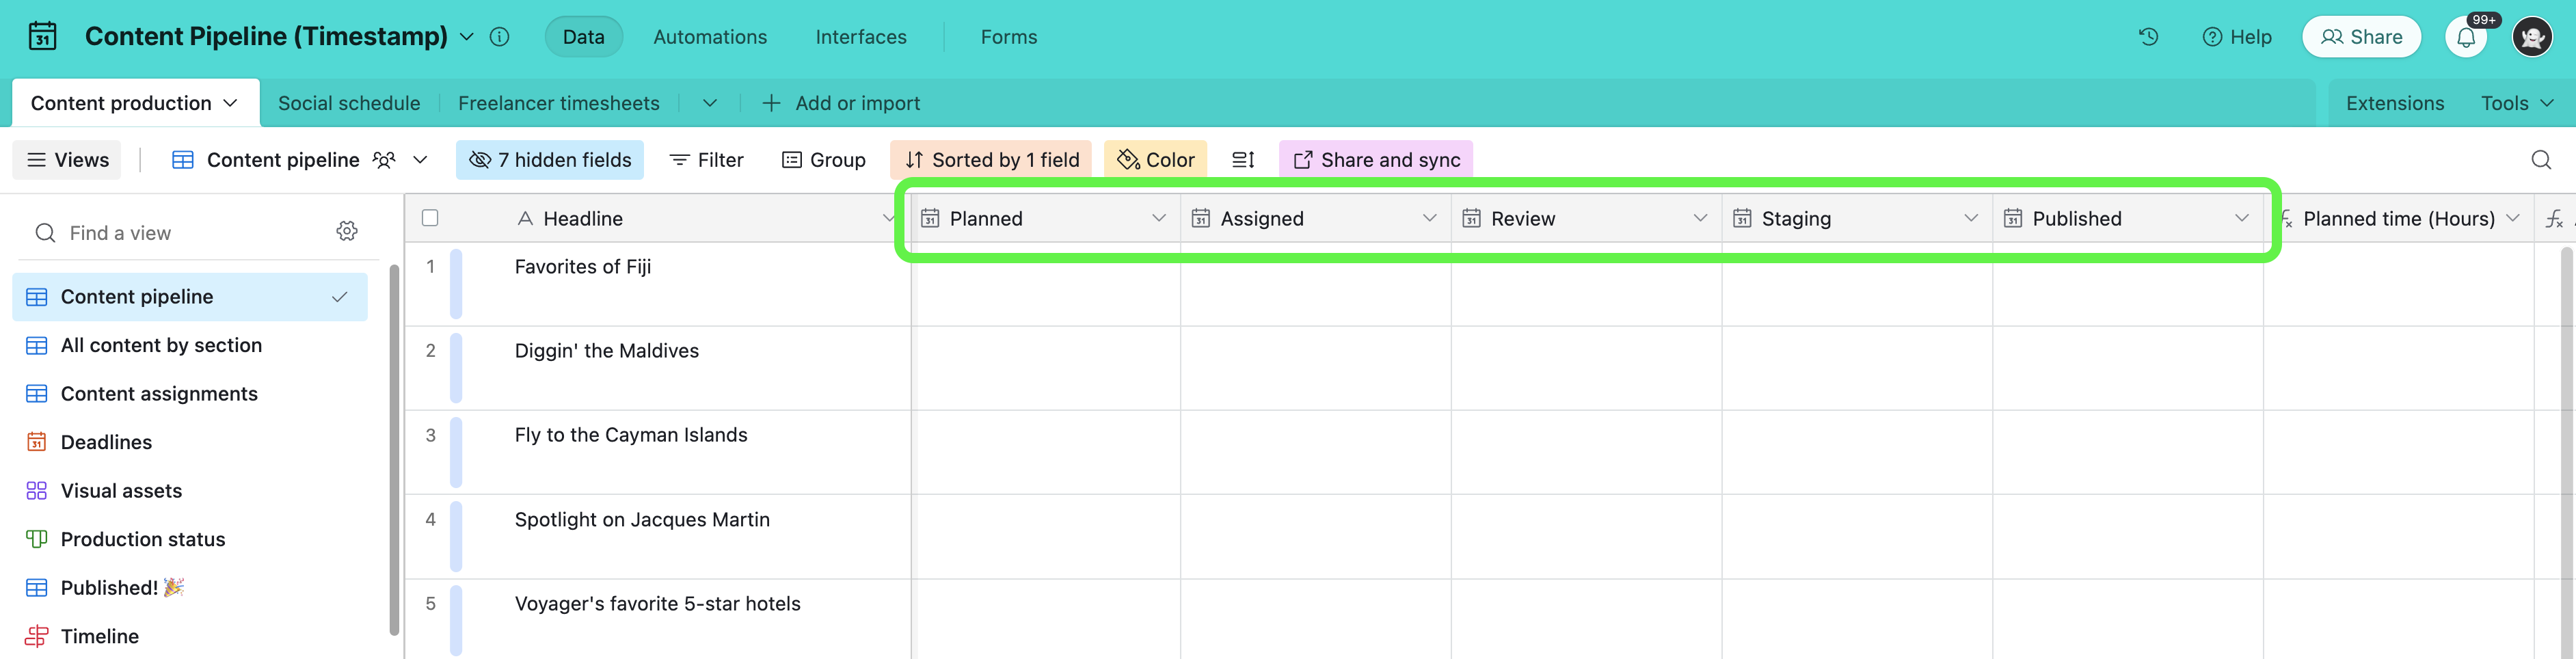
Step 2: Create date fields to timestamp each status change
To timestamp when a record changes to each unique status we need to create five date fields; one each for {Planned}, {Assigned}, {Review}, {Staging}, and {Published}. These fields will be populated later by the automation.
Configuring a timestamp automation
Now that the required fields have been configured we can start building an automation. We'll create a single automation with five conditional groups that will map to each of the status date fields we created in the last section. Follow the steps below to create the entire automation.
Note
The automation we are building can't detect the current "Status" field of existing records, because the automation trigger relies on a change of state. Therefore, for any existing records, you'll want to manually fill in the approximate date/time each record went into each of its statuses. Once the automation has been turned on, all future records that are created and updated should have each status date field filled in automatically.
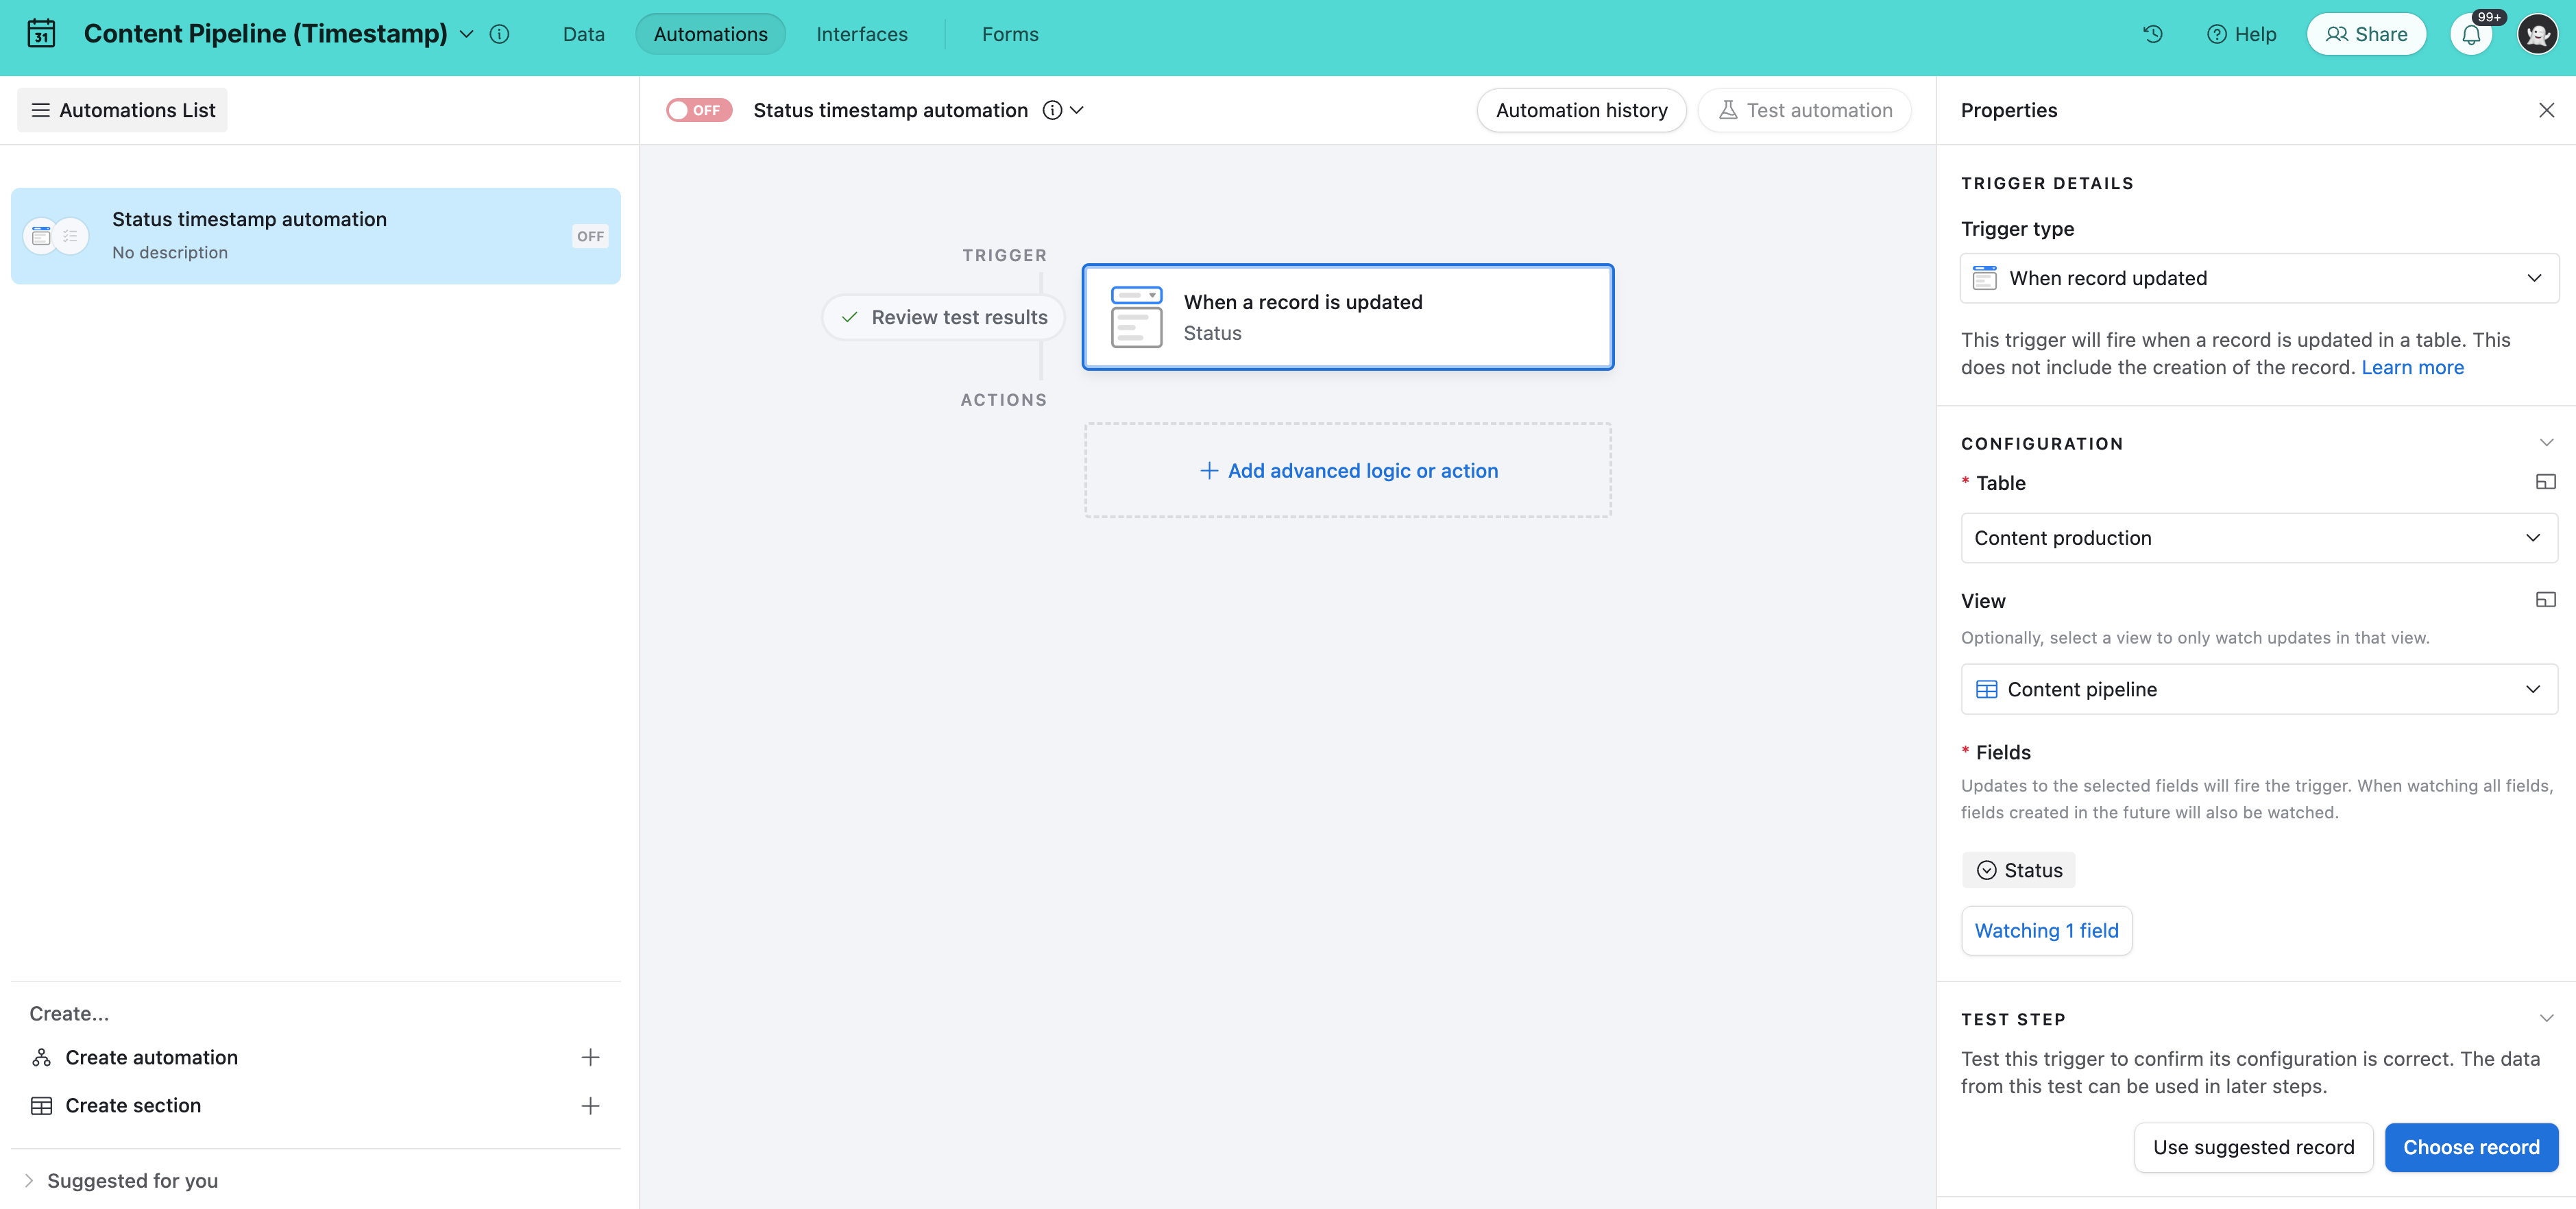
Step 1: Configure the automation trigger
Start by navigating to the Automations section in your base located in the top left part of the screen. Then click Create automation + to begin the setup process.
Select the When record updated trigger.
Next, choose the name of the table you want the trigger to reference. In our case, this will be the "Content production" table.
Then, configure the trigger to only watch for when the "Status" field has been updated. You can skip the optional view selection or Select a view if you only want this automation to be scoped to activity in a certain view.
Test the trigger before moving on to the next step.
Step 2: Configure conditional action groups
Click + Add advanced logic or action, then choose the Conditional logic option.
This will open up a menu to configure the first conditional group. This first group will be set up to only run the action we set next when the "Status" field is set to the "Planned" status option. Then, click the + Add action option.
Now, we want to set up the action so that the record will be automatically timestamped with the datetime value when the automation was run.
First, choose the Update record option from the list of actions.
Next, choose the same table from the trigger step, which in our use case is called "Content production."
Then, you'll want to set the Record ID to be the same record from the trigger step. Click the blue plus sign button to insert that value from the token picker.
Next, under Fields you'll click the + Choose field option and select the "Planned" date field.
Finally, click the cogwheel icon. Then, click the Dynamic option. Next, click the blue plus sign button. Here, you will select the A specific time option and then click the Actual run time token. This is the run time of when the automation was triggered to run.
You’ll need to repeat this for each of the 4 additional statuses/status date fields in order to timestamp each date field as the content production status changes. To timestamp each of the status date fields, we'll need to have one unique conditional group per status date field. Since the first conditional action group is already configured we can quickly duplicate it and adjust the values in order to update each of the last four status date fields.
After duplicating the conditional group, click into that group and then click Edit conditions to change this conditional group to run the update record action when the "Status" field is marked as "Assigned."
Last, click into the Update record action. You'll need to delete the previous group's "Status" field and follow the same steps to dynamically add the "Last modified time" to update the corresponding status date field.
Repeat these steps three more times and adjust the settings accordingly to create conditional action groups for the remaining status date fields.
Once all five conditional automation actions are configured, each date field will be timestamped whenever its corresponding status is changed. For example, when a record changes status from "Staging" to "Published," the "Published" date field will be timestamped with the exact date and time when the automation was triggered to run.
Here’s a video to help assist you with setup:
Step 3: Test the automation and turn it on
Be sure to test the automation you’ve configured and turn it on when you are ready. Then, monitor the automation behavior in real time in your base. We recommend creating a test record (as long as your base doesn’t have other dependencies to consider) to try out different conditions related to the automation you configured.
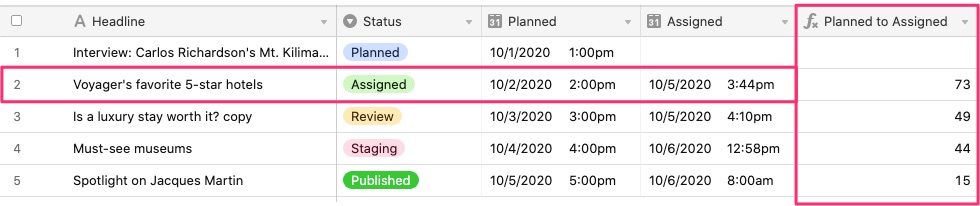
Use formula fields to calculate each status duration
The final step is to calculate the duration that a record spent in a particular stage. In the example below, we'll calculate how long an article spent in the "Planned" stage before moving to "Assigned." You can then modify the formula values to calculate the time spent in each status.
Note
Remember, you'll also need to adjust the values below to fit the names of the fields in your particular base if they don't perfectly align with the example used in this article.
Step 1: Create the first time difference formula
To start, add a new formula field. Then copy in the formula below (making adjustments for field names if yours are named differently).
IF(
    AND(
        {Planned}, {Assigned}
    ),
    DATETIME_DIFF(
        {Assigned},
        {Planned},
        'hours'
    )
)
The formula will check to make sure that both the {Planned} and {Assigned} fields have a date entered, and if they do, it will calculate the time difference between those dates in hours. If you would rather use a different time output, then check out our article on unit specifiers for DATETIME_DIFF() formulas here.
Step 2: Duplicate and modify formula fields
To get the difference in time for the other stages, duplicate the formula field and adjust the values for each of the different statuses. For example, the next time difference to calculate is the time between "Assigned" and "Review", so the adjusted formula will look like this:
IF(
    AND(
        {Assigned}, {Review}
    ),
    DATETIME_DIFF(
        {Review},
        {Assigned},
        'hours'
    )
)
Now you should have four separate formula fields that each output the number of hours a record spent in each stage of the content process.
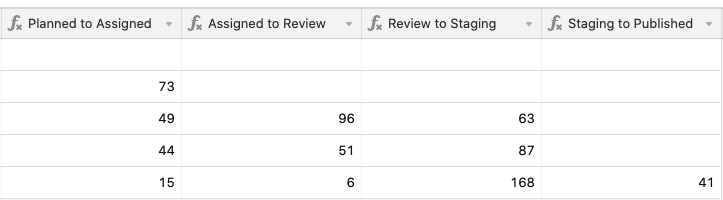
Step 3: Create a total time to "Published" field
You can also calculate the total time spent from "Planned" status to "Published" status by creating another formula field that sums together the time values from each of the four fields that you just created. That formula could be as simple as:
{Planned to Assigned}+{Assigned to Review}+{Review to Staging}+{Staging to Published}At this point, you have completed the setup for this timestamp use case. If you haven’t already turned on the automation created earlier, make sure to test it out and do so at this time. Nice work!
FAQs
What format is the “A specific time” / “Actual run time” token? How is timezone factored into the way this token is used?
The “Actual run time” token is formatted in ISO to correspond with the way date fields are formatted on Airtable’s backend. However, the ISO time should be converted to the timezone of the user looking up the record’s timestamped date.
Just a reminder that the date field being used may or may not show time depending upon the configuration of the date field.
Are there any limitations of the “Actual run time” automation token with regards to time in a date field?
If time hasn’t previously been toggled on in a date field that is updated by an automation’s “Actual run time” token, then no time values can be passed via the automation run. In these instances, when time option is toggled on in a date field, the time will default to midnight / 12:00 am.
If time has previously been toggled on, then the automation will pass the time value onto the date field being updated.