Plan availability | All paid plan types with varying limitations |
Permissions | Owners - Accessing the information outlined in this article requires owner permission in the workspace where you are wanting to manage sync integrations. |
Platform(s) | Web/Browser, Mac app, and Windows app |
Learn how to use the Airtable Sync integration feature to bring information from an external application into Airtable as a new table in your base. Sync integrations are always a one way sync from the external application into an Airtable base, so changes made in Airtable cannot be synced back to the external application that you are syncing with.
Sync integration access by plan type
Airtable sync lets users import data from external sources like Google Calendar, Zendesk, Box, and more into a base. When a user on the Business or Enterprise Scale plan creates a table in a base, under the "Other sources" tab if they'll have the option to select from several sync integrations.
Sync integration category | Included integration types | Access by plan type |
|---|---|---|
Box, Google Drive, Google Calendar, GitHub Issues, GitHub Pull Requests, and Miro | All paid plans | |
Emailed Data, Sync API, Tableau Online, Jira Cloud, Salesforce, and Zendesk | Business and Enterprise Scale plans only | |
Jira Server/Data Center and Adobe Experience Manager | Enterprise Scale only |
Managing syncs via the sync activity log
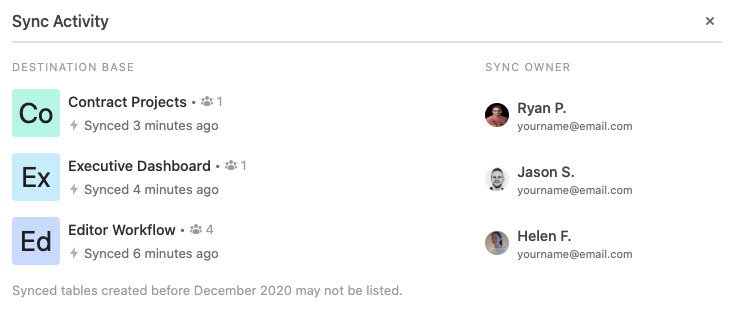
To help understand how data is being synced you can use the sync activity log to see which bases can currently sync from a specific base, as well as the owners of the synced destinations.
To manage your sync activity log:
Open your Airtable home screen.
Open your preferred base.
Click Share and sync.
Click Link settings.
Once you open the sync activity log, we’ll show entries for:
Every sync destination base ordered by the last time it synced
The most recent password change for the shared view
The most recent email domain restriction change for the shared view
The most recent time the shared view link was regenerated
If you have access to the base, we’ll also show you the base name and icon.
Accessing sync log activity from the base share menu
Open your Airtable home screen.
Open your preferred base.
Click Share in the top right.
Click View on the bottom left side of the base share menu.
Click the ⌄ icon next your view's name to find a another view.
The toggle next to the view's name will appear green, indicating that the view has sharing enabled.
If the shared view has the "Allow data in this view to be synced to other bases" option enabled, then there will be a three line and lightning bolt icon you can click to access the sync activity log.
Accessing sync log activity from the view share menu
Open your Airtable home screen.
Open your preferred base.
Click Share and sync.
Select Sync data to another base.
When a view doesn't have a sync(s) configured, an "Inactive" status is visible.
After enabling "Allow data in this view to be synced to other bases," click View sync activity to open up the sync activity log.
Managing sync integrations when over limits
Note
This management modal will only appear if the workspace you are working out of is over limits.
There are times when your workspace may be over the sync integration limits for the plan it is on. In these cases, we have a sync management tool that can be found on that workspace's settings page. Ultimately, this allows workspace owners to:
View all current sync integrations across all of the bases in a workspace.
See when and who added each sync integration.
Enable or Disable specific sync integration types.
Allow new sync integration types to be accessed.
To find the management modal:
Open your Airtable account overview.
This requires Owner permissions at the workspace level.
Open the workspace that is over the sync limits.
Click Usage.
Click the Manage sync integrations.