Paid plans only with varying limitations | |
| |
Platform(s) | Web/Browser, Mac app, and Windows app |
Related reading | Creating an automation - Learn how to set up your first automation in Airtable. |
Using AI in automations
With AI in Airtable Automations, you can combine the power of AI to build automated workflows such as:
When negative customer feedback is submitted, summarize it, and share it in Slack with the appropriate team(s)
Summarize team updates on Friday and send an email of the summary with the team every Monday morning
Fill out an interface form, then have AI generate a guide in google docs and share the draft with content editors
Automations that involve the Generate with AI action will incorporate at least three components, but can certainly contain more depending upon the complexity of the workflow that you are wanting to automate:
An automation trigger that will tell Airtable to begin the automation and queue up the AI to run the prompt.
A "Generate with AI" action step with the prompt, randomness, and model sections configured.
One or more automation action steps that takes the content generated by the AI and does something with it - writes it to a record in Airtable, sends it in an email, posts it to Slack, etc.
Configuring an automation using the “Generate with AI” action
In this example, we will us AI in an automation that will send an email every Monday morning with a summary of all meetings last week.
Note
You'll want to adjust any sample settings listed in the walkthrough below to match the field, view, and table names in your base. Use this example, just as a reference to think about the overall structure of building this type of automated workflow.
Step 1: Add an automation
To start creating an automation, click on Automations in the upper left corner of an open base.

Step 2: Choose a trigger
Create a new automation with an "At a scheduled time" trigger set to run every 1 week on Mondays at 6:30 a.m. Test the trigger and move on once the trigger successfully tests.
Step 3: Add a “Find records” action
Next, we will use a "Find records" action to find only meetings from the past week. In this example, we will set the "Table" to be Weekly meetings, then "Find records based on" a View, and then set the "View" to be This past week's meeting.
If you don’t already have a view set up like this in your base, then you will want to create a view that has filtering conditions set to only show meetings that occurred in the past week.
Alternatively, you could also set conditions to accomplish this. Test this step until it tests successfully and then move on.
Step 4: Add a “Generate with AI” action step
Next, you'll add the Generate with AI action step. Here you will configure the prompt, randomness, and model. Let's focus on the prompt since randomness and model are covered in this article. For the prompt, we want a mix of static text to give the AI model context along with the dynamic details about the meeting that the AI model can interpret to generate a summary. Here's an example prompt to get your creativity flowing:
You are a note-taker for our team's meetings throughout the week. Summarize, the
{List of 'Notes'} that were taken during each of the meetings.
Be sure to also include the meeting date found here:
{List of 'Meeting date'}, as well as a list of who attended the meeting located in this field:
{List of 'Attended'/List of 'Name'}
Here is an image of what that looks like in Airtable:

Note that the {List of …} tokens inserted using the blue plus button will be highly specific to the automation you are building as well as the underlying base's architecture.
Step 5: Add a “Send email” action step
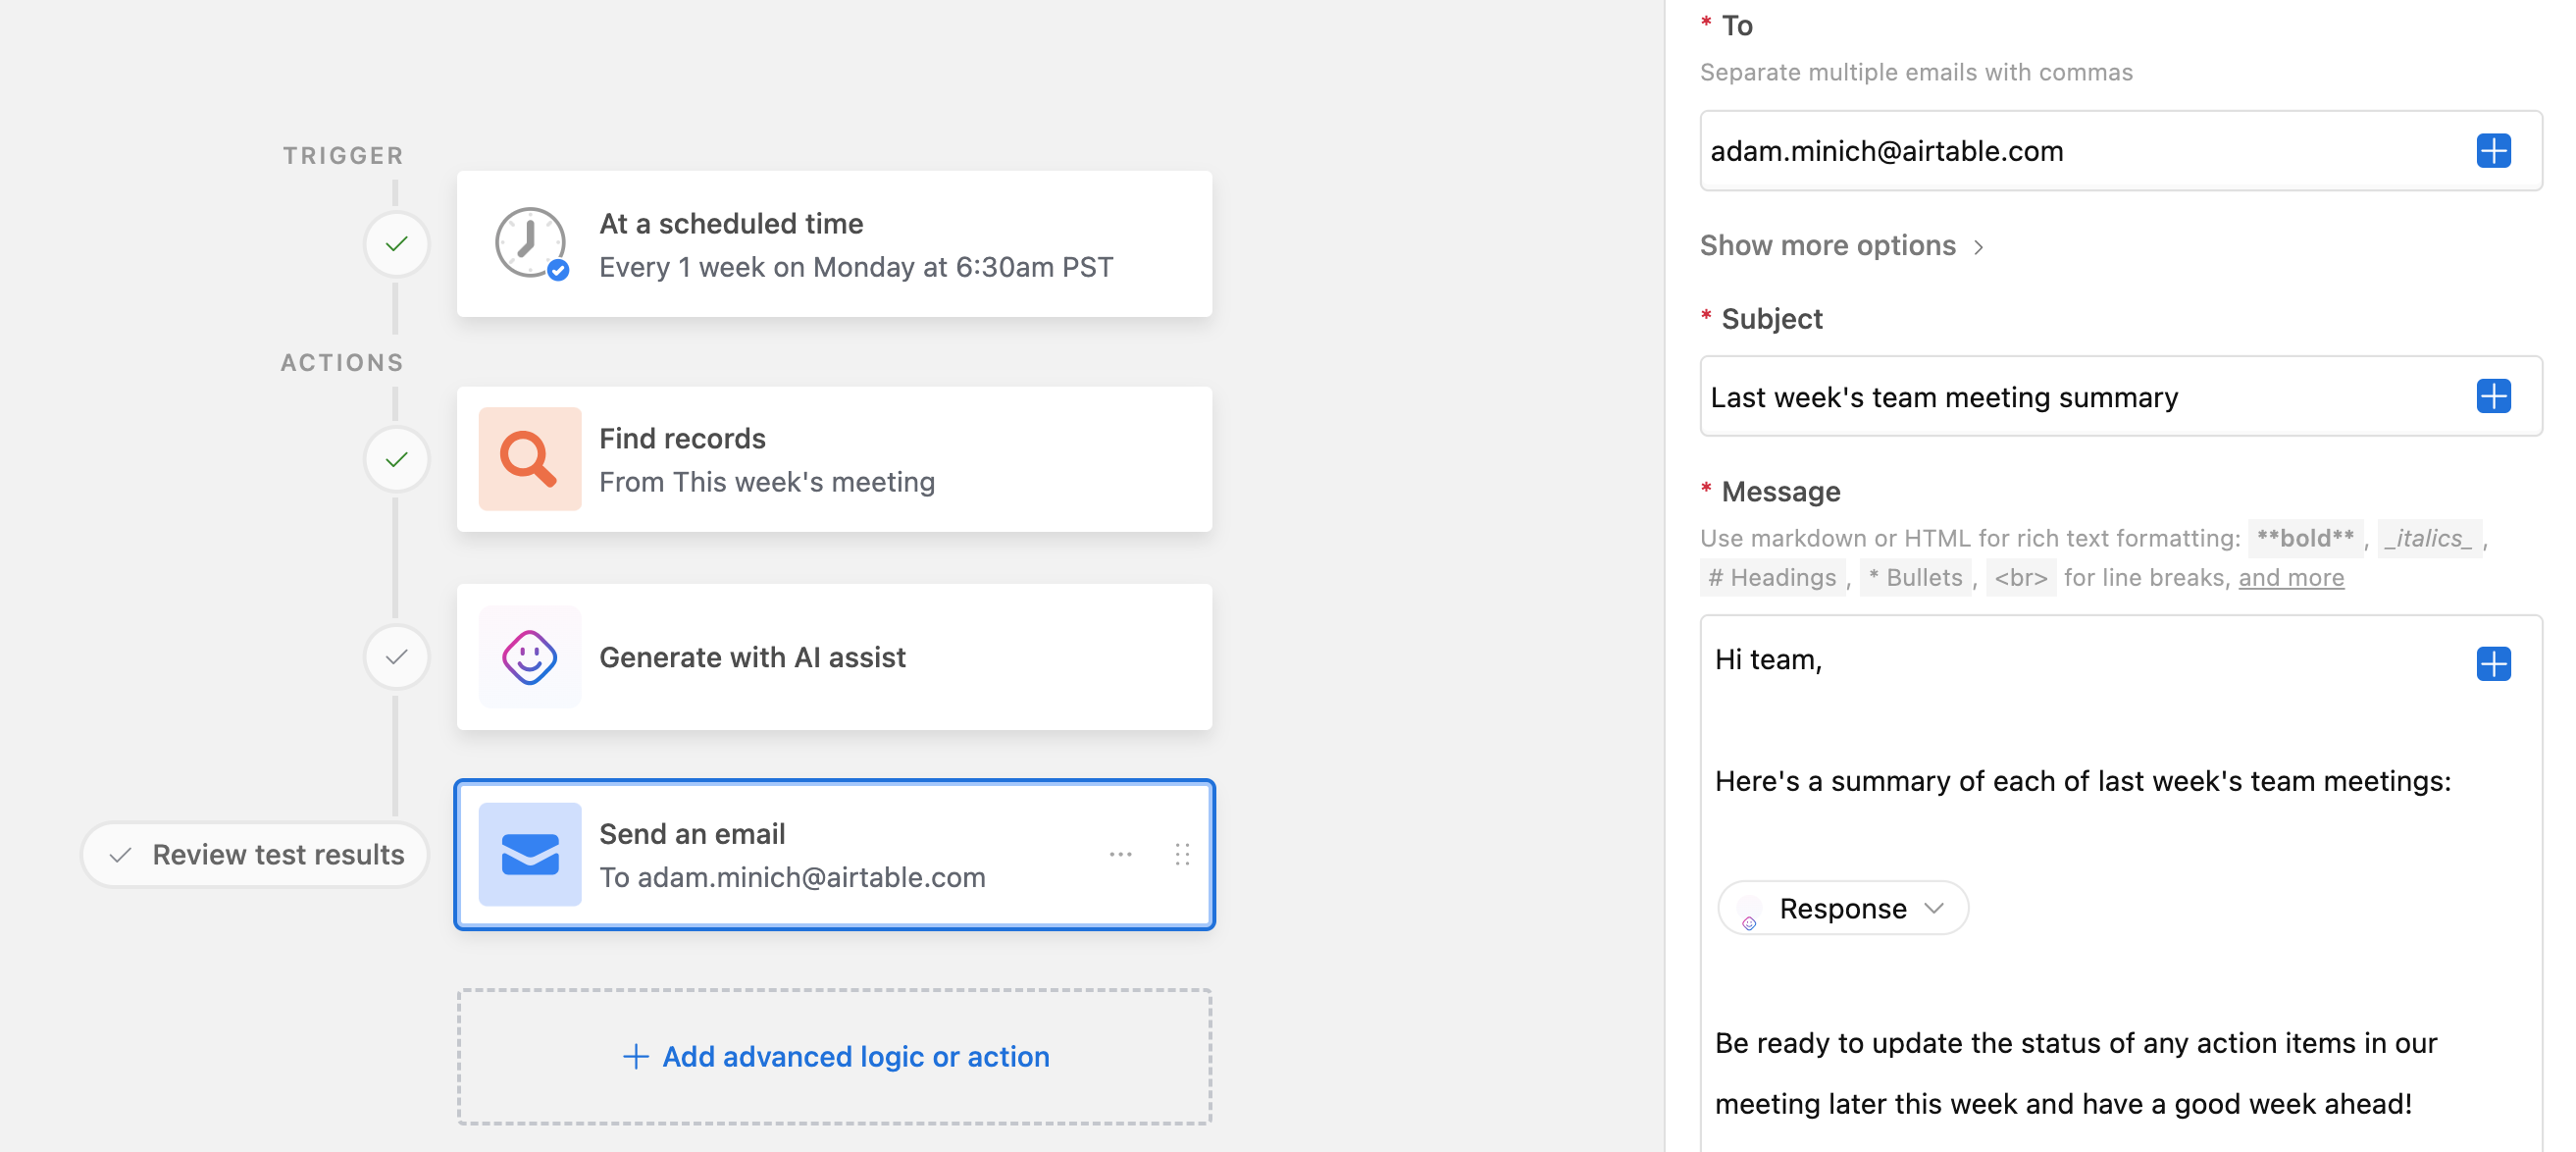
You will also want to add a Send email automation action so that you can send the summarized meeting notes to your colleagues via email. Configure the "To" and "Subject" fields according to your needs. Then, in the "Message" you'll want to insert a token of the Generate with AI action's "Response." This response is the output that the AI generates based on the settings you configured in the prior steps of this automation. Here's an example of what that configuration might look like:

Limitations
The total number of words in your query and response must be under a certain amount set by the AI model being used on the backend and Airtable’s automation system. This includes the words in the fields referenced by your query. If you exceed these limits in your query, you will see an error message. If the AI's response exceeds the limits, the text will be truncated.
Lower powered AI models: Up to ~12,000 words
Higher powered AI models: Up to ~90,000 words
In addition to the model word limitations, the prompt cannot exceed 64,000 characters.
Note
For more information about model types and credit limitations is available in this article.
FAQs
I’m running into an error with my automation, what do I do?
Before contacting support, we recommend that you use this support article to troubleshoot common errors and mistakes in automation configurations.