Plan availability | All plan types |
Permissions | Owner / Creator - Can configure interface page layouts Please consult this support article for a breakdown of Interface Designer permissions. |
Platform(s) | Web/Browser, Mac app, and Windows app |
Note
This element is only available in element-based blank layouts or legacy record review and record summary layouts.
The calendar element in Interface Designer functions and appears similar to the calendar view in an Airtable base. This provides a visually pleasing way of seeing projects and tasks over time, planning out sprints, coordinating events, and much more. We'll cover the setup and functionality of the Calendar element below.
Adding calendar elements
If this is the first time you've added elements to an interface, please consult this help article first.
Find the Calendar element by clicking + Add element in the lower left portion of the interface editor.
You'll then place the element somewhere in the layout of your interface page. Don't worry if it isn't in perfect positioning yet, as you can always move the element later.
Next up, you'll need to configure the calendar's properties so that it performs and looks the way you want it to.
Configuring calendar element properties
Note
The “Editable” setting allows users interacting with the interface to add, edit, or delete records in the view element.
Element name and source
Now that you've placed the calendar element, you'll need to configure the calendar. The "Properties" box allows you to customize the Source, Data, and Appearance of the calendar. If you want to change the name of the calendar, then click the pencil icon near the top to edit that.
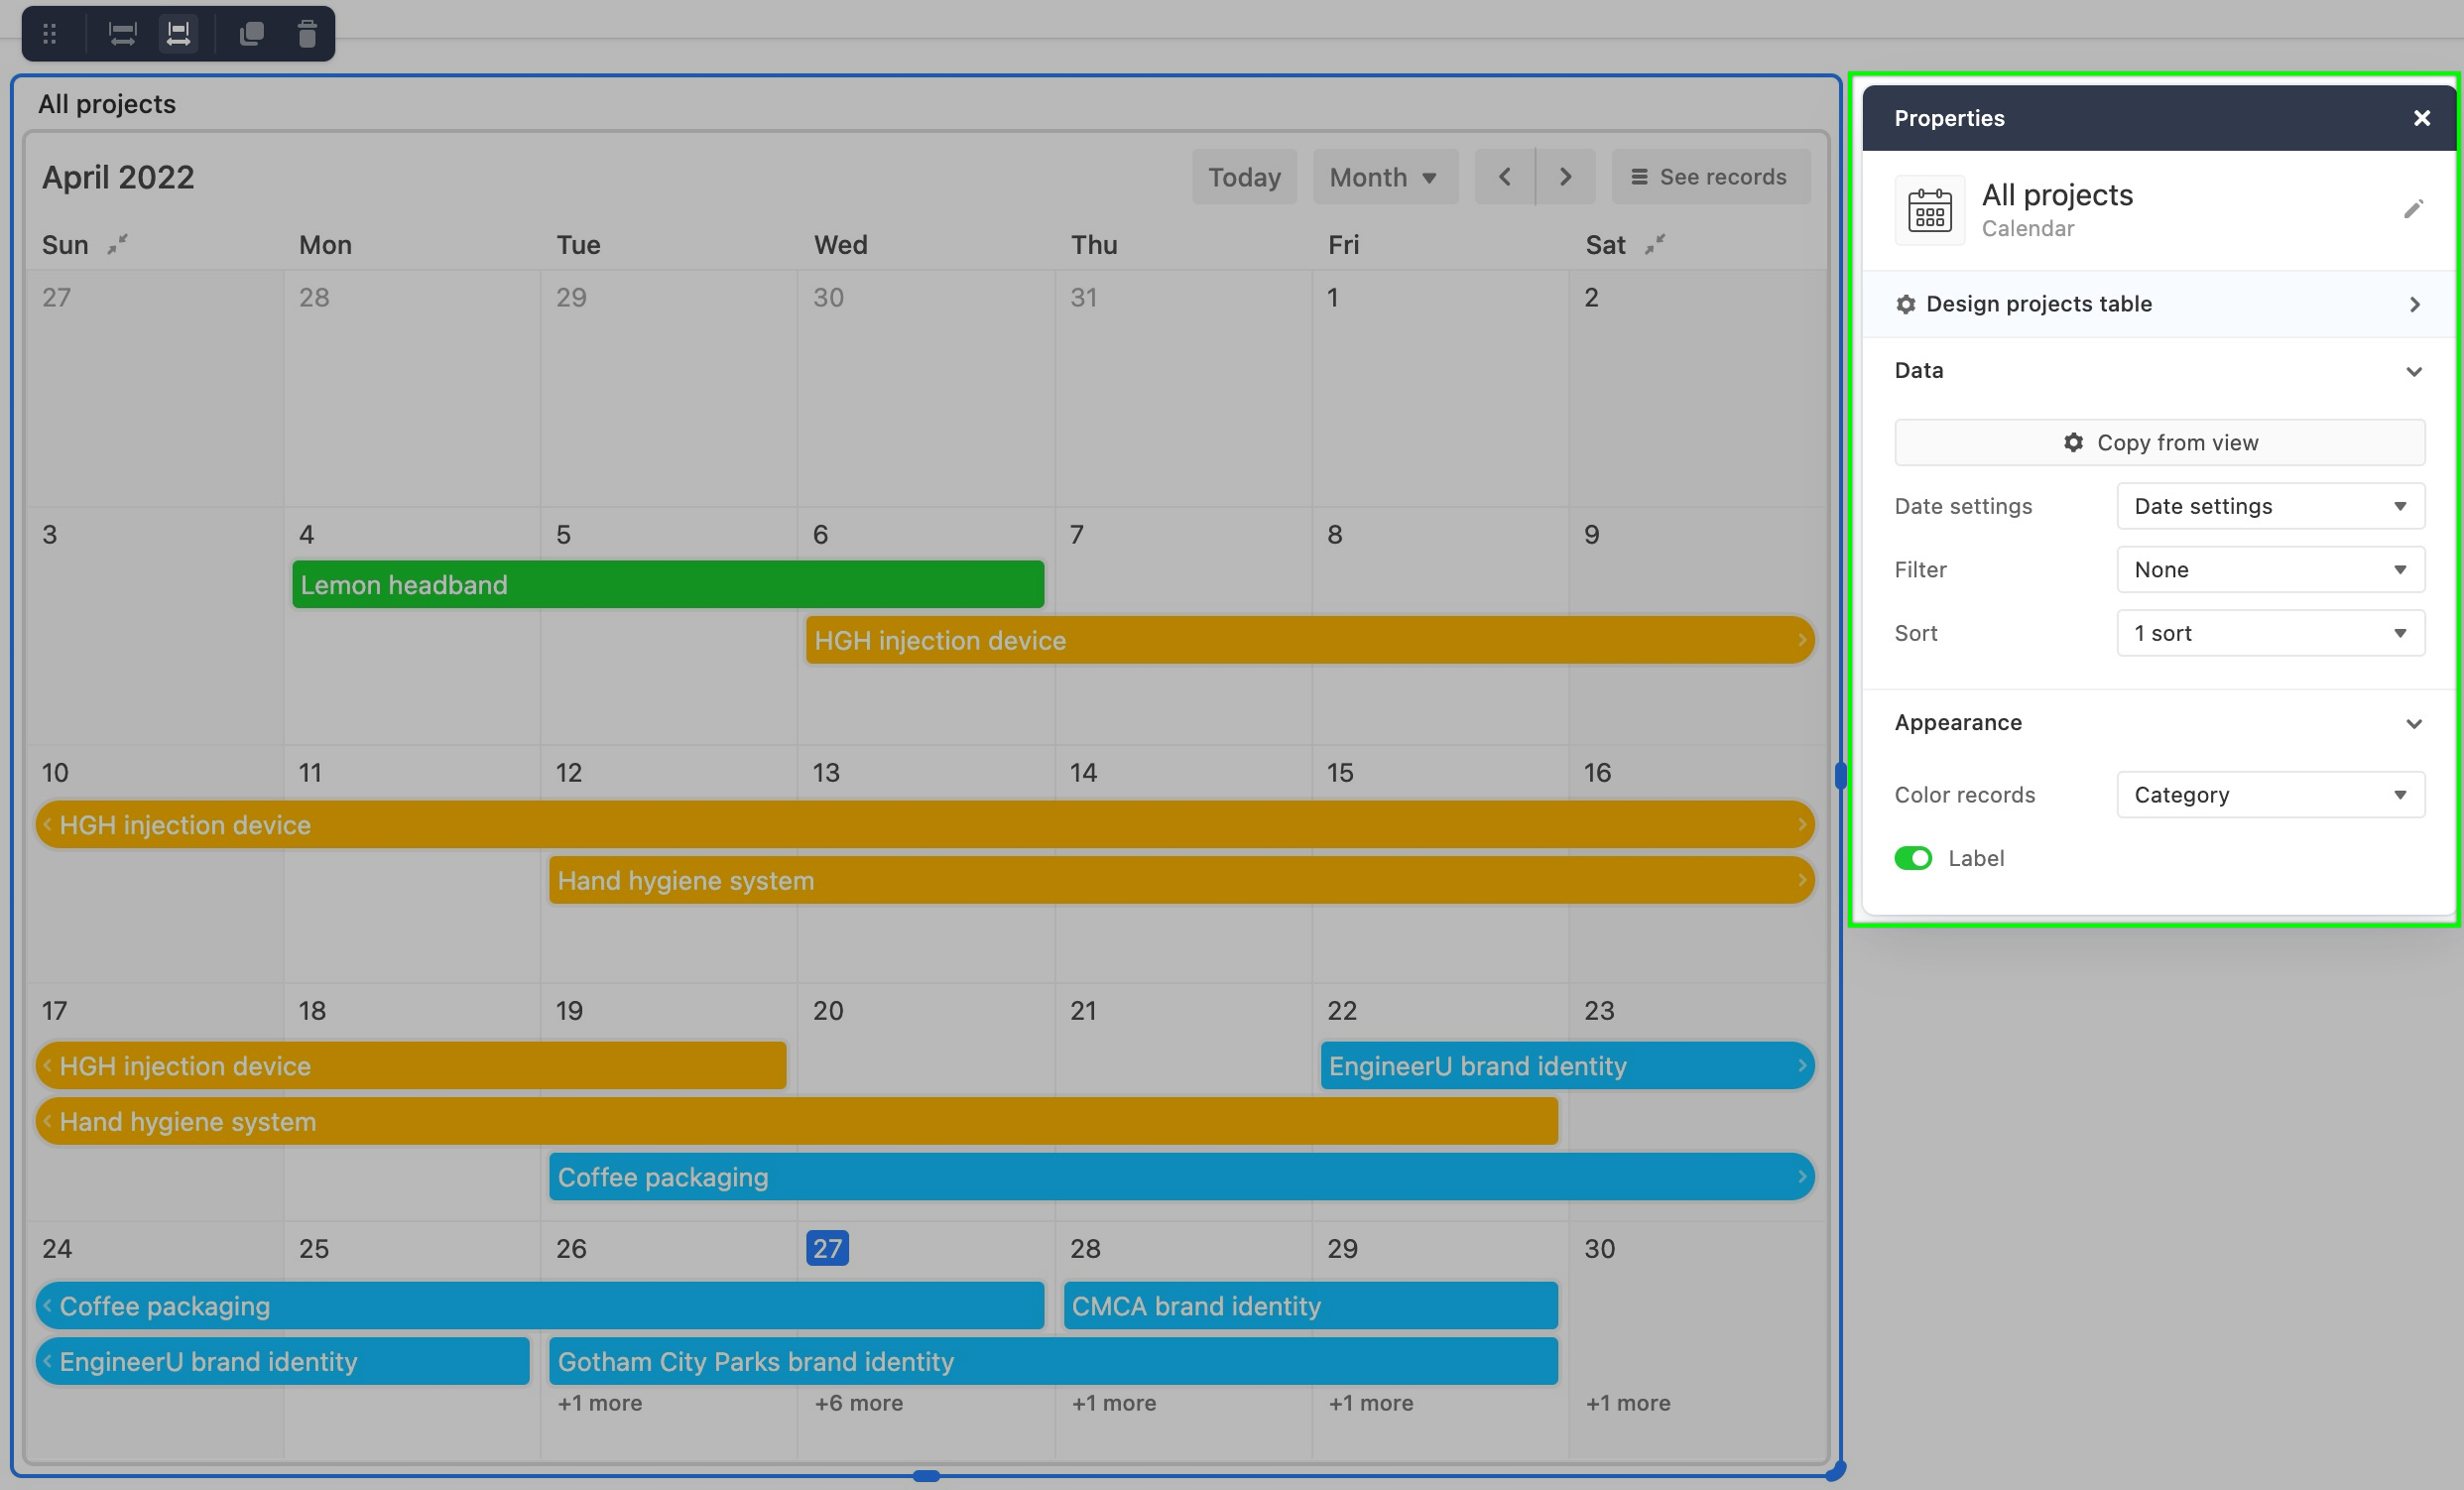
Next, you'll want to choose a source for your calendar. In this case, we will choose the "Design projects" table as our source.

Data adjustments
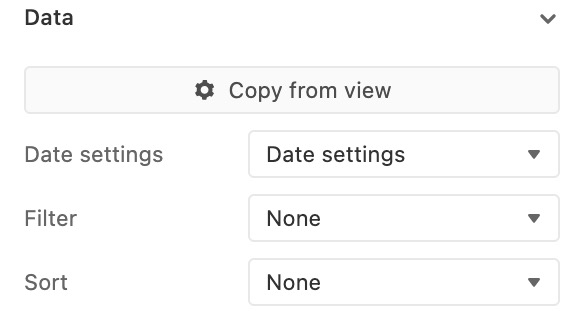
Then, you'll decide which data to show in the calendar. The "Copy from view" option will allow you to copy over settings you've already created in a view from your base.
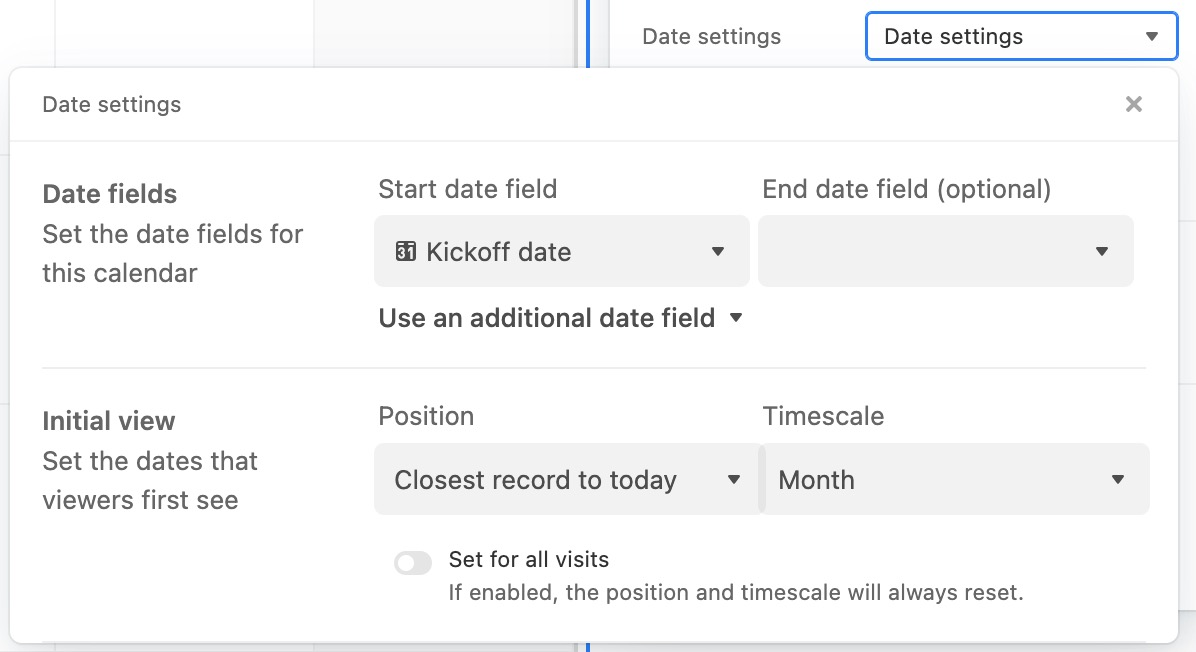
The "Date settings" section drop-down will show a menu of additional options to customize. Every calendar needs at least one date field to use in the "Start date field." However, the "End date field" is optional. You can also click the "Use an additional date field" option to add more event dates to the same calendar element.
The "Initial view" section allows you to set up the way that the calendar will initially appear to collaborators opening the interface. These options can be changed by the interface user, but it may be helpful to think of the way your team will be interacting with this calendar element. The "Position" field can be set in three ways:
Closest record to today
Today
Exact date
You can also set the "Timescale" of the calendar. Here, there are 5 settings:
Month
2 week
Week
3 day
Day
Lastly in this section, you can choose to enable the "Set for all visits" toggle which will reset the Position and Timescale to the settings you've configured each time the interface is visited or reloaded.
If there are any other filters or sorts you would like to add to the calendar, then you can add those now. You can even create a Filter element to allow collaborators interacting with this interface to set their own filters for the calendar.
Appearance
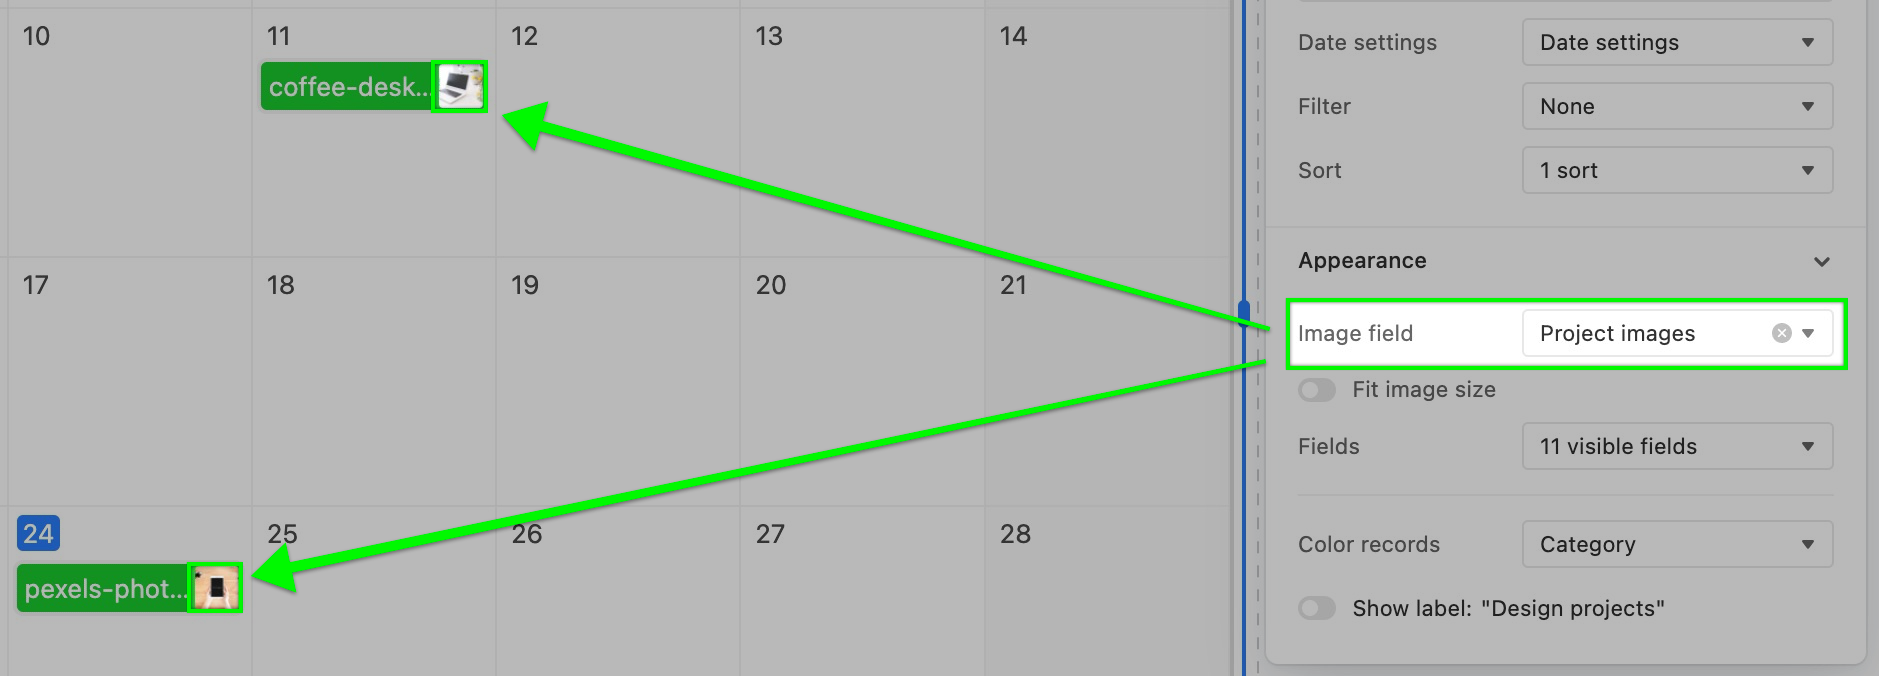
Finally, you can also customize the appearance of the calendar. This includes setting an image field up to be a thumbnail for calendar events, changing the fit of those images, choosing which fields should be visible in the event's record, coloring the records by a single select field or conditions, and finally choosing whether or not to show the element's name/label.

The first option is to select an image field. The table you are sourcing information in the element from must contain an attachment field in order to use this option. The "Fit image size" toggle will allow for slight adjustments in the way the thumbnail will appear in the element. It's worth noting, that only the first image attachment that shows in the corresponding attachment field will appear in the calendar element.
Next, you can choose which fields will appear in the event's record. It's worth noting that there isn't a lot of room to show multiple fields in cases where an end date is not present or where the start and end date for an event are close to one another. In the GIF below, you can see how making some adjustments (like adding an end date field) gives more space for adding more information:
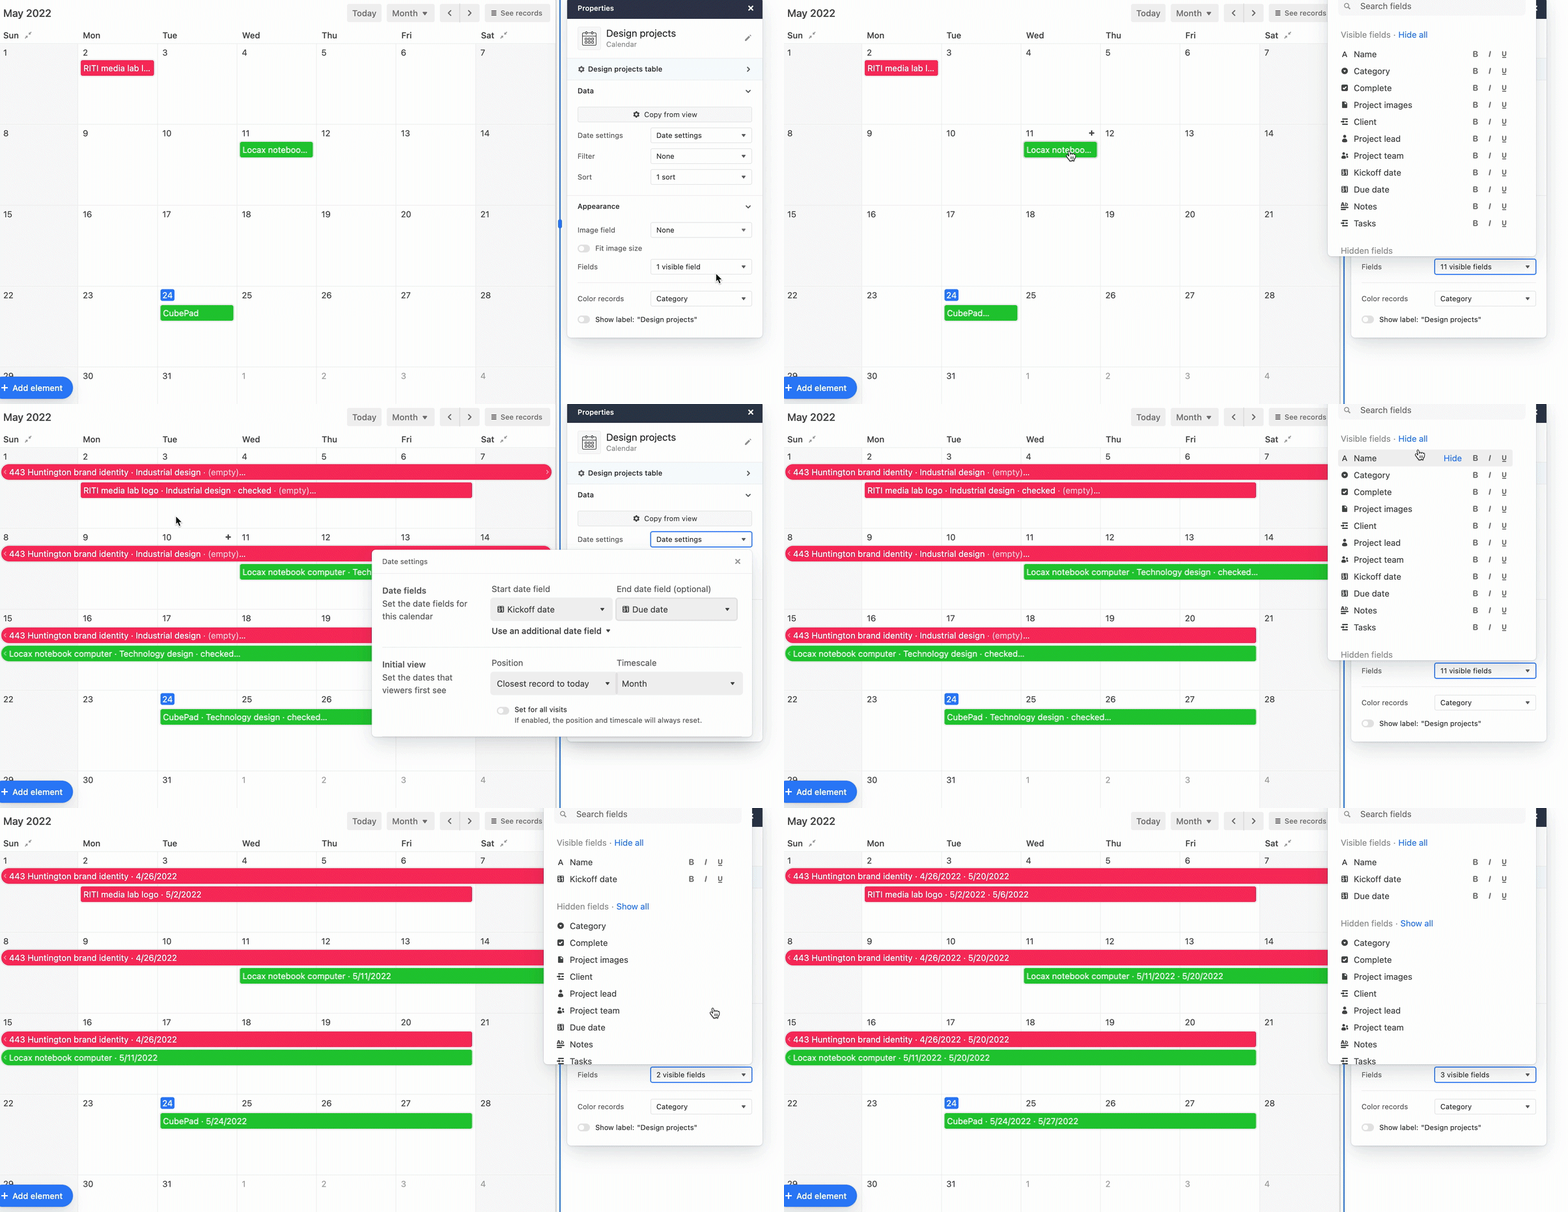
You can also color the records in the calendar. There are currently two options:
Color by a single select field in the source table
Conditional coloring
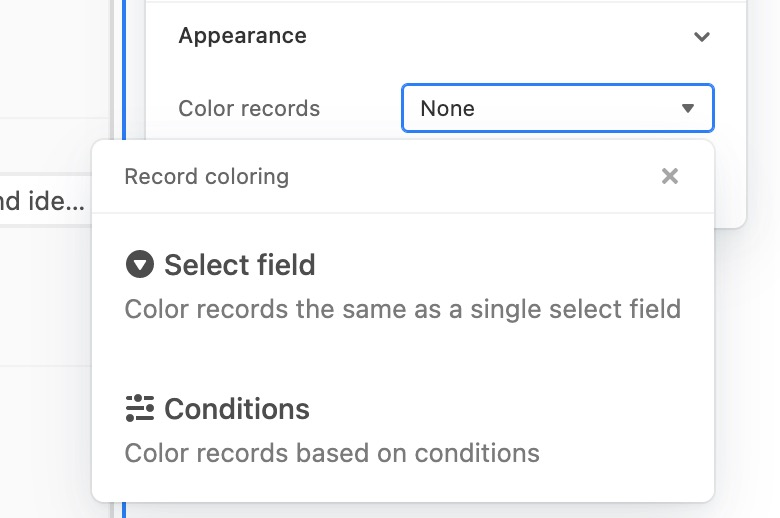
The last option is the "Label" toggle. This allows you to show or hide the name of the element. By default, this option is toggled off.

Calendar element options
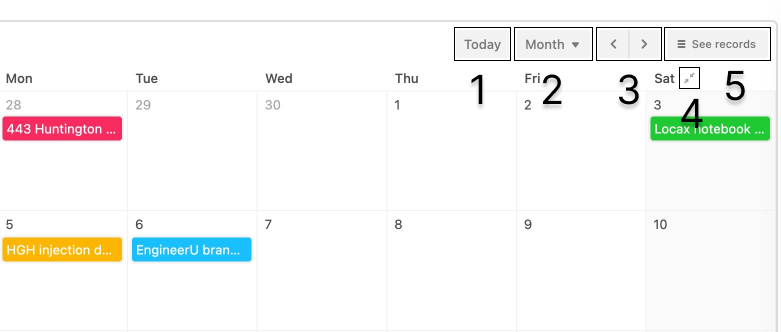
When you or other users are interacting with a published calendar element there are five options that allow users to tweak the element:
Today - Sets the calendar to start from today's date looking into the future
Timescale - Set the scale of the calendar (Month, 2 week, Week, 3 day, Day)
Move (Forward/Backward) - Clicking these buttons allow you to move the calendar to the past or future by the value set in the timescale drop-down.
Collapse weekends - Some teams may not work through the weekends. In these cases, you can collapse Saturday/Sunday weekends.
See records- Clicking this allows you to see a list of records (With dates, Without dates, or All records) and also will show a search bar to "Find a record."
You can also click on a record (event) in the calendar to show more details and even expand the record. Collaborators may also be able to edit or delete the record from this window.
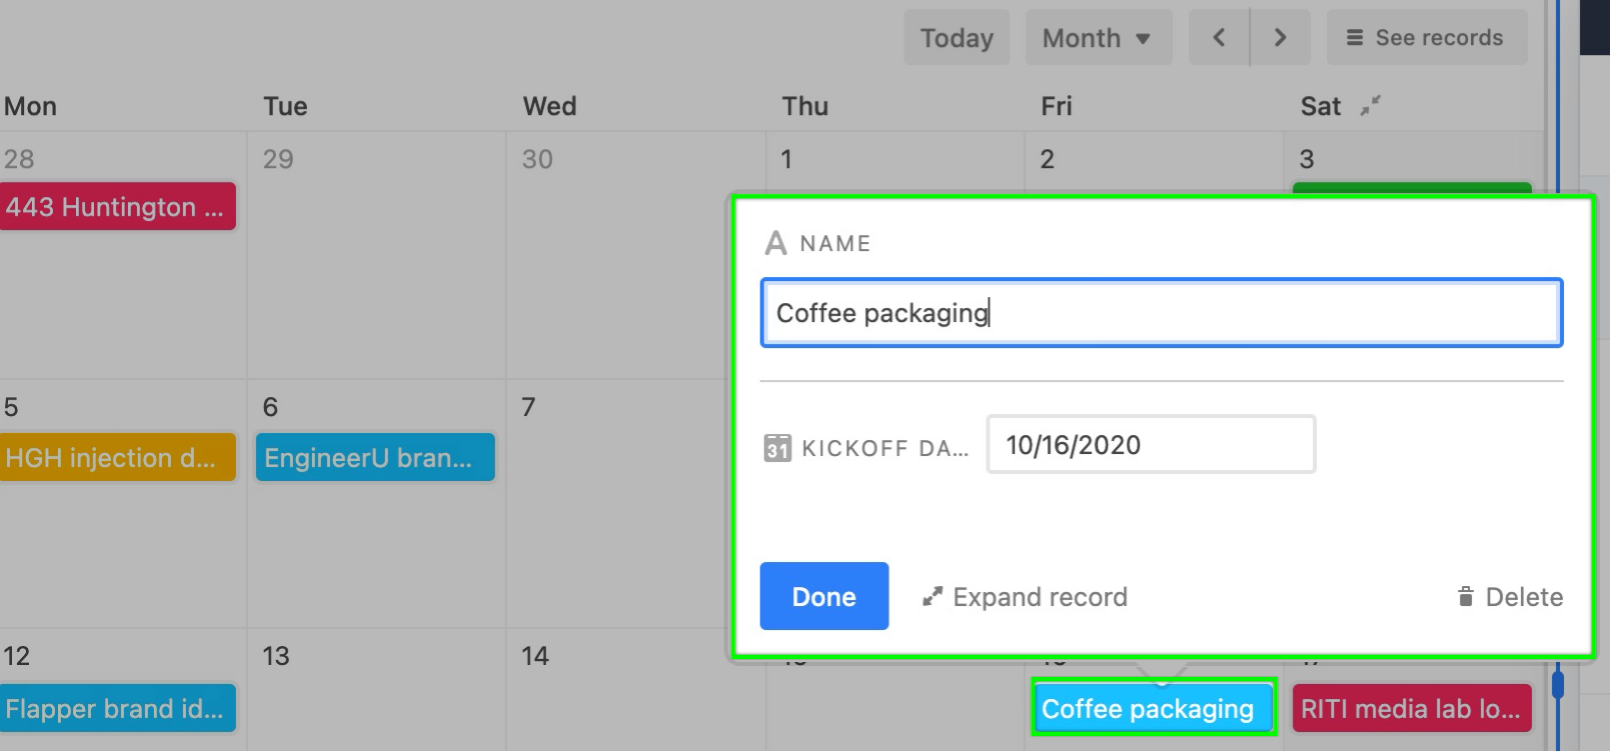
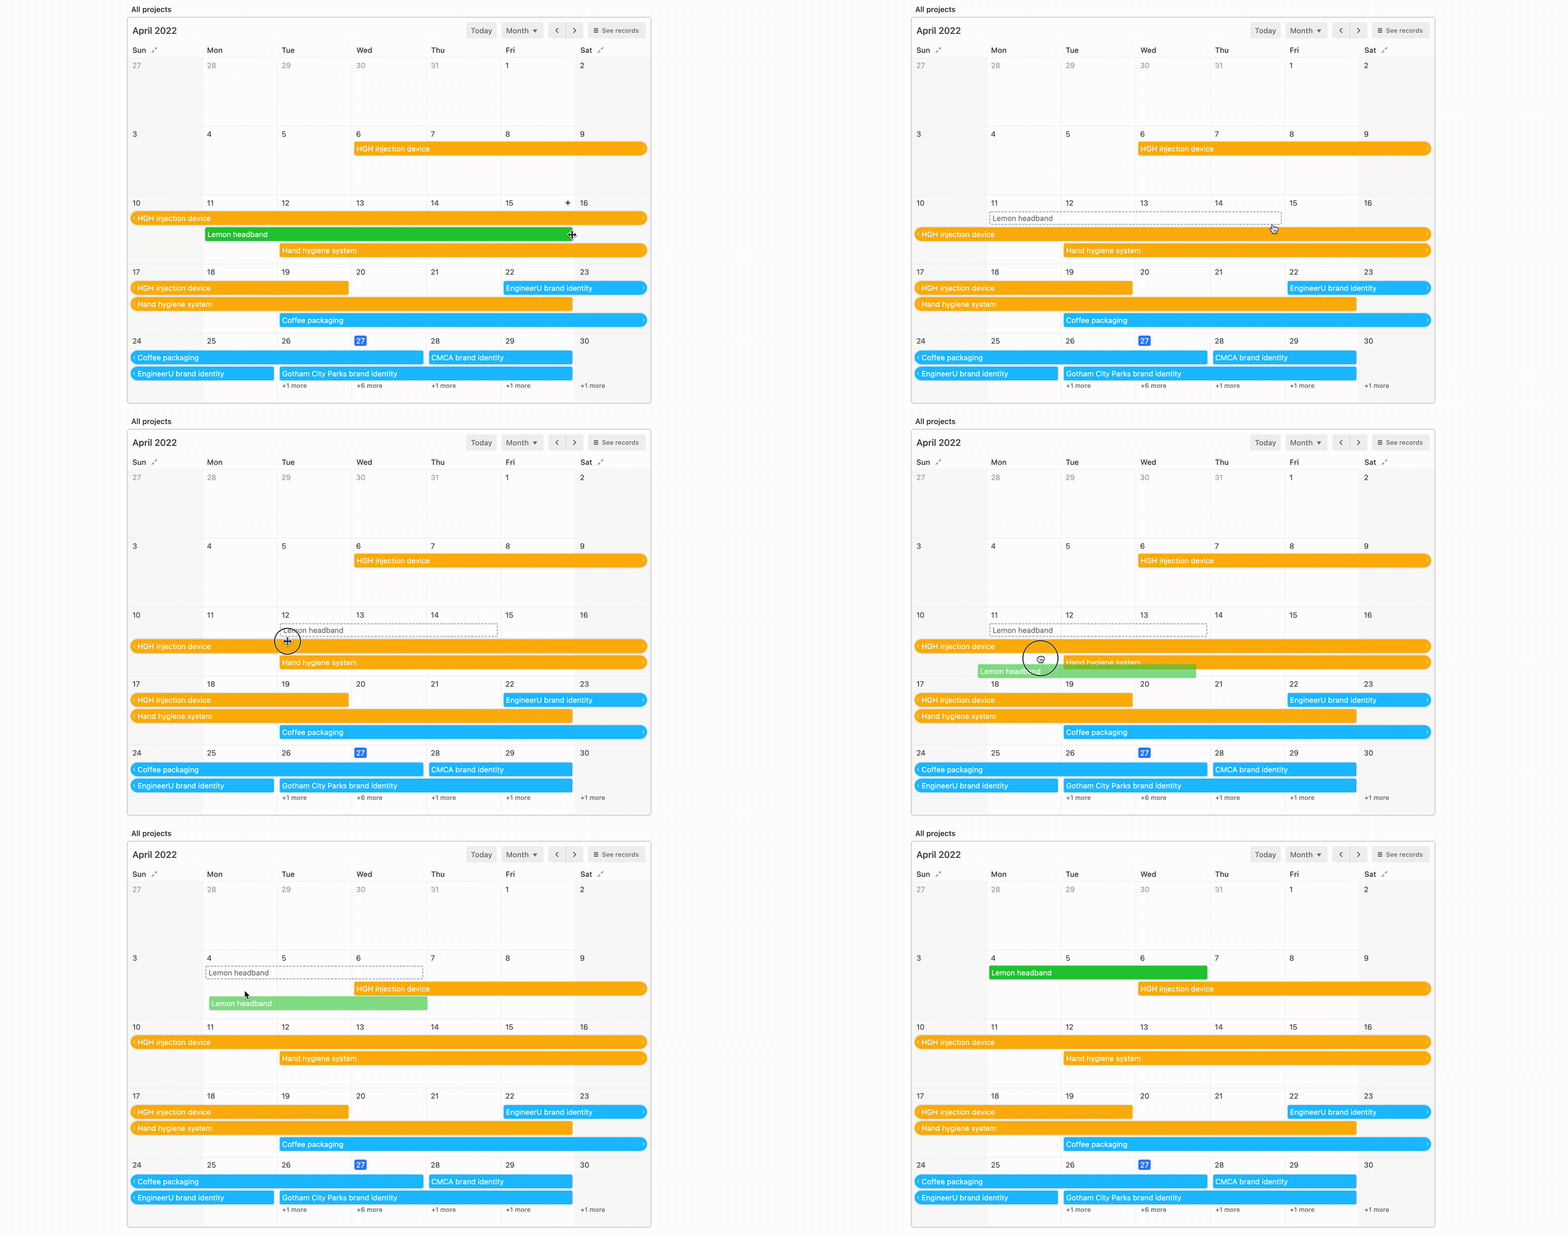
If users are able to make edits in the element and have the corresponding base permissions, they can:
Move events (Maintains current date range)
Edit start and end dates
Add new events (records)
Here's what that might look like:
FAQs
I'm seeing (empty) on some or all of my calendar events, what does that mean?
When you see the (empty) tag it means that a field that has been set to visible in the appearance settings is blank in the table where you are sourcing the information from. To resolve this, either add information to that field in the base or toggle that field to not show in the element.
I’m not seeing the plus button on a calendar visualization in interfaces even though I have the setting "Add/delete records inline” turned on, why might that be?
There are a few common reasons why users wouldn't be able to add a record to a calendar visualization in an Interface. We recommend checking the following to see if any of these settings are preventing you from adding records inline:
Add/delete records inline - check to see if this setting is enabled in your interface configuration menu. Note: This setting may only be enabled if the "Edit records inline" settings is on.
Computed fields - Is the date used to configure your calendar a computed field type? If so, you won't be able to add records inline.
Computed fields such as formula, created time, or the last modified time field do not allow for dragging records between dates or adding records inline. If you'd like to continue using a computed field to build your calendar, you'll need to instruct users to add records via a form instead.
Field permissions - Do users have access to edit the contents of the field in both the interface and the base?
For example, if an interface-only editor is trying to edit a field that has field permissions set to creators and up in the base, the interface-only editor wouldn't be able to edit the field in the interface.
Table permissions - Are table permissions restricting the user from adding/deleting records?
For example, a person navigating the interface may not see an Add Record button (even though the settings are configured to allow this) if the table permissions are set within the base to only allow certain users to add/delete records.
Synced tables - Is the source table synced? If so, the error may be coming from sync-related permissions.
For example, suppose a user attempts to create a record within the interface. This action would be restricted since the source is a synced table. Manual creation or deletion of records is not allowed for synced tables.