Note
While these articles are meant to serve as helpful guides for our customers, 1:1 support for integrations with 3rd party tools is limited in support interactions.
If you are experiencing setup issues or need help troubleshooting this integration, we recommend you search threads in the Community first.
If your question doesn't appear to be asked in the Community, then post a new message on the Development & APIs board (Requires signing into the community).
What is Tableau’s Web Data Connector?
Note
This article outlines a solution to automatically bring information from your Airtable base into Tableau utilizing a Tableau feature called Web Data Connectors. For information on how to bring data from Tableau into Airtable, please refer to this support article instead.
This software is not supported by Airtable. It is made available on an "as is" basis and provided without express or implied warranties of any kind.
Tableau is deprecating the Web Data Connector (WDC) 2.0 in favor of a 3.0 version. The following documentation on the WDC is based on a 2.0 connection and is subject to deprecation. If you are unable to use this, please explore Options 1 and 2 described in this article. Alternatively, you can contact Tableau support in order to explore creating your own WDC 3.0 connection.
Tableau's Web Data Connector allows developers to build connections to data beyond the existing traditional and Tableau-supported connectors using HTML and Javascript. End users can use WDCs without writing code, but it’s helpful to know that these connectors are built and supported by third-party developers, not Tableau.
Ultimately, the tables and rows you pull in from an external data source, such as Airtable, through the use of a Web Data Connector, can be visualized in Tableau in all of the same ways you already visualize your other data sources.
How can I use Tableau to visualize my Airtable records?
This integration guide focuses on option 3 using a Tableau Web Data Connector, however, there are several ways you can use Tableau to visualize your Airtable records:
Setting up a periodic or near-real-time sync between your Airtable base and a data source that Tableau natively supports, such as a relational database or data warehouse.
Using Tableau's Web Data Connector to pull records from Airtable into Tableau.
Web Data Connector requirements
The following are required to use the Tableau Web Data Connector:
Tableau Desktop or server, version 2019.4+ This includes Tableau’s free Tableau Public version
A Personal Access Token with the
data.records:readscope enabledAn Airtable base that you want to visualize in Tableau. In this guide, we’ll use this Venture Capital Fund base from Airtable Universe as an example.
The URL of a Web Data Connector.
The URL used in this guide is https://airtable-labs.github.io/airtable-tableau-wdc/ — example connector to get started.
The URL can be used as-is or to host your own copy of the code.
Connecting Airtable and Tableau
To connect Airtable from Tableau:
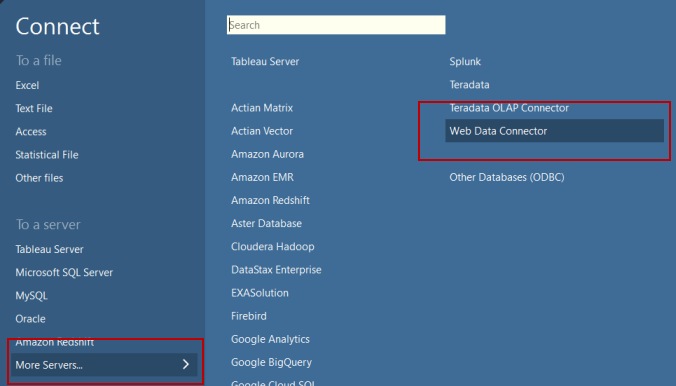
Open Tableau and from the “Connect” section.
Click More Servers.
Click Web Data Connector.
Enter the “Web Data Connector” URL, “ https://airtable-labs.github.io/airtable-tableau-wdc.”
Paste your personal access token (PAT) in the "Personal Access Token” or “API Key" field.
You can also select "Specify a Base ID " and provide a base ID, starting with "app."
Click Go.
Tableau uses Airtable’s API to retrieve a list of tables that belong to your base.
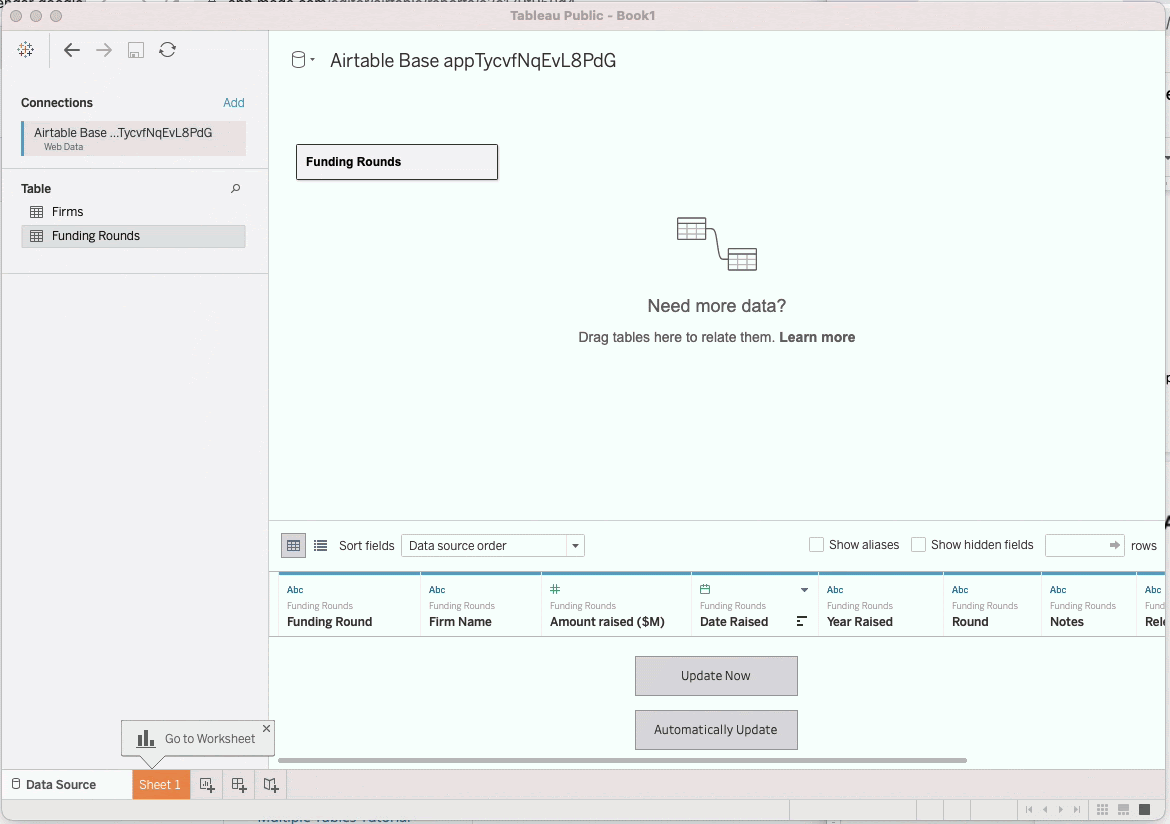
Once, you’ve completed the setup process above, you can select tables and retrieve data:
Select and drag the table you want to visualize to the Tableau.
Click Update Now.
Click Sheet 1 to build worksheets, dashboards, and stories.
FAQs
How does the Tableau Web Data Connector work with linked records?
The easiest way to visualize the data from Linked record relationships is to add lookup, rollup, and count fields to your table in Airtable and refresh the data source in Tableau. You can also define relationships in Tableau’s “Data Source” pane. Before proceeding, we recommend watching this guide to relationships.
For example, the following screenshot shows a relationship between “Firm Name” (which in Tableau shows the “recXXXXX” value) mapped to the “_airtableRecordId” from the “Firms” table:
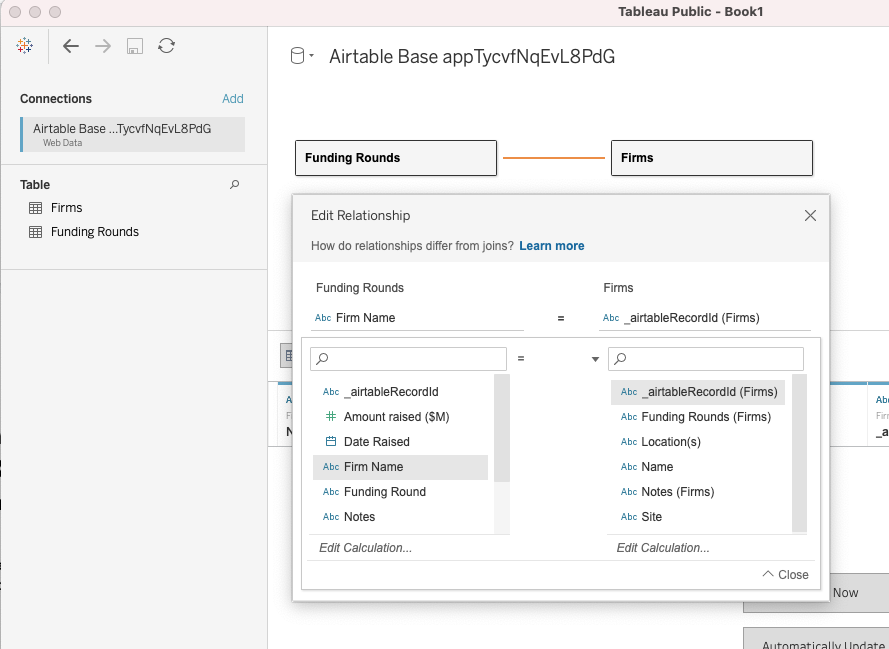
You can now go back to your worksheet and pull in data from both tables: “Name” is from the “Firms” table, while other fields are from the “Funding Rounds” table.
How do I inspect the code or host Tableau Web Data Connector on my infrastructure?
The web data connector is: https://airtable-labs.github.io/airtable-tableau-wdc/ is hosted on GitHub Pages
The source code is: https://github.com/Airtable-Labs/airtable-tableau-wdc.