Note
Tableau recently changed the name of their cloud-based product from Tableau Online to Tableau Cloud. While we adjust for this in-product, you might see Tableau Online still in use.
Plan availability | Business and Enterprise Scale plans only |
Permissions |
|
Platform(s) | Web/browser, Mac app, and Windows app |
Learn how to use the Airtable Sync integration feature to bring information from an external application into Airtable as a new table in your base. Sync integrations are always a one way sync from the external application into an Airtable base, so changes made in Airtable cannot be synced back to the external application that you are syncing with.
Tableau builds tools to measure, parse, and share data and visually compelling analytics. Follow along below to learn the ins and outs of syncing data from a Tableau Cloud worksheet to Airtable.
Note
This sync integration is built for Tableau Cloud users. Data held in Tableau Server is out of scope for this feature.
Setting up a Tableau to Airtable sync
Navigate to a base where you want to sync data into Airtable.
Add a new synced table by clicking the + Add or import button.
Scroll down to the bottom of the list and click the XX more sources… option.
Browse or search for “Tableau Online” and then click Tableau Online.
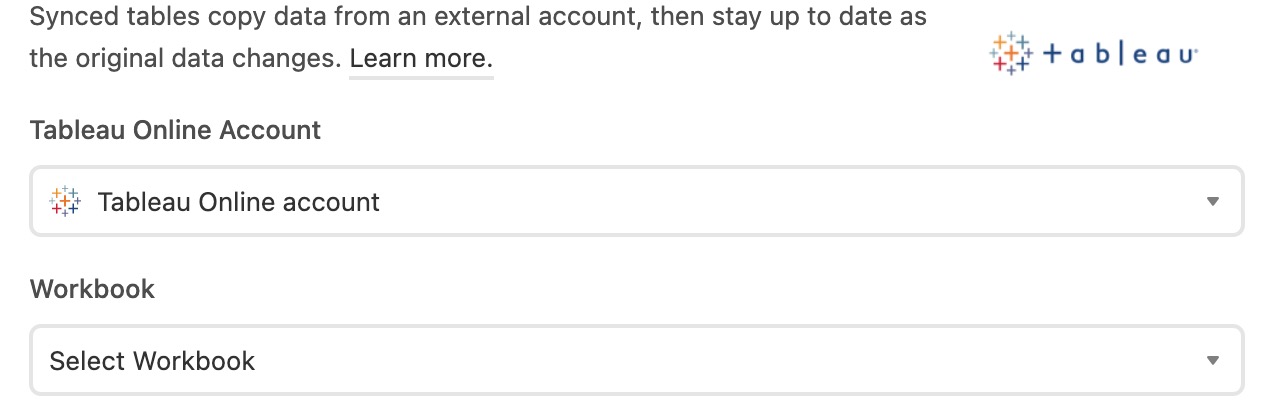
Next, you’ll be prompted to select or connect a Tableau Online account.
If this is the first time you are setting up a sync with Tableau, then you’ll need to connect with a new account.
This will bring up a new window where you will enter your Tableau credentials. This includes the Host Name, Site Name, Personal Access Token Name, and Personal Access Token Secret. Links are provided throughout the setup window for further instruction. Additionally, we recommend that you create a new Personal Access Token just for this Airtable connection.
If needed, click here for more information about Security and Authentication.
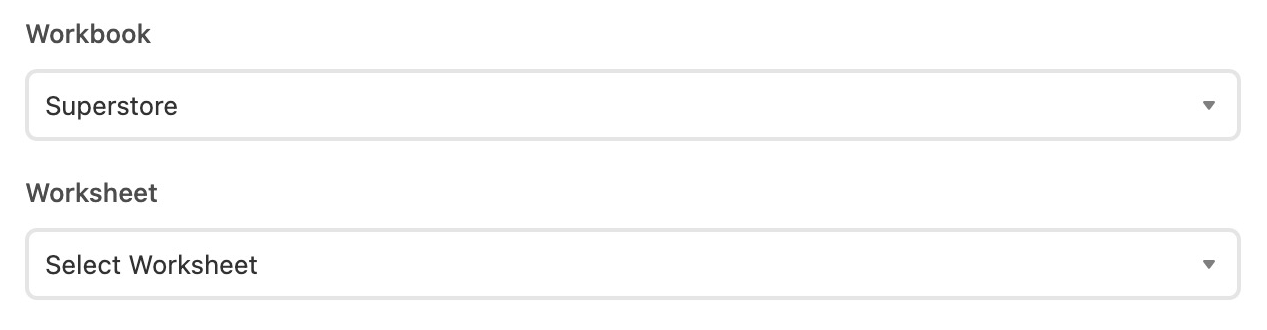
After connecting your Tableau account you’ll see a drop-down asking you to select a Workbook.
From the Workbook selected, you’ll then select a Worksheet to sync to Airtable. If you end up remembering a certain Worksheet is in another Workbook, then you can open up the Workbook drop-down and select an other one.
Click the Next button to move on to field configuration.
Note
Depending upon the size of the worksheet, it may take some time for the next step to appear in Airtable. At the moment, Airtable can sync over a maximum of 10,000 records from a worksheet per sync.
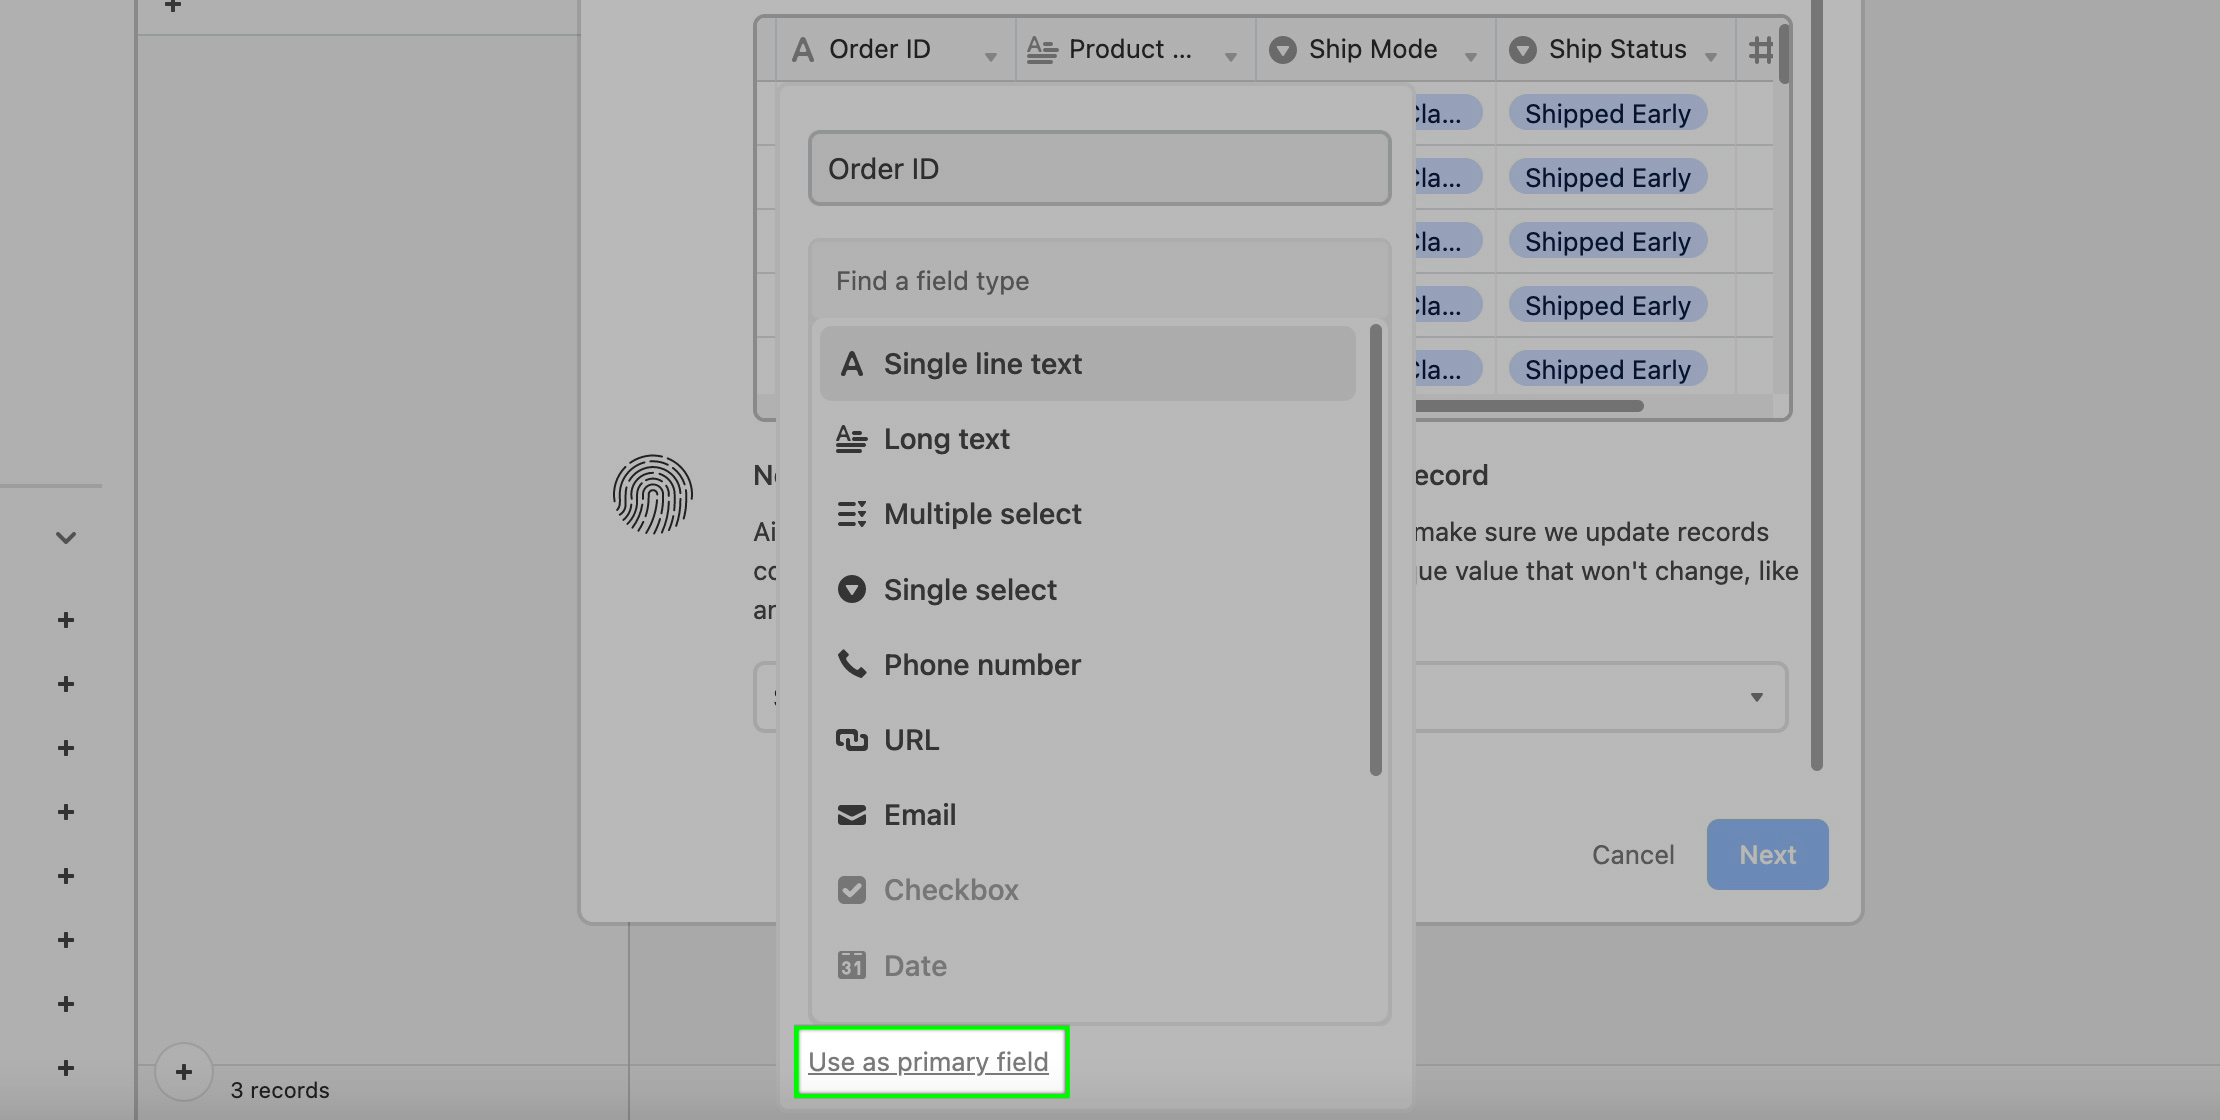
Next up, you’ll need to configure the fields that will be synced over to Airtable. This involves choosing a primary field, customizing which fields will be shown, as well as picking field types for each column (field).
We do our best to identify good field types for each field coming from Tableau, however, sometimes you’ll want to adjust things so they make sense in your Airtable base. For this example, we first want to change the “Order ID” field to be a single line text field. This serves two purposes. First, it is likely a better field type for this row of data. Second, it allows us to set this as the primary field.
Now, we want to set this Order ID field to be the primary field in Airtable since it uniquely identifies each row (record) of data. Upon clicking the drop-down next to the Order ID field name we’ll click the Use as primary field option.
Next, you need to choose a field that uniquely identifies each record. This may sound redundant since you just set the primary field in Airtable, but it isn’t. Setting the primary field in Airtable allows you to uniquely identify it in Airtable, whereas choosing it here helps us to accurately perform the sync when comparing the current state of your sync in Airtable to the information being held in Tableau. Since the “Order ID” field is a good identifier, we will use that field in this step.
Note that there may be times when a certain field is not a good unique identifier. In these cases, we will warn you that some non-unique records will be lost unless another field can be used.

Before creating your synced table, there are Settings options that allow you to choose how often you want to sync, and how to handle records deleted or hidden in the Tableau source:
The frequency of syncing. Right now, the options are manual syncing and automatic syncing which happens about every hour.
Whether or not deleted records in the Worksheet in Tableau should be removed from the Airtable table. By default, deleted rows will be removed.
Once you’ve selected your desired sync settings, click the Create table button. Depending on how large the data set being synced in from Tableau is, it may take a few moments for the synced table to be created.
Security and Authentication
This sync integration utilizes Tableau’s PAT (Personal Access Tokens) functionality to connect the two services together. The link above provides a more detailed breakdown of how Tableau has designed their PATs to work and is the best document to refer to for authentication and security questions.
Note
Airtable uses HTTPS to ensure secure and encrypted transfer of information.
FAQs
What limitations exist for this sync?
We will only sync with the first 10,000 records from your Tableau Worksheet. If your Worksheet has more than 10,000 rows, you can use a filter to bring it under 10,000 rows then duplicate the Worksheet and adjust the filter to exclude the rows from Worksheet 1 and include the remaining rows in the duplicated Worksheet 2. You'll need to set up a multi-source sync or a separate synced table in Airtable for each additional Worksheet.
Example: Assume you have a Tableau worksheet containing office supply orders over a two-year period and the total record count is 18,000. If you wanted to bring all 18,000 records into Airtable you could filter the Worksheet using the date field to just include records for the first year, dropping the total record count below the 10,000 record limit. You could then duplicate the worksheet and change the date filter to just include records from the second year. You now have two worksheets that represent all the data you want, both of which are under 10,000 records and can individually be synced into the same Airtable destination table using multi-source sync.