All plan types/levels | |
Platform(s) | Web/Browser, Mac app, and Windows app |
Related reading | |
Airtable terminology | Automation - A trigger-action workflow that executes a series of steps, often used to take the place of repetitive or tedious work (ex. posting updates, sending messages, etc). All automations include a trigger and at least one action (ex. when a new record is added [trigger], send a message to the assignee [action]). |
Creating automated Google Docs in Airtable
In this article, we guide you through an Airtable automations' workflow that allows you to automatically create documents in Google Docs leveraging the information stored in your Airtable records. Airtable automations can create powerful and custom workflows to help your team better collaborate, communicate, and stay aligned over time.
Automatically creating documents
Visit your Airtable homepage.
Create or open your preferred base.
Click Automations and then choose Generate a weekly digest in Google Docs.
A new window opens, requiring you to complete additional information.
Enter a name or description for your automation.
Enter the necessary information, then click Test step to the left of each trigger or action.
To enable your automation, toggle OFF to ON.
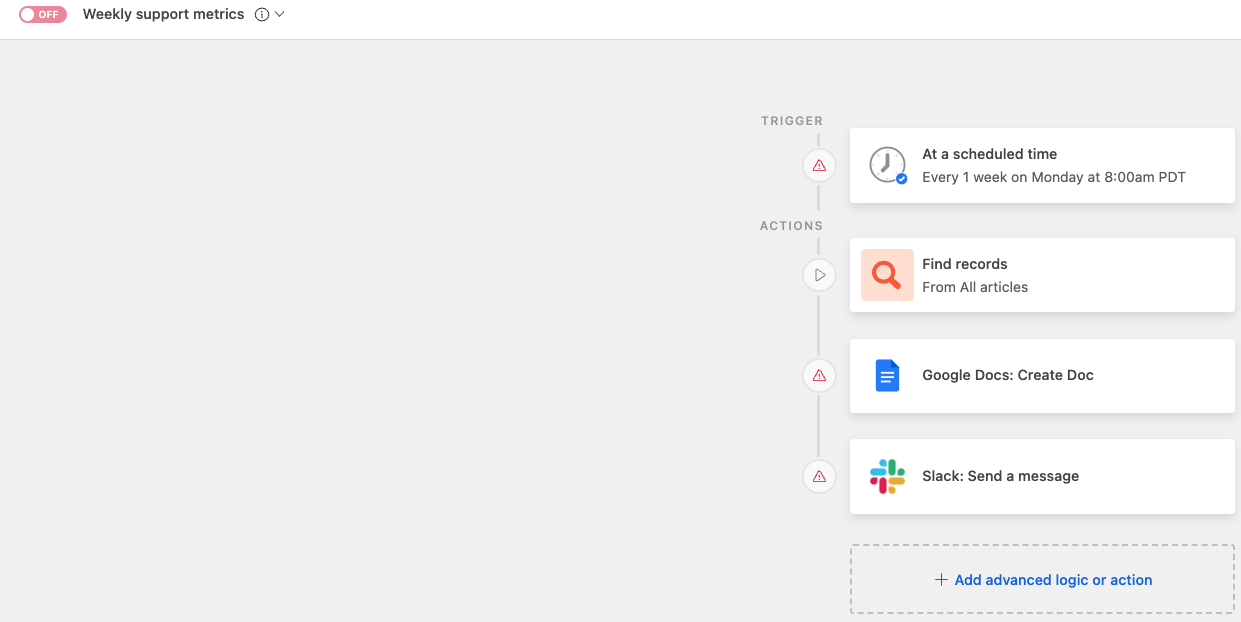
Document automator at a glance
Document automator triggers and actions
Airtable automations are made up of a mixture of triggers and actions. Each automation includes:
Triggers in Airtable
Configuring triggers in Airtable
The At schedule time trigger allows you to choose a date, time, and cadence for your automation.
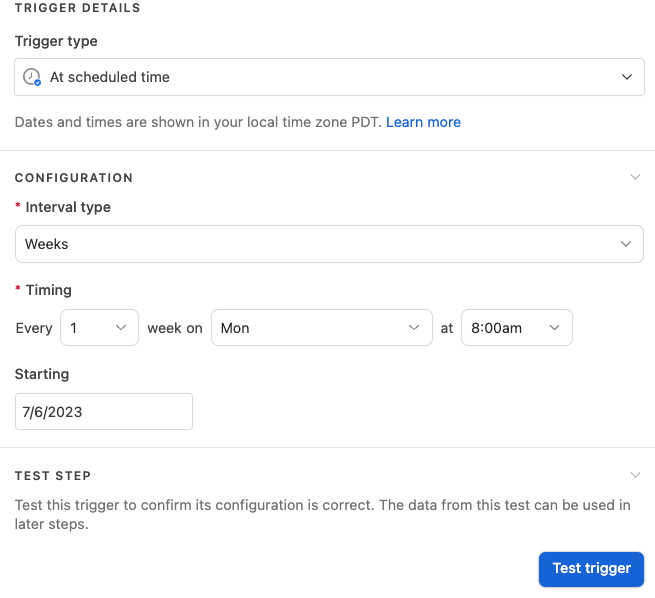
You can also update the trigger type to another trigger to better meet your base's needs. We recommend completely understanding your goals and reviewing our other triggers before creating or configuring your trigger.
Records in Airtable
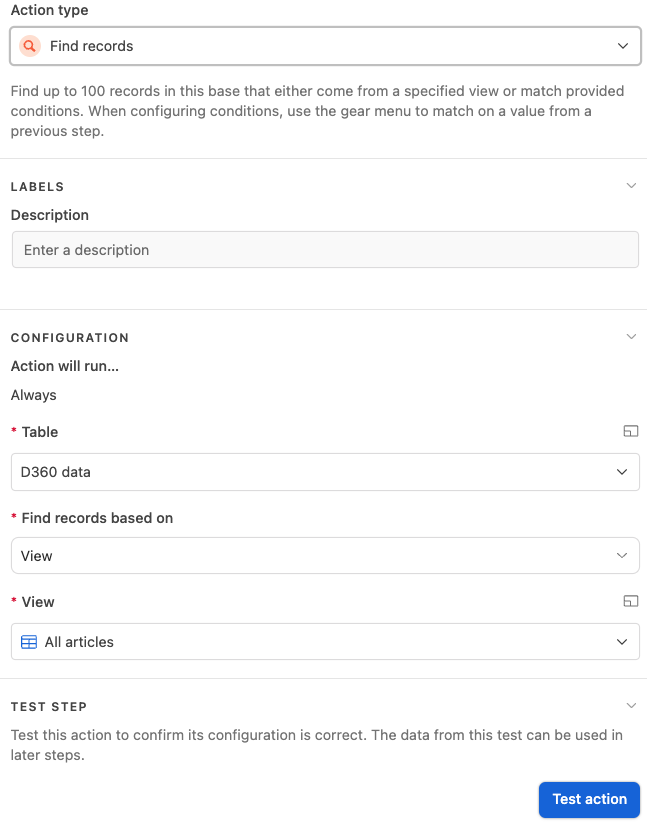
Finding records in Airtable
The Find records action allows you to locate up to 100 records in the connected base from a specified view or match provided conditions.
Note
While you can create automations that don't use the Find records automation action, the Find records trigger allows for easier formatting of the resulting document.
Google Docs in Airtable
Connecting to Google and choosing a folder location
If you have yet to connect Airtable and Google before, you'll need to complete the authorization steps before moving ahead. Once the two accounts are connected, you can choose a folder in your Google Drive where any docs created in the future will live. If no folder is chosen, the docs will be put into your overarching "My Drive" folder by default.
Note
It may be a good idea to create a test folder in your Google Drive and connect to that first since you made want to test out the formatting of the created document before turning this automation on.
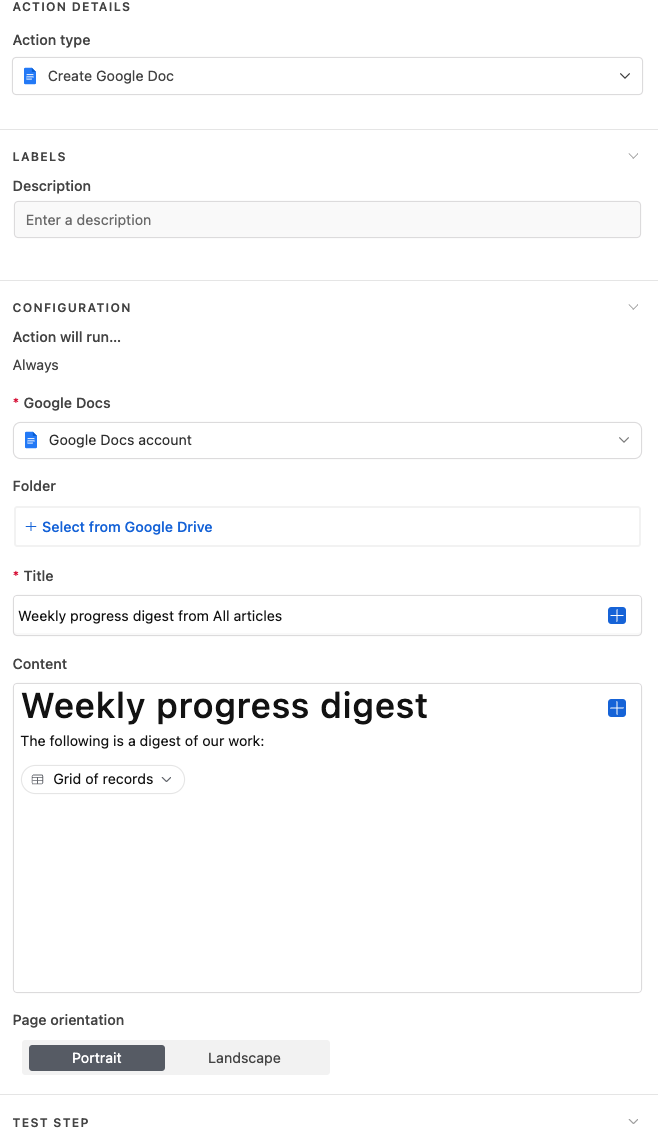
Updating the document’s title
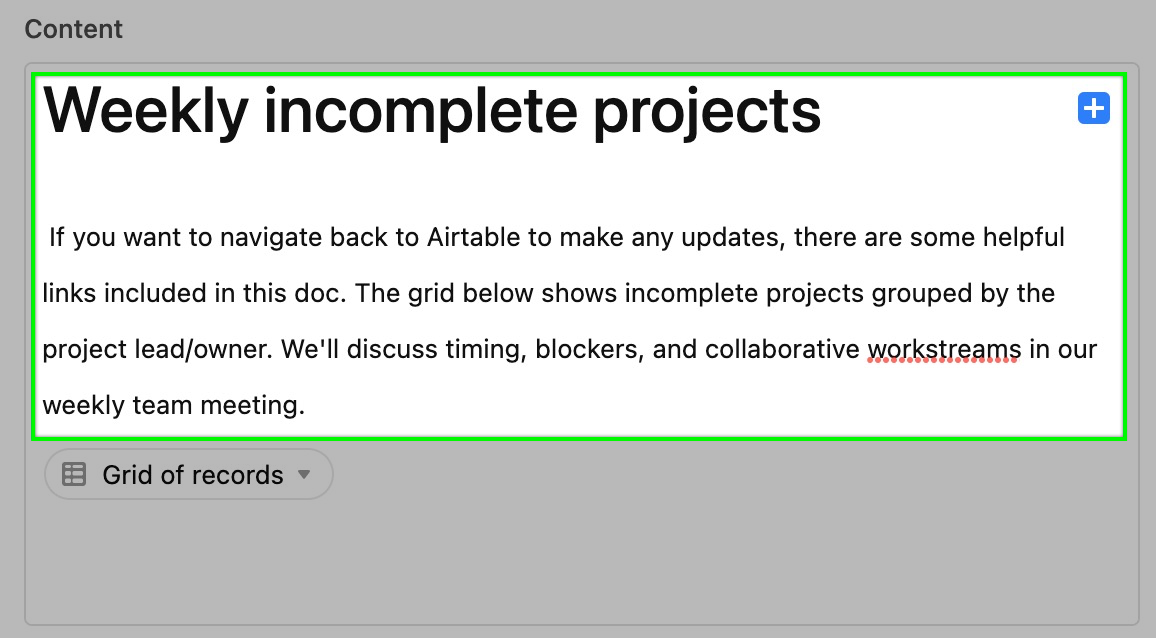
Next, update the Title and Content sections. In our example, we'll change the title to "Incomplete projects - Actual trigger time.”

Updating the Content section's copy
The Content section allows you to build reusable templates for future automated documents. Start with the document's header and helper text. Currently, the copy is related to the default use case. Adding a bit more context may help readers to better digest the information.
Note
You can use markdown to further format the content section of the resulting document. You can read more about Markdown in Airtable here.
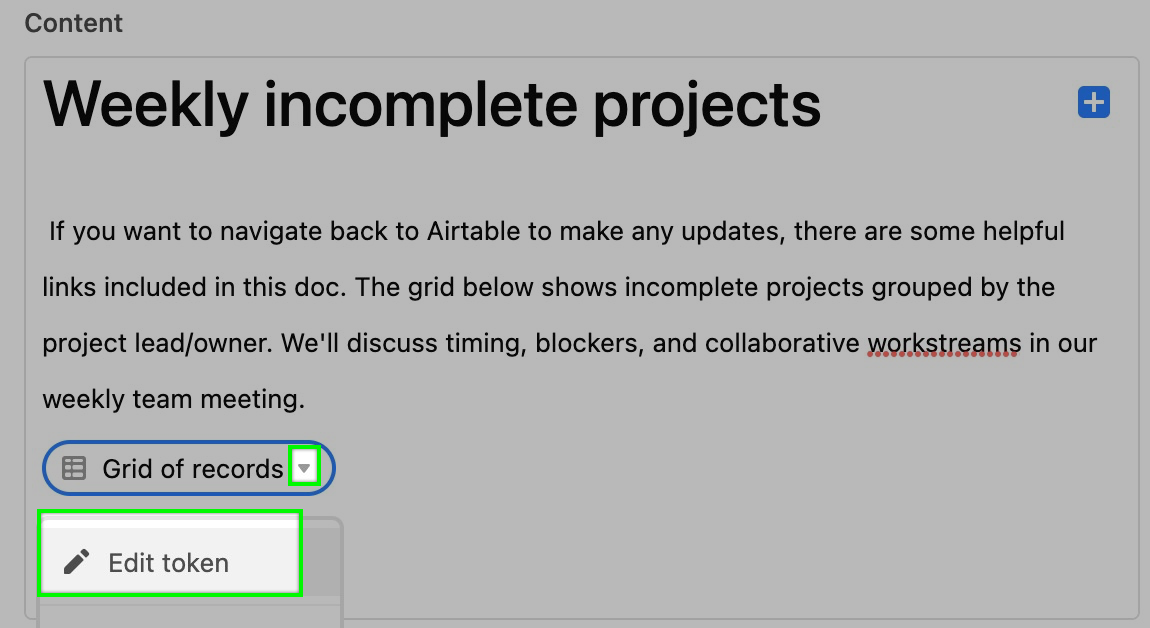
Editing the “Grid of records” token
Next, adjust the “Grid of records” token so that it only inserts the fields from Airtable that are necessary for our weekly team meeting. Start by clicking the dropdown arrow and selecting the Edit token option.
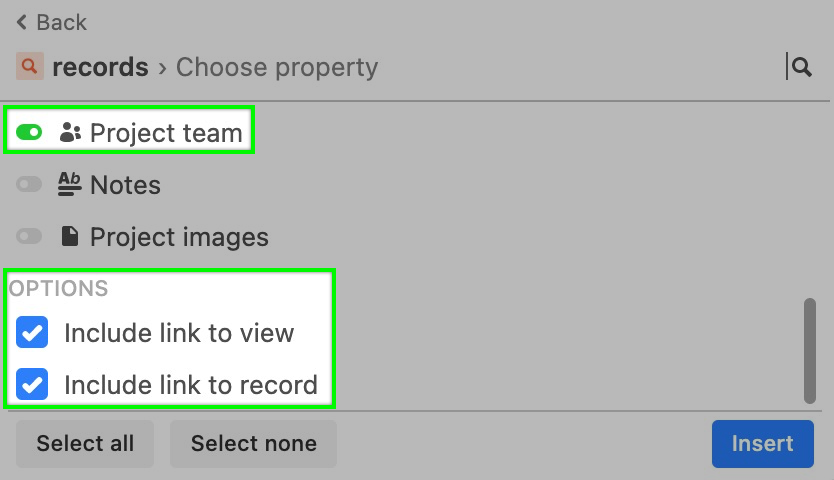
A window opens, allowing you to choose which step the token is coming from. Our example uses the Find records action step to Insert records as a grid or list.
Note
If the sorting order of records in the rendered grid or list is important for your workflow, then be sure to find records by view rather than by conditions in the "Find records" action step. Records will then render in the created Google Doc the same way that they appear in the view you selected in the "Find records" action step.

Our example includes the name, due date, category, project lead, and project team fields. Additionally, we want to ensure both the Include link to view and Include link to record options are selected so collaborators can easily navigate back to Airtable to make changes.
Other options and testing
At this point, you can add more text, images, or formatting to the document. You could even add additional grid tokens. Additionally, there is one more consideration: portrait or landscape.
It's a good idea to use the landscape option if you have more than 5 fields selected in the rendered grid or list token.
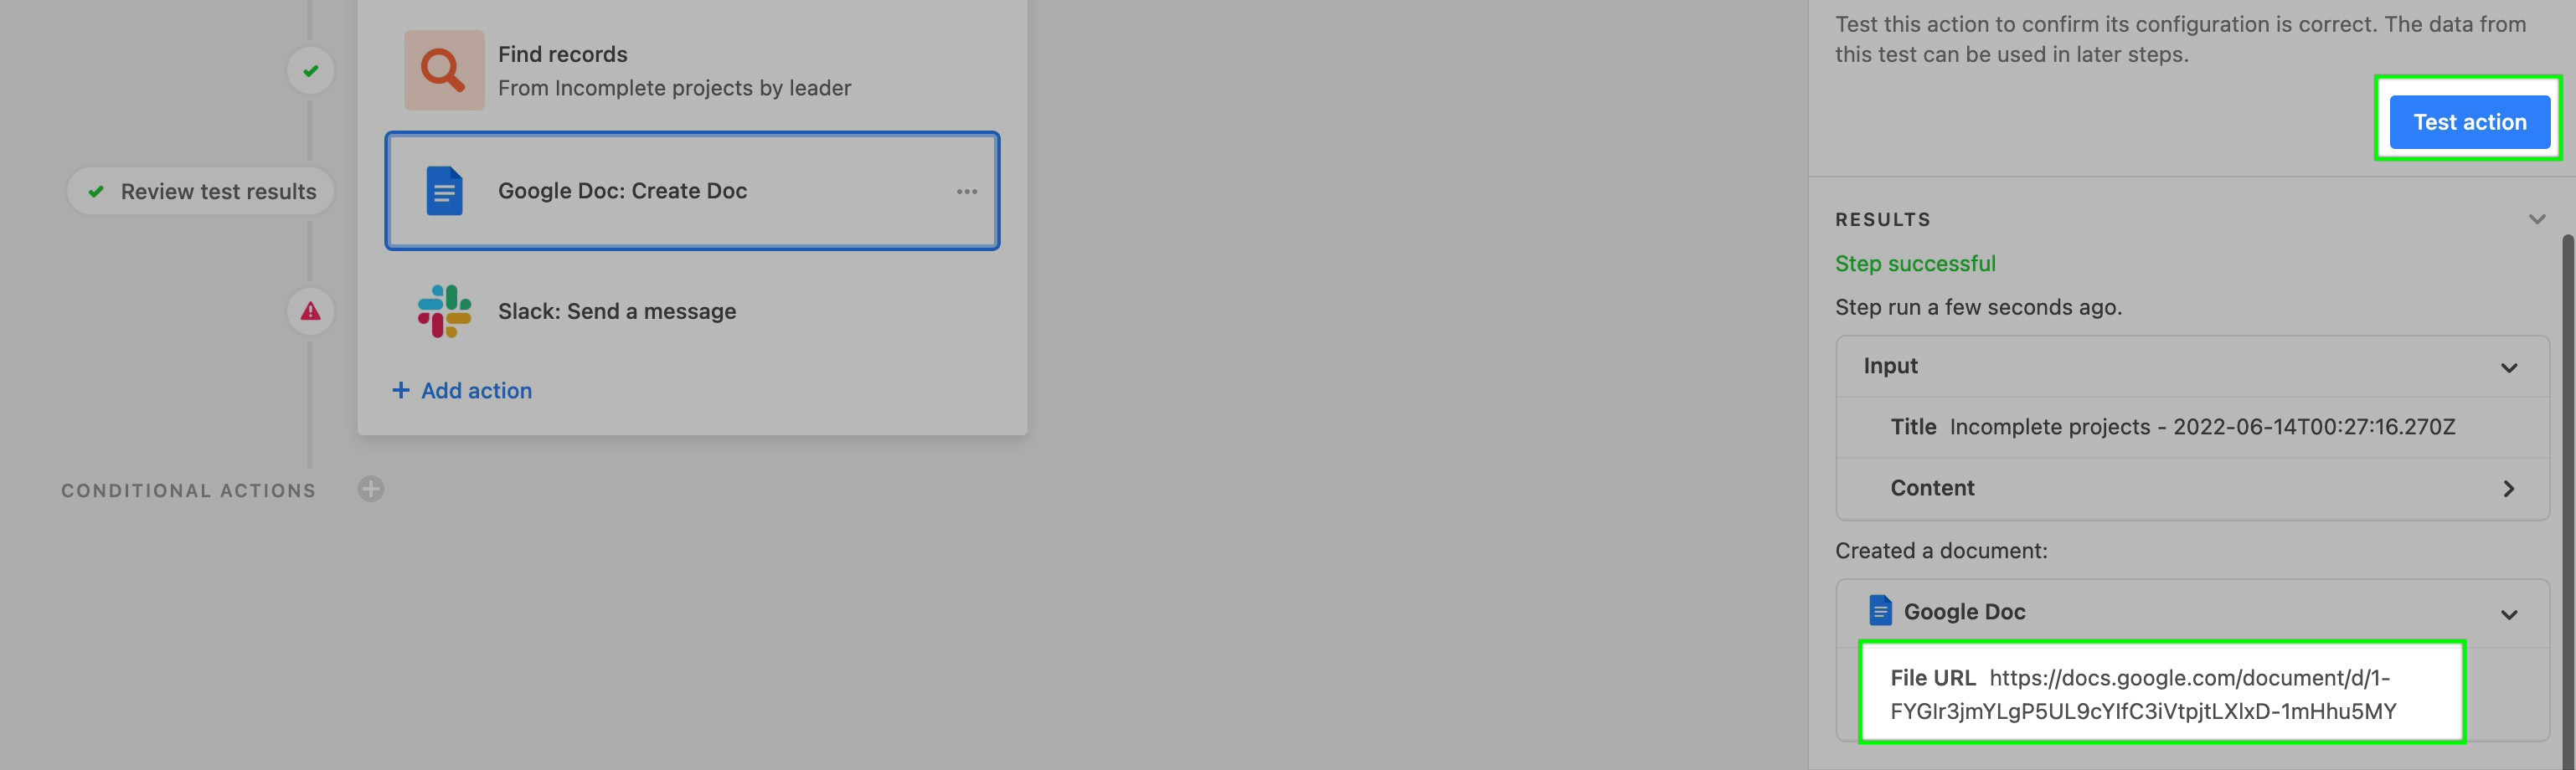
You'll now want to test this step of the automation to make sure that the template you've just created in this automation step looks the way you'd like in Google Docs. After testing successfully, you'll see a URL that you can highlight and copy, or just check the Google Drive folder you configured earlier.
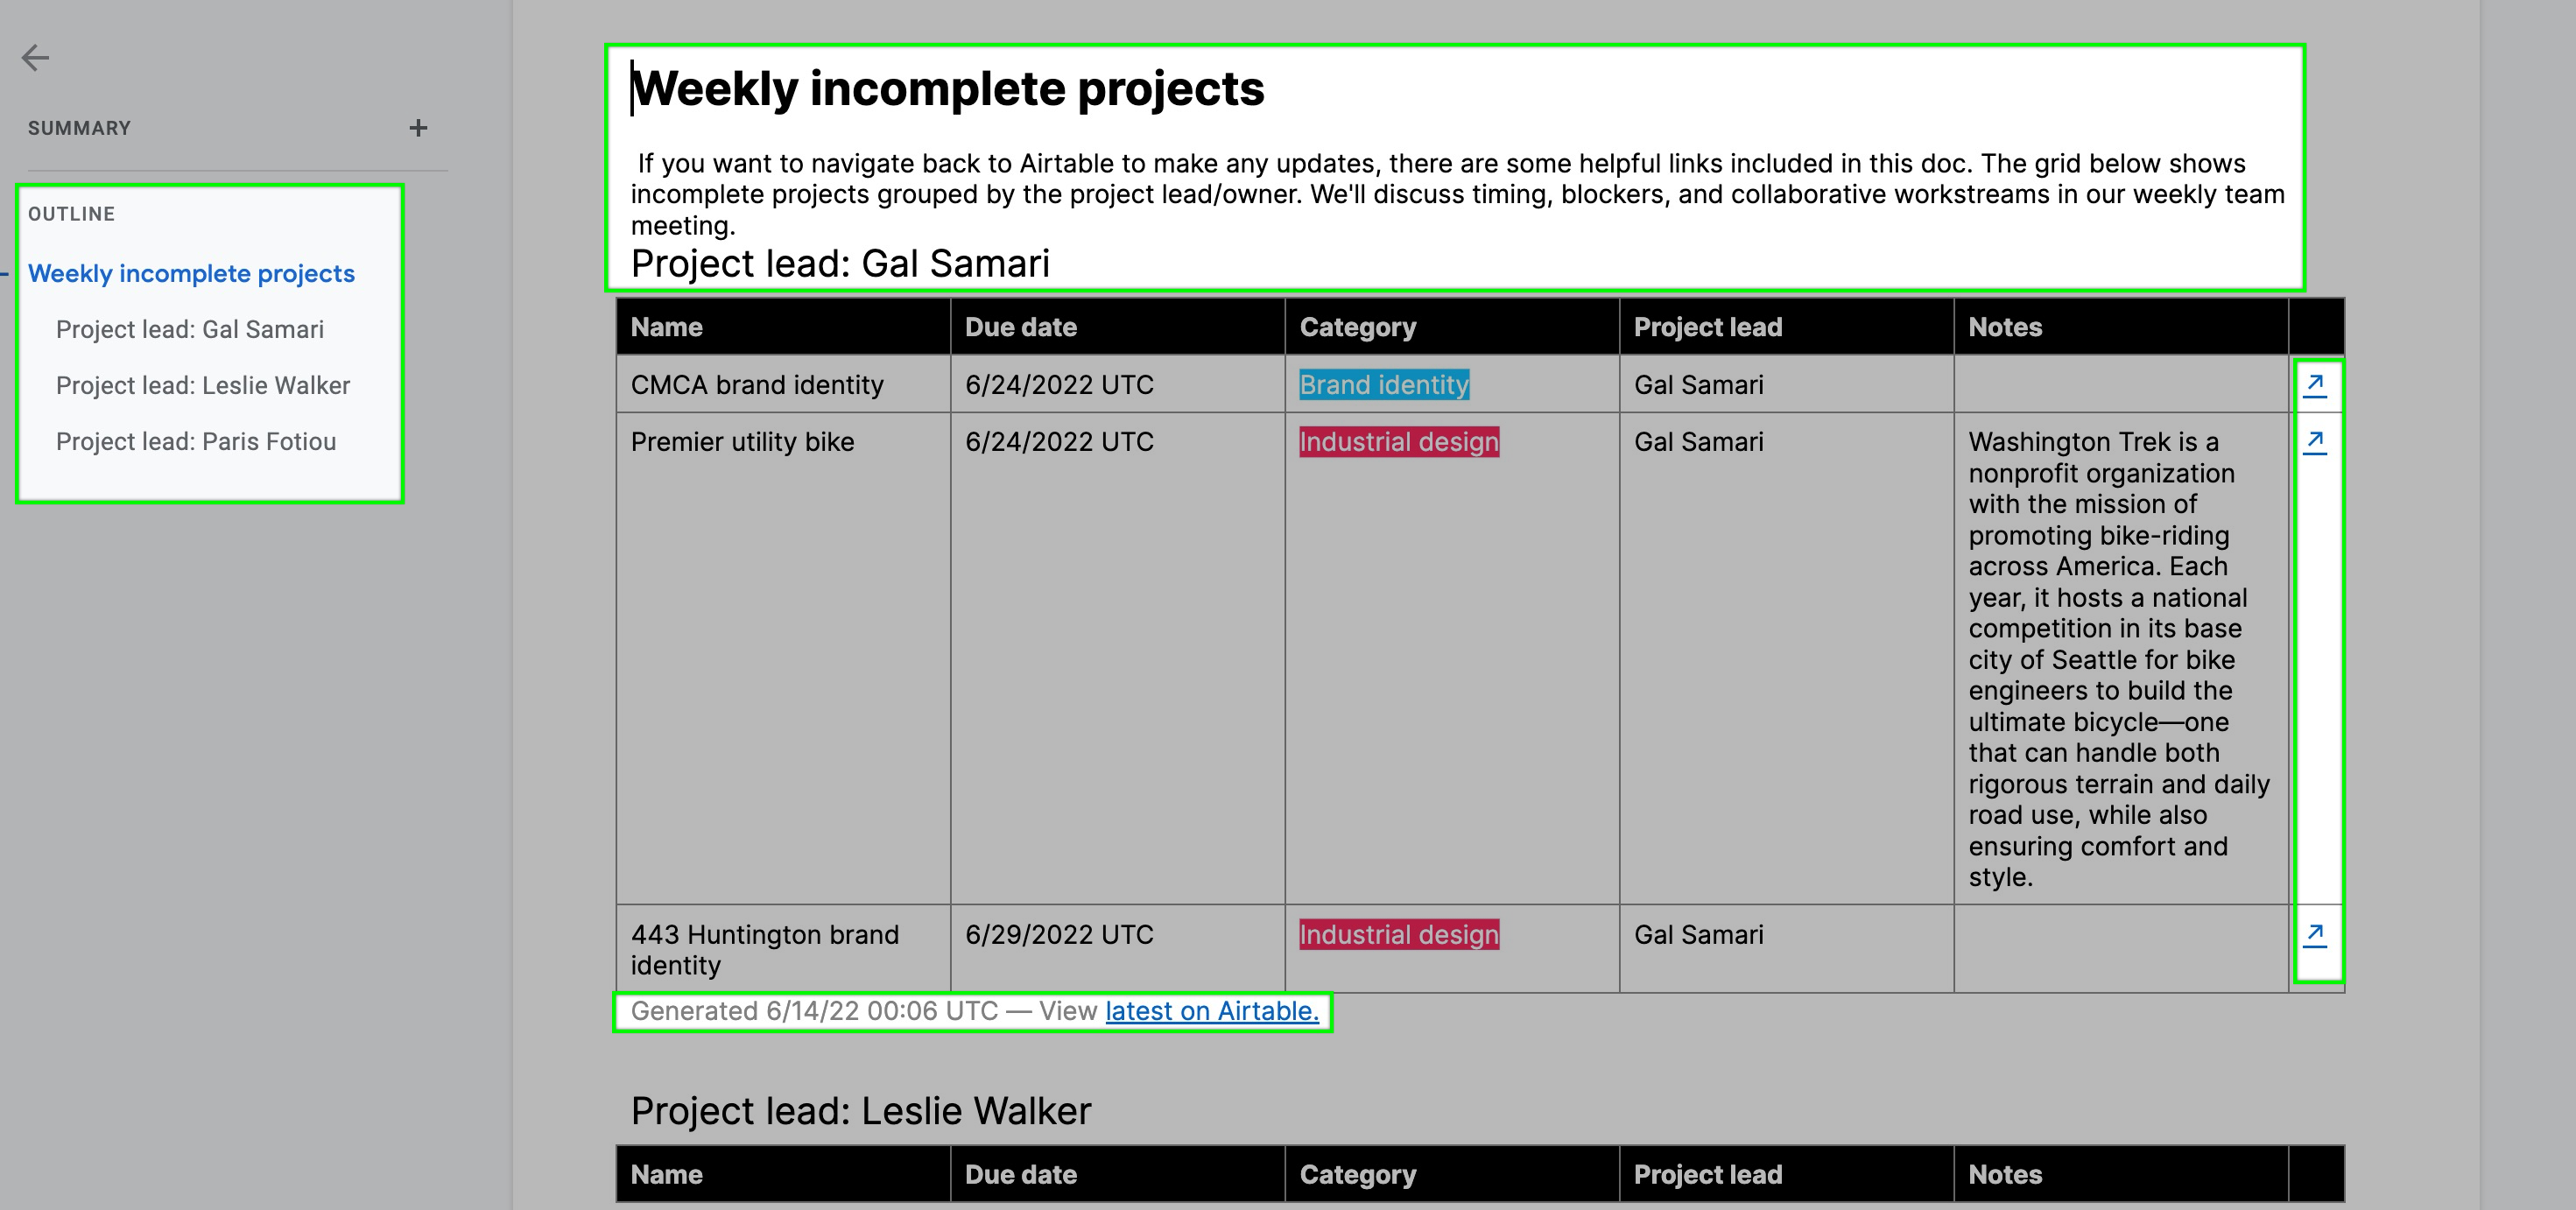 As you can see in the highlighted boxes:
The outline of the document corresponds to the project lead grouping in Airtable.
There's a helpful header and context for the document.
There is a rendered grid that only shows the fields we selected in the "Find records" token.
The arrows in each row link back to the individual corresponding Airtable record.
The line below each section shows when the document was generated and links back to the Airtable view where the records were rendered from.
FAQs
Are both user-created documents and documents created using document automator supported?
Yes, both types of documents are supported but we currently do not allow the doc being updated to be dynamically set up.
Can I use document automator with other services and platforms?
No, currently document automator only works for Google Docs.
Where are documents stored if a Google Drive folder is not selected during the setup process?
If no folder is specified, then the document will be added to the “My Drive” folder in Google.
How do I sort data being pulled in for the grid and list tokens?
Data can be sorted in two ways:
By selecting an existing view with the desired sort in the "Find records" action step.
Or by creating a new view for the document automator with the sort you prefer; choose that view in the "Find records" step, and the document will inherit the same sorting.