Plan Availability | All plan types |
Permissions |
|
Platform(s) | Web/Browser, Mac app, and Windows app (with some additional limited support on mobile) |
Structuring and nesting IF statements in Airtable
On its own, an IF() function can only have two results—either the logical argument is true, or the logical argument is false. Putting an IF() function inside of another IF() function - called nesting - can make it so that your formula can output more than two responses.
IF(
  Logical Argument 1,
    Value 1,
    IF(Logical Argument 2,
      Value 2,
      Value 3
    )
)
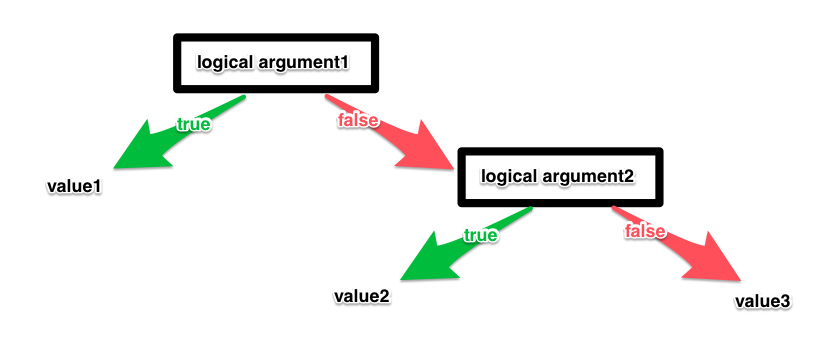
This function means: If “Logical Argument 1” is true, then return “Value 1.” Otherwise, if “Logical Argument 2” is true, then return “Value 2.” Otherwise, return “Value 3.”
This can be represented in a chart:
Note
Airtable can support many, many nested IF functions, though it can become difficult difficult to track mistakes in a formula as IF functions pile on top of each other. See our formula writing tips for beginners article for more help on structuring your formulas for easy readability and troubleshooting.
Nesting IF statement example
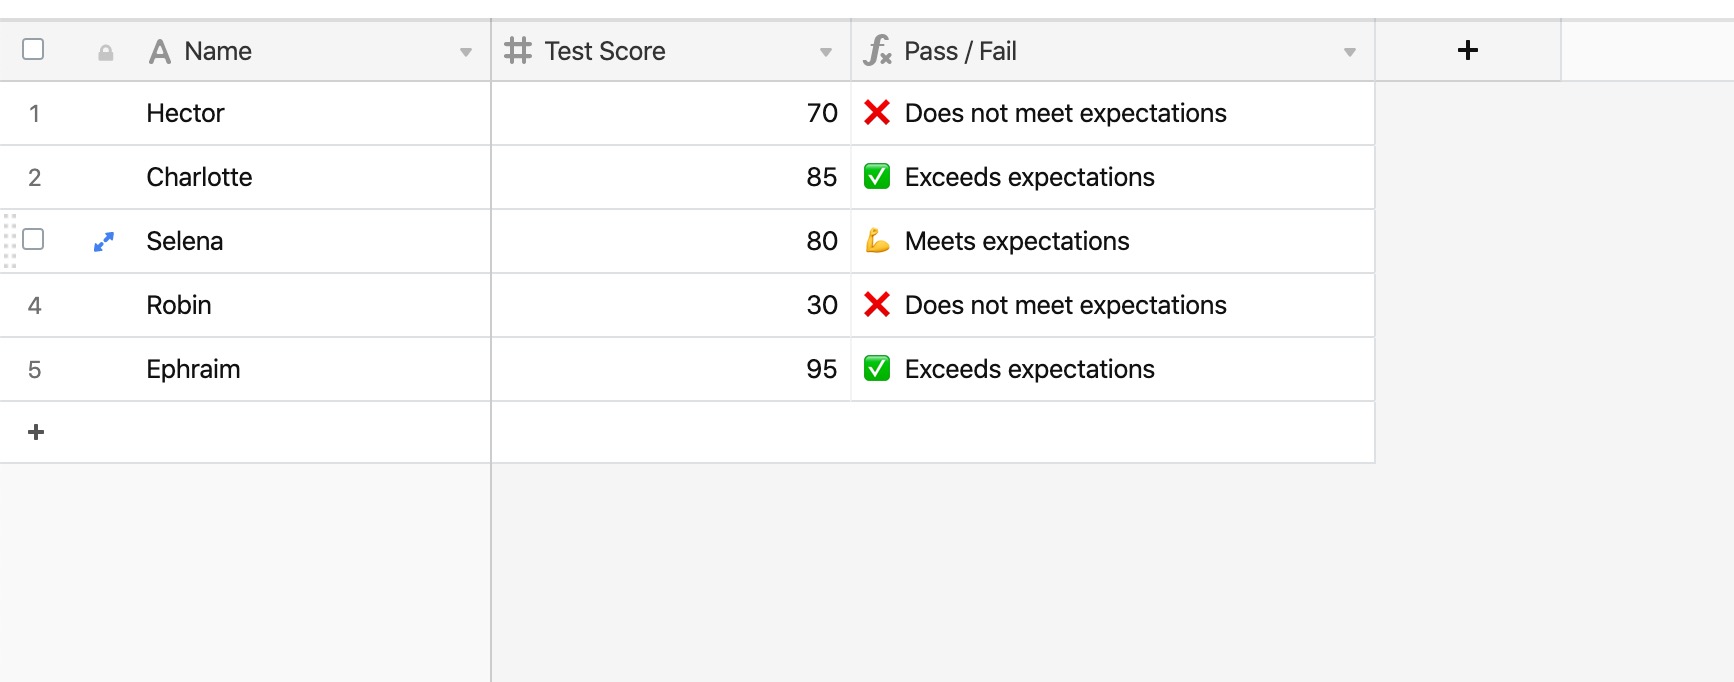
For the example below, any student who received a test score greater than 80 will get "Exceeds expectations ✅", any student who received a test score less than 80 will get "Does not meet expectations ❌", and any student who received a test score of exactly 80 will get "Meets expectations..."
Here is the problem written out in plain language:
If the number in the {Test Score} field is greater than 80, return the text string "Exceeds expectations ✅". Otherwise, if the number in the {Test Score} field is not greater than 80, and it is less than 80, return "Does not meet expectations ❌". Otherwise, if the number in the {Test Score} field is not greater than 80, and it is also not less than 80, return "Meets expectations...".
And here is the problem written out as a formula:
IF(
  {Test Score} > 80,
    "✅ Exceeds expectations",
    IF({Test Score} < 80,
      "❌ Does not meet expectations",
      "💪 Meets expectations"
    )
)
Nesting three or more IF statements
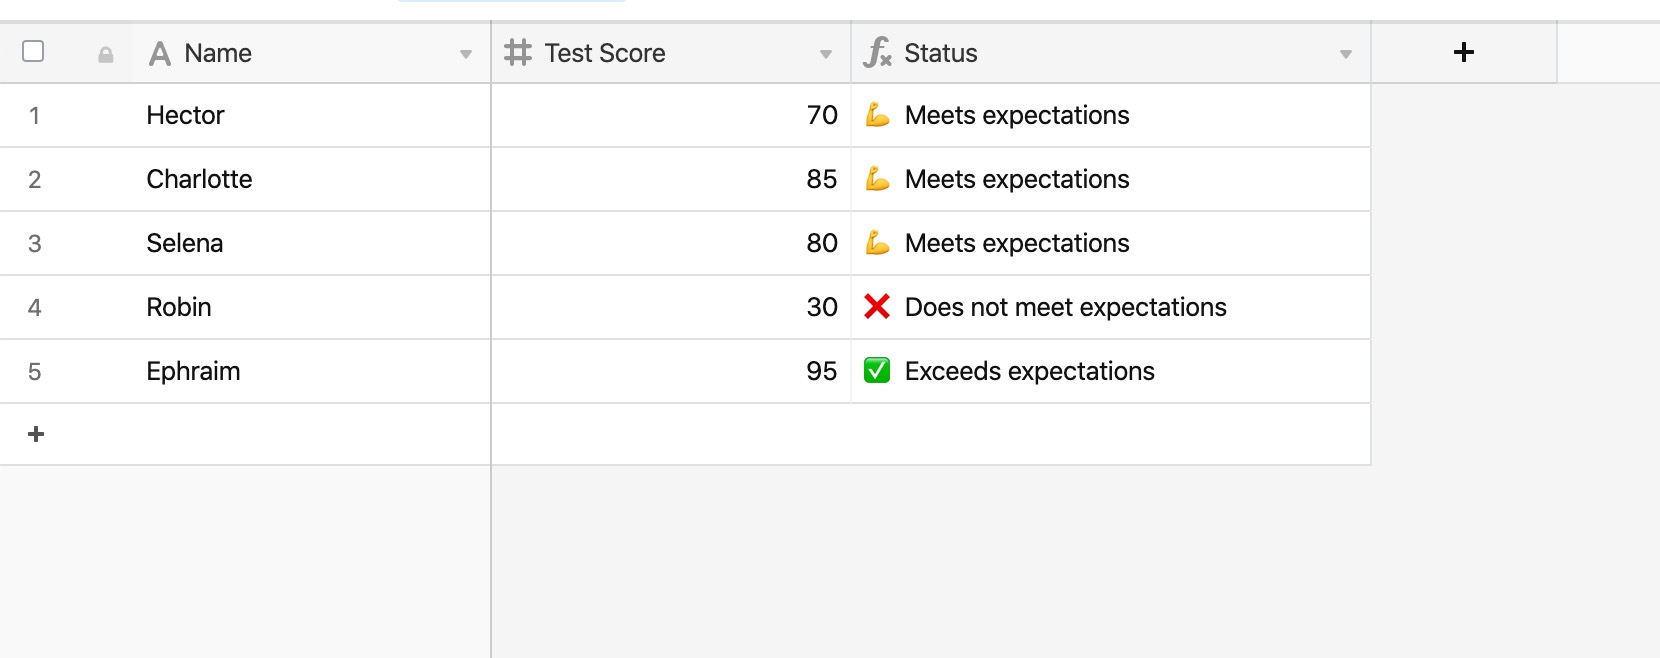
In this example, a group of students have taken a test with a score out of 100 points.
If {Test Score} is less than 70 and greater than or equal to 0, return "❌ Does not meet expectations"
If {Test Score} is greater than or equal to 70, and less than 90, return "💪 Meets expectations"
If {Test Score} is greater than or equal to 90, and less than or equal to 100, return "✅ Exceeds expectations"
If the value in the{Test Score} field is somehow less than 0, or greater than 100, return "Error!"
We need to write a series of IF functions that can return all four possible outcomes, but the catch is that we can only write logical arguments with one operator—e.g., we cannot have "0<{Test Score}<70" as the logical argument in an IF. Therefore, we need to break down this problem into a series of logical arguments that have only one operator.
One way of doing this is represented by the diagram below:
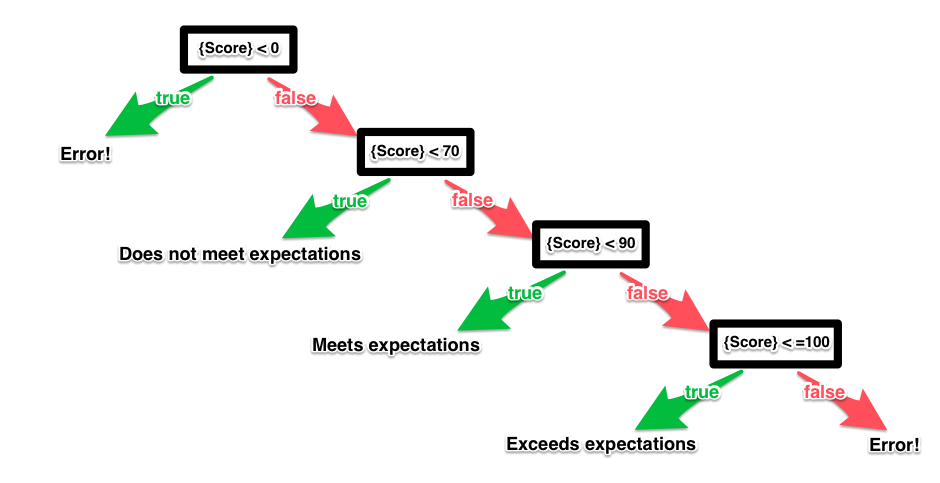
The formula reflecting this series of logical arguments, therefore, looks like this:
IF(
  {Test Score} < 0,
    "Error!",
    IF(
      {Test Score} < 70,
        "❌ Does not meet expectations",
        IF({Test Score} < 90,
          "💪 Meets expectations",
          IF({Test Score} <= 100,
            "✅ Exceeds expectations",
            "Error!"
          )
        )
    )
)
Note
There aren't any hard limits on how long a formula can be, or how many IF statements can be included. However, situations where you need dozens (or more) of statements may be more simple to approach by writing a custom script instead.