Plan Availability | All paid plans |
Permissions |
|
Platform(s) | Web/Browser, Mac app, and Windows app |
What does the dedupe extension do?
The dedupe extension helps you find and manage duplicate records in a table. You can delete duplicates or merge individual fields from duplicate records together. Try using the dedupe extension when you want to:
Convert a messy CSV into an Airtable base
Clean up redundant form submissions
Consolidate leads that were accidentally added to your CRM multiple times
Merge field values from multiple duplicate records into a single record
Preserve specific record comments and revision history during the merge process
NOTE
For large bases/datasets, the dedupe extension may be slow or unable to review, merge, and delete records.
Adding a dedupe extension
Open your Airtable home screen.
Create or open the base where you want to install the dedupe extension.
Click Tools in the upper-right corner.
Click the Extensions option.
Click Add an extension.
Search for and locate the dedupe extension.
Click Add, then Add extension.
Finding duplicate records using the dedupe extension
After adding a dedupe extension, you'll need to pick the “Table” where you'll be looking for duplicates. If you'd like, you can also choose to limit your search to a specific “View” to only find duplicates within a subset of records.
Next, you'll need to pick the field or fields that you want to use to find duplicates. If you pick multiple fields to find duplicates, the extension will find “sets of records” where the values match for all of the selected fields.
For text field types, you can choose to use exact matching, similar matching, or fuzzy matching. Below is an explanation of what will be found by each matching type:
Exact: Has the same, case-sensitive value
Exact example: J. K. Meowling and J. K. Meowling
Similar: Has the same value, but may have different capitalization, punctuation, accents, whitespace, or ordering of words.
Similar example: J. K. Meowling and j k meôwling
Fuzzy: Looks for typos and transposition errors (where characters are swapped such as ei vs ie in the word field). Be careful! Fuzzy matching can often result in false positive matches, since its search is so broad.
Fuzzy example: J. K. Meowling and J. K. Lemonwig
Once you've picked your field or fields for duplicate finding and determined how strict you want the duplicate search process to be, the dedupe extension will show how many “sets” of duplicate records are in your table or view, plus a preview of those duplicates. Click Review duplicates when you're ready to start deduping your records. Note that you must go through each set of duplicate records individually to ensure the final “merged” record contains the correct information.
Click the dropdown next to “Sort by” to change the sort order of each set of records.
In each of the record cards shown you can choose to toggle the “Hide identical fields” which will reduce the number of fields shown, making the contrasting process a bit easier. Blank fields will also be hidden.
Click the MERGE PREVIEW button to show or hide the merge preview of each set of records.
Click Skip records when a set of records does not contain duplicates.
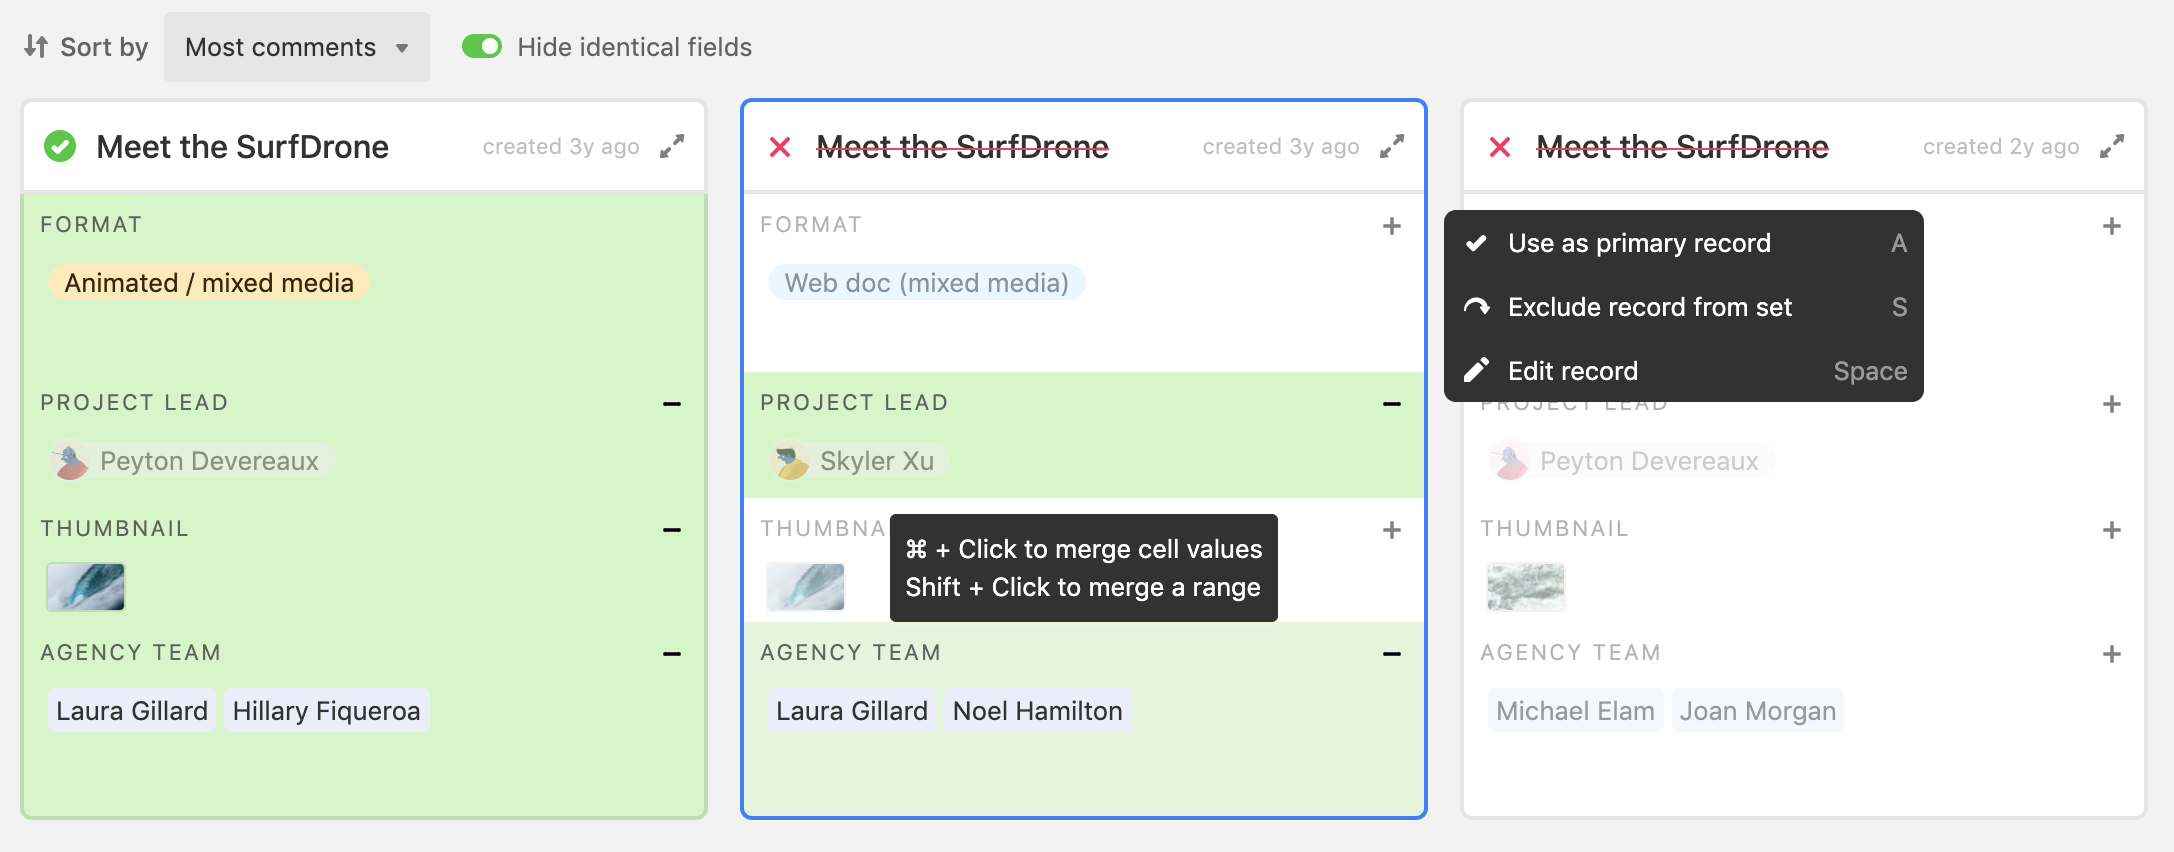
Click on a record’s card. You’ll see additional options appear:
Use as primary record (Shortcut press a) - This will choose that particular record and mark all other records for deletion. Selecting a primary record means that you are specifically preserving that record's comments and revision history. All field information, including the primary field, can then be merged into the primary record you selected.
If there are fields from the other records that you would like to keep, you can merge them with the primary record. Click on individual fields from one or more other records so that they appear highlighted in green. The resulting merged record’s fields will correspond to each of the green highlighted fields you choose. More information on merging records is available in this heading.
Exclude from record set (Shortcut press s) - For each set of duplicates, you can choose to exclude one or more records from the set if they are not a duplicate.
Edit record (Press spacebar) - This will open up an expanded record window of the record that you can edit.
Click Merge and delete x records when you have reviewed the record set and are ready to delete the duplicates.
Click Cancel at any time to return to the dedupe extension’s main page.
Click the Reset button if you want to start from scratch on a given set of duplicates This will restore all records excluded from the set, unset the primary record, and reset all selected fields.
Merging records in the dedupe extension
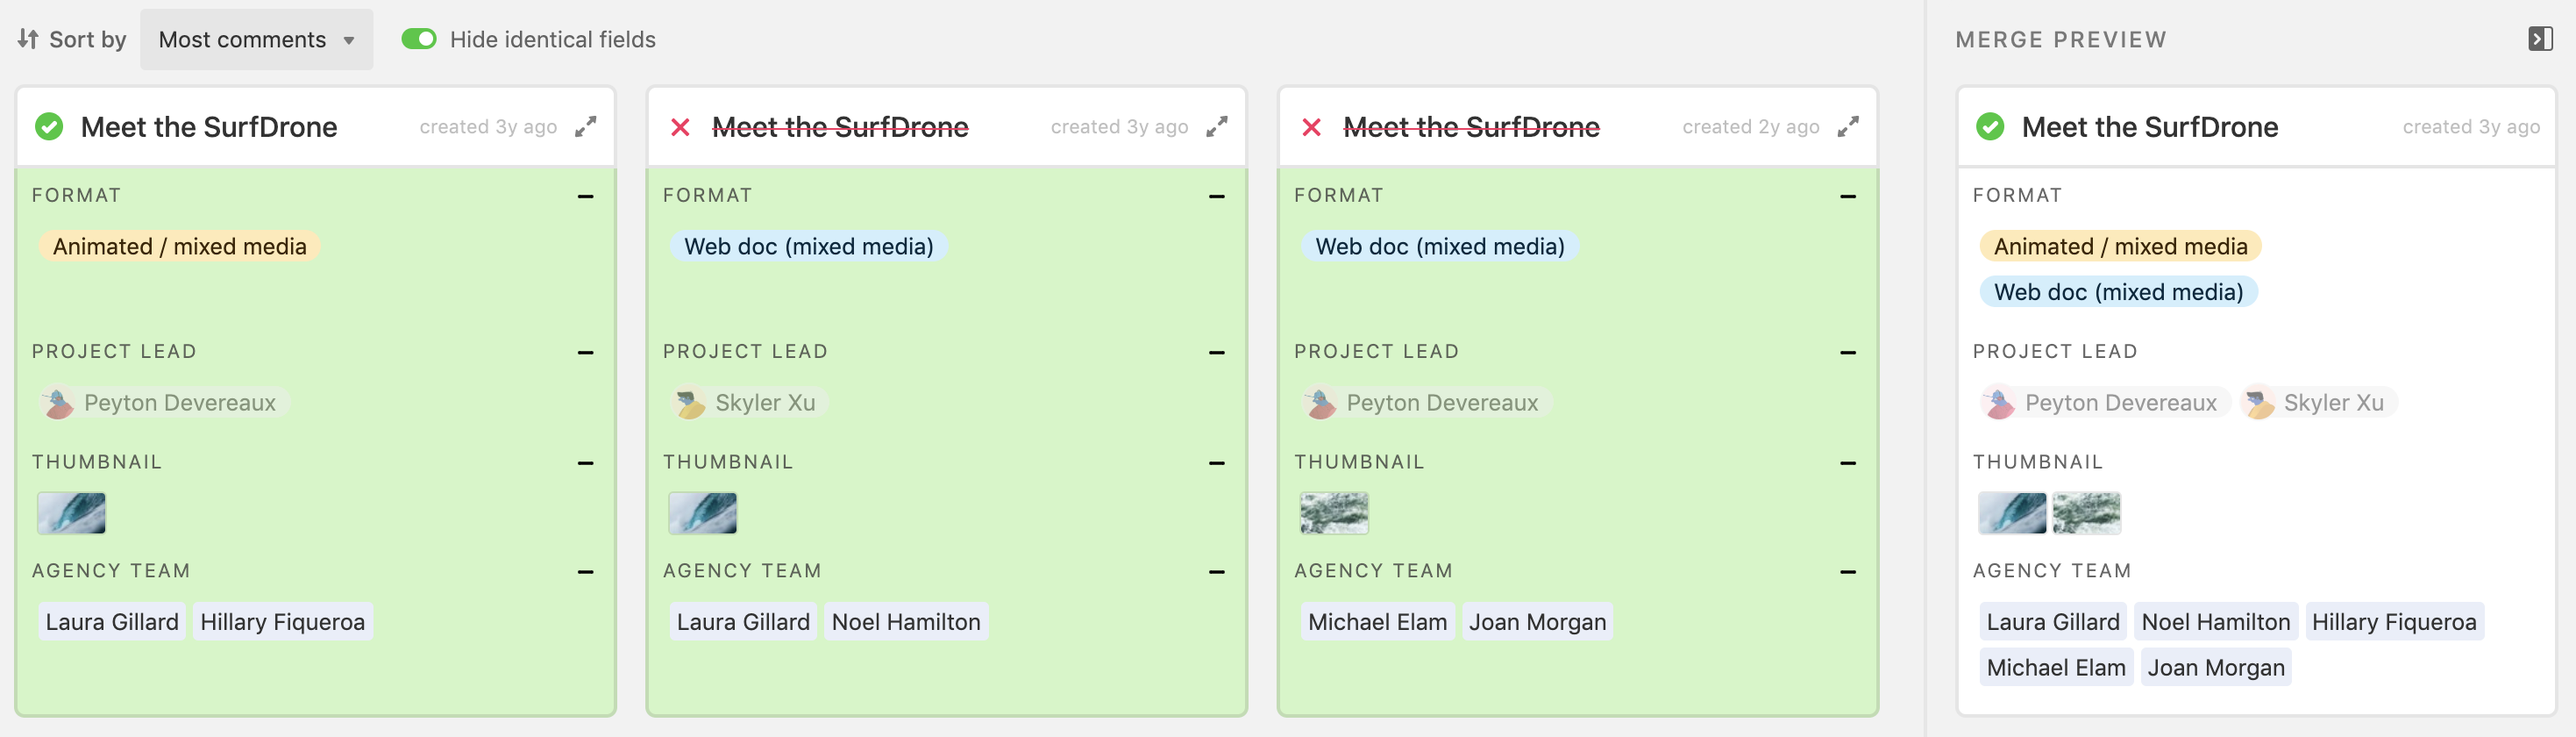
Once you choose a primary record, you will see a green check mark appear in the header. All other records will appear crossed out. For each field, you can choose one value from the available duplicates. The chosen field will turn green, indicating that it will be included in the merged record. If you'd like to combine values from two or more fields, you can do so by selecting Edit record and then manually updating the desired field.
You can execute this merging process over as many records as you want. The example below shows information being merged from 3 different records. What the new record will look like shows up on the right in the merge preview area.
.png)
Choosing multiple field values to include in the final result
For some field types that support multiple values (multiple select, multiple collaborator, linked records, and attachments), you can choose to keep multiple values in the final result.
You can use the + button on the cell or Ctrl / Ctrl + click to select one additional cell to add to the results.
If you click any cell without the Ctrl or Ctrl key, the clicked cell will replace the entire selection. As an example, in the screenshot above, clicking “Agency Team” in the third record would exclude the "Agency Team" cells from the first two records and only include the cell in the third record as shown in the next screenshot.

One common flow might be to combine the cell values from all duplicates. For situations where a user wants to merge all the cells for a particular field, they can use Shift + click to bulk-select cells in a range for merging.

To do this, you must already have a primary record selected. Shift + clicking another record will select all cells between the primary record and clicked record. For example, in the screenshot above, Shift + clicking the third record selects records 1-3. However, it’s possible that the primary record isn’t the first record in the set. When combining the values from these field types, any duplicates will be removed so that only unique values will be included in the final merged record.
Cells without the plus button appearing are not able to have multiple values and so this kind of combining is not available.
Available shortcuts in the dedupe extension
To speed up the deduplication process more, you can use keyboard shortcuts:
Use the arrow keys ← and → to select a record. You can also select a record by pressing its corresponding number key
A will use the currently selected record as the primary record
S will exclude the currently selected record from the merge process, and will not delete it
Space will open up the currently selected record for editing
Ctrl + Enter will merge your selections
The following shortcuts can be used with fields that can have more than one value (collaborator, linked records, multiple select, and attachments).
Ctrl + click will add the current selection to those already selected
Shift + click will add all the values between the primary field and the selected field
Flagging duplicates with automations
You can set up an automation that checks for duplicate records whenever a new record is created and flags any matches automatically.
Open the base where you want to flag duplicates.
Click Automations in the top navigation bar.
Click Create automation.
Add a trigger and select When a record is created. Choose the table you want to monitor.
Add a Find records action. Select the same table as your trigger, then add a condition to find records where the key field (such as email or name) matches the value from the newly created record.
Add a Conditional logic step. Configure it to check whether the Find records action returned more than one result. This accounts for the fact that the newly created record itself will appear in the results, so more than one result means a duplicate exists.
On the branch where the condition is met, add an Update record action. Use this to flag the new record — for example, by checking a "Potential duplicate" checkbox field or updating a status field — or send yourself a notification.
Test the automation with a sample record, then toggle it on.
This approach runs automatically in the background and works well for bases where records are added frequently through forms, integrations, or the API.
Note
Automation-based duplicate detection runs after records are created. It won't prevent duplicates but can help you identify them immediately for review.
FAQs
What is occurring when I see the “You don’t have permission to apply these changes” message?
Typically, there is some kind of editing permission setting that is blocking you from merging (deleting) records. You can learn more in this article.