Plan availability | All plan types |
Permissions | Owner / Creator - Can configure interface page layouts Please consult this support article for a breakdown of Interface Designer permissions. |
Platform(s) | Web/Browser, Mac app, and Windows app |
Note
This element is only available in element-based blank layouts or legacy record review and record summary layouts.
The record picker element allows interface collaborators to choose individual records. Depending upon the configuration, you can provide users with various levels of filters to ensure that they are only seeing the records most relevant to their work. This is great for any workflows involving record review or processing.
Adding record picker elements
If this is the first time you've added elements to an interface, please consult this help article first.
Find the Record picker element by clicking + Add element in the lower left portion of the interface editor.
You'll then place the element somewhere in the layout of your interface page. Don't worry if it isn't in perfect positioning yet, as you can always move the element later.
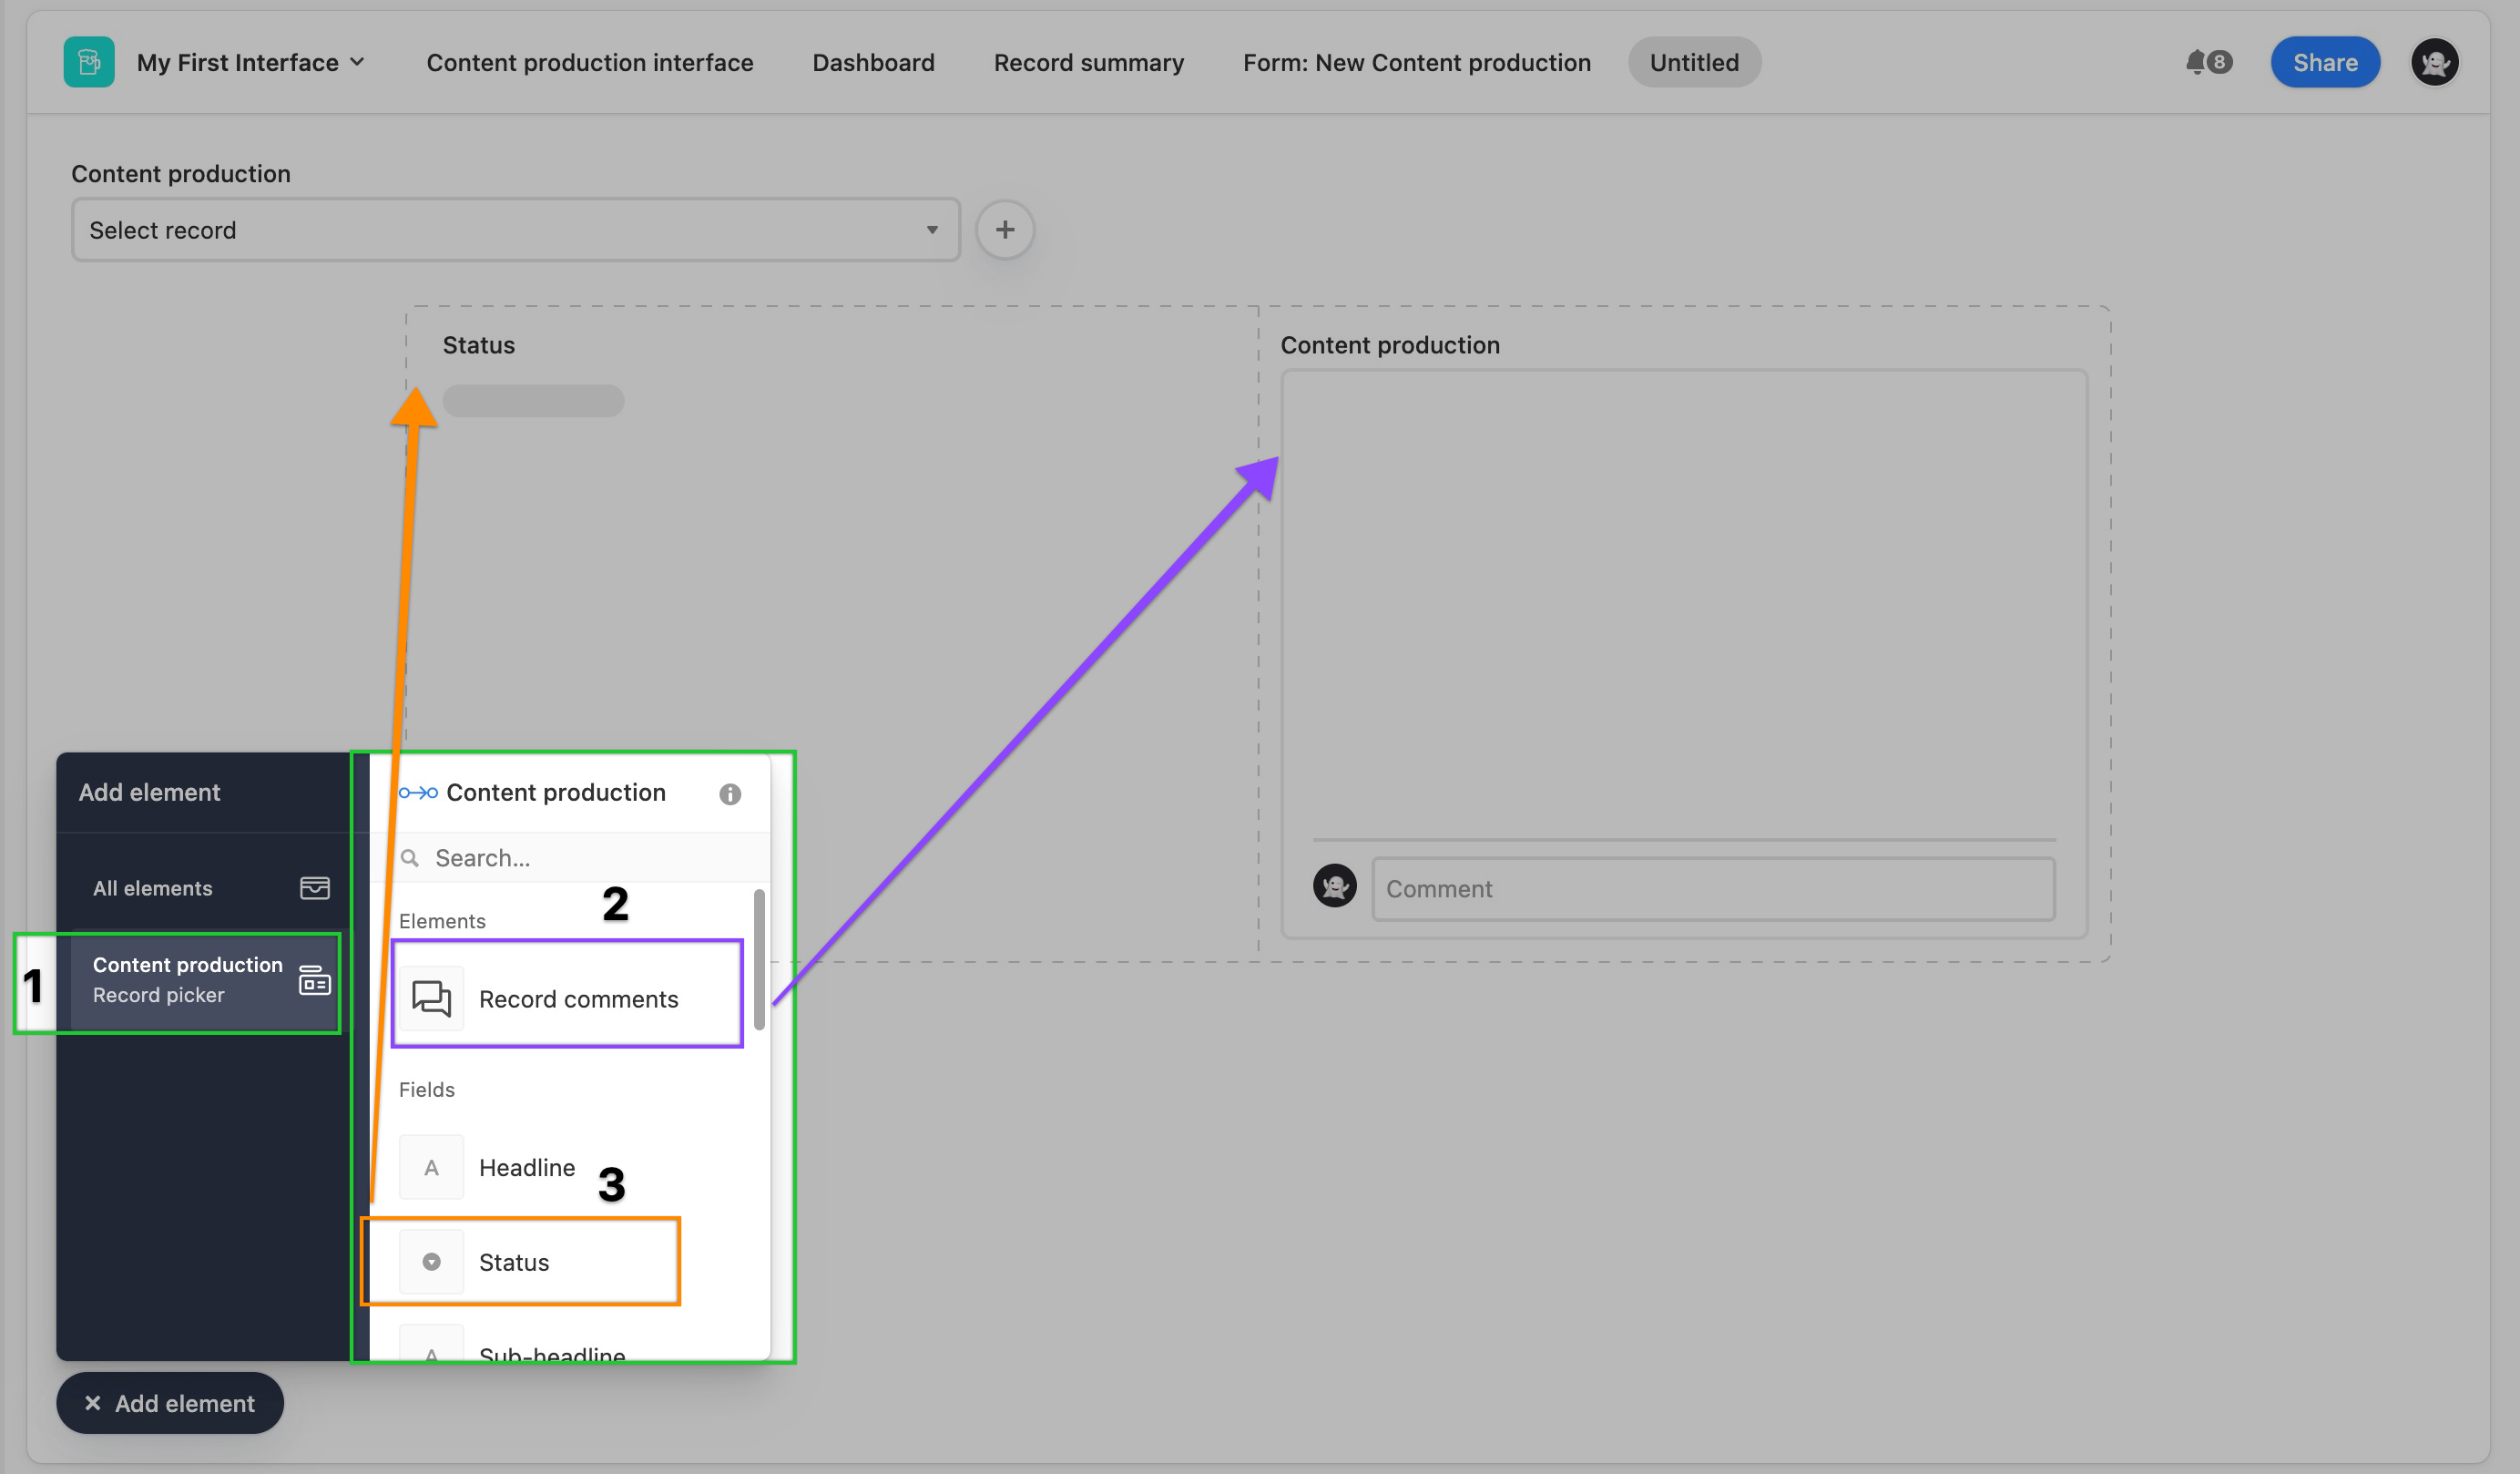
You'll then want to pick which fields from the underlying base to display on the interface page. First, make sure you are pulling in fields from the record picker element 1. Next, choose which fields you want to have displayed when a record is picked. You can see in the image below that Record comments 2 as well as the Status field 3 have been added to the interface page. Next, we'll cover additional configuration options.
Configuring record picker elements
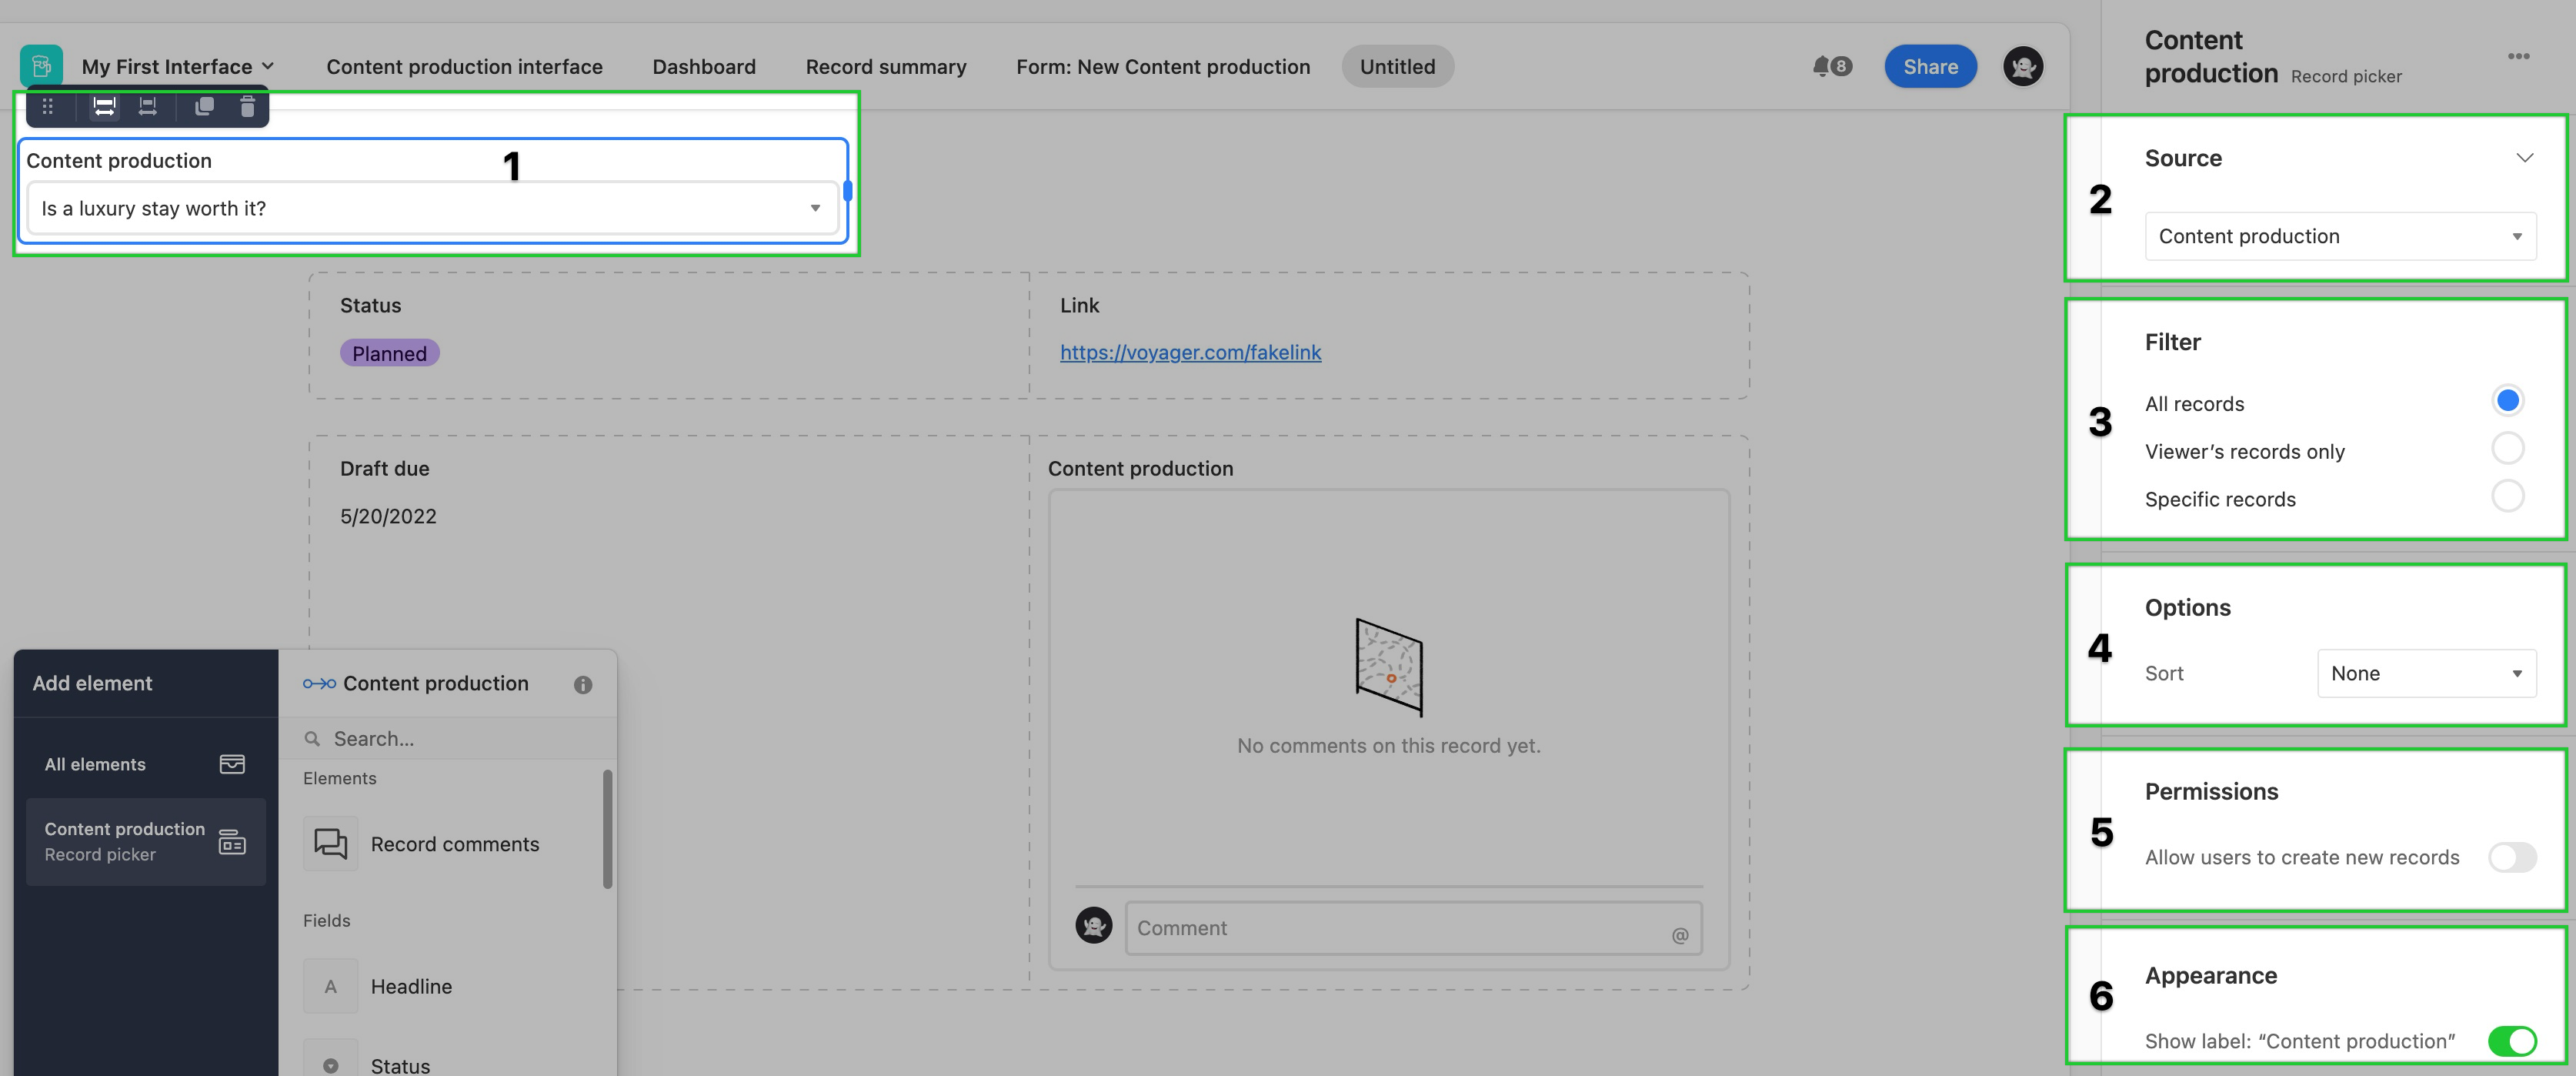
Once placed, you'll be able to configure the element.
As always, you'll need to pick a source for the record picker to pick from.
Then, set a filter type 3 for the record picker. Choose from the three general filters. By default, the All records option will keep the record picker unfiltered. The Viewer's records only option will only show records related to the interface viewer if their name (or a group they belong to) has been added to a user field in the underlying base. You can specifically set one, and only one, user field for this option. Finally, you can set Specific records by condition(s) or condition group(s) to filter the underlying records.
Next, set the sorting order of the records when the record picker drop-down is clicked. The options here are to either sort None or set up one or more fields and conditions for the picker to sort by.>
Pro and Enterprise customers will be able to choose whether or not to allow users to create new records from the picker. More on permissions here.
Lastly, choose whether or not to show a label for the record picker.