Note
While these articles are meant to serve as helpful guides for our customers, 1:1 support for integrations with 3rd party tools is limited in support interactions
If you are experiencing setup issues or need help troubleshooting this integration, we recommend you search threads in the Community first
If your question doesn't appear to be asked in the Community, then post a new message on the Development & APIs board (Requires signing into the community)
Zapier is a third-party service that connects Airtable to many other apps and services, including Shopify, MailChimp, Calendly, Jotform, Hubspot, and more. This article is specifically designed to teach you how to design Zaps where Airtable is the trigger (i.e. creating a new record in Airtable triggers a Zap), and where Airtable is the action (i.e. doing something in another app/service will automatically trigger the creation of a new record in Airtable).
If you wish to learn how to make more sophisticated Zaps that can both update and create new Airtable records, please read this support article. Embedded below are some of the most popular Zaps that have been made using Airtable—simply click the "Use this Zap" button to get started!
Zapier basics
Note
Airtable's Automations feature is an alternative to using Zapier, allowing you to configure custom trigger-action workflows directly without ever having to leave your Airtable base.
The basic structure of a Zap is that there is a trigger app and an action app. Whenever a specified event happens in the trigger app (e.g., for YouTube this might be "A video was uploaded to a specified channel," or for Facebook, this might be "I liked a post") it automatically triggers an action in the action app.
Some examples of Zaps might include:
Whenever a new record is created in Airtable (the trigger app), create a corresponding event in Google Calendar (the action app).
Whenever a new subscriber is added in MailChimp (the trigger app), create a new record for that subscriber in Airtable (the action app).
Whenever you get a new follower on Instagram (the trigger app), create a new record in Airtable for that follower (the action app).
To make a Zap with Airtable, you'll need to log in to Zapier (or create an account). When making the Zap, you can decide whether you want Airtable to be the trigger app or the action app. In either case, you'll need to connect your Airtable account to Zapier. To do this, you'll need to log into Zapier and follow their OAuth steps in order to connect the services together.
For more detailed examples of how to create Zaps yourself, read on!
Example 1: Creating a Zap with Airtable as the trigger (Send an email notification whenever a new record is created)
Note
Again, this functionalty can be acocmplished natively within Airtable in an automation. The example below is merely for simple demonstration and educational purposes.
For this example, we will be using the Sales CRM template. In our "Accounts" table we keep track of all our client accounts. Say we wanted to be notified via email whenever we get a new account (a new account record is created in our table). After connecting your Airtable account and your email account with Zapier, you can create a Zap that makes Zapier regularly look for new records in a specified Airtable base and table.
To make a Zap with Airtable, you'll need to log in to Zapier (or create an account). From the home page, click the + button. You'll then be brought to the Zap configuration page. Here is the page where we will set up the trigger and action for our Zap. We recommend taking a moment to name your Zap now to keep track of it.
Step 1: Set up the trigger (When new account record is created in Airtable)
The first step of any Zap is to set up a trigger. In this case, we would like Airtable to trigger an action (sending an email)—so Airtable would be considered the trigger app. After selecting Airtable as the trigger app, you will be prompted to choose the specific conditions for activating the trigger. In this case, we want the Zap to run whenever a new record is available.
The next step is to connect your Airtable account to Zapier (or to select an already connected Airtable account). More information about Zapier's OAuth login process is available here.
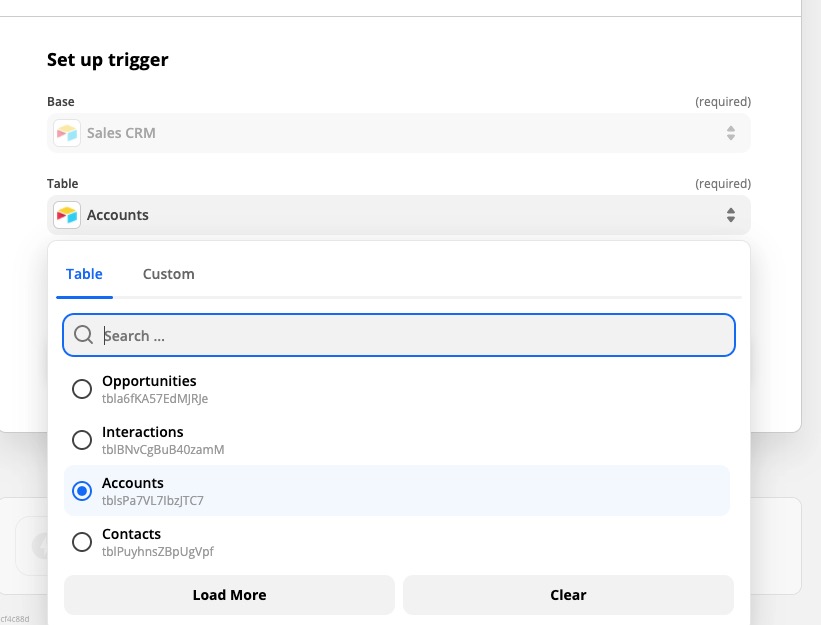
After selecting the appropriate account, you'll then be prompted to configure the trigger-specific setup options. With Airtable as a trigger, we'll need to specify the base and table by clicking the dropdown menu and selecting the appropriate options (in this case, we want the "Sales CRM" base and the "Accounts" table).
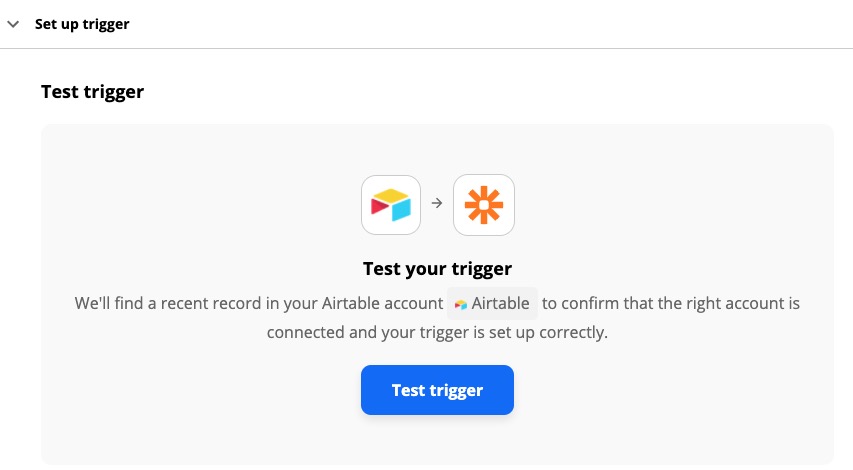
For the last part of the first step, Zapier will ask you to test your trigger. If everything works, then you'll be prompted to move onto the next step of your Zap.
Step 2: Set up the action
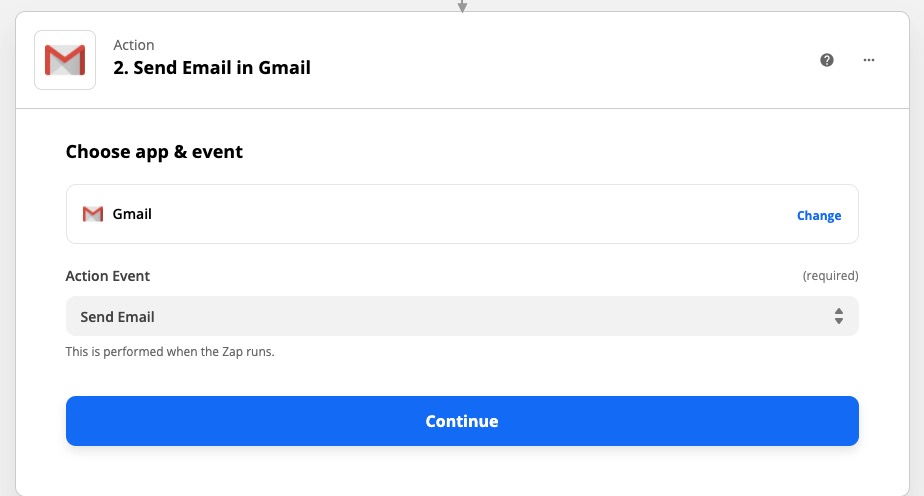
For the second step, you'll be asked to pick an action app. You can pick Gmail, Email by Zapier (which will send an outbound email from a custom @zapiermail.com email address), Mailgun, or another mail service supported by Zapier. For this example, let's pick Gmail as the action app.
You'll then be asked to select an action for Gmail to take. There are a variety of potential options, but for our purposes, we want to pick Send Email.
The next step is to connect your Gmail account to Zapier (or to select an already connected Gmail account).
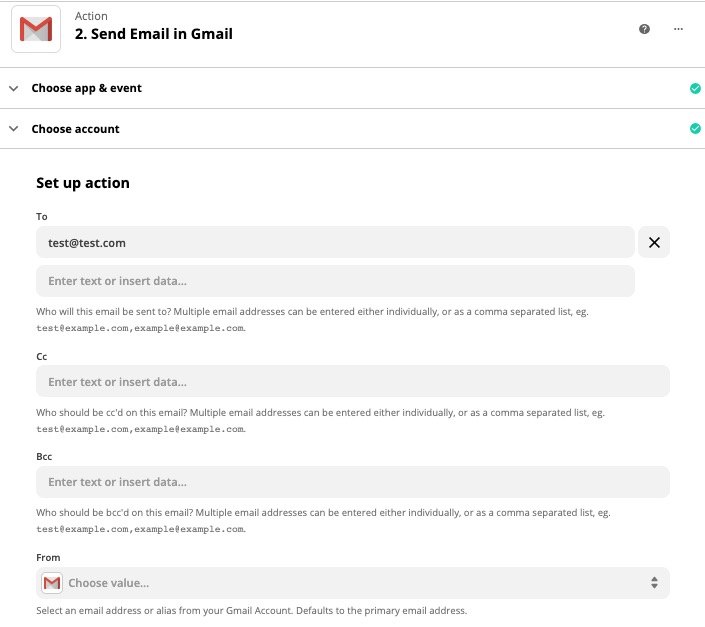
After that, you'll need to set up the template for the email. There are several customization options here, but at a minimum, you'll need to specify an email address to which the email notifications can be sent, a subject line, and some body text.
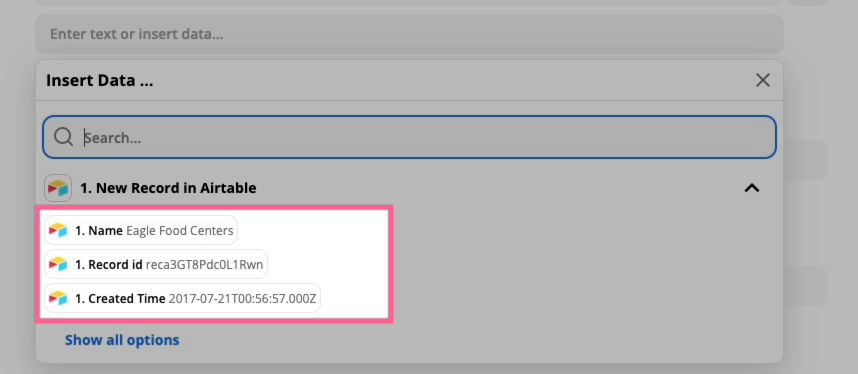
When composing the email template for your action step, you can incorporate both plain text and dynamic data from the incoming record from Airtable. So say we created a new record in our "Accounts" table in Airtable for "Eagle Food Centers". Since that record triggered this Zap, we would have access to that record's data in the Zap itself, so we could include that data in our email. When inserting data on any of the email template inputs, you can access the available record data from the dropdown menu:
In our example, let's say that for every new record created, you want to have an email notification sent to you and to the new Account holder. Since every email notification will always be sent to you("[email protected]"), your email address will be static, and all you need to do is type it directly into the "To" field.
If we'd like to also email each account holder, we'll need to make sure we use the email for that account. We can do that by going to the next line, and choosing the data for "Account Email" from the incoming record ("[email protected]"):
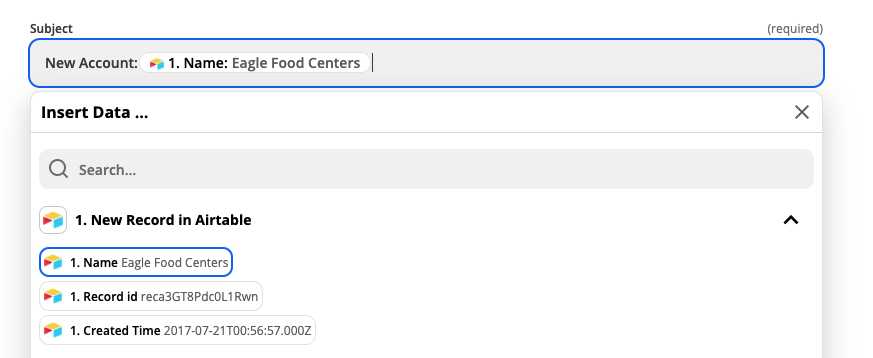
You can also use dynamic input data in other parts of the email template. In constructing the email's subject line, for example, you can have it dynamically render the name of the new account by choosing the record's name from the dropdown.
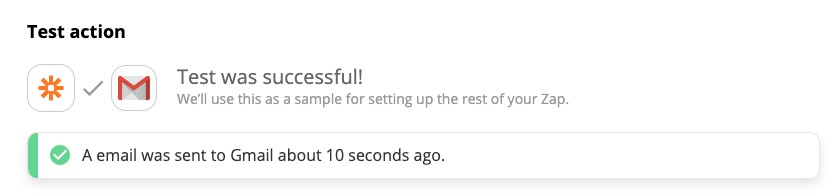
Once you're done creating the email template, click the blue Continue button. Zapier will create a test email for you before you're done completing the step so you can check to see if everything looks good. Make sure you test the action before moving on:
After testing, all that's left to do is to turn on the Zap! Congrats! You've set up email notifications!
Example 2: Creating a Zap with Airtable as the action (Record your Instagram posts in an Airtable base)
Let's say that we're compiling a base of travel photos, and you want to make it so that every picture you post on Instagram automatically gets logged to a record in an Airtable base. So we will create a Zap that makes Zapier regularly look for newly posted photos, take the data from those photos, and turn that data into Airtable records in a specified base and table.
To make a Zap, you'll need to log in to Zapier (or create an account). From the home page, click the + button. You'll then be brought to the Zap configuration page, where you can name your Zap.
Step 1: Set up the trigger
For this example, we would like an app other than Airtable (Instagram) to trigger an action within Airtable—so Instagram is considered the trigger app.
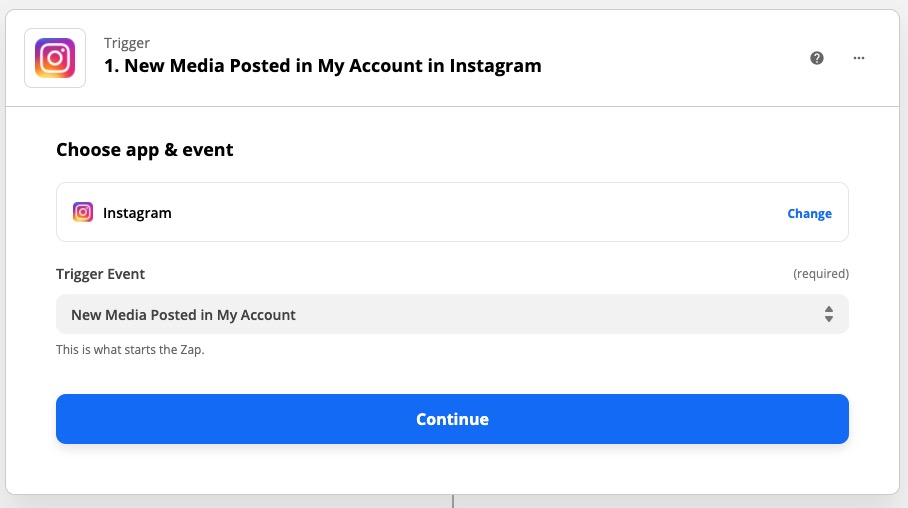
After selecting Instagram as the trigger app, you will be prompted to choose the specific conditions for activating the trigger. In this case, we want the Zap to run whenever new media is posted to our account.
The next step is to connect your Instagram account to Zapier (or to select an already connected Instagram account). Finally, Zapier will ask you to test your trigger. If everything works, then you'll be prompted to move on to the next step of your Zap.
Step 2: Set up the action (Airtable)
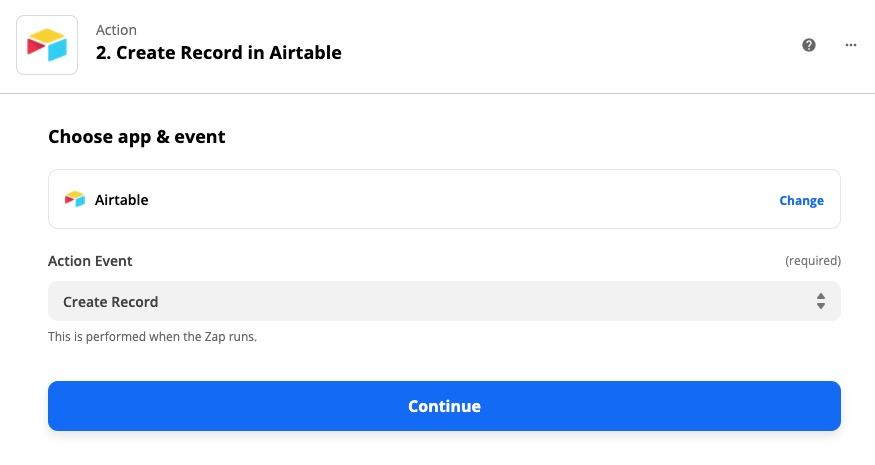
For the second step, you'll be asked to pick an action app. In this case, the action app is Airtable. You'll be asked to select an action for Airtable to take. Since we want a new record to be created for every Instagram post, we'll select "Create Record".
The next step is to connect your Airtable account to Zapier (or to select an already connected Airtable account). More information about Zapier's OAuth is available here.
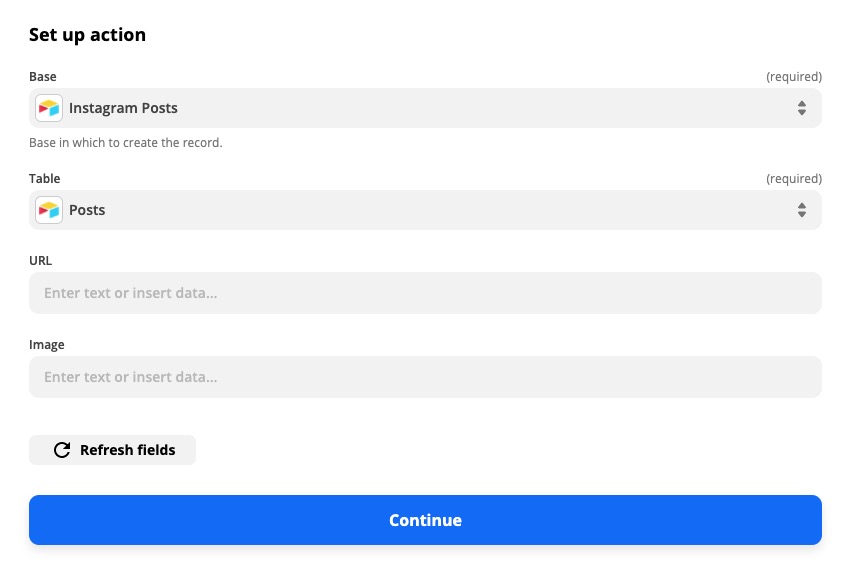
We can now select the table and base where our new records will be created. Once you've selected the base and table into which you'd like your records to go, Zapier will automatically fetch all of the different fields from that base and table:
You can use plain text for these inputs, or incorporate specific parts of the incoming data from the trigger (Instagram). For our example, we want to make sure we take both the link to the original post, as well as the post's image itself. You can access available dynamic data from past steps by choosing that data from the dropdown menu:
Once you're done creating the Airtable record template, click the blue "Continue" button. Zapier will then prompt you to test your action. For testing this particular action, you should not only see that your test was successful in Zapier, but you can also see a newly created record in the Airtable base you specified.
If everything looks good you can turn your Zap on, and now every time you post to Instagram it will be recorded as a new record in your Airtable base. Congrats! You've integrated Instagram and Airtable!
Does Airtable have a native Dropbox integration?
No. Airtable doesn't have a direct, built-in connector for Dropbox the way it does for sources like Google Calendar. To move files or data between Dropbox and Airtable, you'll use a middleware automation service such as Zapier or Make, which connects the two and lets you do things like create an Airtable record (with a link to the file) whenever a new file is added to a Dropbox folder. See Using Zapier to connect Airtable with other services for how the bridge pattern works. Note that Airtable attachment fields store links/files, so a typical setup stores Dropbox file links in Airtable rather than mirroring the files themselves.