Note
While these articles are meant to serve as helpful guides for our customers, 1:1 support for integrations with 3rd party tools is limited in support interactions
If you are experiencing setup issues or need help troubleshooting this integration, we recommend you search threads in the Community first
If your question doesn't appear to be asked in the Community, then post a new message on the Development & APIs board (Requires signing into the community)
Zapier is a third-party service that connects Airtable to many other apps and services. This article is specifically designed to teach you how to design Multi-Step Zaps for the purpose of creating an integration that will automate the updating of Airtable records.
You can learn more about the basics of integrating Airtable with other apps and services with Zapier by reading this support article.
Since this article was first create Airtable has added many native automation triggers and actions that can provide similar, and sometimes better or more trustworthy, results.
Zapier basics
The basic structure of a Zap is that there is a trigger app and an action app. Whenever a specified event happens in the trigger app (e.g., for YouTube this might be "a video was uploaded to a specified channel", or for Tumblr this might be "I liked a post"), it triggers an action in the action app. There can be multiple action apps and multiple actions, but only one trigger app and one trigger.
When you select Airtable as an action app for your Zap, there are three possible actions that can be taken:
Create a record. This action creates a new record in a specified table in a specified base, and populates the new record with data from the trigger app.
Find record. This action searches a specified table in a specified base to see if the incoming data from the trigger app matches any of the existing records in the table. If no records match any of the incoming data, you can also specify that a new record be created.
Update a record. This action updates the values of specified cells in a specified Airtable record. In nearly all cases, the record to be updated must have been specified by a previousFind record action. This is because, without a find action, Zapier doesn’t have any way of knowing which record needs to be updated.
With a free Zapier plan, you can design Zaps with a single trigger and a single action. This means that you can set up Zaps that will automatically create new Airtable records using incoming data from any of the hundreds of third-party services supported by Zapier.
With a paid Zapier plan, you have the ability to craft Multi-Step Zaps, which can contain multiple actions.
Note
Because updating Airtable records using Zapier requires two separate actions (a find record action and an update record action), using Zapier to update your Airtable records requires a paid Zapier plan.
Example: Using Zapier’s Multi-Step Zaps to set up an automatically updating Gmail-to-Airtable contacts base
Let's say we have an Airtable base containing our email contacts, and we want to keep each contact record updated with the timestamp of the most recent email we've received from that contact in Gmail.
After connecting your Gmail account with Zapier, you will create a Zap that makes Zapier regularly look for new emails in that account’s inbox. For each of those emails, the Zap will then search your Airtable contact records for a record containing a matching name. If an Airtable record does not exist for this name, the Zap will create a new one, and if a record does already exist, it will update the existing record's "Date of last contact" field value to match the new email's timestamp.
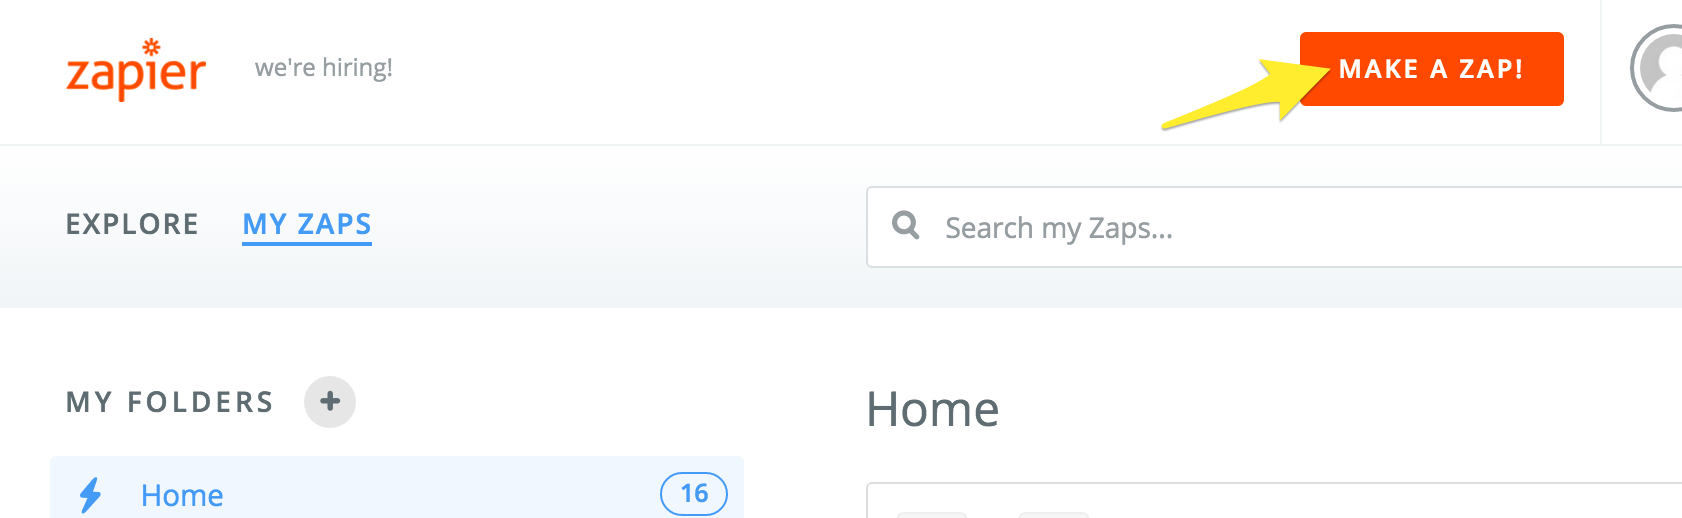
From the Zapier dashboard, under the "My Zaps" tab, click the "Make a New Zap" button:
You'll then be brought to the Zap configuration page, where you can name your Zap.
Set up the trigger - The first step of any Zap is to set up a trigger. In this case, we would like Gmail to trigger a change in our Airtable database—so Gmail would be considered the trigger app.
After selecting a trigger app, you will be prompted to choose the specific conditions for activating the trigger. In this case, we want the Zap to run whenever a new email is received.
The next step is to connect your Gmail account to Zapier (or to select an already connected Gmail account).
After selecting the appropriate account, you'll then be prompted to configure the trigger-specific setup options. For this particular trigger we've picked, we'll need to specify a Gmail label or mailbox. Since we want the trigger to fire for every email that comes into our inbox, we'll pick INBOX, but you could pick another label or mailbox if you wanted. (For example, you could make it so that the Zap only triggers on emails you decide to label as "Airtable.")
For the last part of the first step, Zapier will ask you to test your trigger. If everything works, then you'll be prompted to move onto the next step of your Zap.
Set up the find record action - For the second step, you'll be asked to pick an action app—select Airtable.
You'll then be asked to select an action for Airtable to take—in this case, we want "Find Record," since we want the Zap to look through existing Airtable records for one that matches a particular contact's name. (Note: Without making this “Find Record” step, Zapier won’t know which record to update when we try and construct the “Update Record” action later.)
You'll be asked to connect your Airtable account to Zapier via OAuth. Then, you'll configure the find record action. The first step is to pick which of your Airtable bases to search, and the appropriate table within that base.
Now, look at "Search by field" and "Search value"—this part can be a little tricky.
The idea here is that we can choose a specific part of the incoming email (called a variable) from Gmail (the trigger app) to compare against a field in Airtable—in this case, the "Contact Name" field.
In the Search value section, we need to pick the variable from our trigger app, Gmail, with which we'll search the Airtable records. For our purposes, we'll pick "From Name," because we want to conduct a search using the name of the person who sent the incoming Gmail.
In the Search by field box, we'll pick the field we're planning on searching in our selected Airtable base/table. In this case, we'll want to pick the Contact Name field, because we want to check if the From Name of the incoming email matches any of the names in the Contact Name field of our Airtable base.
Now, whenever an email from Gmail triggers the Zap, Zapier will take the From Name of that email, and scan through Airtable to see if any Airtable records have a matching Contact Name value. If there is a match, it will then perform an action on that matching record; if there are multiple matches, it will simply pick one of them. We'll configure exactly what that action is in the next step.
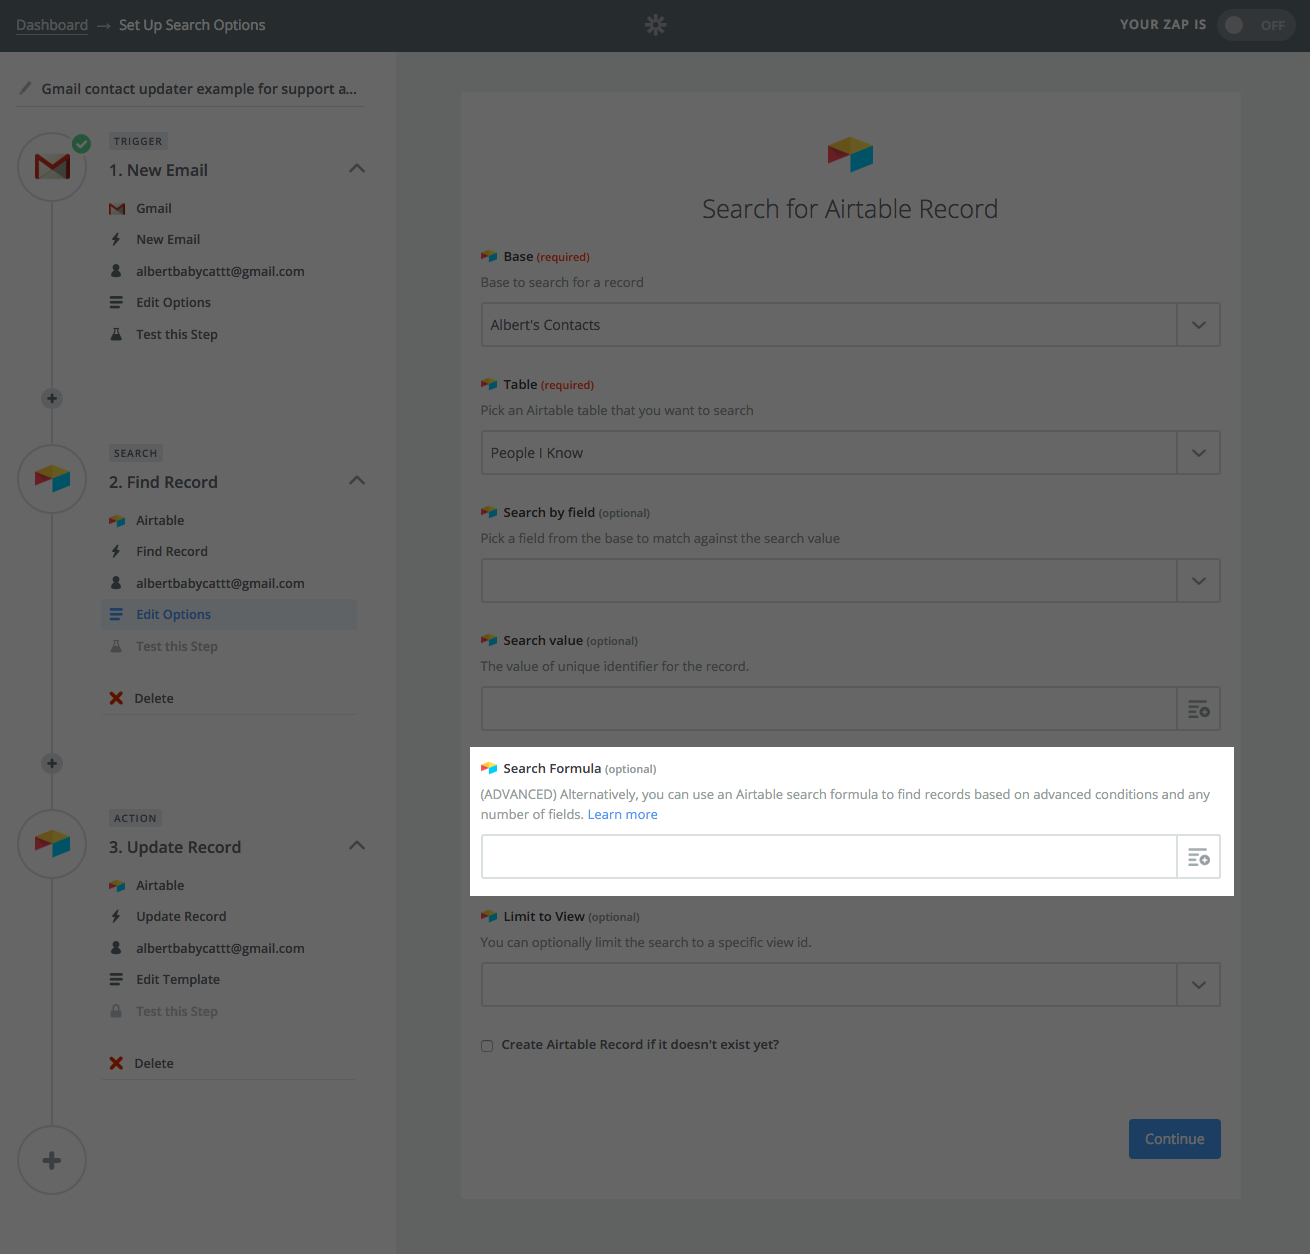
Notice that lower down on the page there are parameters called Search Formula and Limit to View, as well as a checkbox called "Create Airtable Record if it doesn't exist yet? " (For more explanation on what each of these mean and how you can use them, see Advanced tips and tricks.)
Once you've finished setting up the search value and search by field parameters, you'll finish up Step 2 by testing it. If everything goes well, then you can move onto your last step.
Set up the update record action - Now that we’ve set up a find record action, we can set up an update record action. After you’ve finished configuring your find record action, you can either click the “Add a step” button or the big plus button to create a third (and final) step.
For this next step, pick Airtable as the action app again, but this time, choose Update Record as the action.
After linking to the appropriate Airtable account, you'll then be taken to the Set Up Airtable Record step. Filling in the Base and Table fields as appropriate will populate the bottom half of the page with the names of the fields in the specified table of the specified Airtable base.
Let’s look at the Record field. The button which says Add a Search Step will let you add a Find record step if you haven’t already done so. When you click the dropdown menu, it’ll look something like this:

The sequences of numbers and letters represent each of the records that already exist in our table. In our case, we don't want to pick any of these; we want the record that gets updated to vary depending on which record was found in Step 2. To do this, select Use a Custom Value.
This will bring up another field called Custom Value for Record ID, which asks us to specify the custom value. We want the record in our Airtable base to be updated based on the record that we found in Step 2. To tell Zapier that you want to do this, scroll down in the dropdown menu until you find the Step 2 options. From among the Step 2 options, we want to pick ID, because that option represents "the ID that we found using the 'Find Record' action for Step 2."
The following boxes let you specify which of the fields in your Airtable base you'd like to be updated with information from the triggering Gmail in Step 1. In our case, we can set it up so that the Date of last contact field of our Airtable base gets updated with the Date data of the most recent triggering Gmail, and the Last message field of our Airtable base gets updated with the Body HTML of the most recent triggering Gmail.
Once you're done, Zapier will prompt you to test the step. If everything works, then you can turn on your Zap!
Advanced tips and tricks
Write a search formula
When configuring the Find Record action, instead of picking a single Airtable field from the Search by field dropdown and picking a single Search value from the triggering app, you have the option of writing a custom Search Formula instead. You can use this formula to compare fields in your Airtable records to the values that are passed on from your trigger app in more complicated ways.
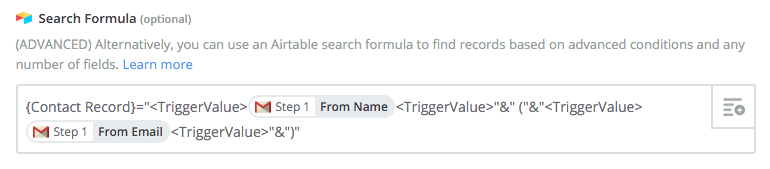
The search formula should be a valid Airtable formula that is true when a record matches. The names of Airtable fields should be surrounded in curly brackets (e.g. {Contact Name}). You can insert values from your trigger app using the button to the right of the input. Note, however, that you'll need to surround the value tokens from the trigger app with <TriggerValue>. So, in our earlier example, we could write the formula:
{Contact Name}="<TriggerValue>(Step 1: From Name)<TriggerValue>"
This would mean "search to see whether the From Name value in Step 1 matches anything in the Contact Name field of my Airtable database."

The benefit of writing a search formula is that you can create more complex search actions. Suppose that the primary field in the target table of your Airtable database isn't just a person's name, but a formula that concatenates a name and an email address.
If you wanted to search for records formatted in this way using the trigger values from Gmail, you would need to write a search formula.
Note that if you decide to use a formula here, you don't need to fill out the Field to Search and Field Search Value options.
Limit to view
When configuring the Find Record action, you have the option of limiting the search just to a specific view ID.
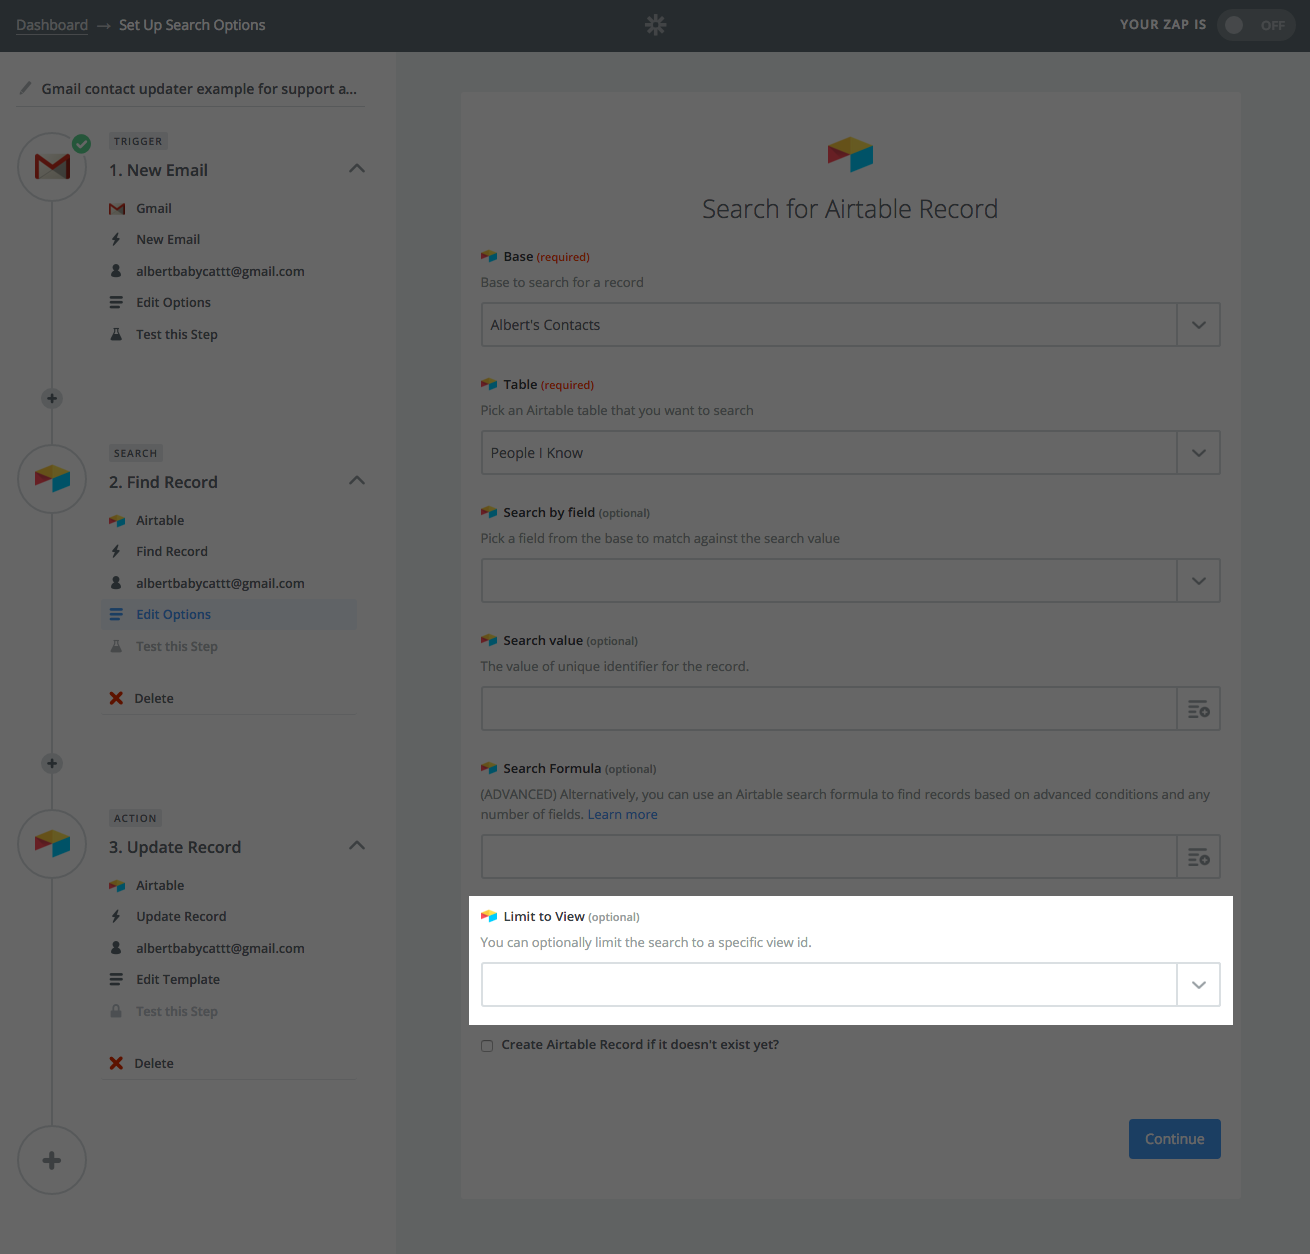
This can be useful when you know that there’s only a certain portion of your records that you'd like to keep updating. Let's go back to the contact base example.
Let's say that you only wanted to keep track of the dates of last contact and last messages of the people you've tagged as friends (and that you don't particularly care about updating the records of the people you've marked as nemeses). You could create a record which filters out anyone who's not a friend. Then, when you're configuring the “Find Record” action in Zapier, you could select the "Friends" view under the "Limit to View" option.
 This way, your base will only update if you receive an email from someone that appears in your Friends view.
Creating a combined find/create record action
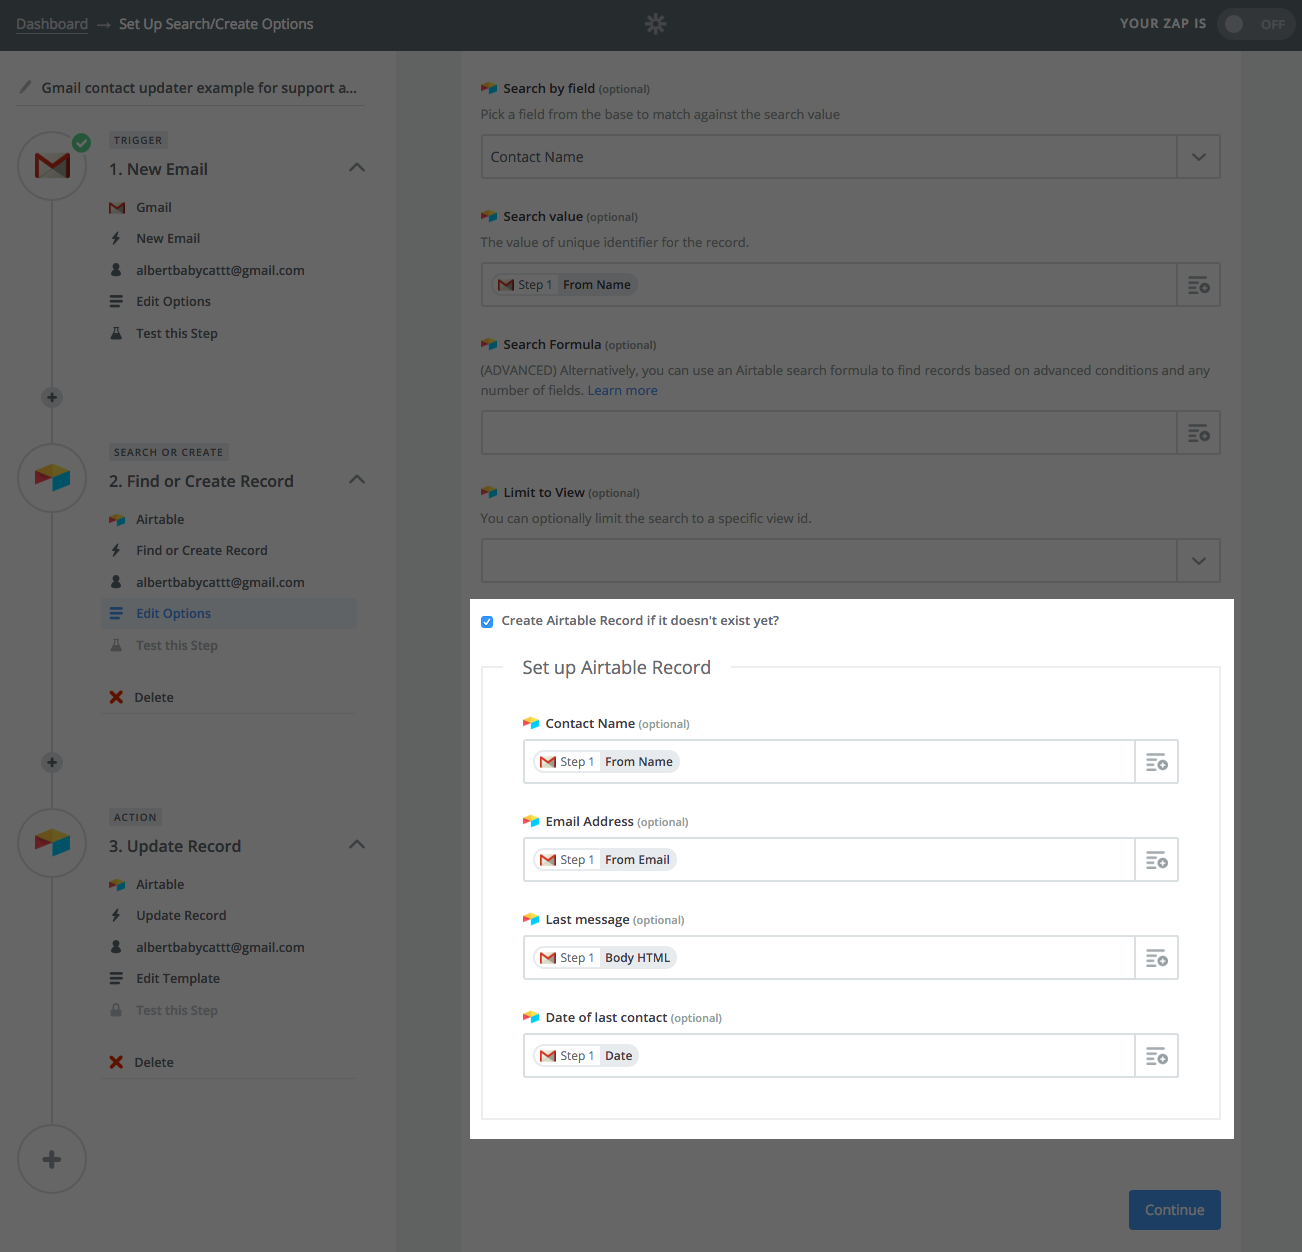
When configuring the Find Record action, you have the option checking a box called "Create an Airtable Record if it doesn’t exist yet?"
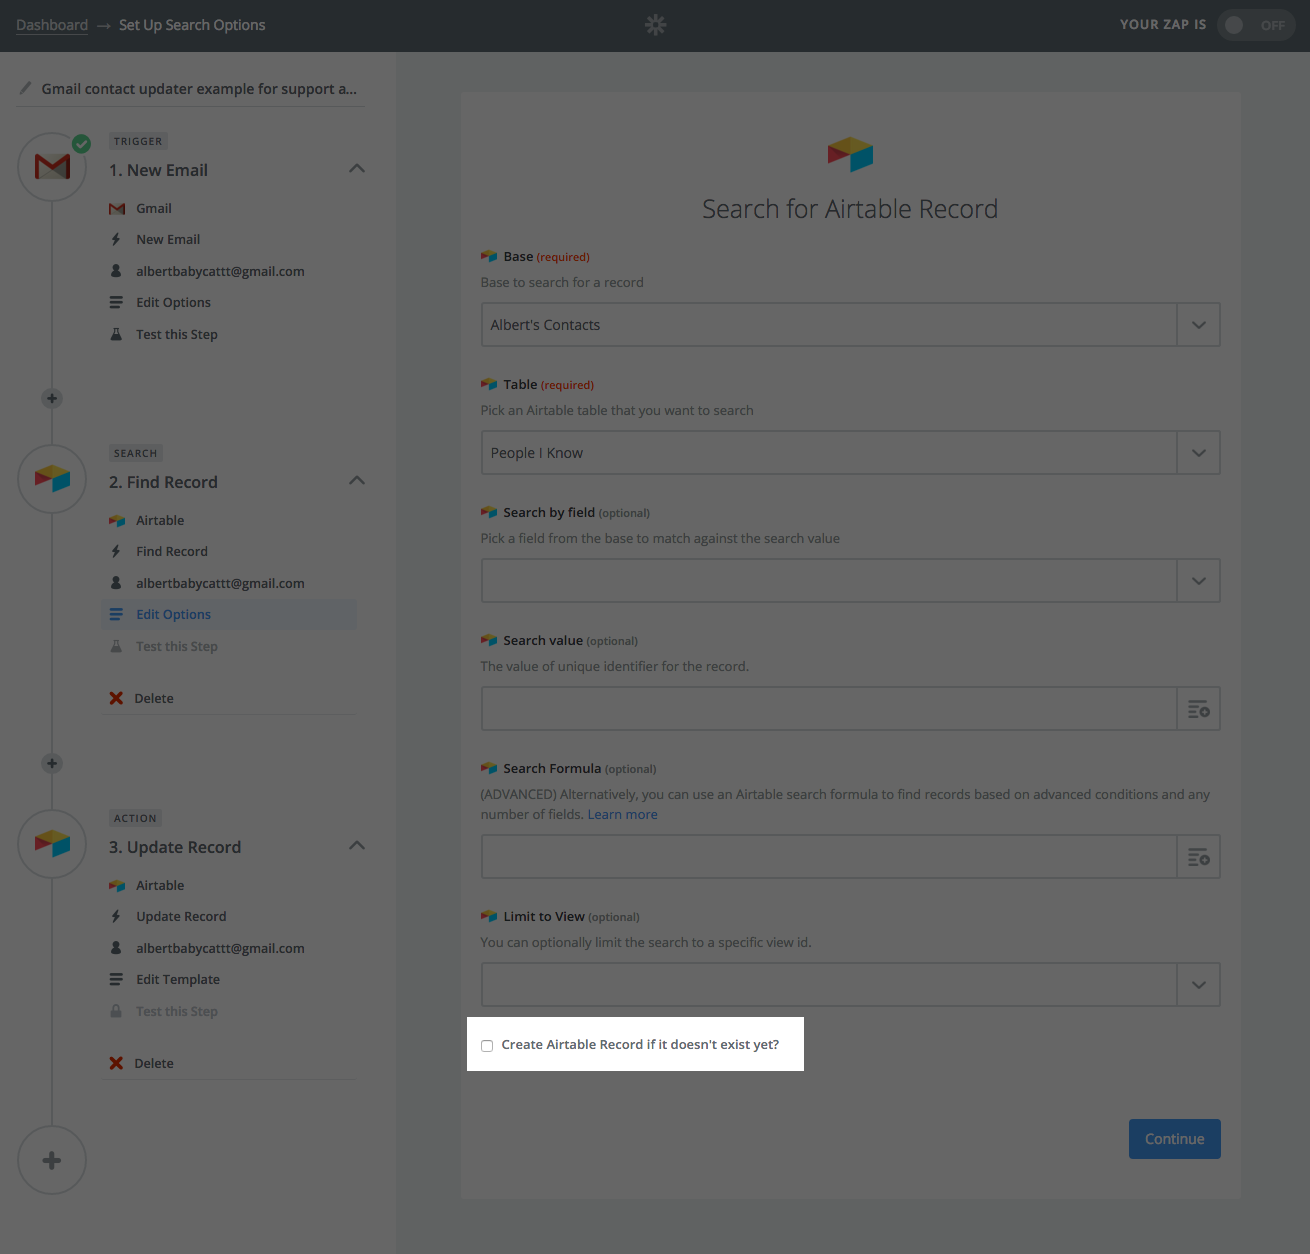
Checking this box means that if your Zap Find Record action doesn't find a matching value in your Airtable base, Zapier will automatically create a new record based on data from the triggering app. You can choose which information from the triggering email will be placed into which fields in the Airtable base.