Plan availability | All paid plans with varying limitations. |
Permissions |
|
Platform(s) | Web/Browser, Mac app, Windows app |
Learn how to use the Airtable Sync integration feature to bring information from an external application into Airtable as a new table in your base. Sync integrations are always a one way sync from the external application into an Airtable base, so changes made in Airtable cannot be synced back to the external application that you are syncing with.
This article covers the process of syncing Pull requests connected to a GitHub branch repository, based on a customized filter set up in Airtable, to an Airtable base. It's worth noting that this sync integration only works with GitHub Enterprise Cloud or GitHub.com. This sync does not work with GitHub Enterprise Server.
Setting up GitHub PRs to sync with Airtable
Navigate to a base where you want to sync data into Airtable.
Add a new synced table by clicking the + Add or import button.
Scroll down to the bottom of the list and click the XX more sources… option.
Browse or search for “Github” and then click GitHub Pull Requests.
Select an existing GitHub account, if you’ve already connected to GitHub before, or link to a new GitHub account if this is the first time you've set this sync up. Connecting a new account will take you to the authentication window. For more info on authentication and authorization consult this support article section.
After you have connected your account successfully, you will need to select a repository or "Repo." Click Select repo to begin the process.
If this is the first time you are syncing Airtable with Pull requests in GitHub, then you will need to install an app connector which you can click on within the sync setup window or by clicking here. This is a requirement on GitHub's end that is needed to allow this sync to work. The installation screen will look something like this:
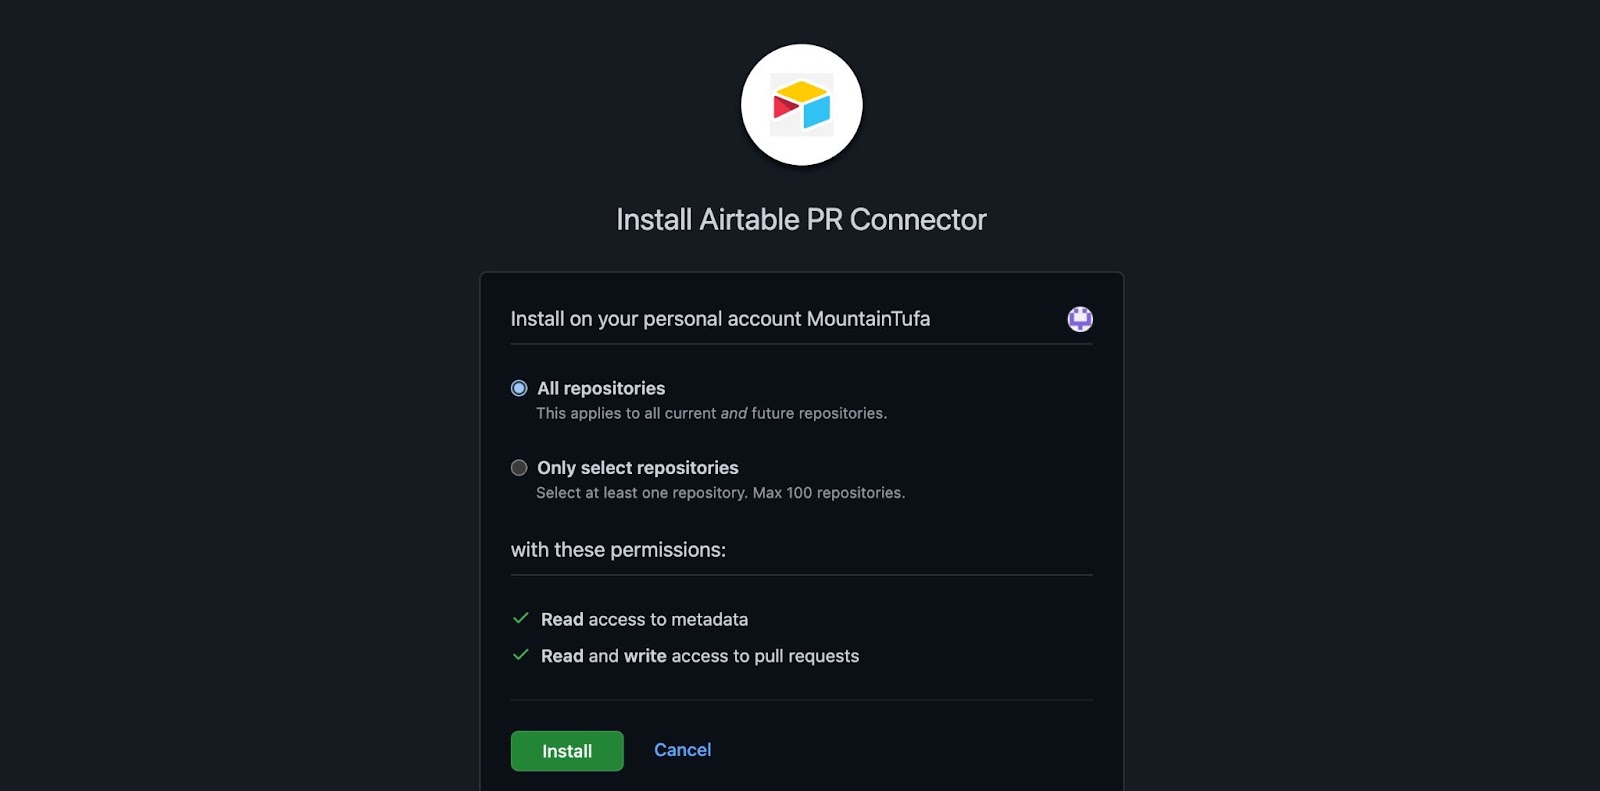
Installing this app allows us to read metadata and read and/or write to issues.
During the app connector installation, you will choose whether to show “All repositories” or “Only select repositories.”
After installing the app successfully, you will see the repositories that you have set up in GitHub. Now you can choose the repo you would like to sync to Airtable.
After choosing the repository you’ll need to choose which pull request state to sync. The options are to show only “Closed,” only “Open,” or “All” Pull requests. Additionally, you’ll choose a “Created after” date that will only sync in Pull requests after that selected date. Once you’ve filled in these two fields, click Next.
Note
GitHub’s API has limits on pull requests. Therefore, when choosing a “Created after” date that is further back in the past you should expect longer wait times for the synced table to be created.
Next, you’ll be presented with two sync options; you can sync:
All fields from the GitHub PR, including any fields added by GitHub in the future.
Specific fields from the GitHub PR.
If you choose to sync specific fields you’ll be shown a menu where you can toggle each individual field that you want to sync from the GitHub Issues source. Currently, GitHub supports 19 fields related to Pull requests:
Title
Updated At
Requested Reviewers
PR Number
Closed At
Requested Teams
State
Merged At
Locked
Labels
Merge Commit SHA
Draft
Body
Created By
Milestone
Created At
Assignees
PR Link
ID
Click the Next button after you have chosen which fields should be synced to Airtable.
Before creating your synced table, there are Settings options that allow you to choose how often you want to sync, and how to handle records deleted or hidden in the Tableau source:
The frequency of syncing. Right now, the options are manual syncing and automatic syncing which happens about every hour.
Whether or not deleted records from GitHub should be removed from the Airtable table. By default, deleted rows will be removed.
Once you’ve selected your desired sync settings, click the Create table button. Depending on how large the data set being synced in from GitHub is, it may take a few moments for the synced table to be created.
Security and OAuth scopes
The authentication window will lead to an authorization window. Authorizing allows us to verify your GitHub identity, know which resources you can access, and act on your behalf.
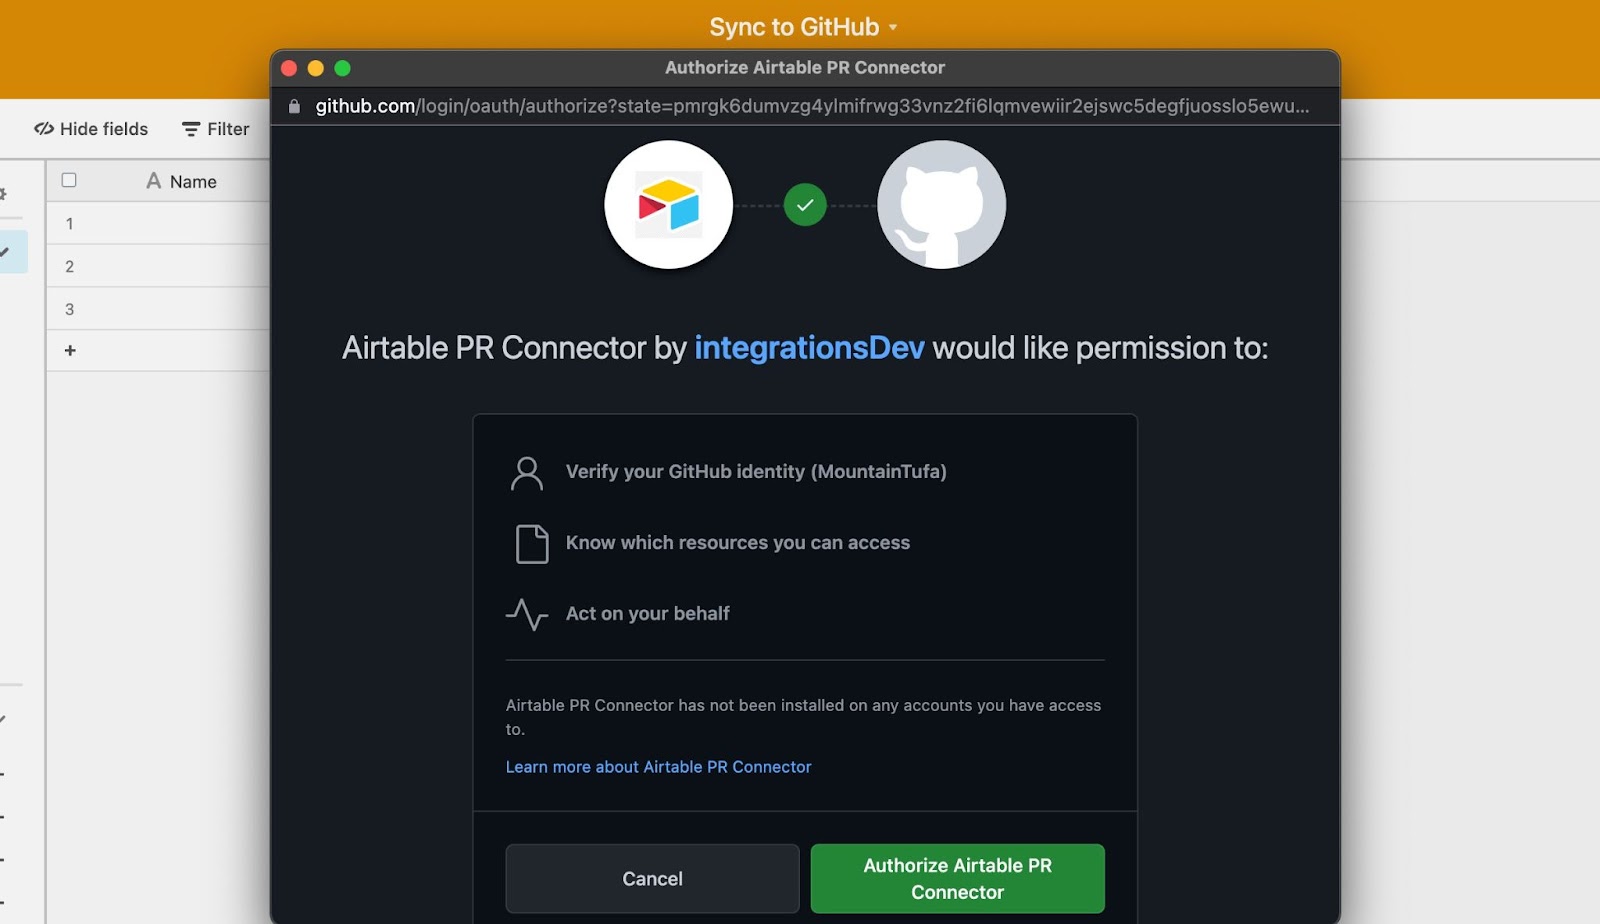
Airtable only supports a single GitHub external account type, so the scopes listed below are used for the Airtable Sync integration as well as the GitHub automation actions. That is why Airtable requests write access even when setting up a sync, even though we only use the read request portion for the sync.
Airtable will only have access to the issues that the user who connected the GitHub account has access to. Furthermore, it will only have access to issues in repositories that the Airtable Connector GitHub App is installed in. If the user who connected the GitHub account leaves the company and their GitHub account gets deactivated, the sync and automation actions will stop working.
For more information on GitHub scopes, check out GitHub's documentation here.
FAQs
Why is the synced table taking so long to be created?
GitHub has API rate limits in place to prevent too many Pull requests being referenced at one time. For repositories with many pull requests, expect to wait for longer periods of time when initially creating the synced table.