Plan Availability | All paid plans |
Permissions |
|
Platform(s) | Web/Browser, Mac app, and Windows app |
Note
The CSV import extension row limit is limited to 25,000, and CSV imports are limited to 5MB. Suppose your data set grows beyond the limitations. In that case, we recommend splitting your information into multiple bases and then syncing it into one base as needed. Read more about Airtable sync and multi-source sync for additional information.
With the CSV import extension, you can add new records to an existing table in your base - or merge data with existing records - directly from a CSV file. The CSV import extension has a 25,000-row limit.
Adding a CSV import extension
Open your Airtable home screen.
Create or open the base where you want to install the CSV import extension.
Click Tools in the upper-right corner.
Click the Extensions option.
Click Add an extension.
Search for and locate the CSV import extension.
Click Add, then Add extension.
Uploading a CSV file to the CSV import extension
After adding a CSV import extension to your base, you can drag and drop a CSV file into the extension. After your file gets uploaded, you'll be brought to a screen where you can map exactly how the information from the CSV gets put into your table.
Note
Before importing data into your base, we recommend taking a base snapshot. This will let you restore a version of your base from a point in time.
Configure settings and field mappings
After you've uploaded your CSV file into the extension and selected which table you want to import into, you'll need to configure a few settings.
Merge with existing records
If you want to create new records with your CSV data, keep this option toggled off. If you want to merge your CSV data with your existing records, toggle the option on and continue reading below.
To merge CSV data with existing records you'll need to pick a field on which to merge records (ideally containing a unique value like an ID number or email address, for example). The extension will then compare the records in your table with the rows in your CSV, find matches using the field you selected, and update the values in the table according to the contents of the CSV file.
Matching for the field you select will be case-sensitive; for example, the extension will consider "[email protected]" and "[email protected]" to be two different values. However, leading and trailing whitespace will be ignored when finding matches.
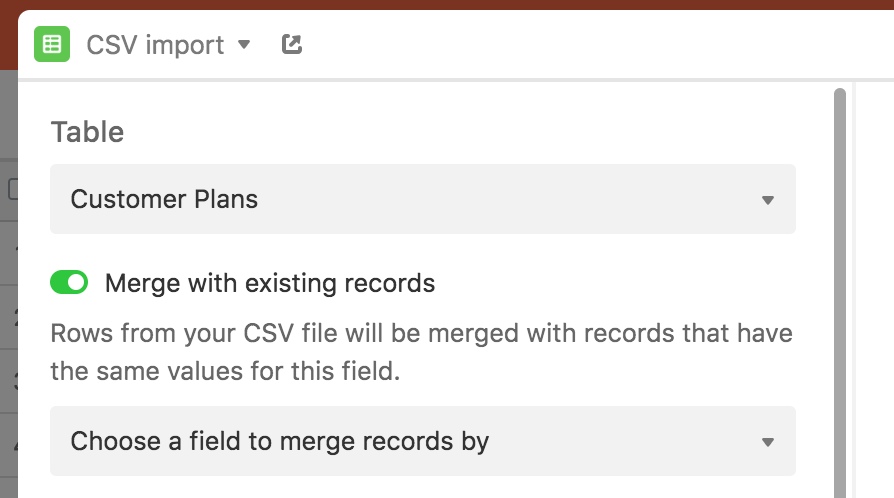
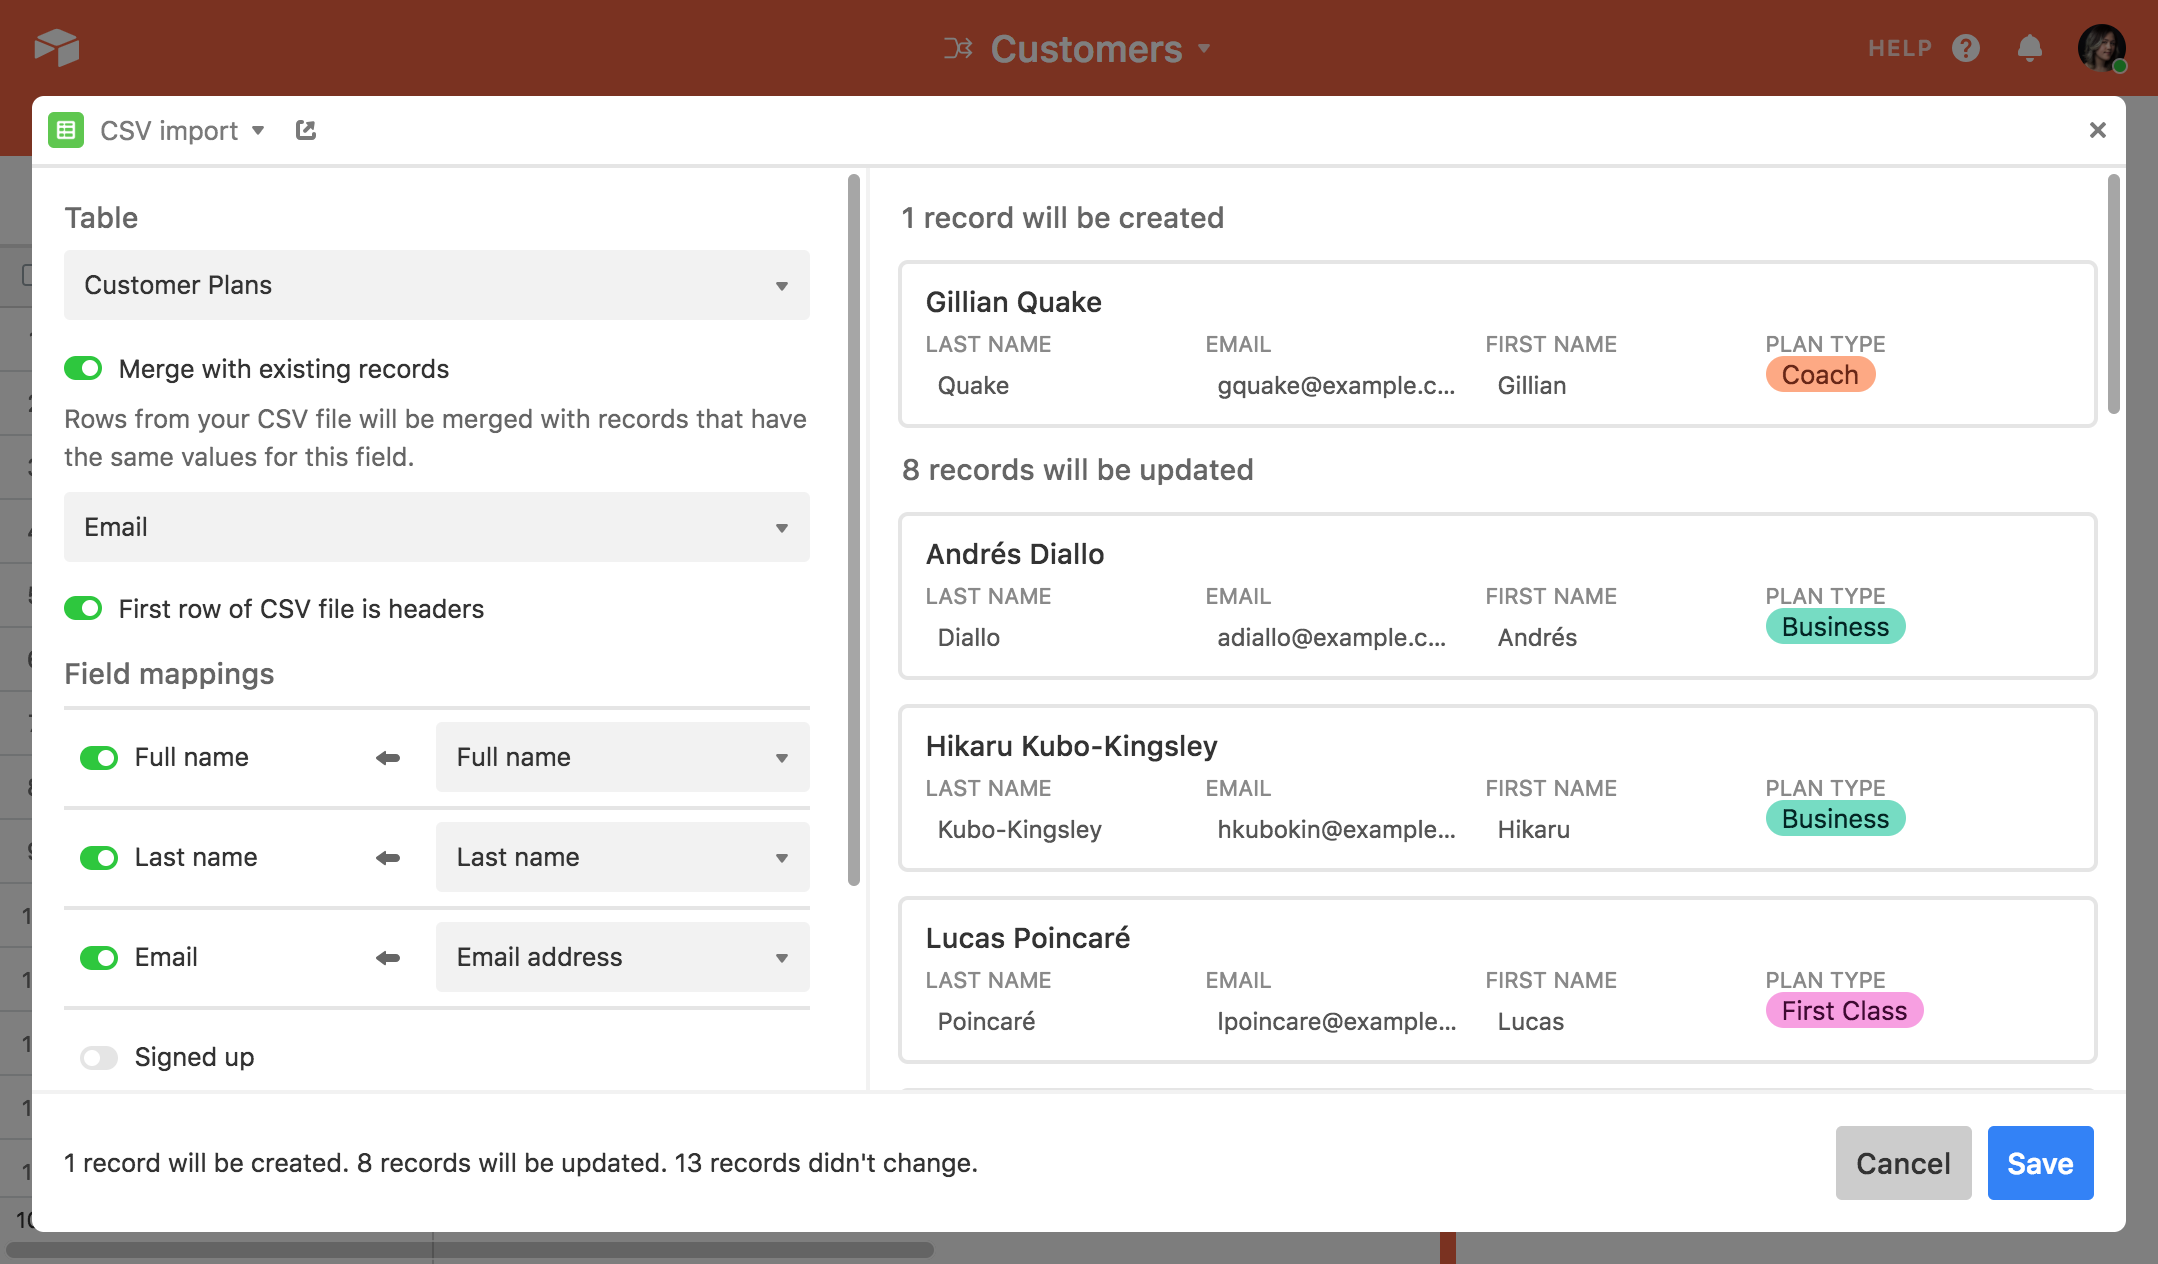
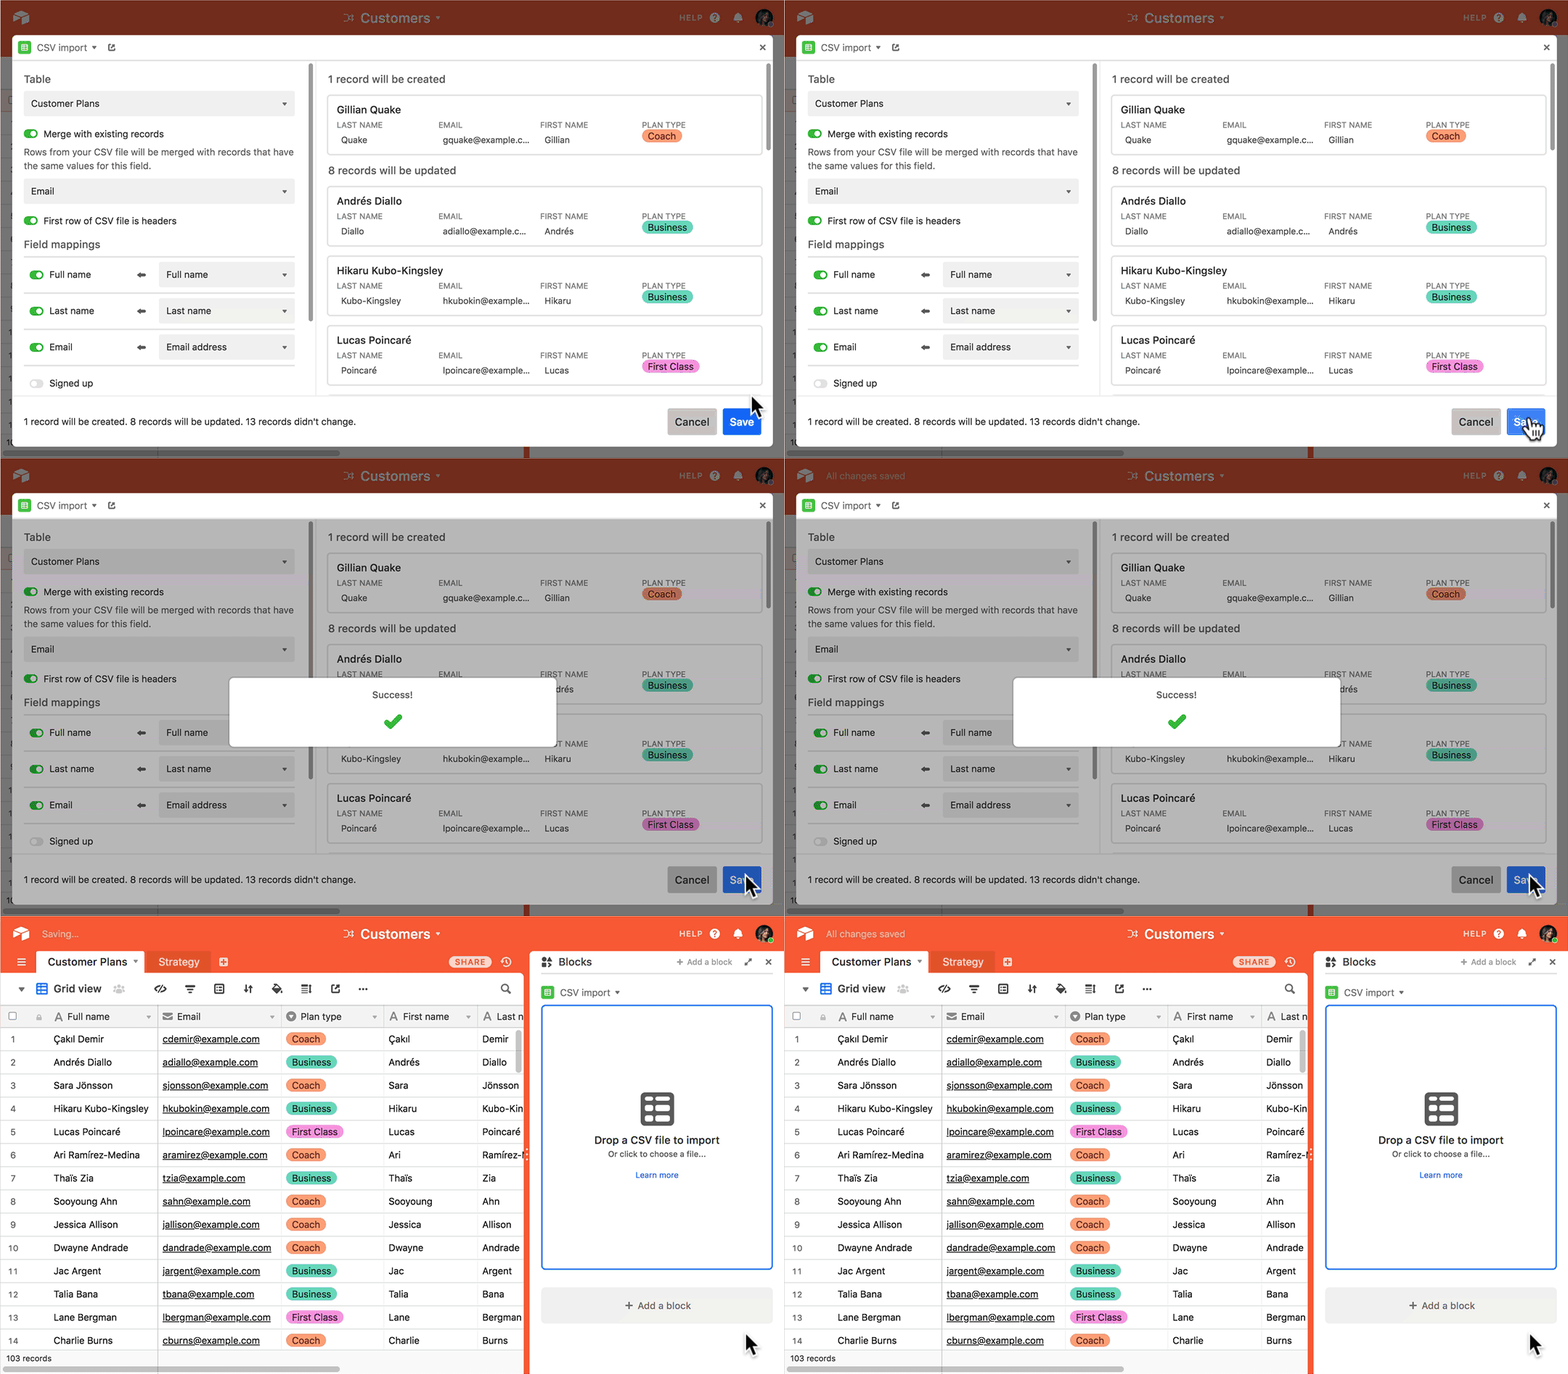
Once you pick a field, the extension will display previews for the records to be updated. If the CSV being imported contains rows which have no matches in the table, the extension will create new records. The bottom of the extension window will show the number of records that will be updated, the number of records that won't change, and the number of new records that will be created (if any).
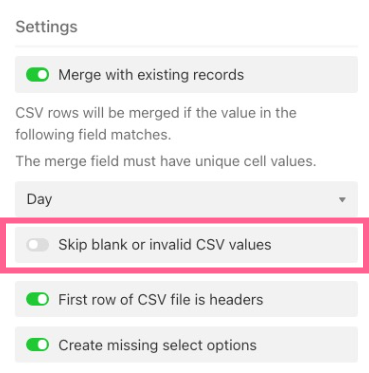
If your CSV contains blank or inconsistent values, you can choose to ignore those fields when importing by toggling the option to "Skip blank or invalid CSV values":
A few other notes on the updating process:
If the CSV file contains multiple rows which contain the same value for the merge field, the extension will only use the first of those rows, and subsequent rows will be ignored.
If the table has multiple records, all of which contain the same value for the merge field, all of those records will be updated if there's a matching row in the CSV file.
If the CSV contains any rows where the value in the merge field is blank, a new record will be created.
Note
If you merged your data incorrectly, you can revert your base to a previous version by restoring a base snapshot. Learn more about this feature in this article.
Skip blank or invalid CSV values
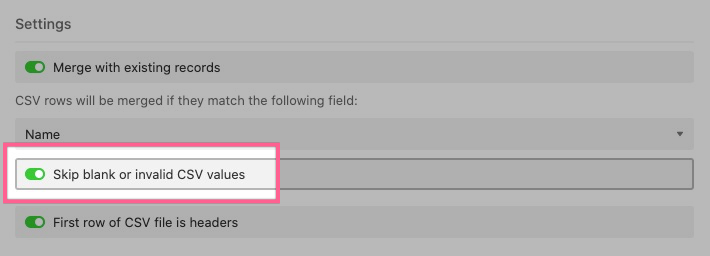
If you toggle on the "Merge with existing records" option (more details on that option below ), another option will appear to "Skip blank or invalid CSV values". This option is helpful if your CSV file might have any blank rows - instead of overwriting existing Airtable records with blank rows, it will skip these rows in the CSV import.
First row of the CSV file is headers
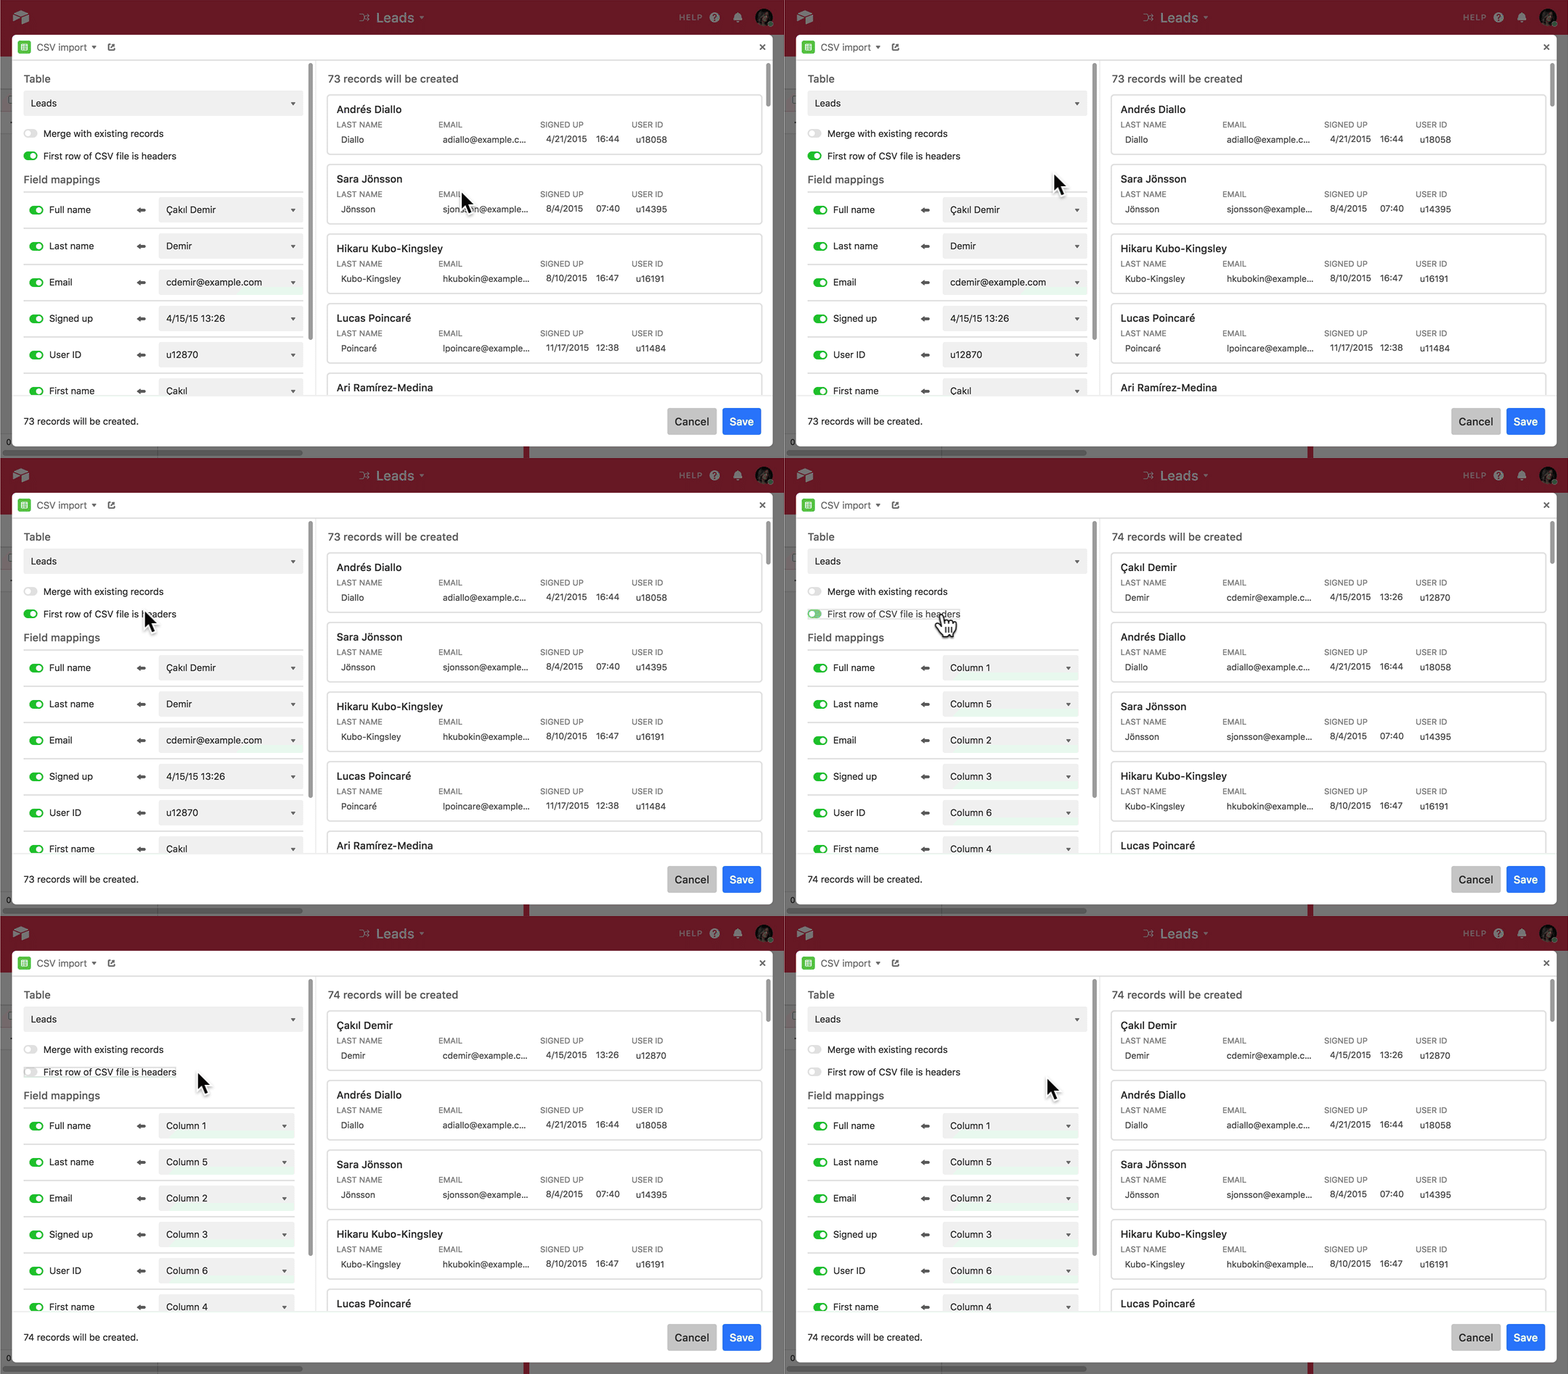
The extension will automatically try to detect if the first row of your CSV is comprised of headers or not, and check the "First row of CSV file is headers" option accordingly. If this option is checked, the columns in the field mappings section of the extension will be named after the CSV's column headers.
If this option is not checked, the columns in the field mappings section of the extension will be given generic names like Column, 1, 2, 3, and so on.
Field mappings
The left side of the Field mappings section (with the toggles) shows the fields in your table, and the right side (with the dropdowns) shows the columns of the CSV. If the columns of your CSV and names of the fields in your table have matching names, the extension will automatically try and match them. Otherwise, you can map the columns of the CSV to whichever fields you prefer.
To map a value, select the field toggle, then choose a CSV column from the dropdown menu. Repeat this process for as many fields as you want.
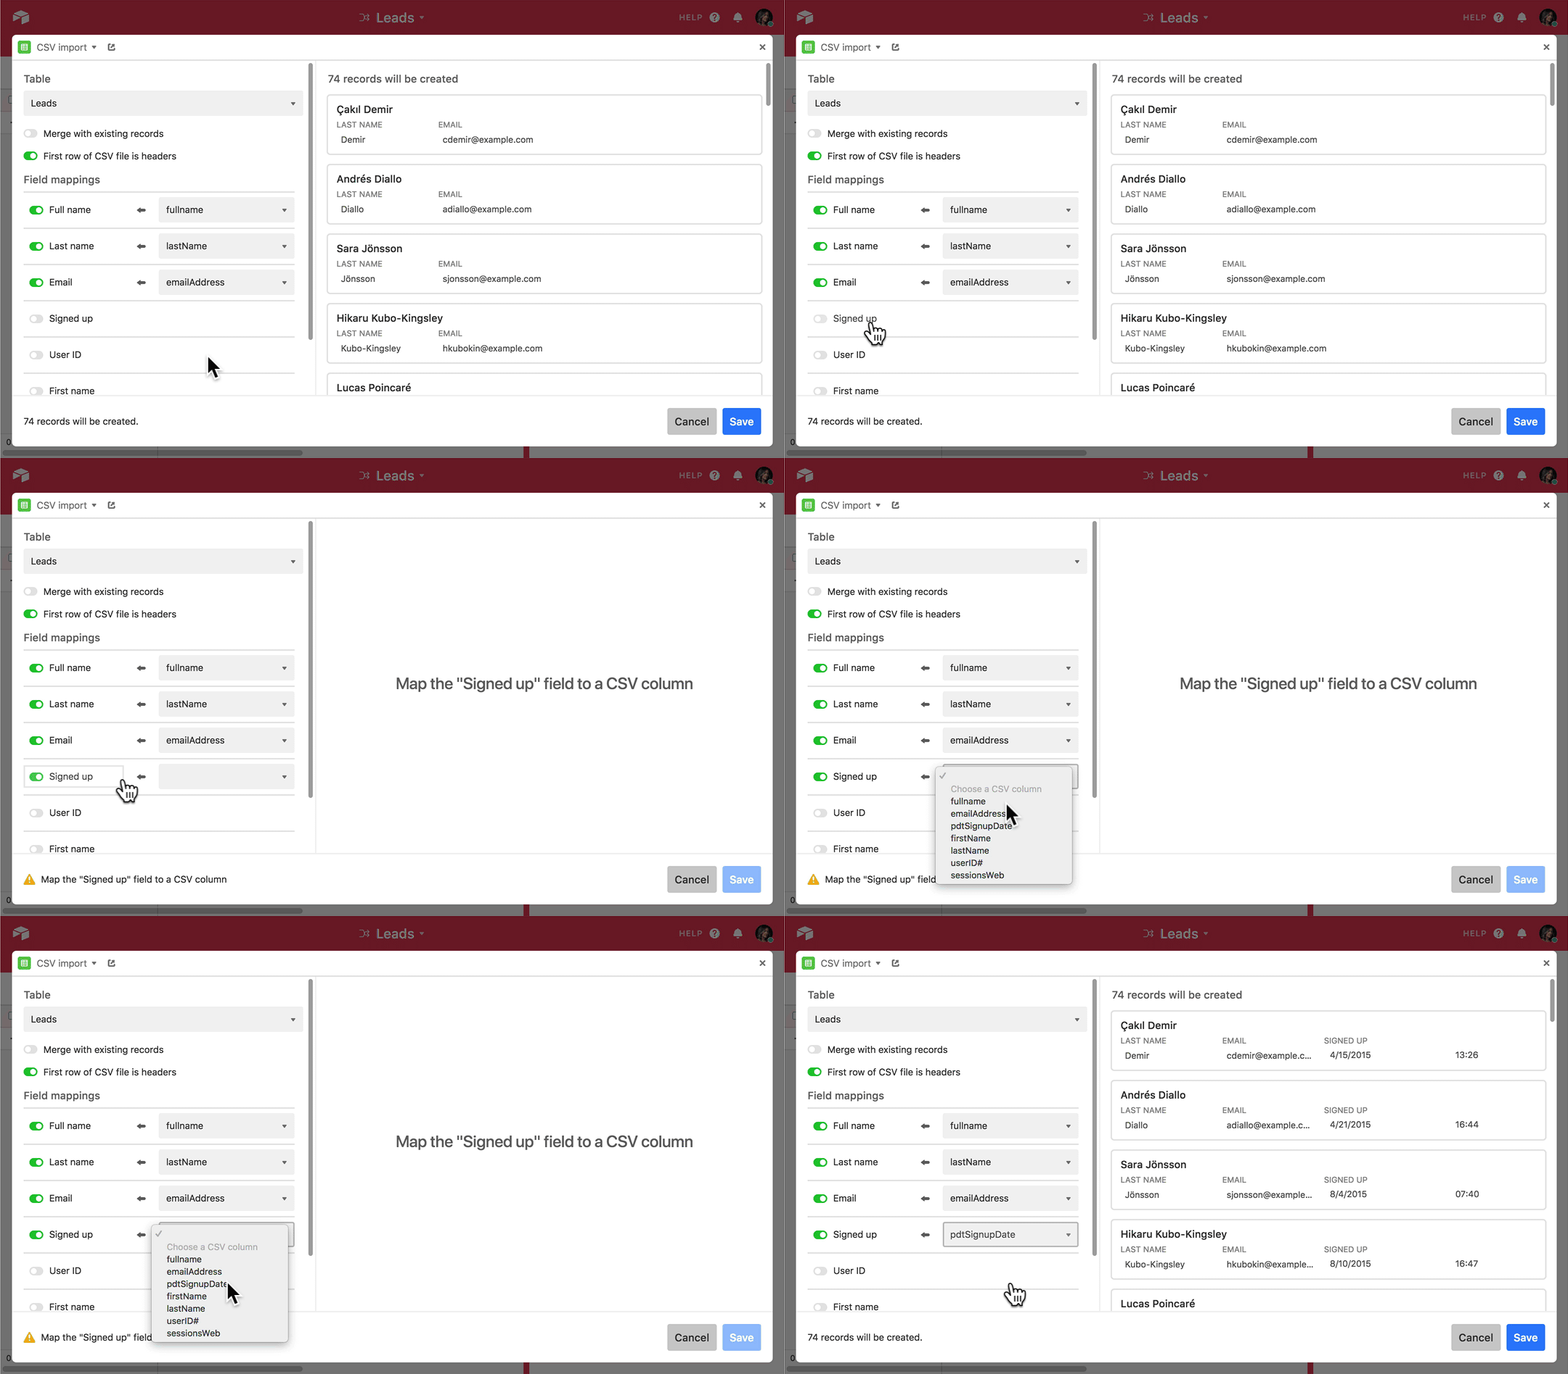
Note that you don't have to import any fields you don't need to, and the order and names of the fields in your CSV don't necessarily have to match the order and names of the fields in your Airtable base.
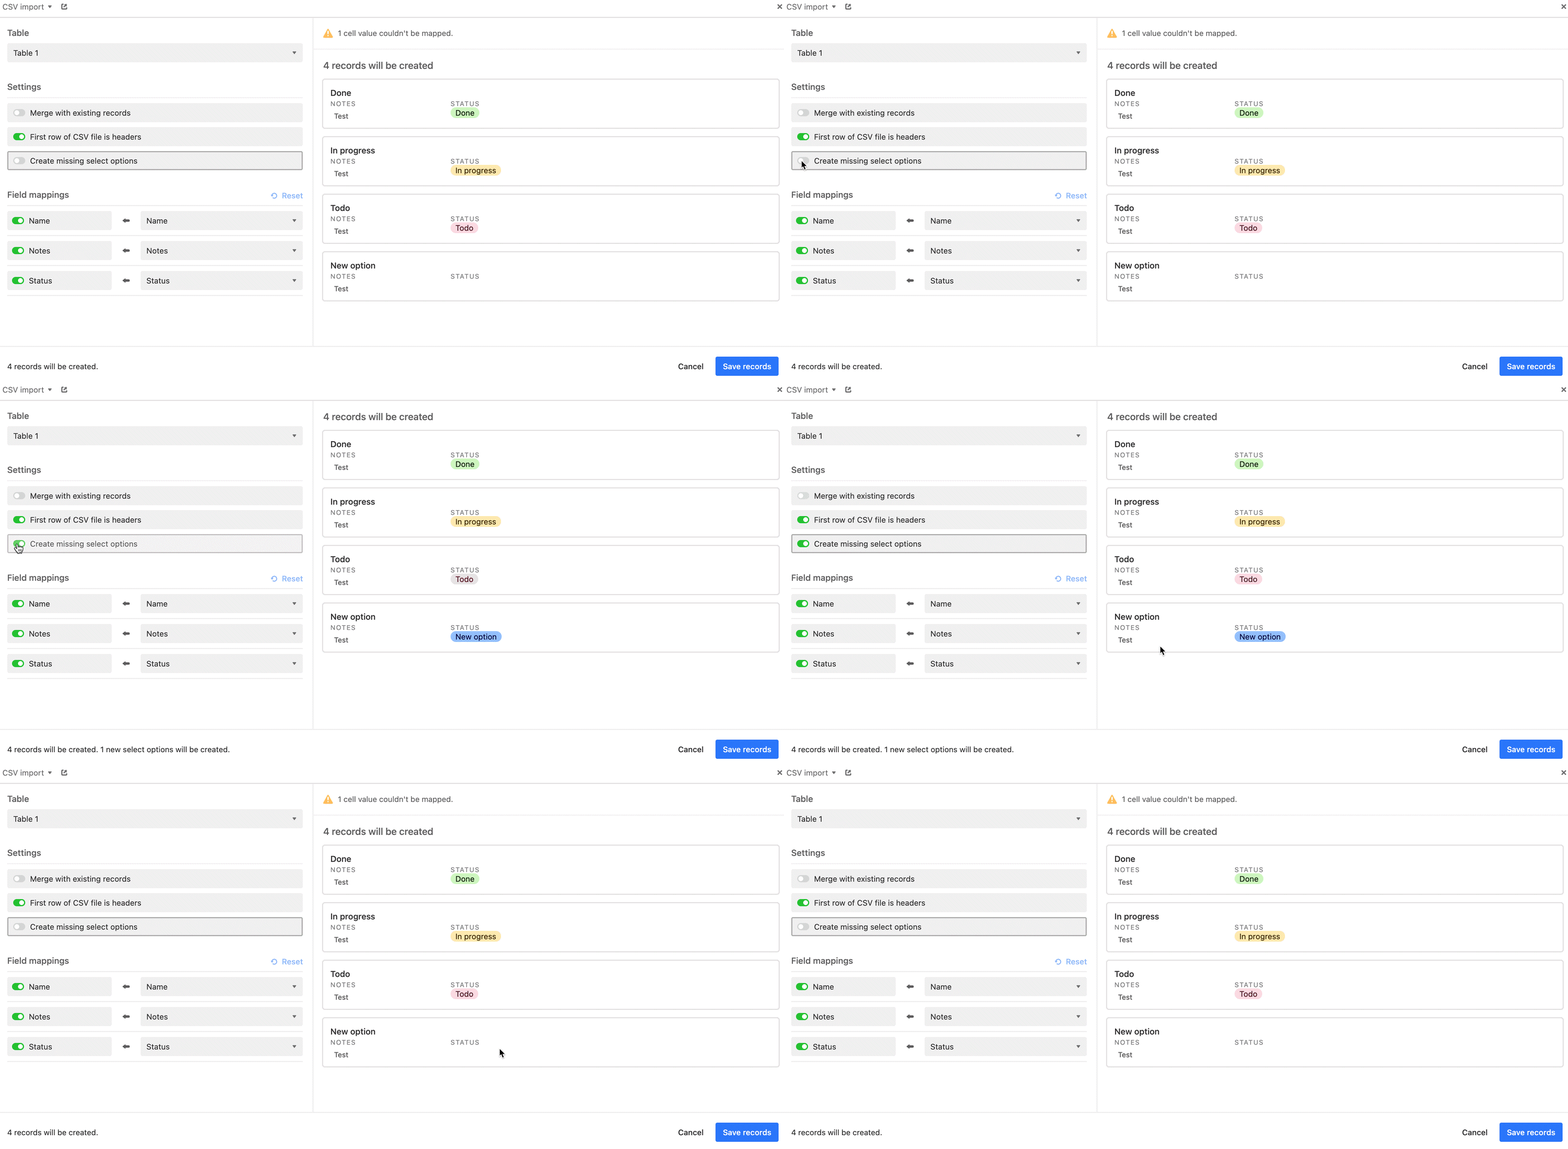
Create missing select options
There is also a setting to create missing select options. Toggling this option on means that if there is a single or multiple select field in your table, then the new option will be created. Leaving this toggle off means that new options will not be created. Pay close attention to field mappings as well as how this setting may be affected by the " Merge with existing records " option mentioned above.
Resetting field mappings
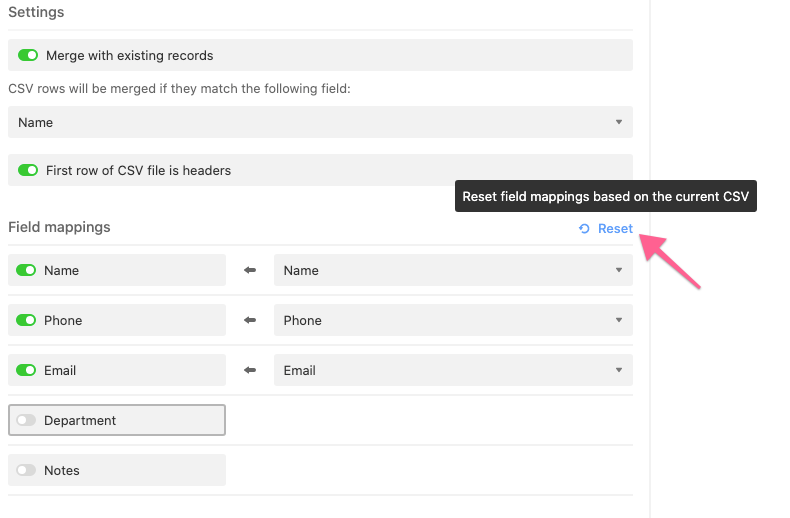
The extension will remember your field mappings the next time you import another CSV, speeding up the process if you plan on importing CSVs again and again as part of your workflow.
However, if you are importing a new CSV file, or if the table where you intend to import has changed, you may want to reset the field mappings using the current CSV and table.
To do so, click the "Reset" button - this performs the field name to CSV header name matching that occurs the first time you use the CSV Import extension , however this time it uses the current CSV and table.
Preview sample records
As you alter the field mappings, you can look at the right side of the extension, which shows samples of the records that will be created according to the specified mappings.
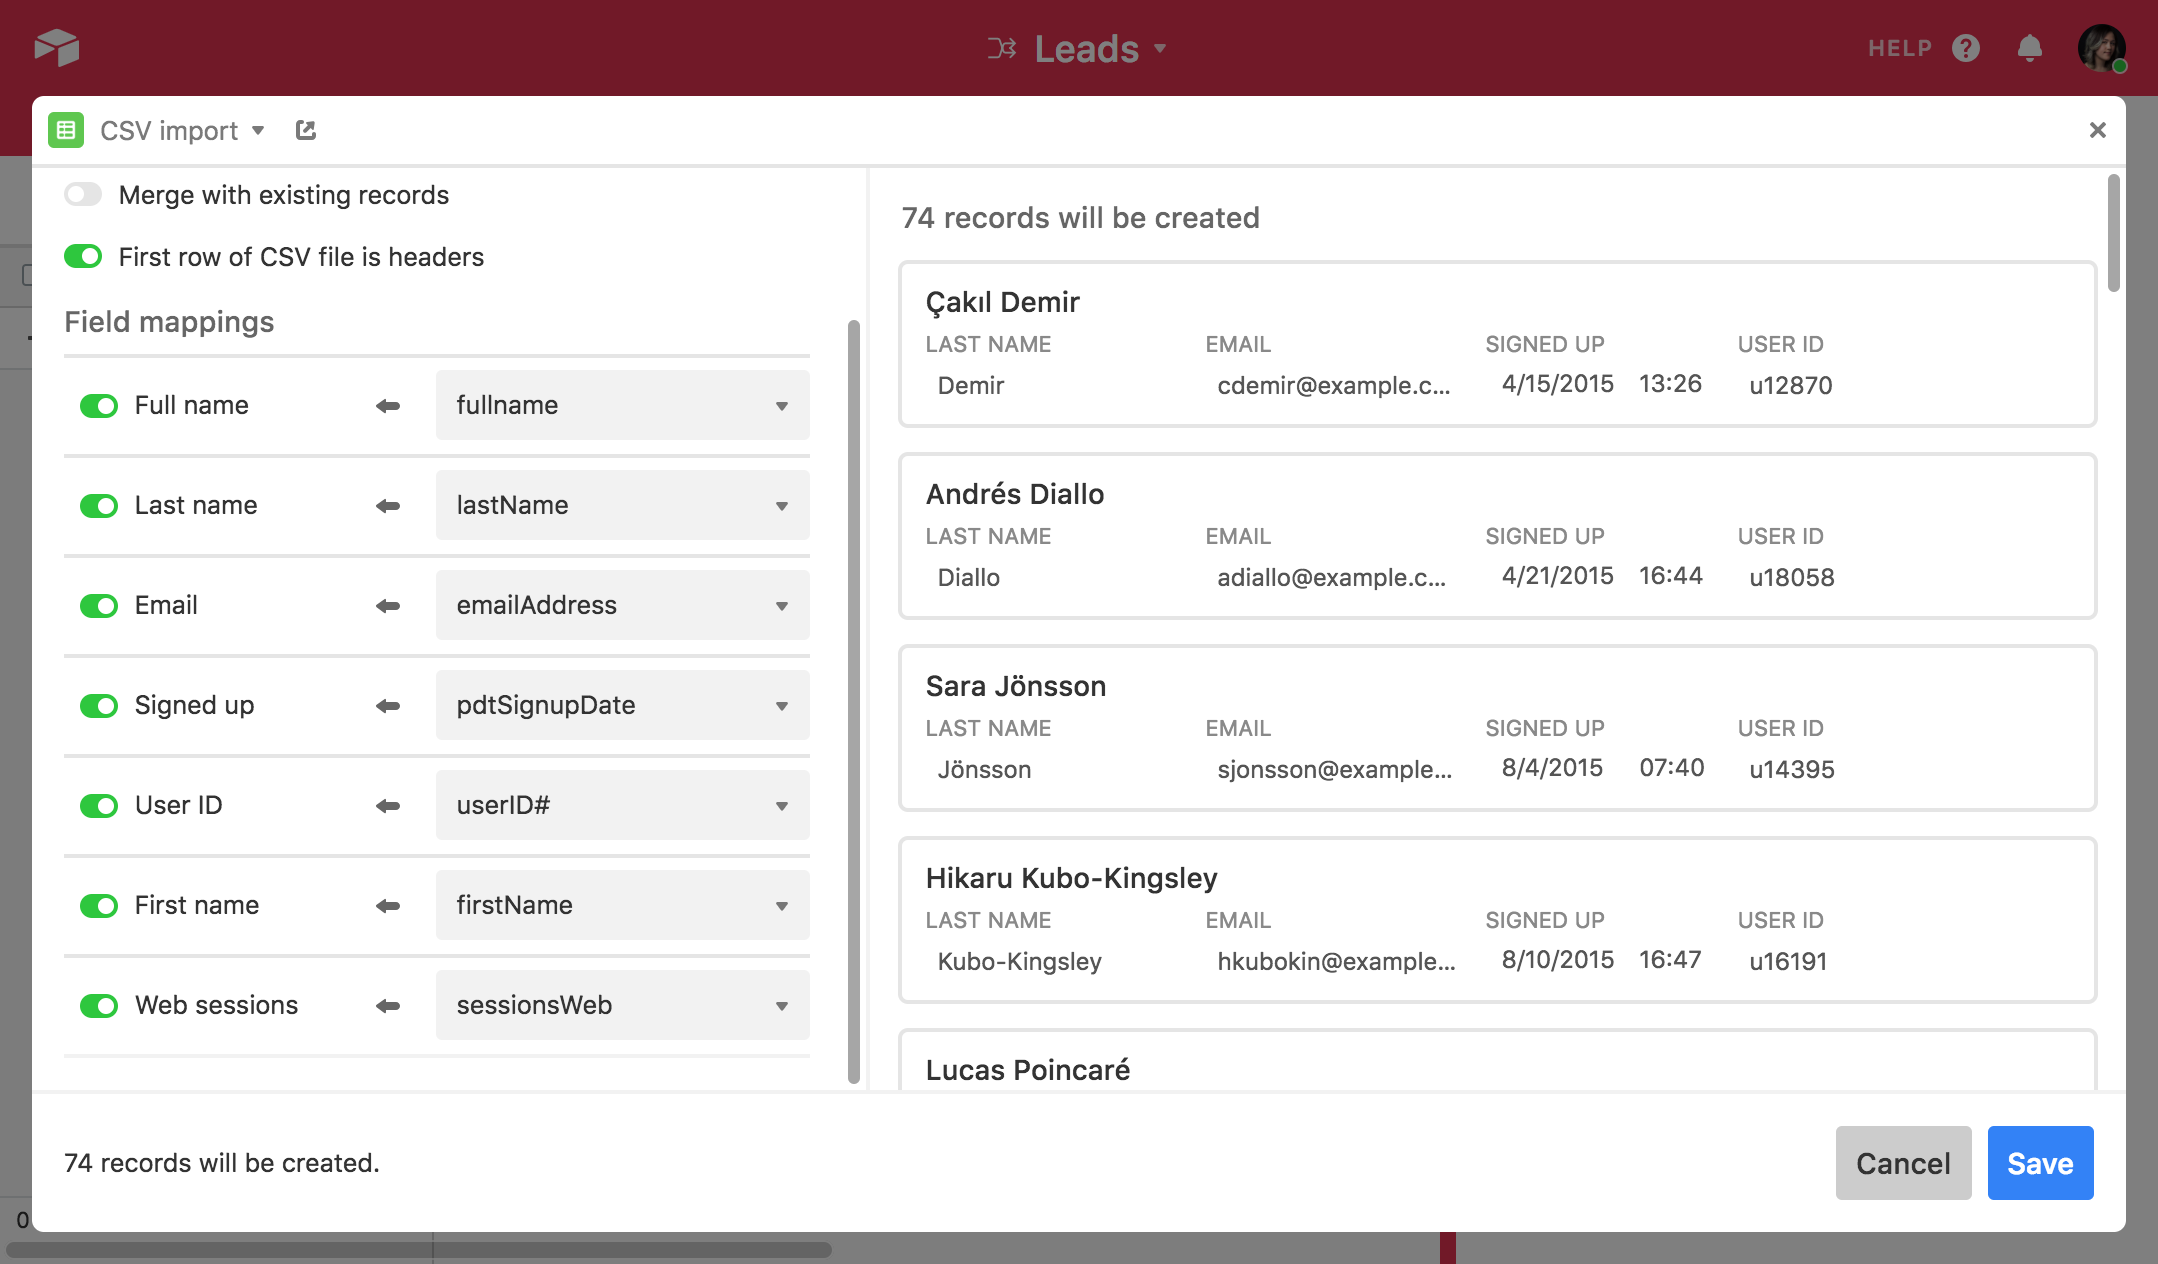
Previewing the records that will be created will likely be your last step before you import your CSV data.
Import CSV data
Once you've configured your settings and field mappings, you're ready to import your CSV data. Click the "Create records" button to start importing data into your table. This may take a few seconds to a few minutes depending on the amount of information you're importing.
FAQs
How many rows of data can I import?
The CSV import extension has a 25,000 row limit.
Should I do anything before importing CSV data?
Yes - we recommend taking a base snapshot before importing any data into your base.
Are any field types incompatible with CSV or XLS file importing?
Yes, generally computed field types are unsupported. The following field types are unsupported:
Attachment
Autonumber
Barcode
Button
Count
Created by
Created time
Formula
Last modified by
Last modified time
Long text (unsupported when the “Enable rich text formatting” setting is toggled on)
Rollup