Plan availability | All paid plan types |
Permissions | Owners/Creators - In order to create or update synced tables, you'll need to have creator permissions in the base where you are setting up the sync. |
Platform(s) | Web/Browser, Mac app, and Windows app |
Related reading |
|
Learn how to use the Airtable Sync integration feature to bring information from an external application into Airtable as a new table in your base. Sync integrations are always a one way sync from the external application into an Airtable base, so changes made in Airtable cannot be synced back to the external application that you are syncing with.
Miro is an online, visual collaboration platform designed to unlock creativity and accelerate innovation among teams of all kinds. In this article, we will cover all the steps that go into setting up a Sync that will provide a way to bring information from Miro into Airtable.
Setting up Miro to sync with Airtable
Step 1: Add a new synced table
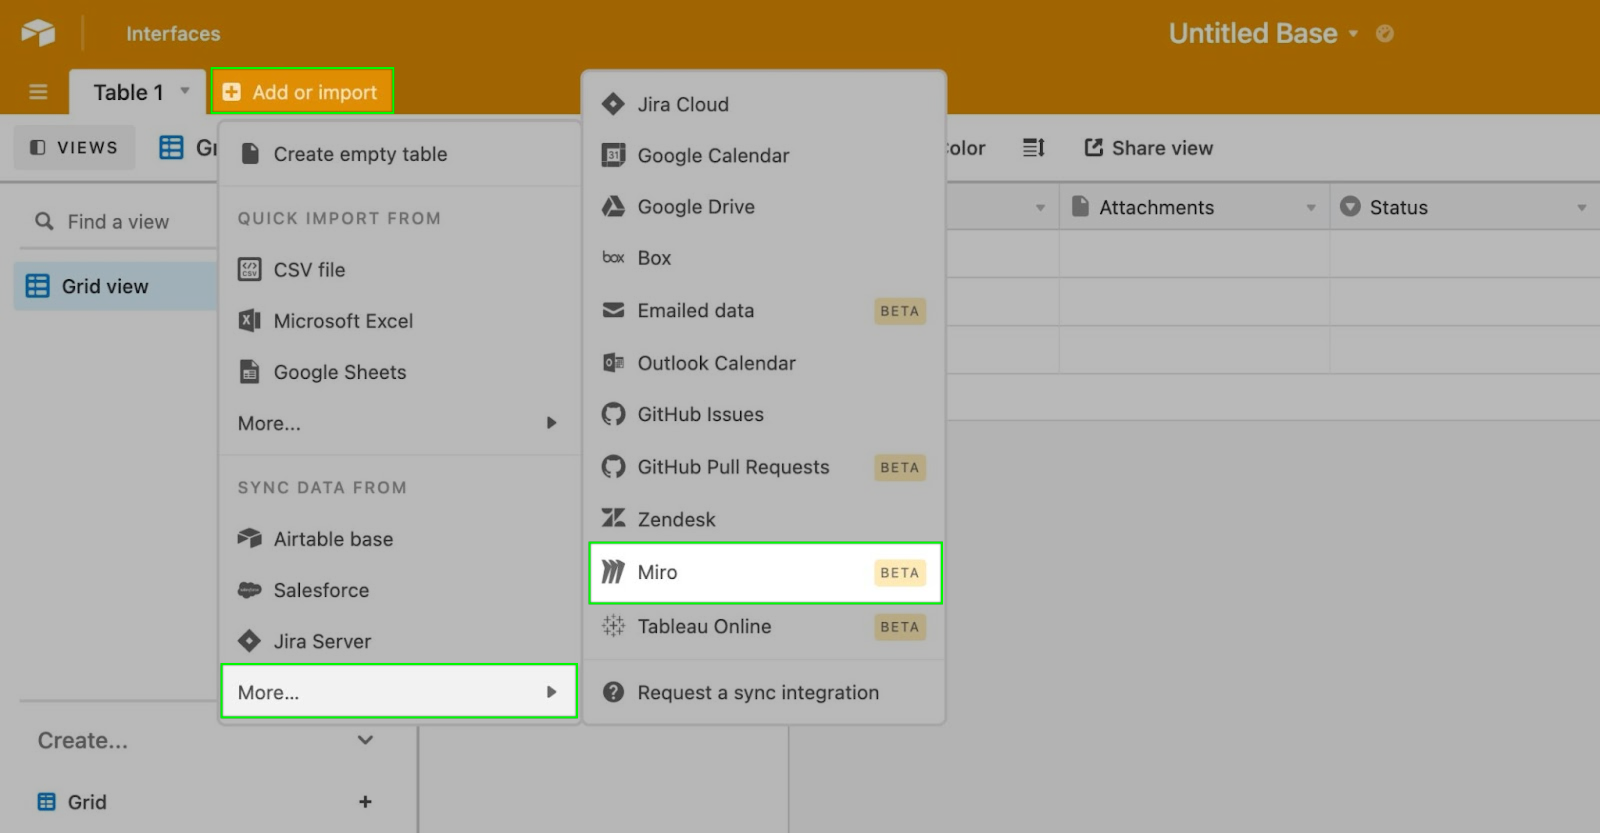
From a new or existing base, find the + Add or import button next to the table furthest to the right. If you have 4 or more tables in your base, then this button will simply appear as a “+” plus sign. Next, click the More… option. Then, you’ll see a list of other available syncs to choose from. Finally, click the Miro option.
Step 2: Select a Miro account
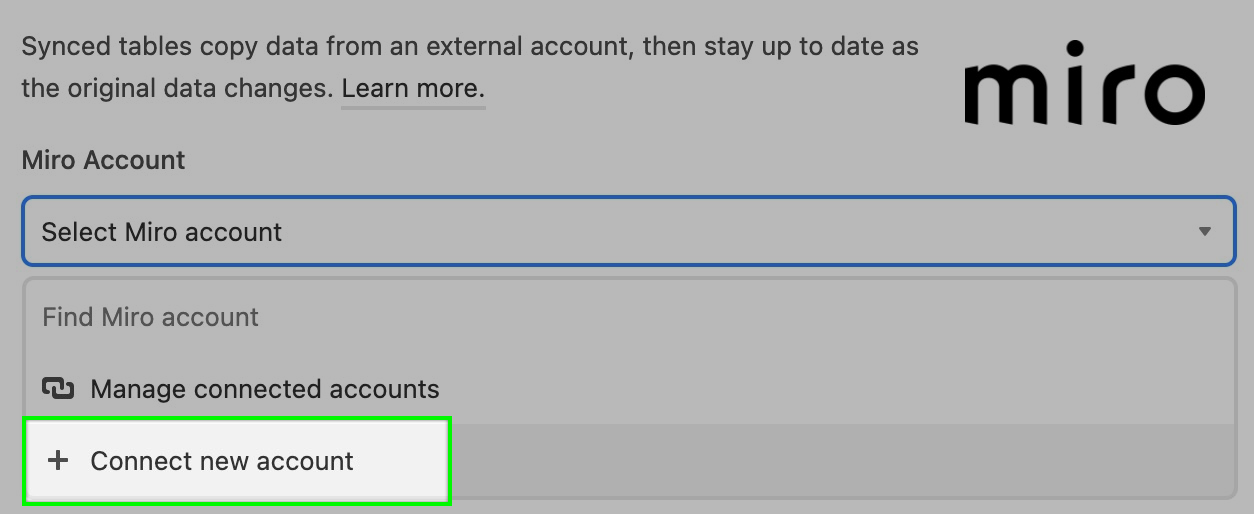
Next up, if this is the first time you are connecting your Airtable account with Miro, then you will need to press the + Connect new account button.
Note
You may see the message “Miro integration is currently not enabled for your organization. Please contact your organization's administrator.” In this case, an Airtable admin from your organization will need to enable the integration in the admin panel as outlined in this article.
Clicking this window will open up an account authorization window. An admin may also need to install/allow the app on Miro’s side. More on that below. More on authentication and authorization below.
Step 3: Choose board and frames
In order to parse which information should be brought into Airtable, this Sync integration has you choose a board and a frame or frames in Miro. You must choose a board in order to continue the setup process. The Board name in Miro will become the Table name in Airtable.
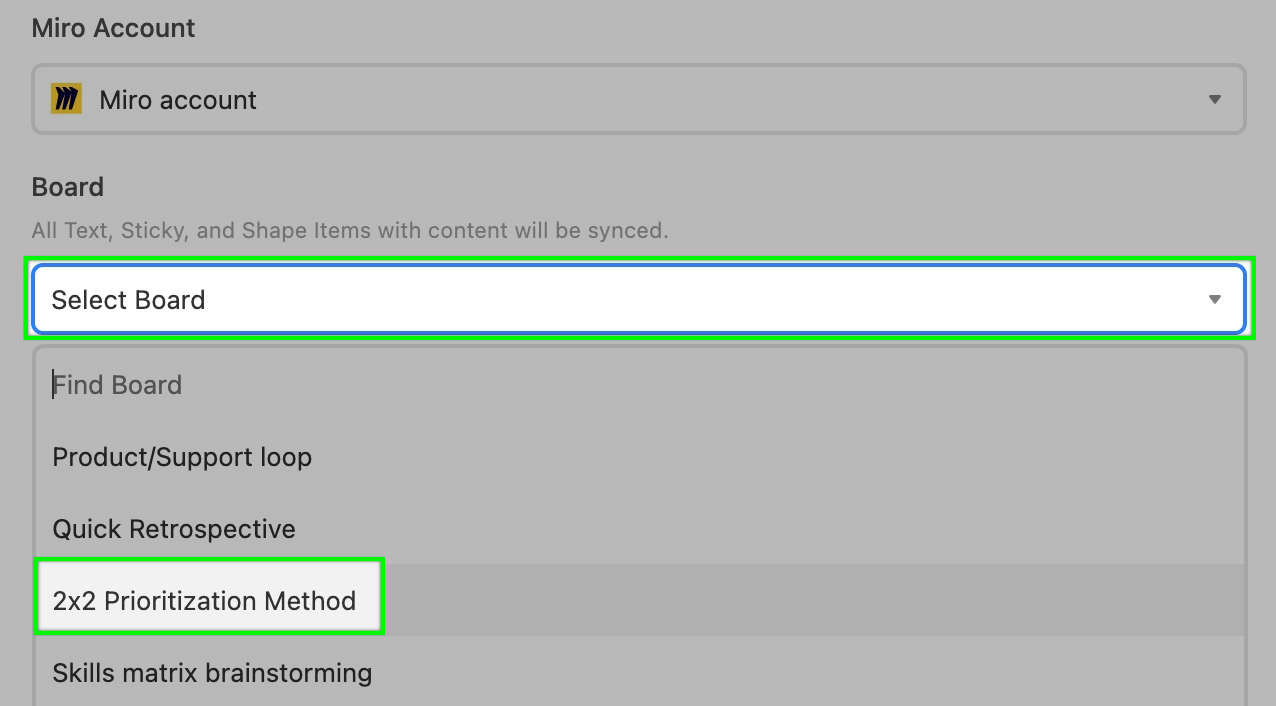
Although it is optional, setting up frames within Miro is important in helping to section out how data held in Miro will be transferred to Airtable during the syncing process. More on best setup practices below. For frames, you can either choose to select:
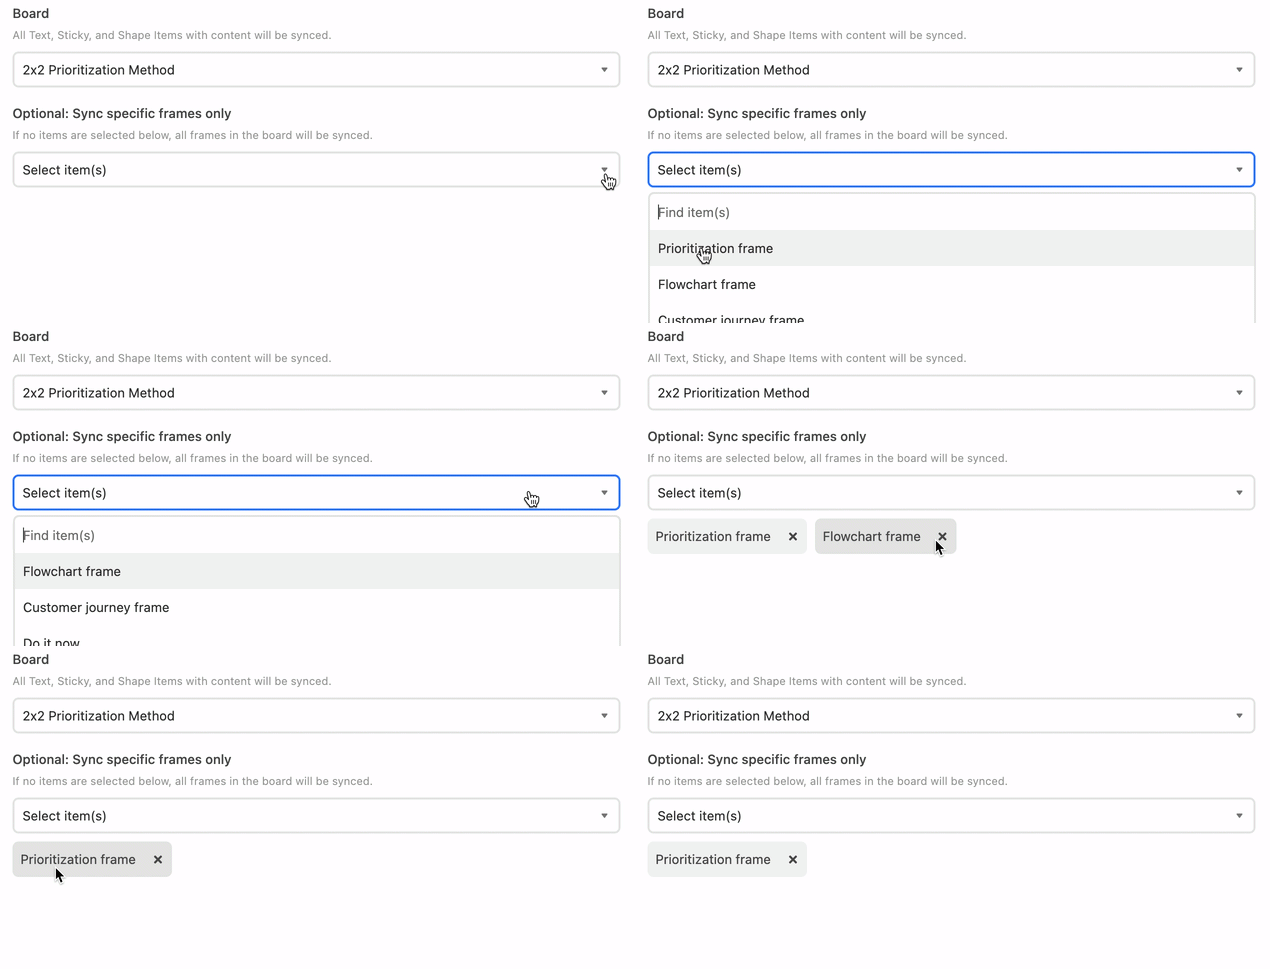
None - This will import all items within the board regardless of the frames set up.
One or more - Clicking one frame at a time allows you to choose specific frames to sync. If you decide you don’t want to sync a particular frame, click the “x” by its name to remove it from the sync.
Note
If you don’t see any frames to choose from, then it likely means that no frames have been set up on your Miro board. To target specific information in Miro, you’ll want to go back to Miro and configure frames before proceeding.
Step 4: Select fields to sync
After clicking next, you’ll be presented with two sync options; you can sync:
All fields in the source, including any fields added by Miro in the future.
Specific fields from the source.

If you choose to sync specific fields you’ll be shown a menu where you can toggle each individual field that you want to sync from Miro. For this sync there are currently 10 possible fields to choose from:
1. Content 1 | 5. Created at (Time) | 8. Modified at (Time) |
2. Color | 6. Created email | 9. Modified email |
3. Type | 7. Created by | 10. Modified by |
4. Frame |
1 The content field is the default primary field in Airtable.
Once you’ve decided which fields to sync, click “Next” to finish the setup process.
Step 5: Create synced table
Before creating your synced table, there are “Settings” options that allow you to choose how often you want to sync, and how to handle records deleted or hidden in the source Miro.
The frequency of syncing. Right now, the options are manual syncing or automatic syncing which happens around every 5 minutes.
Whether or not deleted records should be removed from the Airtable table. By default, deleted rows will be removed.

Once you’ve selected your desired settings, click the “Create table” button. Depending on how much information is on the Miro board you are syncing, it may take several seconds for the sync to fully appear. 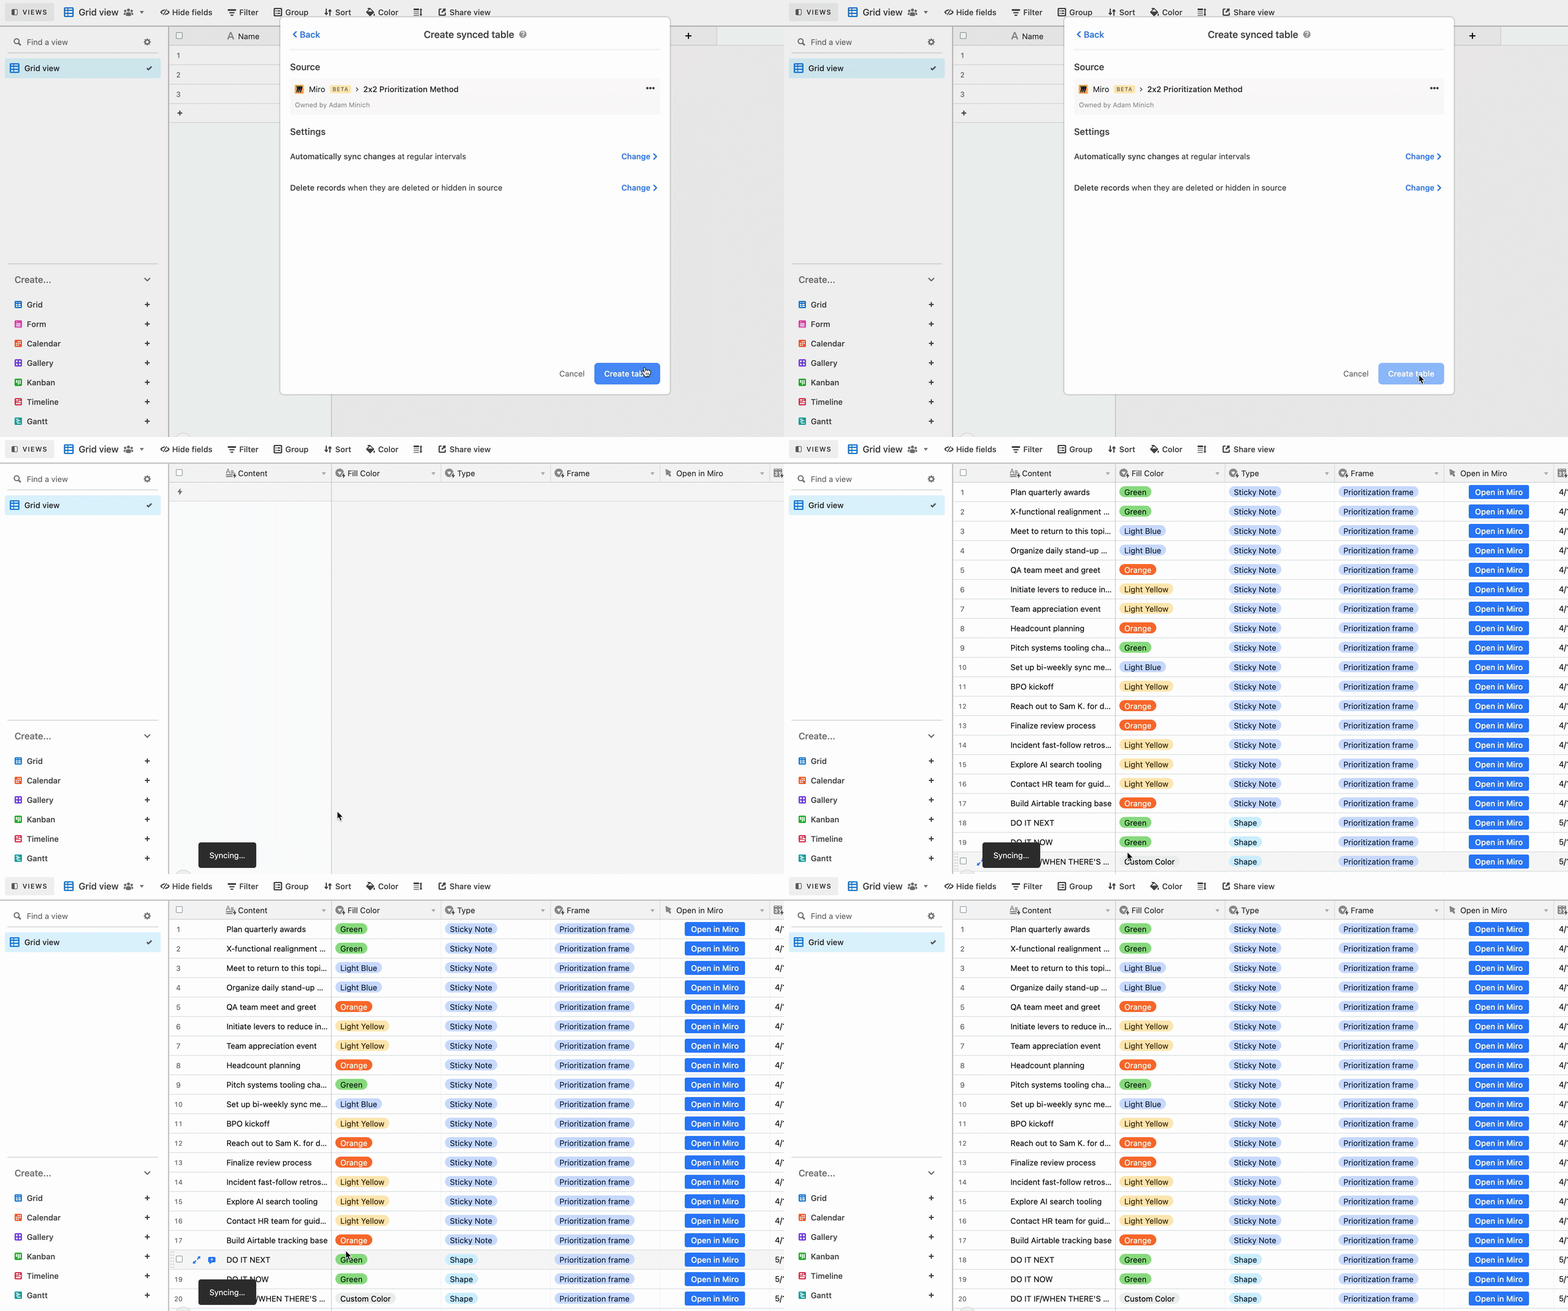
Example sync and tips
As mentioned above, frames help to guide Airtable during the syncing process. You can sync over a Miro board without any frames, but the result is that Airtable will interpret every shape, text string, and sticky note as its own record in Airtable. You might be wondering, “What does a sync look like?” Let’s walk through how data from Miro will appear in Airtable.
For this example, we have a board in Miro utilizing three distinct templates (Customer journey, 2 x 2 Prioritization method, and Flowchart) that have been framed: 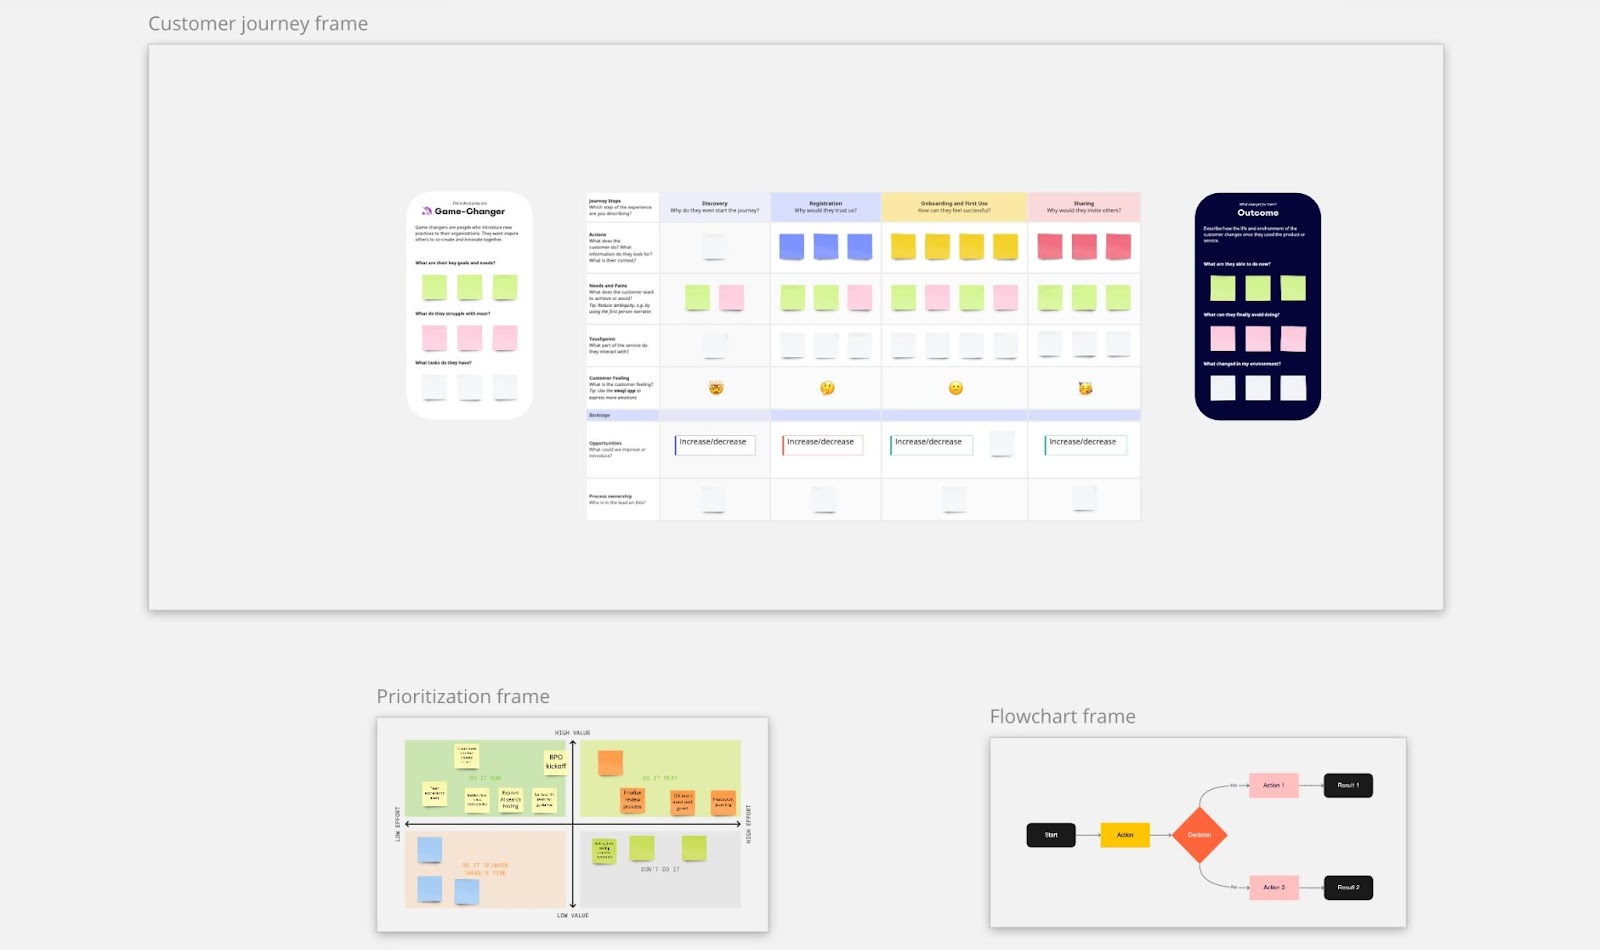
In Airtable, we are only wishing to sync over the data from within the 2x2 prioritization method template. Before setting up the sync in Airtable, we actually want to set up a few more frames in the Miro board to use instead of the prioritization frame. Doing this will help Airtable to better section out your data. Here’s what the additional framing looks like in Miro. Each box outlined in green represents a different frame: 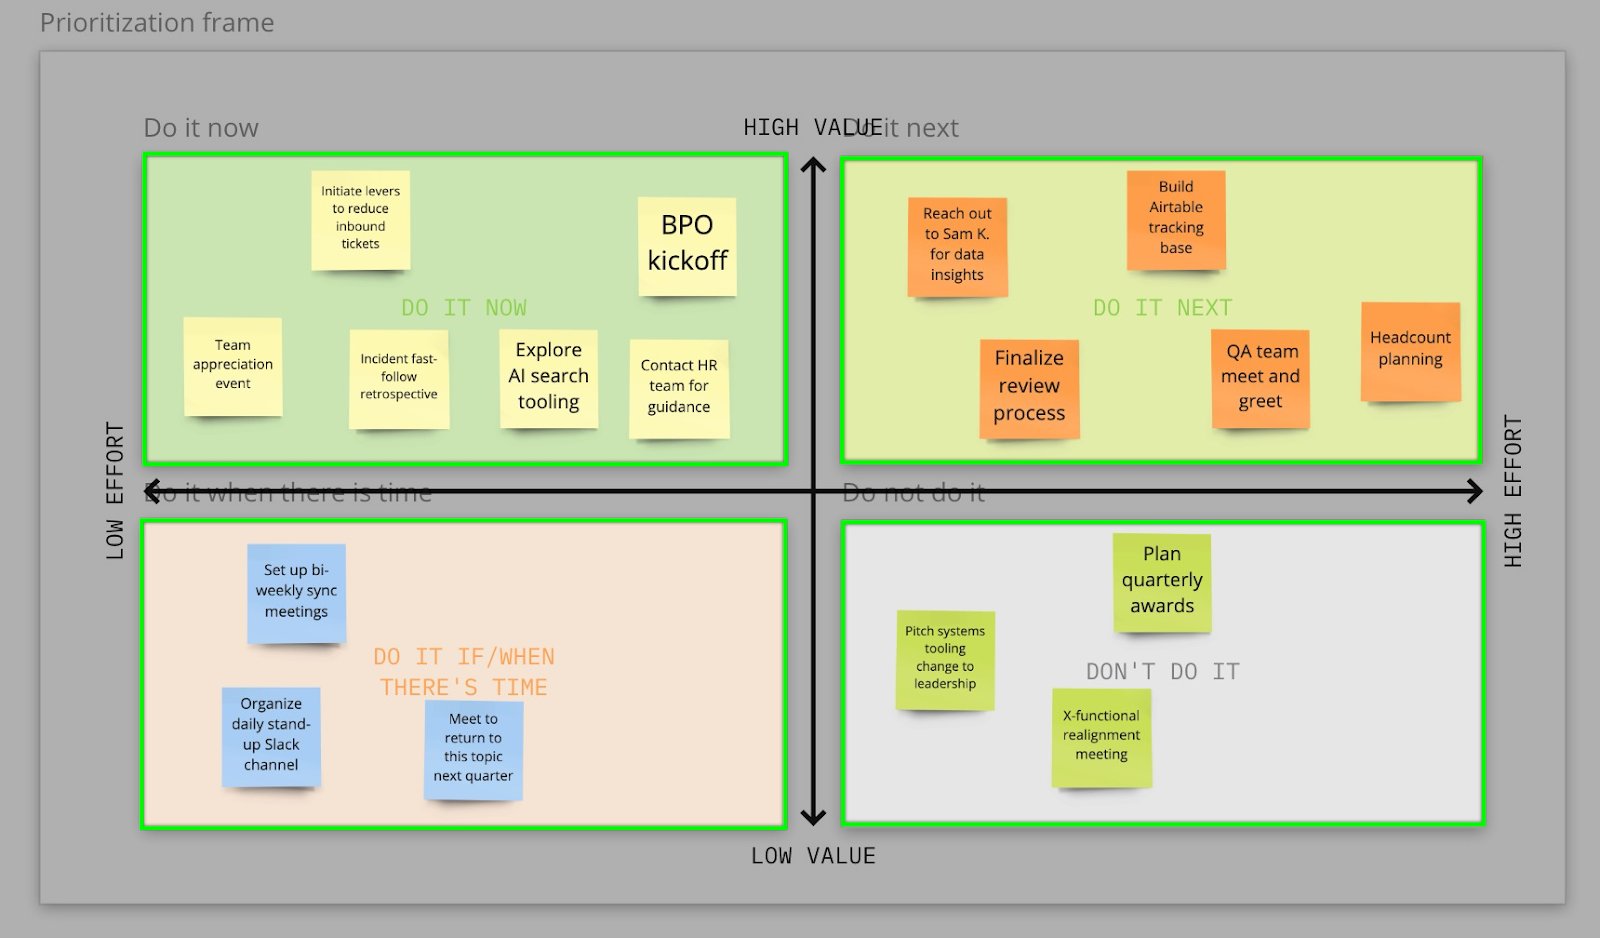
Each frame is named after the timing section (Do it now, Do it next, etc.) that it encompasses. Framing the template this way has two benefits:
It prevents unnecessary information from being transferred to Airtable. (In the example, this means the low/high effort and low/high-value axes will not show in Airtable.)
It helps to add the frame’s name as an attribute to each sticky note’s record in Airtable.
Now, it’s time to set up the sync in Airtable using the process outlined above, with special attention to add only the frames you need for your use case. After setting up the sync for our example, the result looks like this in Airtable: 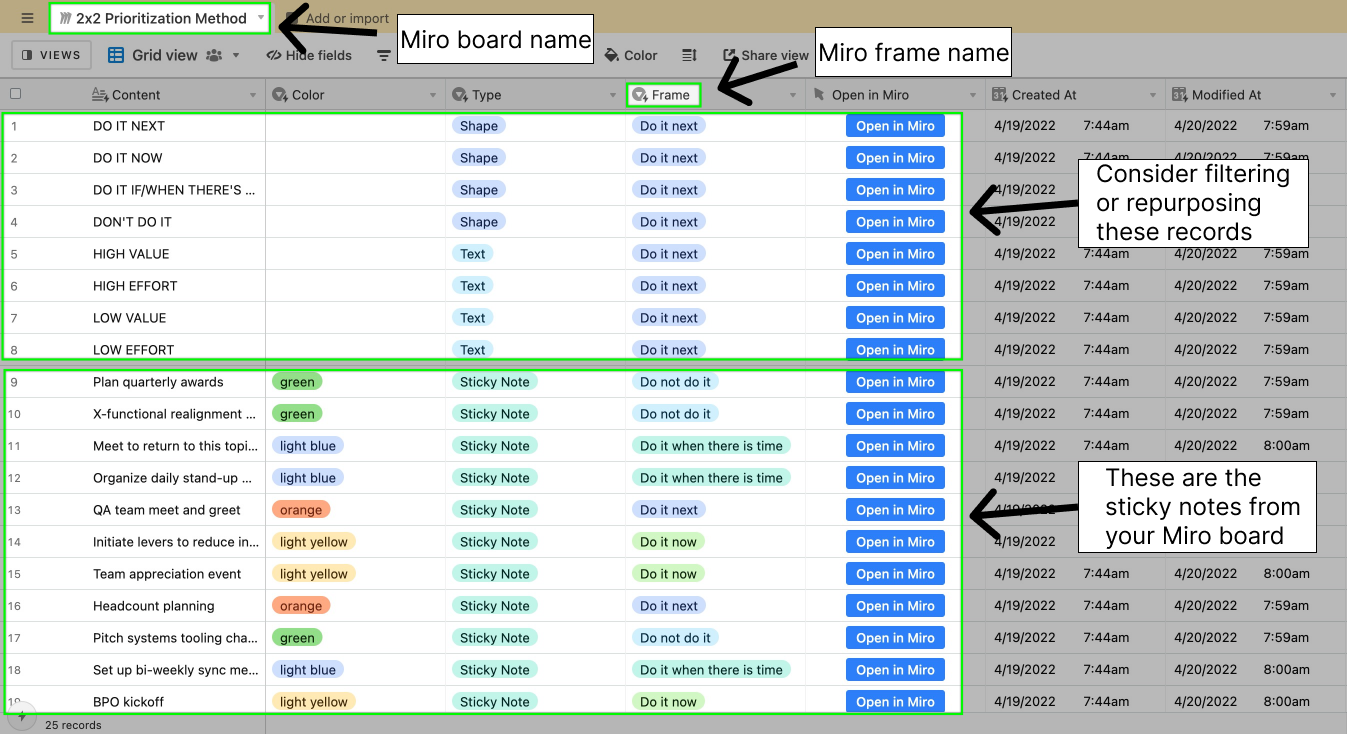 Depending upon the elements set up in Miro, you may want to consider filtering certain records. In the case above, we could set up a filter to only show records with a “Sticky note” value in the “Type” field. That way, future syncs won’t show “Shape” and “Text” record types. You could also delete records, however, if your Miro board syncs again in the future, then the records will be added in Airtable again.
Note
Customizing your view like this will likely be highly specific to your use case. Just some things to keep in mind while you are working in Miro and Airtable.
Security and OAuth scopes
Authentication
The OAuth consent screen for this integration will look like this: 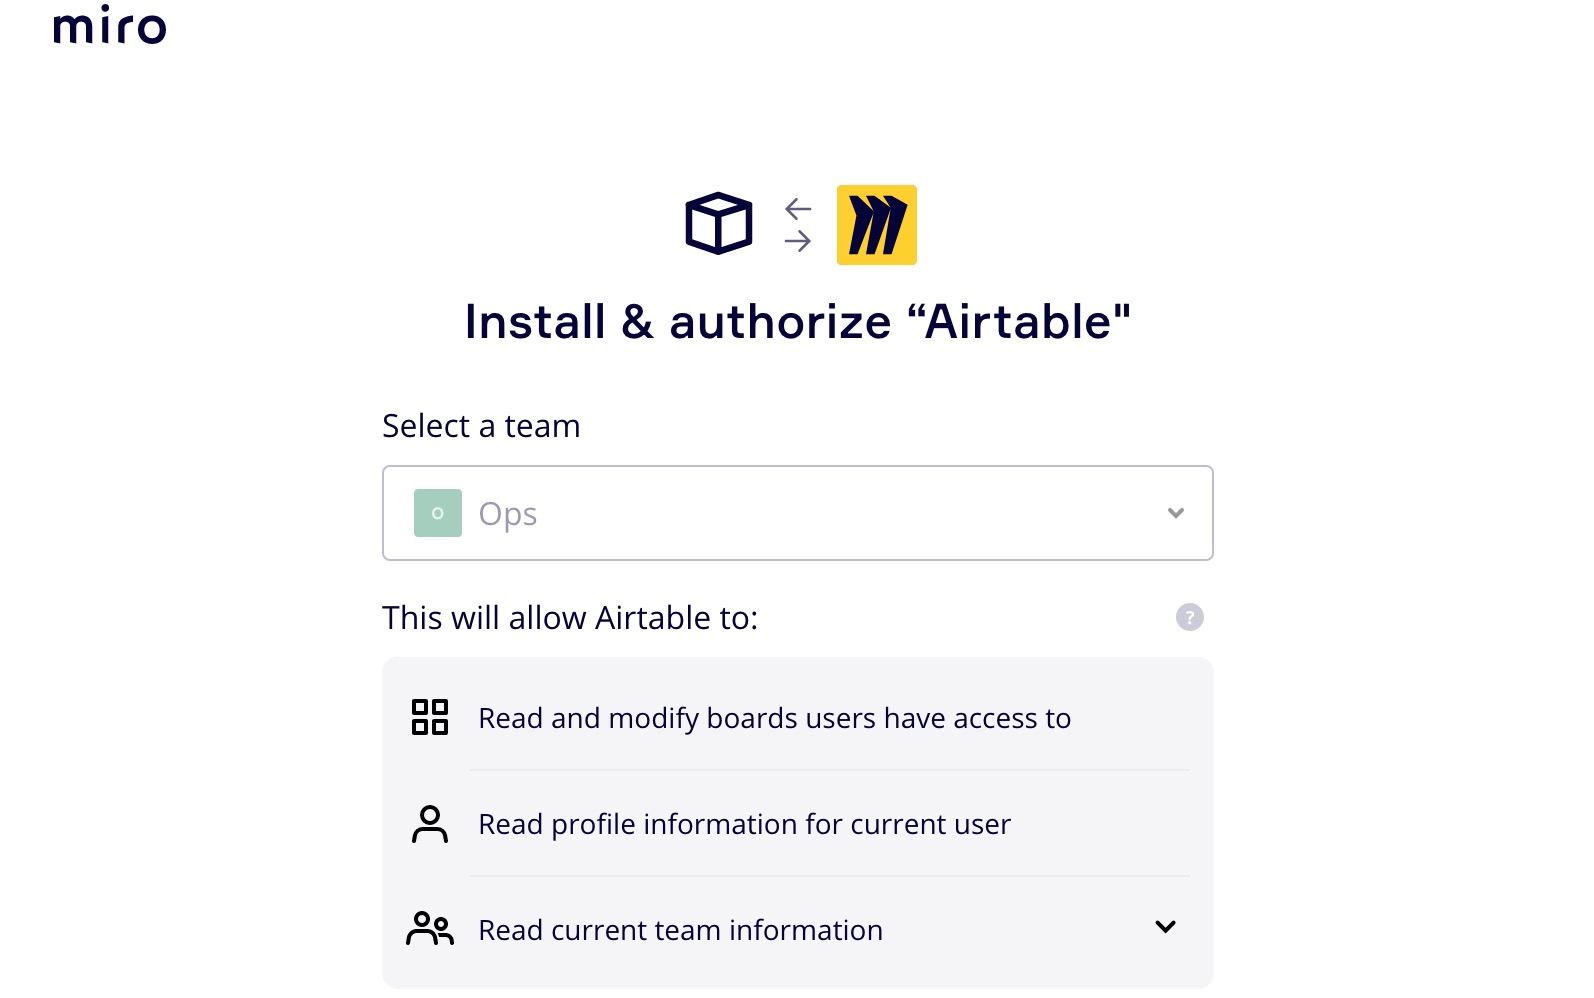
Airtable will only have access to:
Read and modify boards that the Airtable user has access to in Miro
Read current team information (Allows us to bring in name, email, and other information to know who created what in Miro)
Read profile information for the user
It’s possible that an admin will need to approve the Airtable app on Miro’s end. This Miro help center article describes the process for requesting app approval and describes the steps the IT admin needs to take to approve an app.
Miro Scopes
Scope name | Scope purpose |
|---|---|
| Retrieve information about boards, board members, or items. |
| Create, update, or delete boards, board members, or items. |
| Retrieve details about a user who interacts with an item on a Miro board. |
| Read team information, such as the list of teams, team settings, team members, for an organization. |
The tokens are transmitted between Airtable and Miro’s servers securely via HTTPS. On Airtable’s side, the tokens are stored in databases that are encrypted at rest. More on Miro scopes can be found here.
FAQs
Why aren’t colors showing up for “Text” objects?
Airtable doesn’t support colors for “Text” objects, only for “Shapes” and “Sticky Notes.”
Why isn't my frame importing?
If you are attempting to import a frame with other frames "nested" below it, then the "nested" frames take precedence. Instead, try adjusting the sync to import the "nested" frames and see if that allows the Miro data to sync into Airtable.