Plan availability | All plan types with varying limitations |
Permissions |
|
Platform(s) | Web/Browser, Mac app, and Windows app |
Learn how to set a time delay for an automation to use before running. Normally, an automation run will occur instantaneously after the conditions related to the automation’s trigger are met. Sometimes, it may be beneficial to delay the automation run in order for other potential updates to occur. It's worth noting that there are multiple ways to accomplish a similar result. For instance:
You might also consider utilizing conditional automation action groups for more complex workflows.
Airtable also offers the "At a scheduled time" trigger for handling situations where you'd like an automation to run at a specific time/date. This could occur just once or on a regular cadence.
Understanding automation run delays
In this article, we'll apply an automation delay to an example scenario where a marketing team is using Airtable to track record assets (images, copy, and more). When the required assets are ready they want to change the status to Review and notify the team with an automated message in Slack. They need the option to delay sending the Slack message if preferred.
Here's a summary of the workflow we'll create for this hypothetical marketing team:
Create a date field (with time toggled on) to use for delaying the automation
Create a formula field to track the current date/time against the date/time entered in the date field
Configure a filtered view to only show records that have all assets and the "Review" status
Setup the automation action to fire only when the current date/time matches the date field date/time
Note
The process in this article is a workaround involving the use of the
NOW()formula function which has some limitations. Generally,NOW()updates approximately every five to ten minutes when a base is open (although this timing may vary slightly). If the base is closed, it will update approximately every hour when the base has time-dependent automation triggers or actions.
Setting up an automation to run after a delay
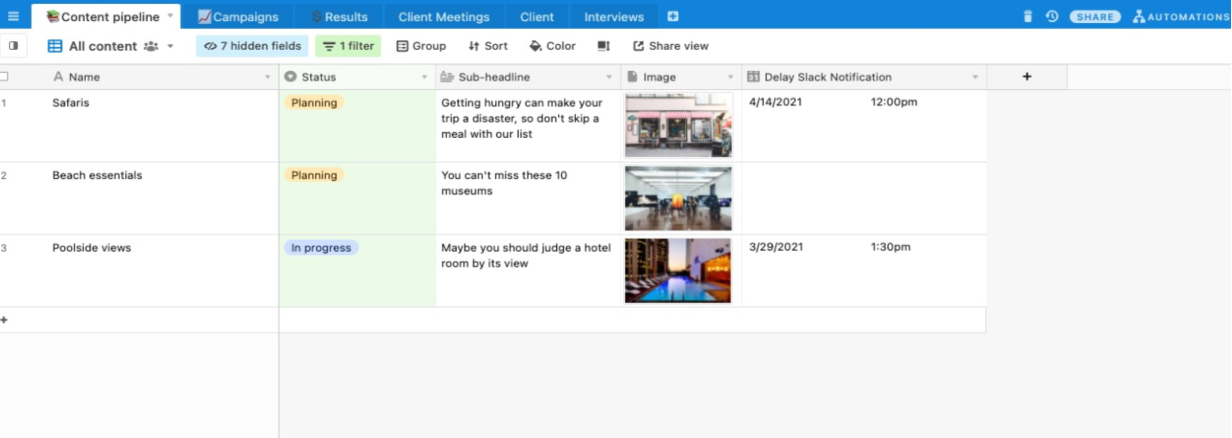
Create a date field - Add a new date field and name it “Delay Slack Notification.” Notice that some of the records shown below have a date and time filled out, while some don't.
Create a formula field - We'll use a formula to check if the current date and time is the same as the date and time entered in the date field. The formula used below follows this logic:
If the “Delay Slack Notification” field is empty then display a message that says, "Send Notification".
If the “Delay Slack Notification” field has something entered and the current date/time matches it, display a message that says, "Send Notification".
If the “Delay Slack Notification” field has something entered and the current date/time doesn't match, display a message that says, "Delay Notification.”
IF(
    OR(
        AND(
            {Status} = "Review",
            {Delay Slack Notification},
            NOW()>={Delay Slack Notification}
        ),
        AND(
            {Status} = "Review",
            {Delay Slack Notification} = BLANK()
        )
    ),
"Send Notification",
"Delay Notification"
)
Configure a filtered view - Next, you'll need to set up a new filtered view that will be used to display only records that have all of the desired assets present. The filtering criteria we set up for our conditions are:
Sub-headline is not empty AND
Link is not empty AND
Header image is not empty AND
Status is "Review"
Records will enter this view whenever each of those fields is filled and someone has changed the status to "Review.”
NOTE
The Content Tracker template doesn't include the “Review” status by default. If you're using that template to build this same automation you'll need to add that status manually.
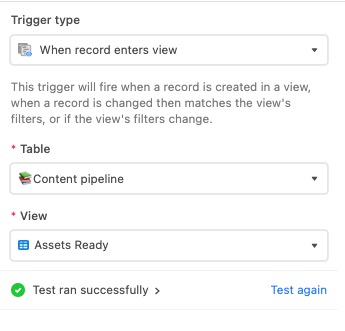
Choose an automation trigger - The next step is to setup an automation using the “When record enters view” trigger. Select the appropriate table and the “Assets Ready” view we just created. We strongly recommend pairing the "When record enters view" trigger with a locked view. By using a locked view, or ensuring a locked field is involved, you can decrease the likeliness of accidentally changing a view's filtering (therefore avoiding accidental automation runs for unintended records that enter that view).
Add an automation action - Next, add the Send a Slack message action and select the channel where you want to send the message. You can then format your message to include any information about the record. In the example below a link to open the record is included to make it easy to review the record.
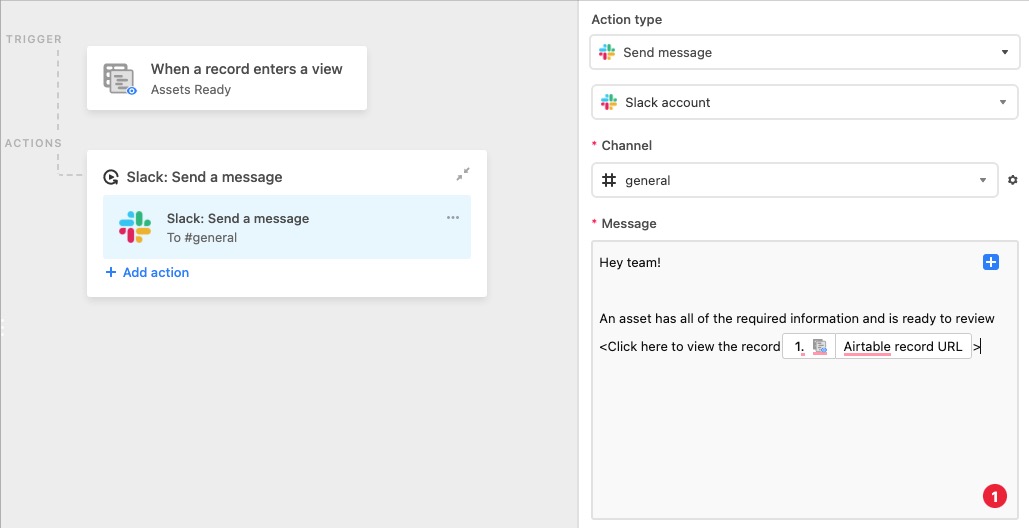
Once you've configured the message details make sure to run a test to check that everything is formatted correctly.
Test and turn on the automation - Be sure to test all of the steps in the automation that you are building. Once every part of the automation has tested successfully, you’ll likely be ready to turn the automation on. Find the red colored “OFF” toggle and click it so the automation now appears as “ON” in green.
Understanding expected automation output behavior
Now that everything has been configured, the automation action will run in these scenarios when a record enters the “Assets Ready” view:
If a record has a "Ready" status and has a delayed date and time entered, the Slack message will wait to send until that date and time is reached.
If a record has a "Ready" status and no delayed date and time is entered, the Slack message will send immediately.